Written by Tomas Glavina
In this tutorial I’ll show you how to open old and popular Russian lens – Helios 44 in the aluminum finish, how to clean and lubricate it, how to give shiny finish to the old aluminum housing, and how to put everything back.
For the start I chose Helios 44 because it’s a simple lens, ideal for the beginners. It is also a lens, that needs minimum tools for servicing and can be bought relatively cheap.
In general cleaning and restoring old lenses, has lot of similarities but also some differences. I believe that through those tutorials, you will improve your service skills step by step.
The idea of these tutorials is to refurbish the lenses in order to make them fully usable again and to experience the joy of working with the lens that you brought back to the life. Important rule is to try to avoid any damage to the lenses. Damage can mostly happen when trying to clean and restore optical elements. That is where sophisticated job, requiring lot of knowledge and experience is needed. We strongly recommend not to disassemble optical parts without a very good reason or to grant this work to authorized service. This is why in this first tutorial, no optical parts will be touched.
I will show you how to open glass blocks and what to avoid if you attempt to clean glass elements as well how to disassemble, clean and put back together mechanical apertures in the later tutorials.
Regarding polishing part of the tutorial, it is done in a similar spirit. The goal is not to make the lens look like it just came out of the factory, but to remove the dirt and the oxidation patina that these old lenses have. We will avoid overdoing it, like you can sometimes sees in the eBay offers. The process that I suggest, doesn’t remove deep scratches, dents or deeper damages done by the usage and time, the goal is to restore the lens housing, letting it get new natural looking patina and oxidation.
I hope you will enjoy the tutorials and become a proud owner of nice, clean looking and fully functional set of legacy lenses, just as I did.
I will be available for questions and additional support in the forum section
Please, don’t use comments bellows this article for the questions, because in time, that can make page too slow for loading.
A short legend of the terms and abbreviations used in the tutorial:
CW – clock wise,
CCW – counter clock wise,
MDF – minimum focusing distance,
Outer or external ring – the ring that you use to focus for example,
Inner ring – usually covered by the outer ring – the actual focusing ring.
To help this page survive, your donation will be highly appreciated.
Chapter I – Opening Helios 44 and disassembling focusing helicoid
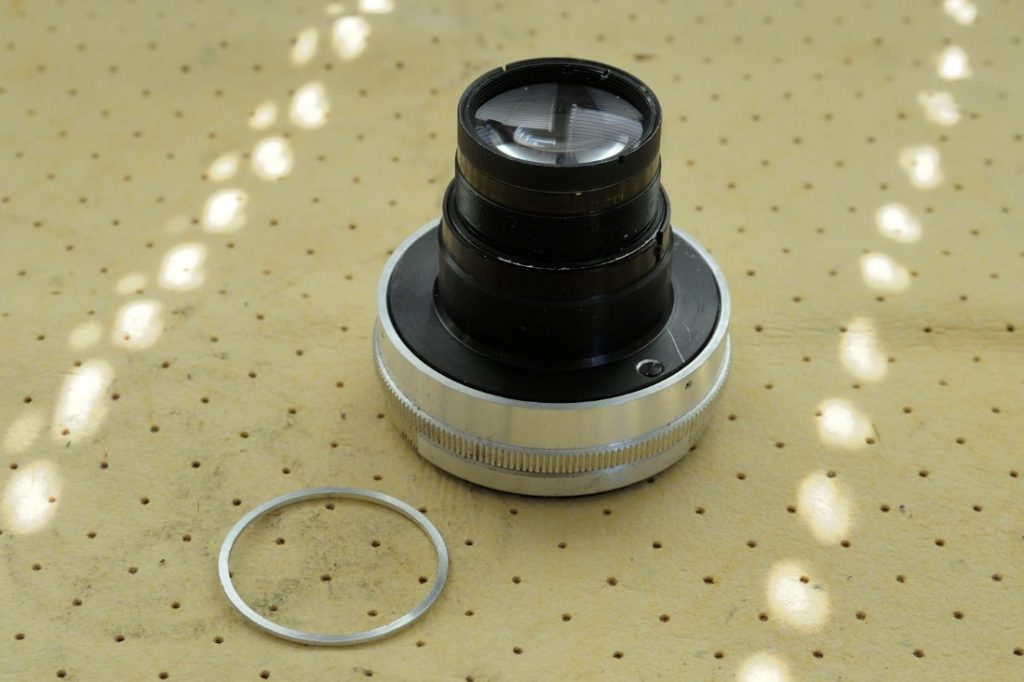
Here it is, a nice Helios 44 in the aluminum finish version. Let’s s restore it mechanically and cosmetically.
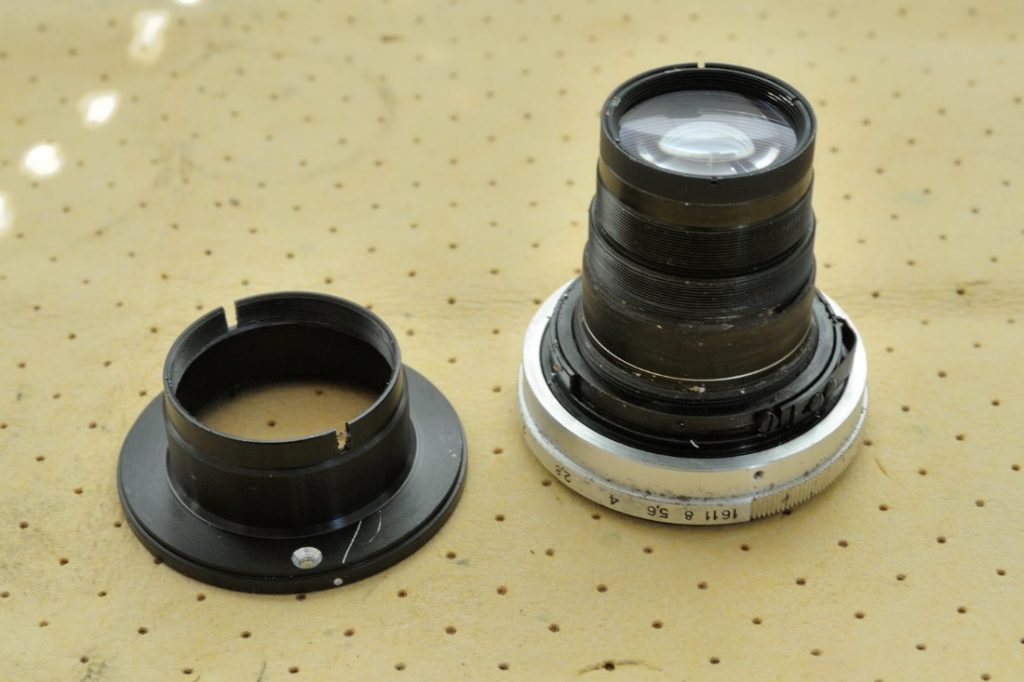
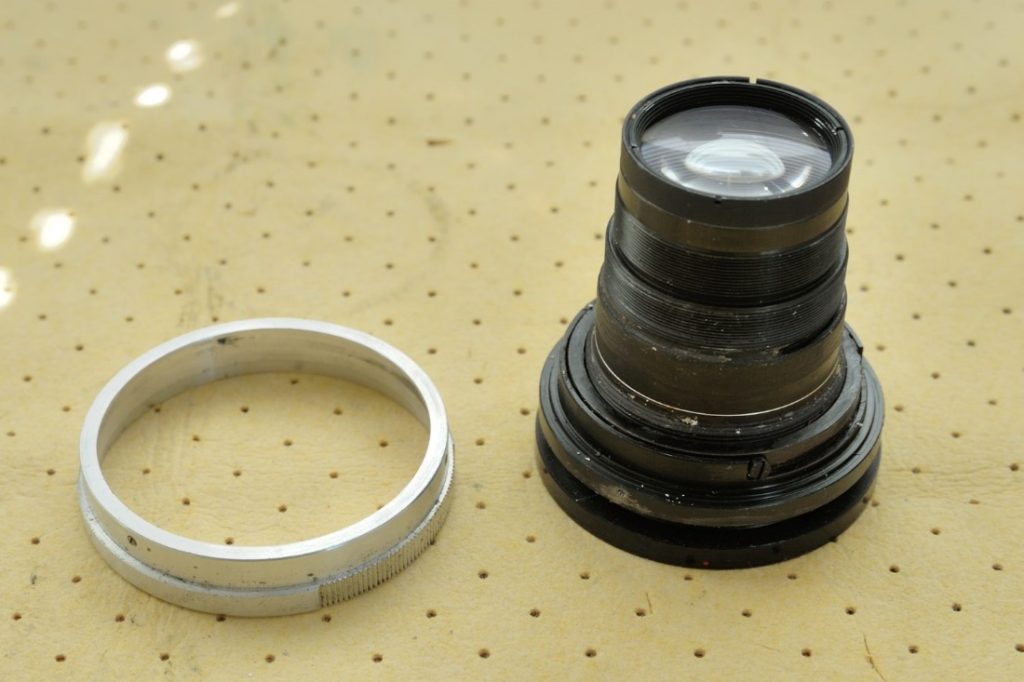
Step 1. Separate the lens into two blocks.
This can be done by holding the front of the lens and turn it CCW against the rear part of the lens
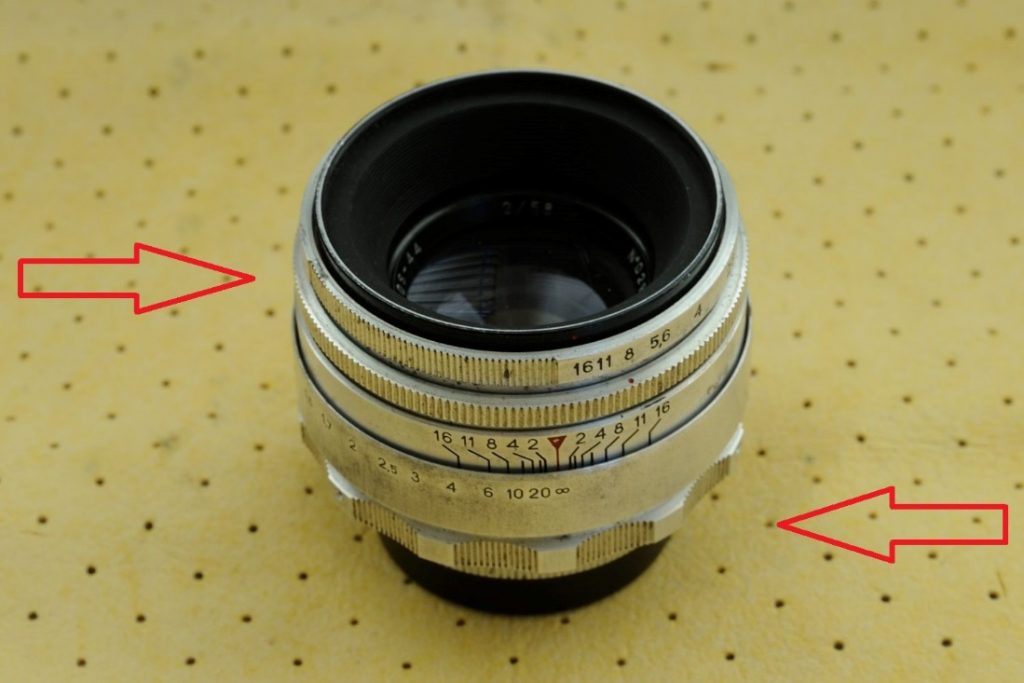 Two pieces should come easily apart. Refer to the picture above, where it is best to hold the lens, or find the most comfortable hold for yourself. Separate two parts (keep unscrewing them until they separate). Result should look like this
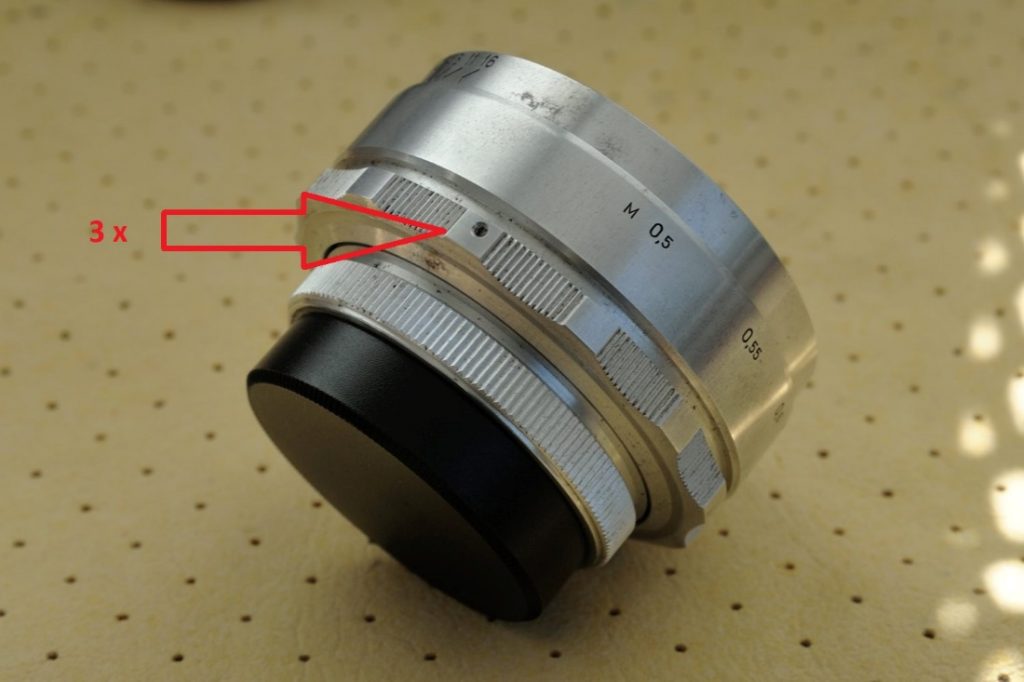
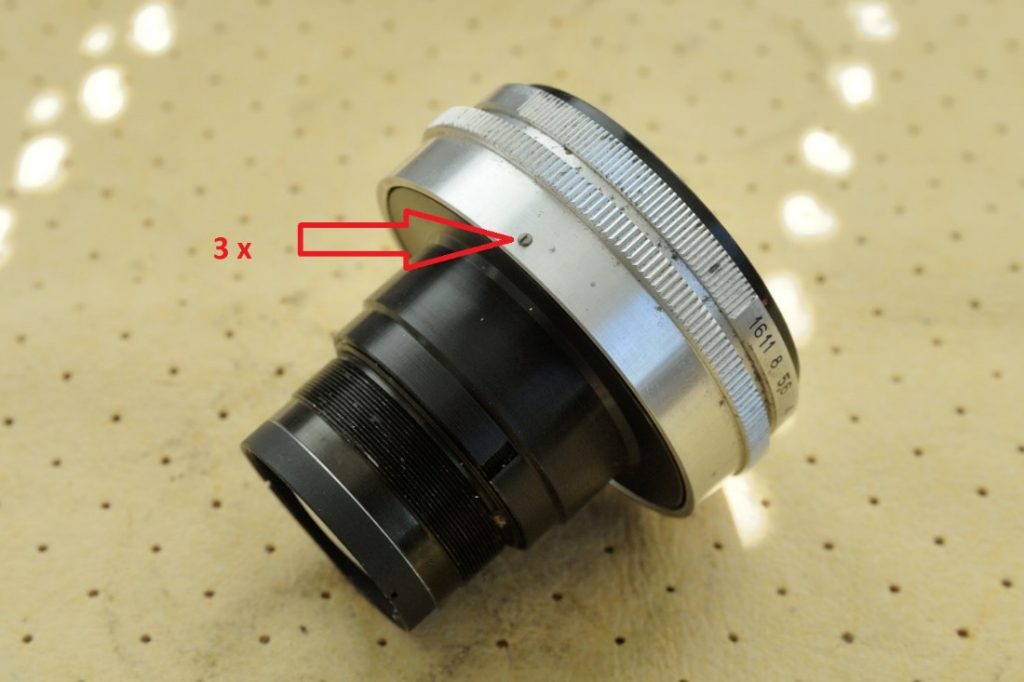
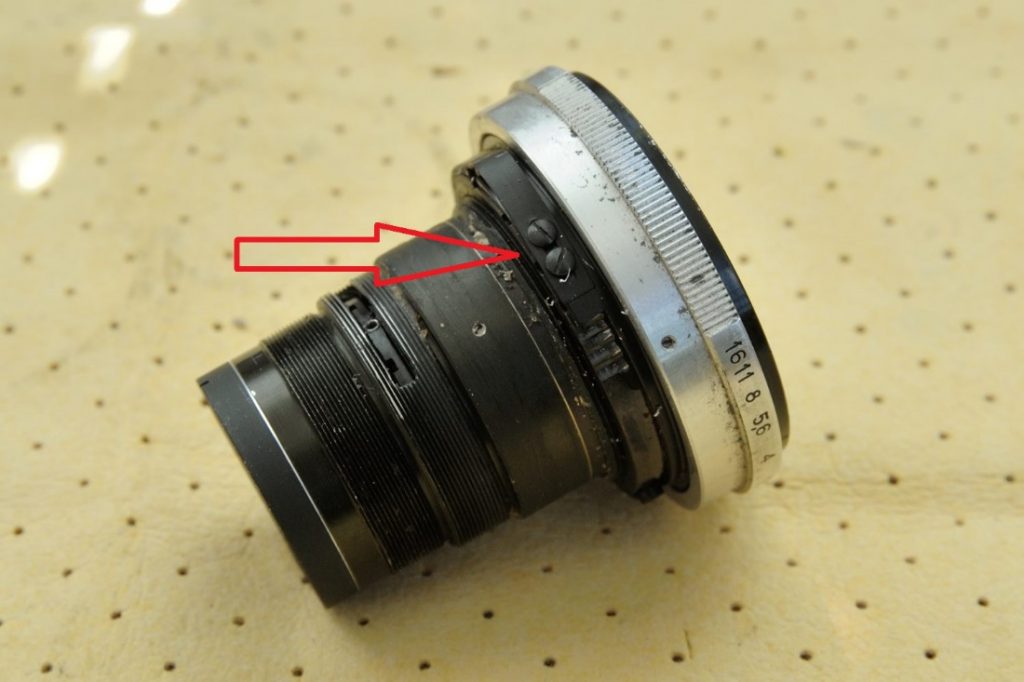
 Step 2. Taking off outer focus ring.
Release 3 small screws indicated by the arrows on the image bellow. Take a good care, not to lose them!
(There are few options how to organize small parts and screws during the process. One is to use some sort of organizer box, such as pills organizer e.g. and insert parts successively into the bins. This way you can keep track of what comes first. Whenever possible, put the screws back to corresponding holes and tighten them on place, or use the tape to secure them in the place. This is safest way to remember what belongs where, but it might be risky, if you don’t pay extra attention in securing the parts (screws) in their place, since they can fall out unexpectedly.)
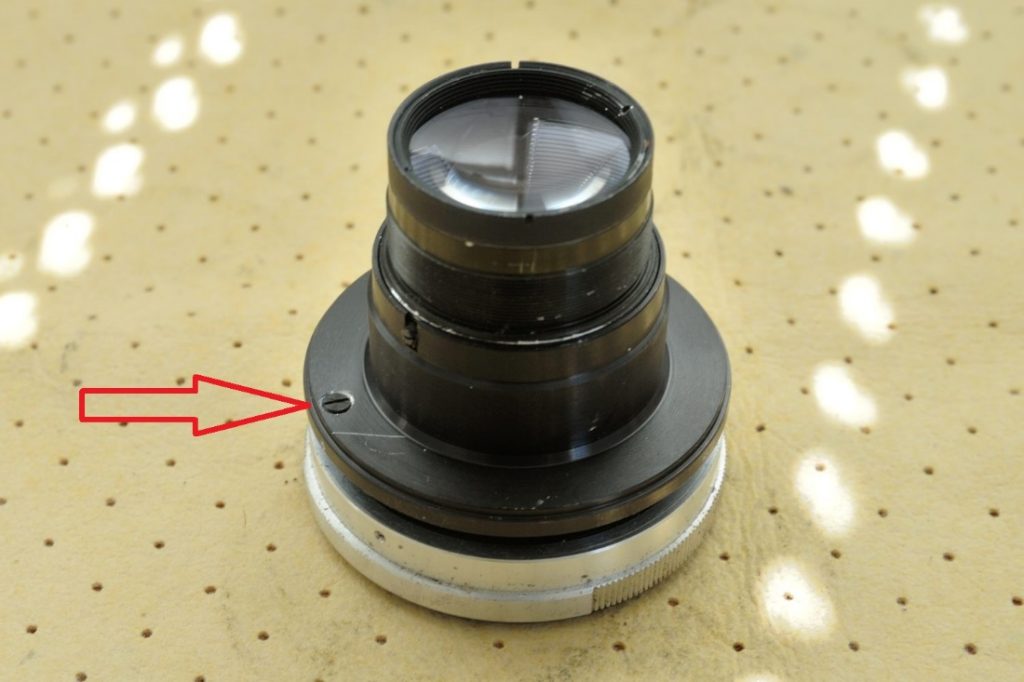
 Step 3. Removing the back part of the inner focusing ring.
This time it s better to remove the screws completely and keep them separately.
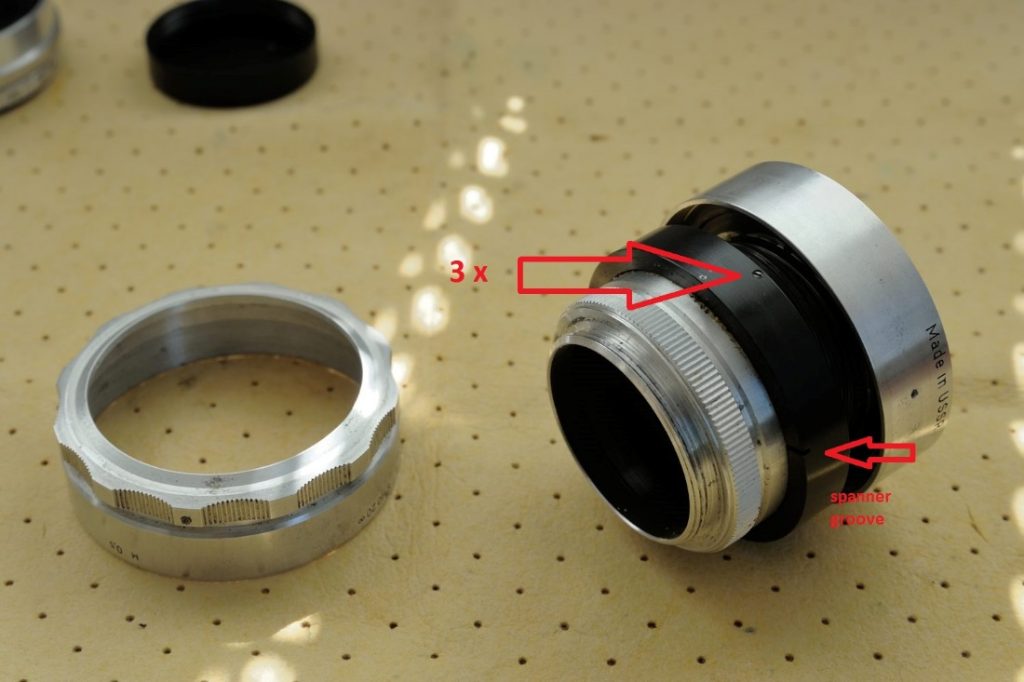 After you do that, turn the ring CCW. This ring can be stuck at first and hard to release. If that happen, try to grab the ring with your fingers, covering as much of its surface as possible and applying even pressure. Do not apply too much pressure however, since you can deform it! The key is to spread the pressure around the ring. If it still resists try putting outer focusing ring back and use it as a gripping tool. On some lenses, there are groves for a spanner which will certainly help in your effort. If nothing of the above helps, try to put few drops of the rust eater or deep penetrating oil around the thread and apply gentle force in both direction for a few times. Repeat this procedure every day as long as needed and be patient. Sooner or later you should be rewarded.
Remember well this ring, as it might be challenging to put it back correctly, but we will deal with it later. Also be sure to clean it well from the dirt and old grease.
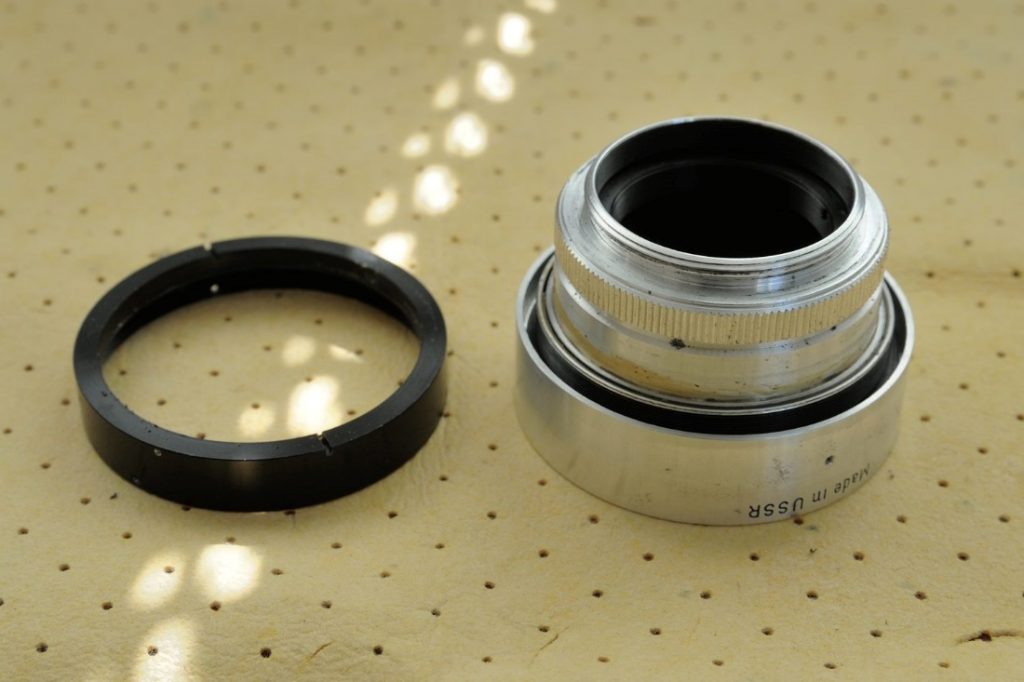
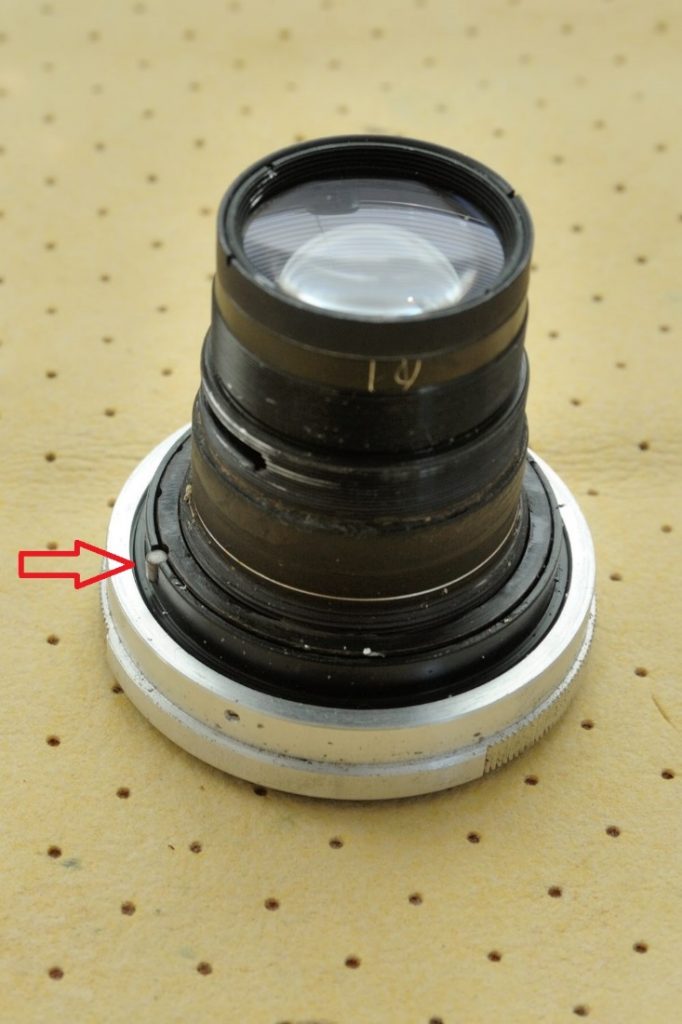
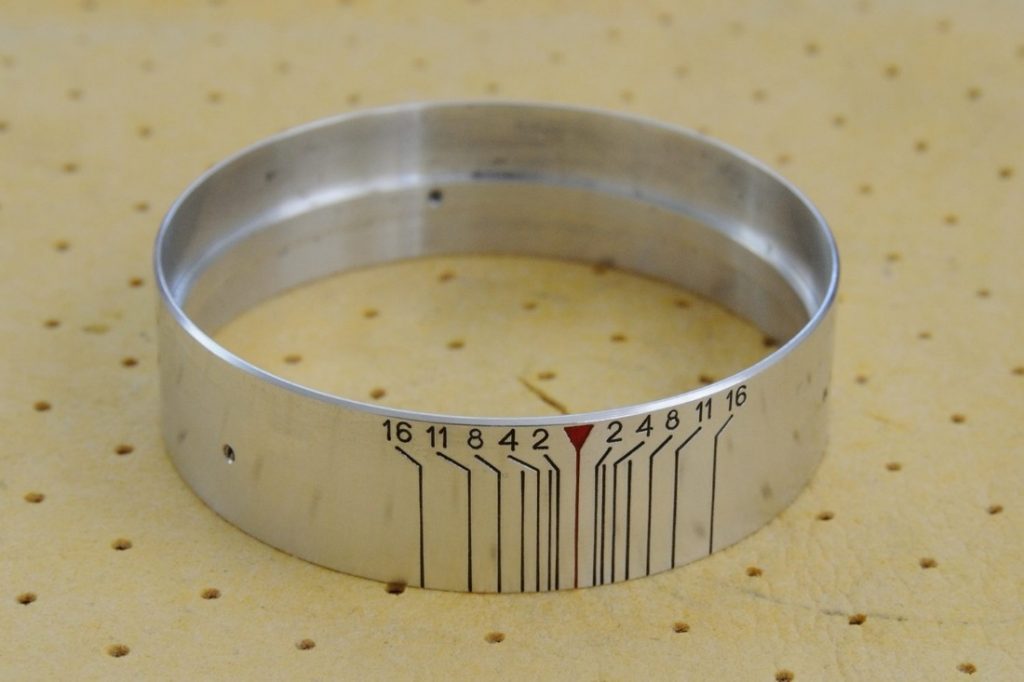
Step 4. Taking off the silver housing of the front inner focusing ring.
To remove this part, you need to gently lift it up. Be sure not to try to rotate it on either side. It has a groove inside, where important screw slides, which can be damaged if you try to rotate the housing.
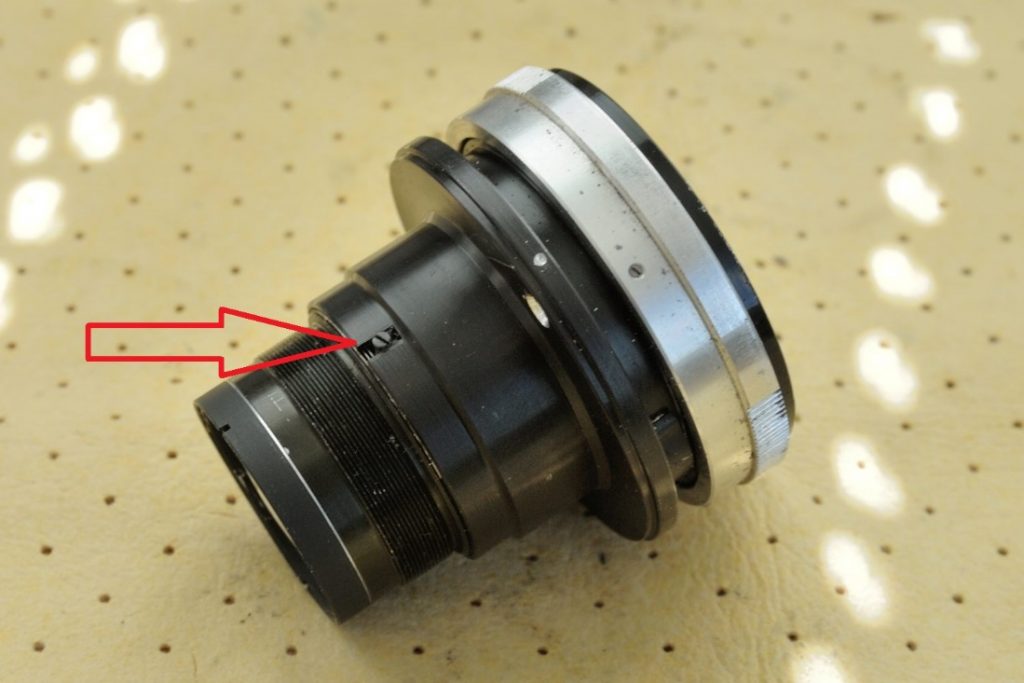
 Now you can see that small screw on the right.
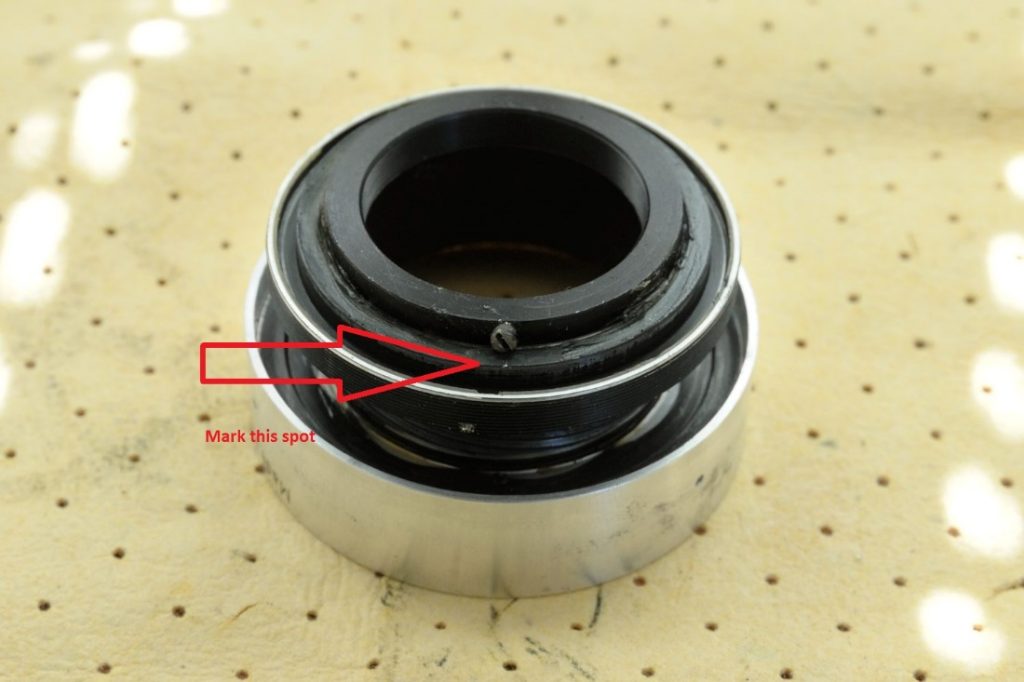
Step 5. Marking of the front inner focusing ring position.
Turn the front inner focusing ring to the MFD (this is usually the position where the lens extends to its maximum length. In contrary, in the shortest extension, lens is mostly in its – infinity focus position).
It is a good chance that there is already some mark on the ring, made in time by the limiter screw contact or made in factory at the initial assembly. If you can’t see it, make your own. Put the line/dot on the ring, where it touches the limiter screw. Use the screwdriver or permanent marker. This mark is essential in helping us to determine the right step (thread starting position) during resembling, so be sure that you don’t forget to make it!
 Step 6. Removing focusing limiter screw.
Take the screw off and put it in the safe place.
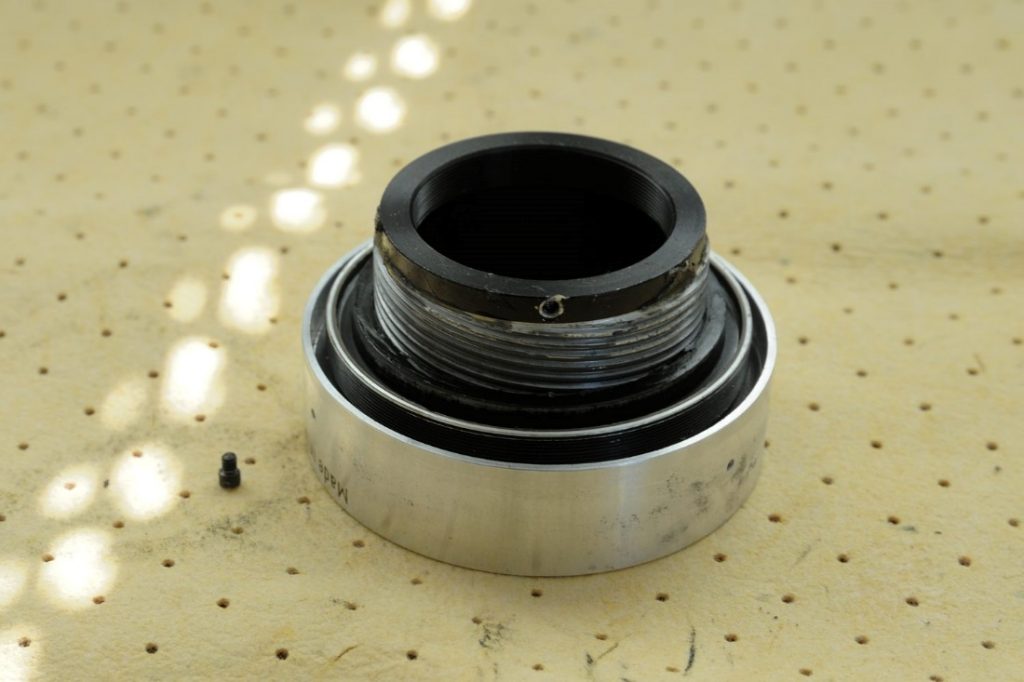
Step 7. Fully removing the front inner focusing ring
This is delicate part, beginners might have problems to reassemble the focusing mechanism if they don’t pay extra attention here. Slowly turn the front inner focusing ring CW. At one point, it will separate from the thread! Look carefully at it from above and try to remember the position of the mark, that we made in the step 5, in the exact moment when the ring comes off the thread.
 In this case, our mark moved to approx. 2 o’clock position from the viewer point of view. Before doing anything else, try to put the ring back, using this step position and turn it until it set on the thread. Do this few times to get the feeling how it goes on and off, since this is crucial for the later assembly.
Good idea is to make your own image of the step position (the image as the one above), which will help you to memorize it. Helios 44-2 has rather steep threads, so even if you miss this point, don’t panic, there will be only 4-5 possible steps-in, which you can try later. Some lenses though have very fine threads with many possible steps in, so it is good to build a marking routine for this stage. Optionally you can make another small line/dot on the rim of the thread bellow, which can later be aligned with the first dot on the ring.
With this last ring removed, we finished disassembling of the focusing mechanism
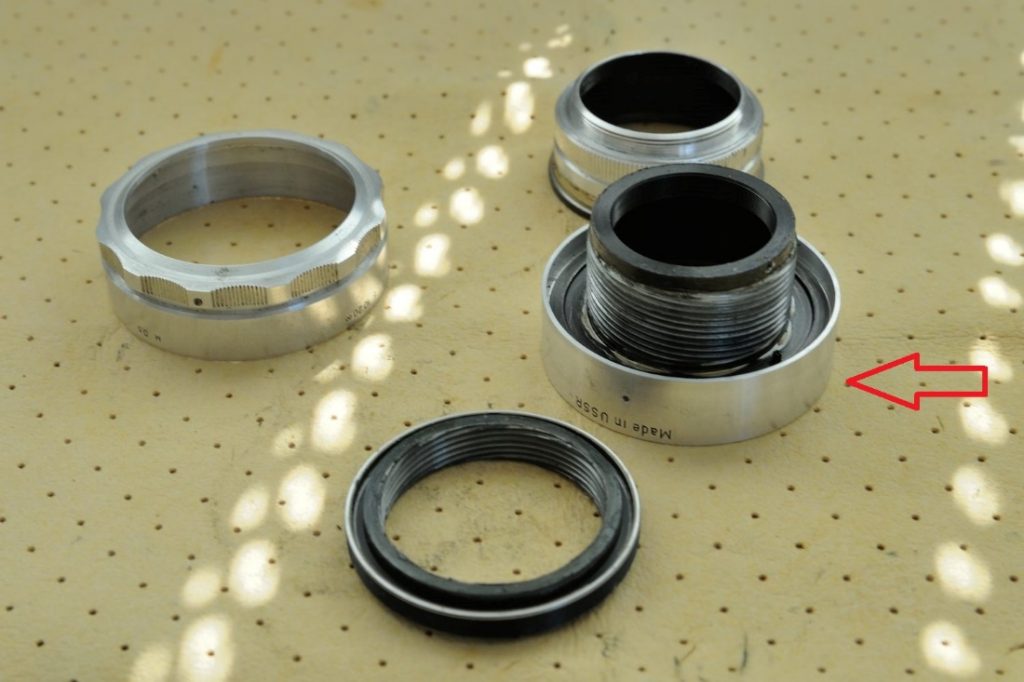
You can also remove the ring which goes around the front side of the focusing thread, but I didn’t, since it’s not needed for our job.
Bellow is the video, which should help you with the tricky parts
To help this page survive, your donation will be highly appreciated.
Chapter II – disassembling aperture ring
Step 1. Removing infinity adjustment shim
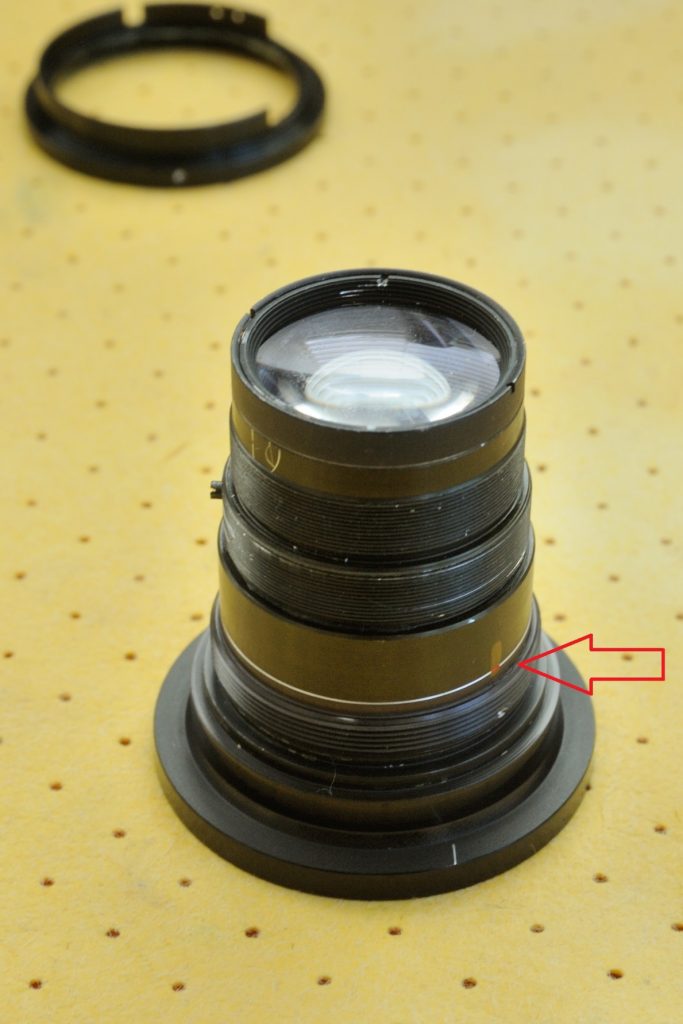
It is time to move to the front part of the lens, which is in fact the optical block. We will not open the optical part, but we need to remove preset and aperture rings in order to clean and re-lubricate them. To start, simply remove infinity adjustment ring. If you can’t grab it, try using tweezers.
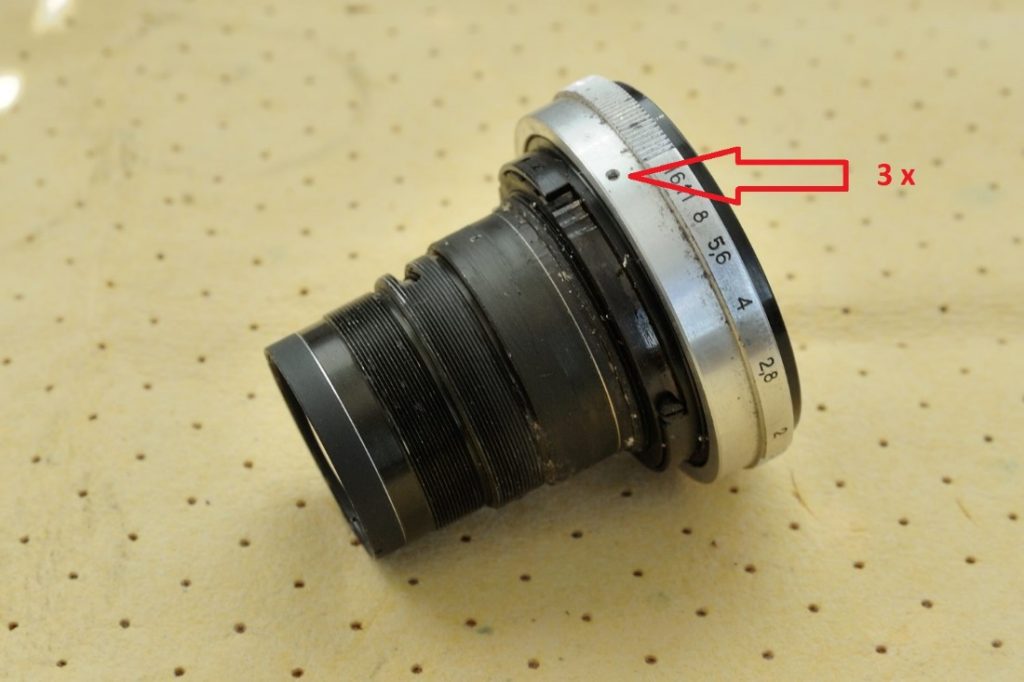
Step 2. Removing aperture ring housing
Continue by removing three small screws and put them somewhere safe. Removing those very small screws might be challenging, especially if someone tried that before and damaged the head grooves. Do not apply too much force, since you can break them. Use a drop or two of the deep penetration oil or rust screw release and give it some time to make its magic.
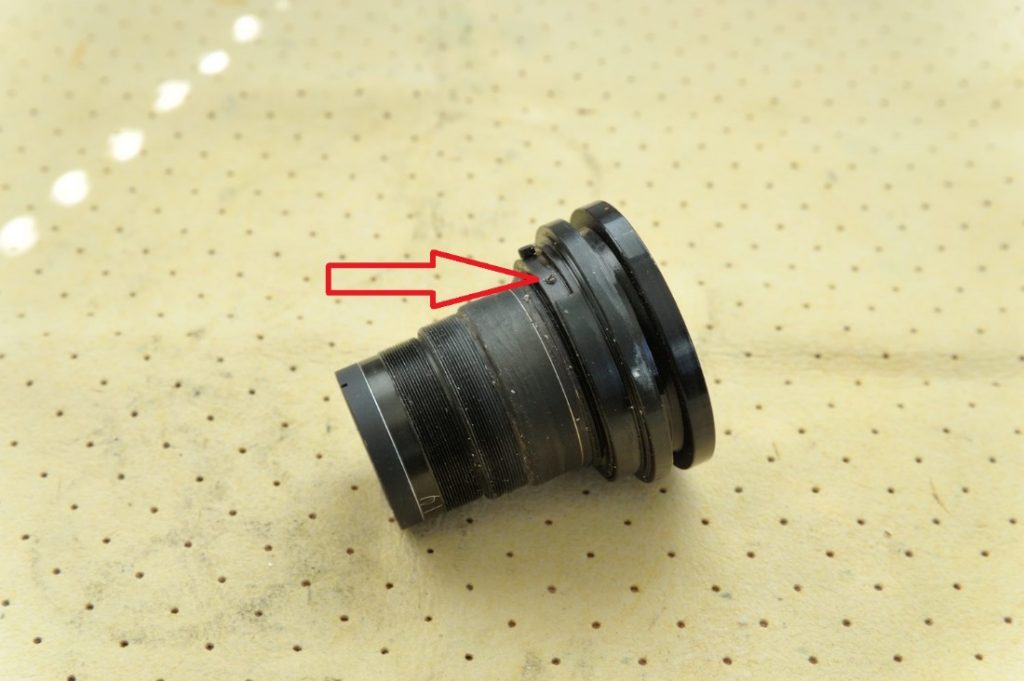
Step 3. Remove the screw from the aperture helicoid which serves as a limiter.
Step 4. Removing aperture coupling screw
Gently remove the screw that couples inner aperture ring, with the helicoid. Before you do so, fully open the aperture. Notice that there is another groove on the opposite side of the helicoid but no screw. In order to avoid confusion when resembling this part, mark the groove with the screw. You can also mark the screw position inside the groove (height) in which it travels or you can count the number of turns while removing the aperture helicoid, whatever works best for you. On this particular lens, there is quite generous tolerance in this regard, meaning that you can’t do much wrong when trying to put aperture helicoid back, but it is a good idea to build a marking routine in general.
Step 5. Removing aperture helicoid
Remove the aperture helicoid by turning it CCW
Step 6. Removing the lever and the roller (serving as a click stopper) on the preset ring
Carefully release two screws, while keeping one finger over the lever (spring), so that nothing suddenly jumps, after release.
Be careful not to lose the roller. If you have a screwdriver with magnetic head, use it to lift the roller up.
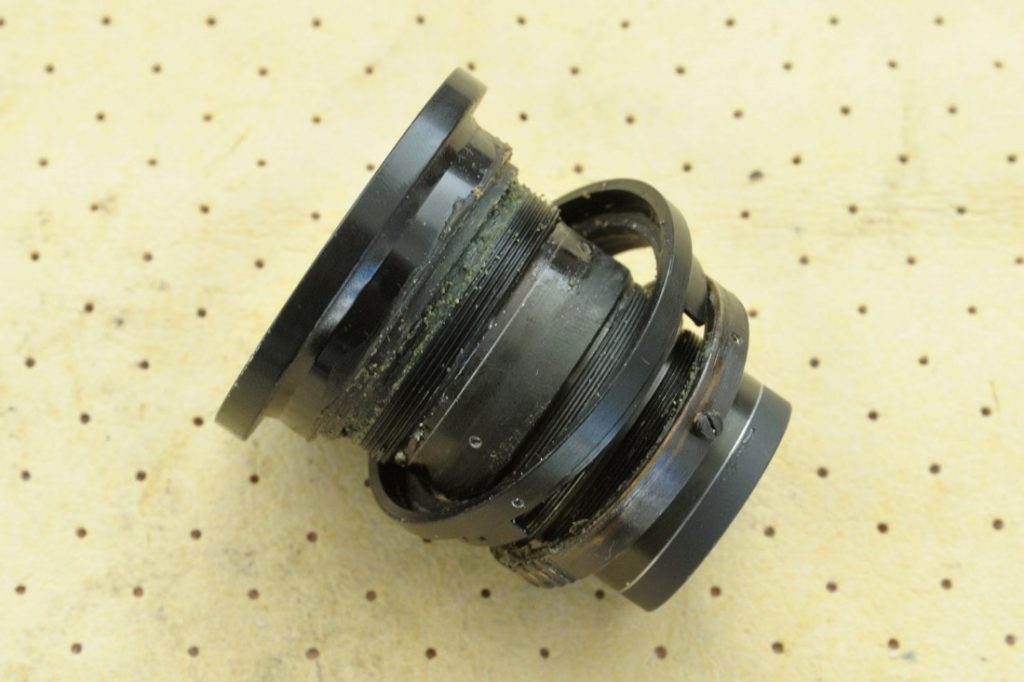
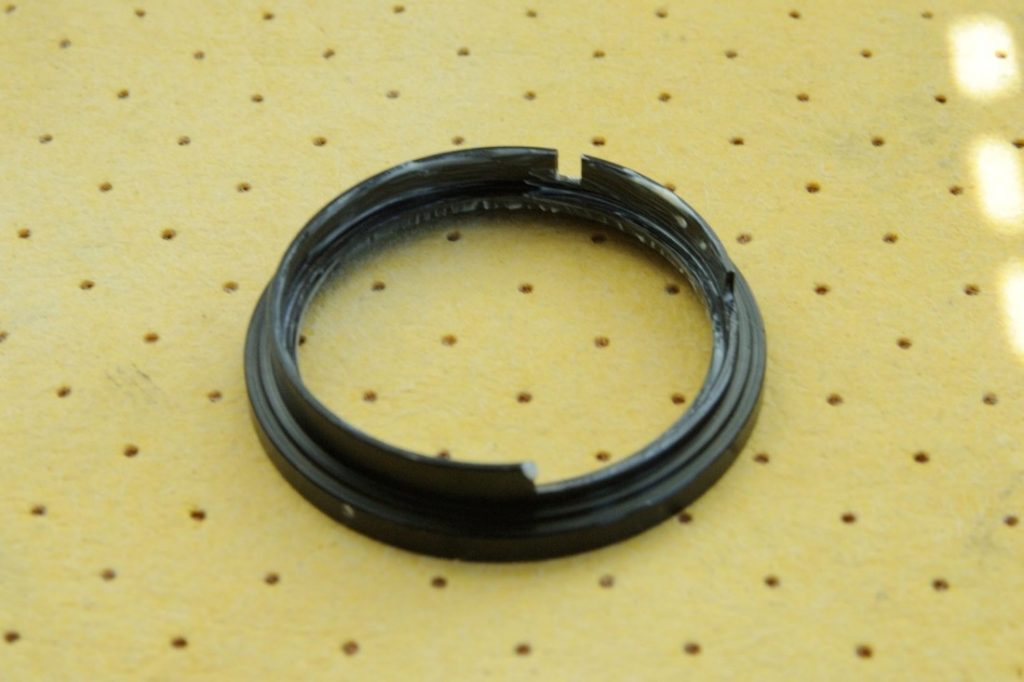
Step 7. Remove the housing of the preset ring
Release three screws and pull the housing backward.
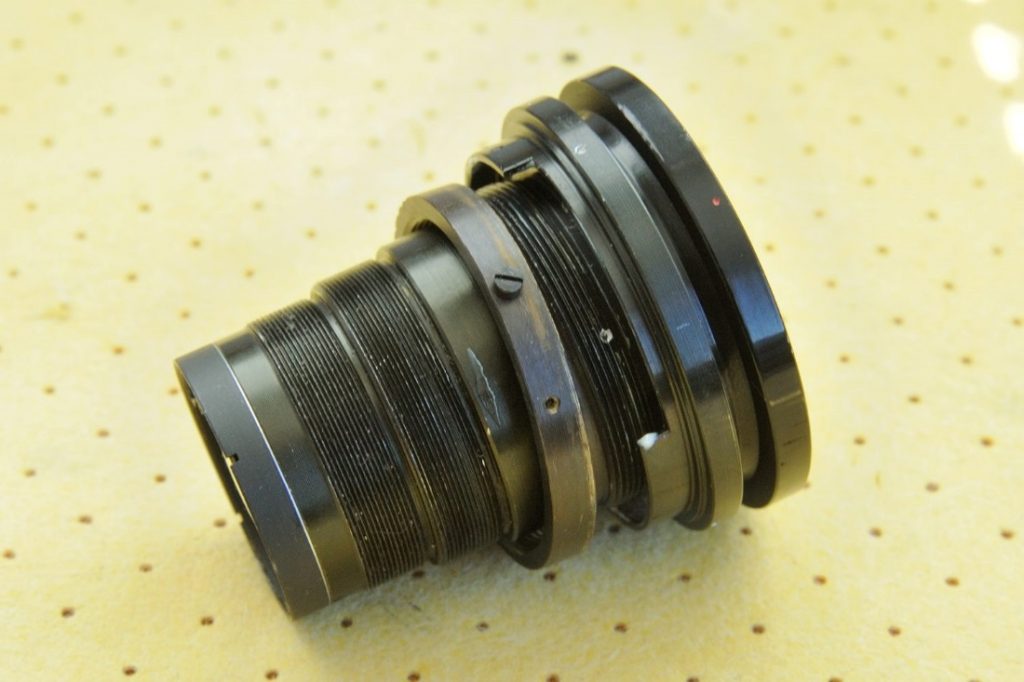
All aluminum parts are now separated and ready for the proper cleaning and polishing.
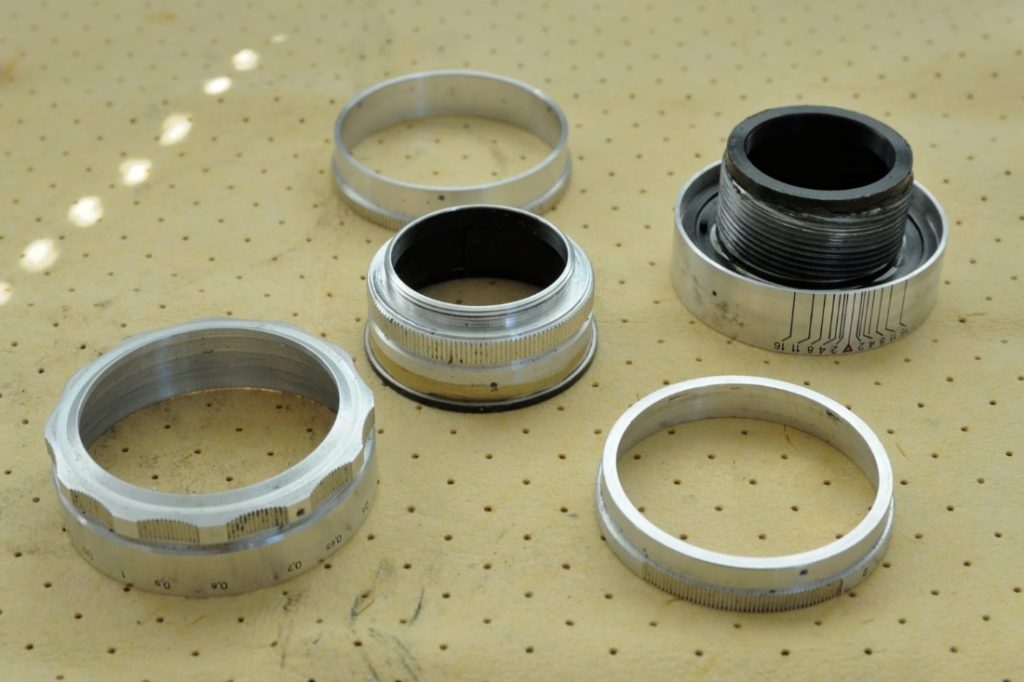
There is however one last thing to remove in order to fully re-lubricate the lens.
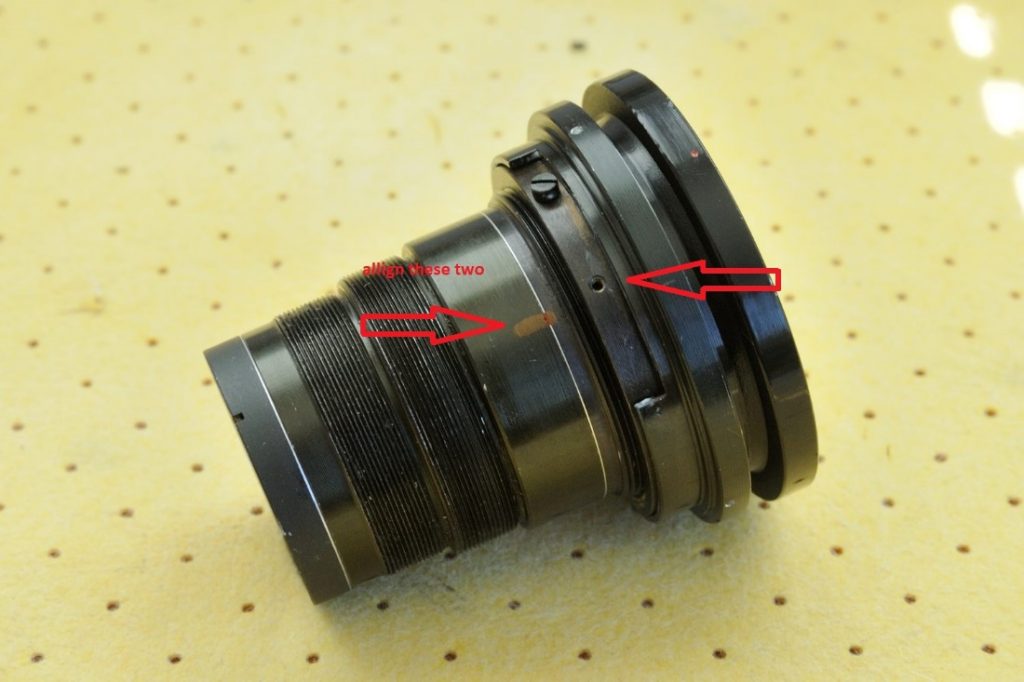
Step 8. Removing aperture preset ring
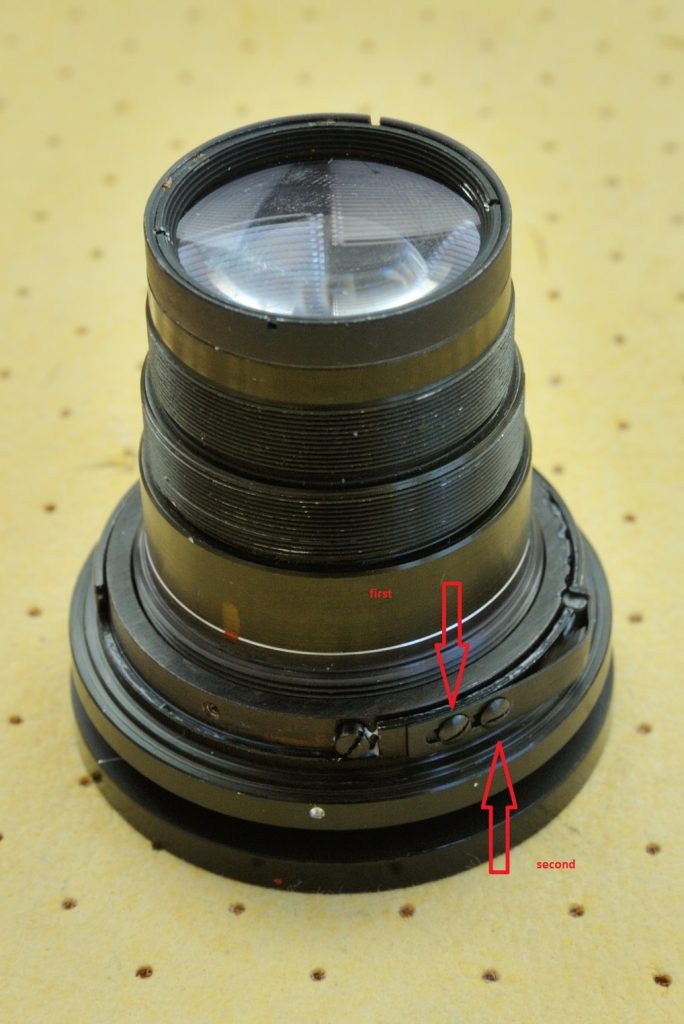
In order to remove the preset ring, we have first to remove the ring bellow, that hold it in place. Start by removing the screw indicated by the arrow
Turn the preset ring CCW, use that big screw for better grip. By doing so, the ring that holds it in place should start to unscrew too. Depending on the state of the old grease, this can be difficult to do. Use latex gloves for the better grip, and if it doesn’t help put few drops of deep penetrating oil, screw remover or other similar product and wait until it helps.
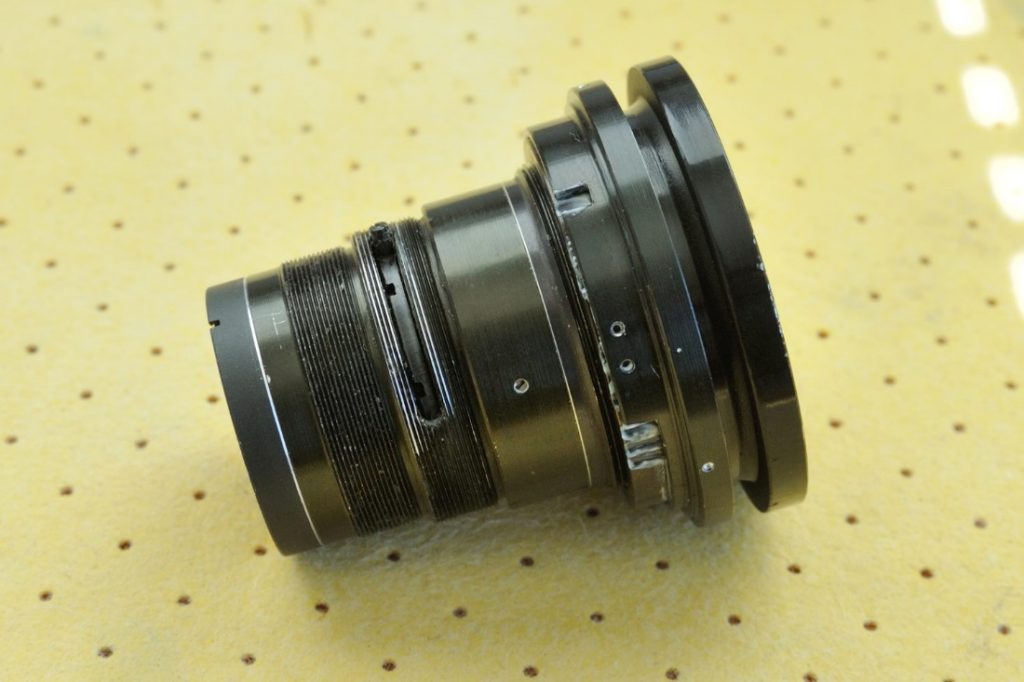
 You have now properly disassembled the lens and we can proceed with cleaning, re-lubricating and re-assembling. As I promised, we didn’t touch optical block itself. In one of the future tutorial, we will show you how to open it and clean it, with all possible warnings about the damage that you can cause, but since this particular lens had good optics, there wasn’t need to do it.
To help this page survive, your donation will be highly appreciated.
Chapter III – Cleaning all parts
The most obvious part of the CLA tutorial, yet not as straight forward as it may seem, is often under estimated – cleaning itself.
I suggest to dedicate some time to this job, you re probably not going to do full CLA of the same lens ever again, so it worth some extra effort.
The goal is simple – get rid of all the old grease and dirt.
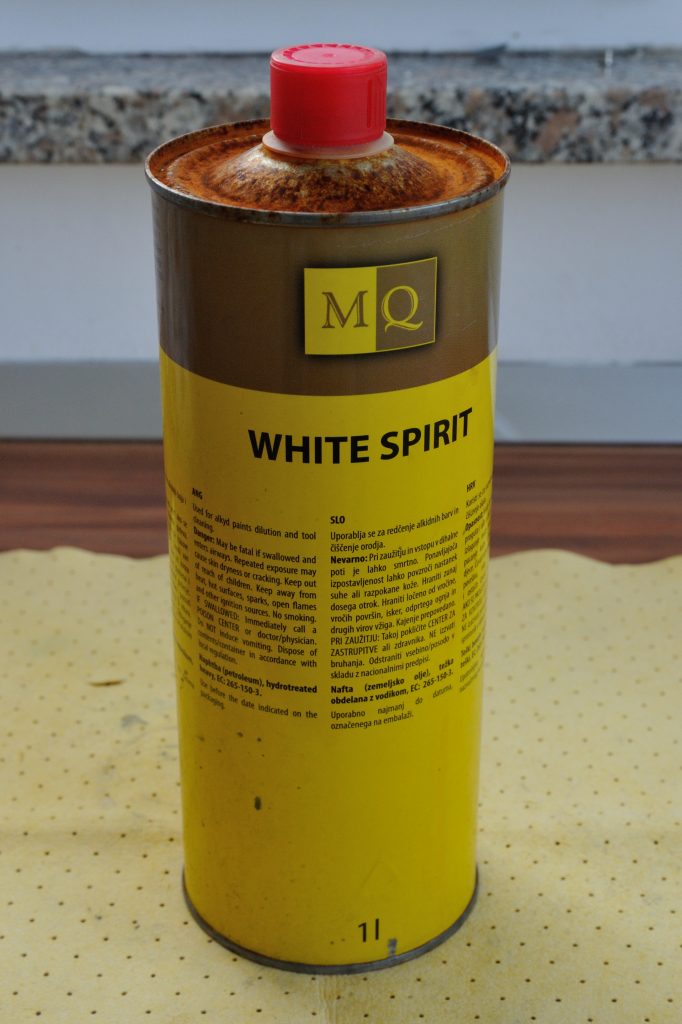
To soften and dissolve the grease I am using “White Spirit”. It’s easy to find in general hardware stores and it s not expensive. As most solvents, it’s highly flammable, and can be toxic in some circumstances, so take all necessary precautions to avoid any risk. It also smells intensively and smell won’t evaporate easily, so whenever possible, do the cleaning outside.
 Here is a short video for the reference
After “heavy” cleaning, I use some household detergents to wash the parts. I use two different cleaning detergents, both based on anionic active substances.
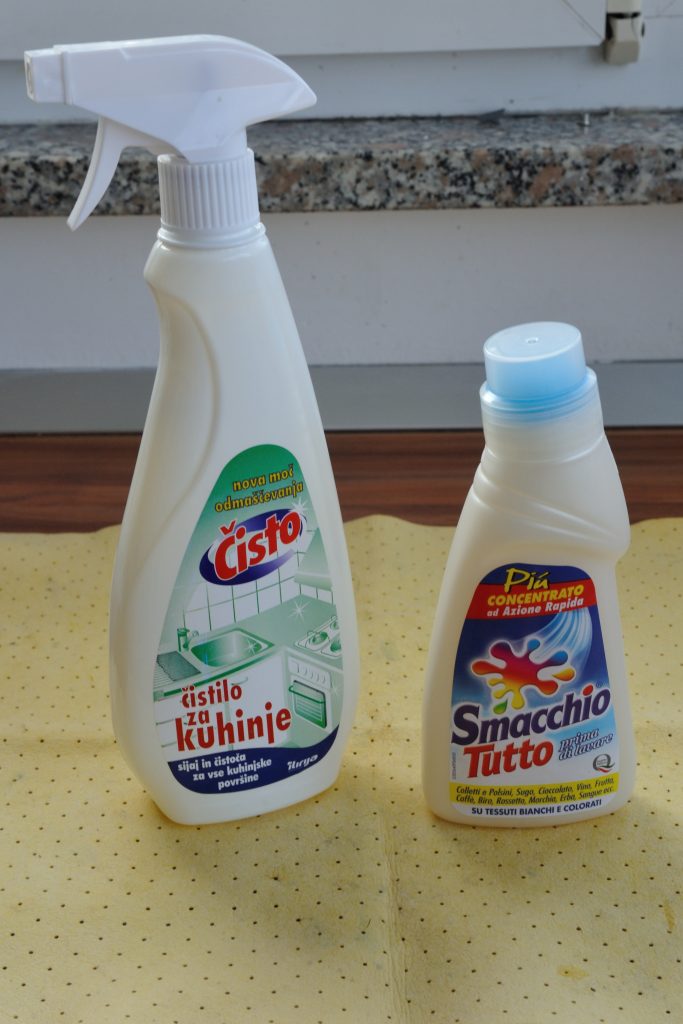
The first one comes in a spray. I simply spray the parts and wipe them with a dry cotton cloth. The second is s a stain remover. I put some hot water in a bowl, add a few drops of the stain remover and leave the lens parts in it for a few minutes. This usually cleans parts to the perfection.
I used those detergents on all aluminum lenses that I cleaned so far, with no damage to the various metal or painted surfaces. If you are going to use some substitutes, you should first try them on the part of the lens (usually inner side of the rings) which won’t be visible after assembling.
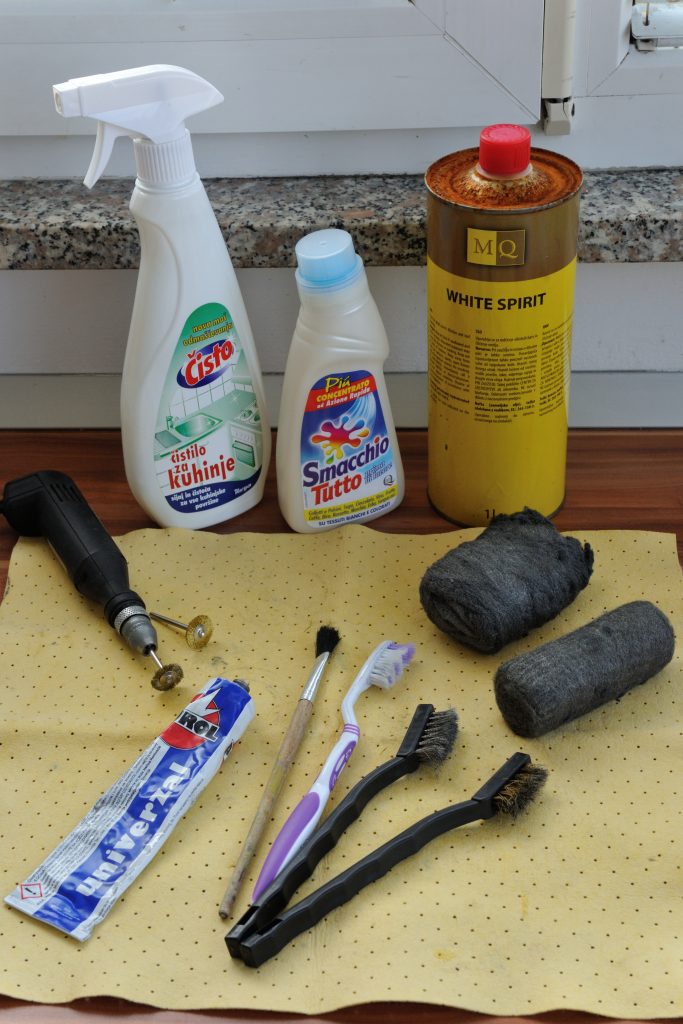
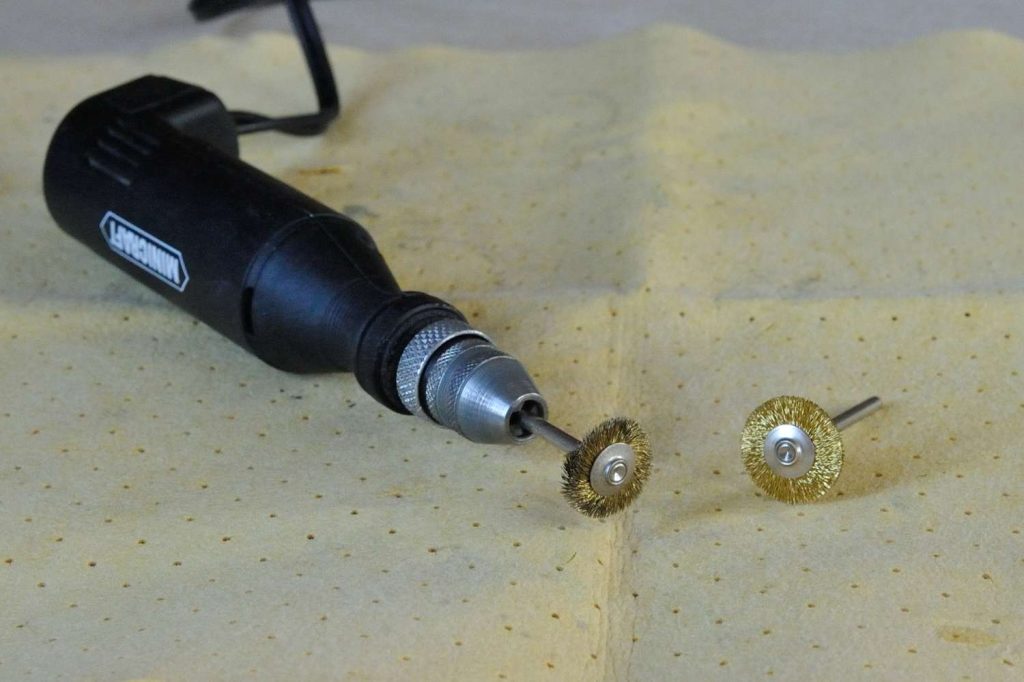
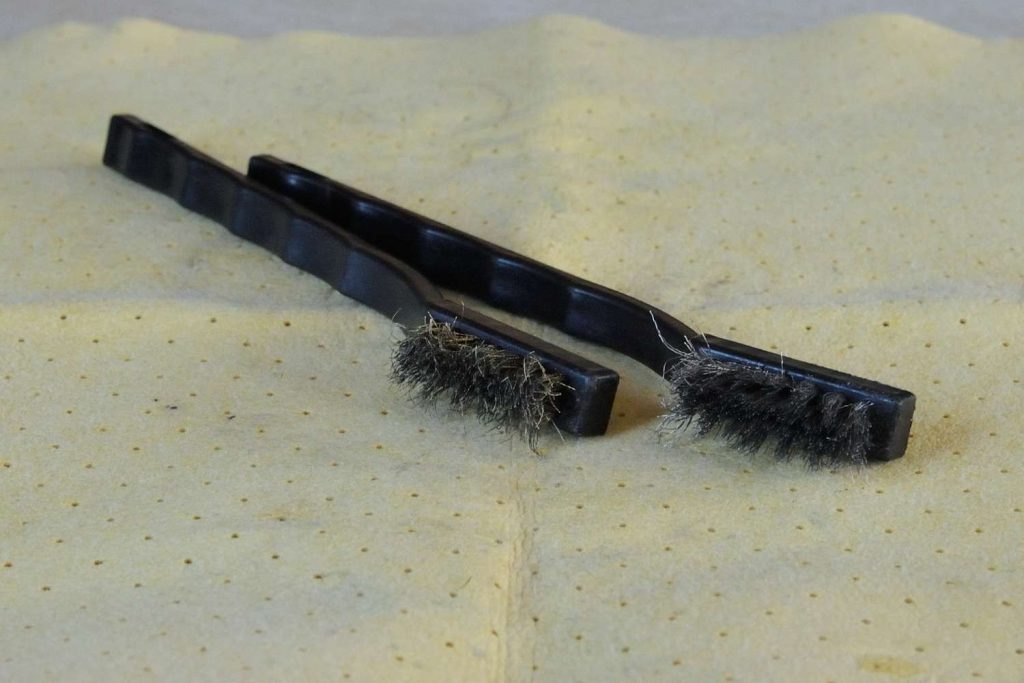
To speed up the grease removal you may use a soft metallic brush. They usually come in two variants – one with a brass wires, the other with a steel. Both are very useful to clean the threads of the various rings and helicons but if you don’t have one, a used tooth-brush can be handy too.
Various sizes of the basic painting brushes are great for applying the grease solvent as well as for the later re-lubrication.
These are my usual cleaning and polishing tools
To help this page survive, your donation will be highly appreciated.
Chapter IV – Polishing aluminum parts
This part is not mandatory, but I warmly recommend to give it a try. Make sure the lens is made of aluminum and not chrome-brass!
Actually the term – polishing is not entirely correct, since my goal was never to achieve a glossy finish of the aluminum but to clean the lens and remove small scratches, stains and blemishes. Applying this polishing method, your aluminum lens will be shiny again, but the new oxidation layer will appear in time, to give it back some original patina.
I started to clean the aluminum with the polishing paste only, but that made the surface glossy and it actually emphasized all those small imperfections, that I wanted to remove. I didn’t want to use sand paper either, since it is quite aggressive on the soft metal surface.
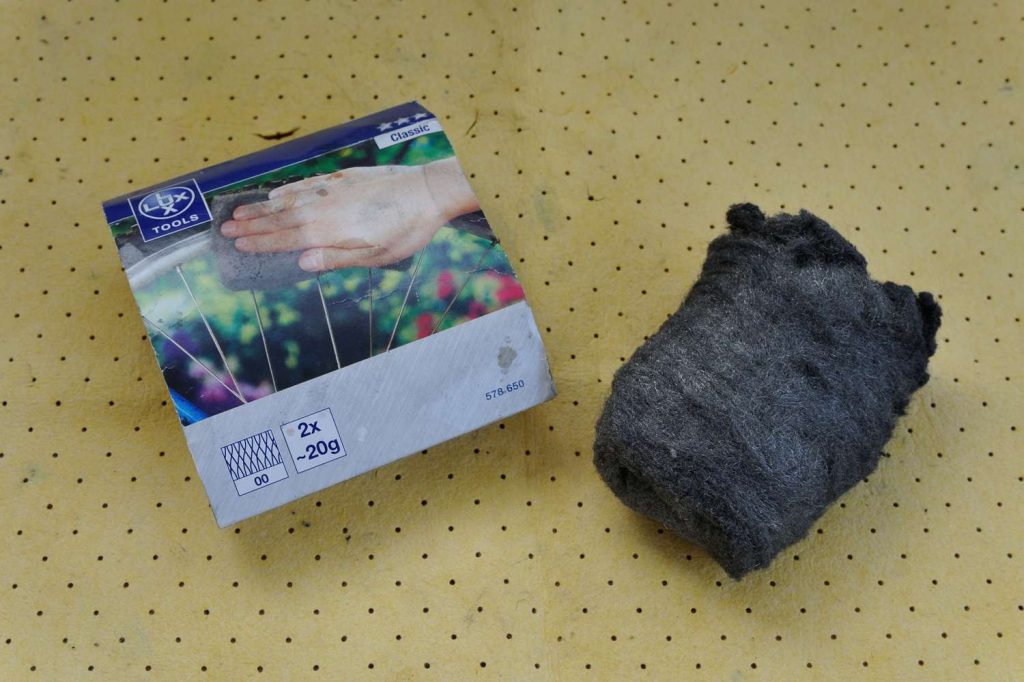
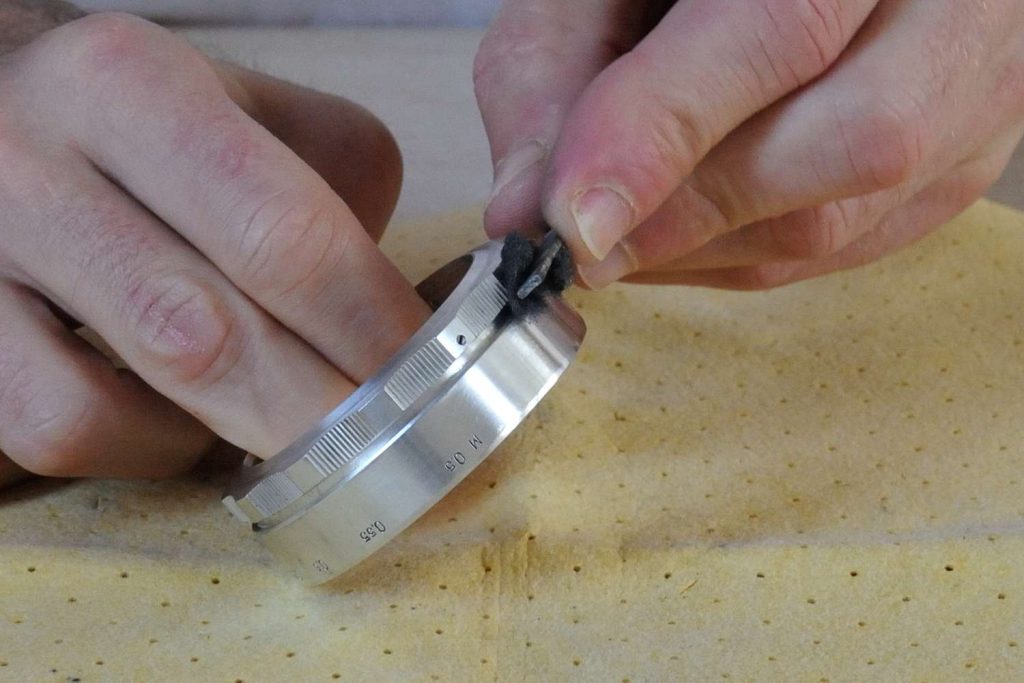
That brought me to the idea of using fine iron wool, which I used successfully in my other hobby – wooden ship building. You should be able to find it in most hardware stores. iron wool comes in various grades. I suggest starting with the »00« grade.
 With the addition of some polishing paste it will remove old oxidation layer, small scratches and if you work with care, it will leave a very homogeneous surface. Before you start to work with the iron wool, make a small test on the inner surface of the aluminum ring to see the result and experience needed force and pressure.
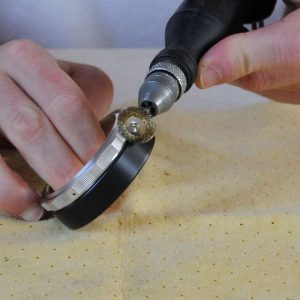
One part that needs special attention are the rib patterns so you might start with them. The best tool to polish those tricky, wrinkled parts that I managed to find is a hobby electric multi-tool which I use with the circular brush extension.
 If you don’t have one of those electric tools, you can try – iron wire brushes. They usually comes in two different version – brass and steel, I use the brass ones.
 Both methods are rather aggressive and you should try to mask areas nearby. I use electrical tape for the masking.
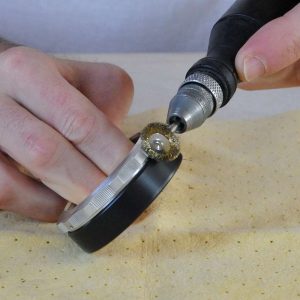

I suggest you to make a test on the inner part of the ring first. If the brush you have leaves too deep tracks, try to get softer one.
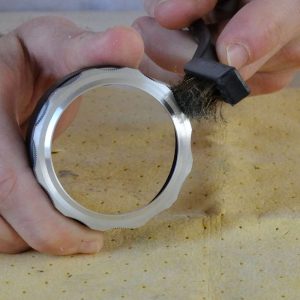
For the difficult to reach parts such as folding steps, grooves etc., use wooden or plastic stick as a base around which you’ll wrap the iron wool. For some grooves you can use old plastic card to get in.
 After polishing of all these tricky places, you can start to work on the main surface. Start with a gentle pressure and add some if needed. Use some polishing paste (can be specially made for aluminum, but any fine polishing paste should work) and since it will get darker in usage, wipe the parts with a dry cotton cloth occasionally, to better follow polishing process.
I am sure that you will be surprised with the result after a short while. After first pass, decrease the pressure on the wool as you proceed. Most important thing is trying to keep cleaning movements lateral, it will create more even and nicer looking surface at the end.
This brings us to the next step, which is optional. I make the final passage with the finest wool »000« but without polishing paste.
 This should give more glossy finish. If you like less shiny look, you can skip this step. Apply very little pressure when working with finest wool. You will notice that without the polishing paste, finest wool degrades quickly, leaving a lot of small, dust like particles.
To get rid of them, wash all the polished parts in water with a few drops of a mild detergent, rinse them under the tap and finally wipe everything with a cotton cloth.
IMPORTANT!
Although this method is generally safe for the engraved letters and numbers on your lens, work on those parts with increased caution. If it happen that some color gets lost in the process, it is easy to paint it over. Just paint over the area with corresponding color and let it dry. Remove the excessive paint with the finest iron wool.
 This polishing method works fine but that doesn’t mean that it can’t be improved. I am constantly experimenting with the new tools and methods and will keep this article updated if needed. Any suggestions from your side are of course welcomed!
Take a look at the video
To help this page survive, your donation will be highly appreciated.
Chapter V – lubricating and re-assembling the lens
Now when we have everything clean we can proceed with lubricating and re-assembling the lens. Those two operations comes simultaneously, so I made a short video explaining how I make my lubricant mixture, how to apply it and where and how to assemble tricky part of the focus helicoid.
First we should start with the aperture a preset aperture ring resemblance though.
Step 1. Assembling the aperture preset ring and the ring bellow that secures it
Mark the position of the hole, for the screw that fixes the ring in place. This will help you finding proper position for the screw when you put the ring back.
Put some grease around the block as per picture bellow. I am using withe lithium grease, which comes in a spray can. Don’t apply spray directly on the lens, rather put some to the bowl and use brush to apply it. This way, preset aperture ring will be lubricated for the smooth movement. Since it has click stops, I like it so, but if you prefer more resistance, you can use denser grease.
 Put some grease also on the inner side of the preset ring and especially on the rim which comes in the contact with the ring that fixes it from bellow.
 Put the rings back on the base and use the preset aperture ring to align with the safety ring bellow, just as you did when you released them. The preset aperture ring should sit tightly and have no play when turned.
 Now the mark that you made at the beginning of this step, will come handy. Align the while on the safety ring with the mark and tighten the screw in place.
Make sure that the preset ring turns nicely. If you want to work out new lubricant a bit, remove that bog screw. This will allow you to turn the ring 360°. Once you’re satisfied with the smoothness, put the big screw back and you are done.
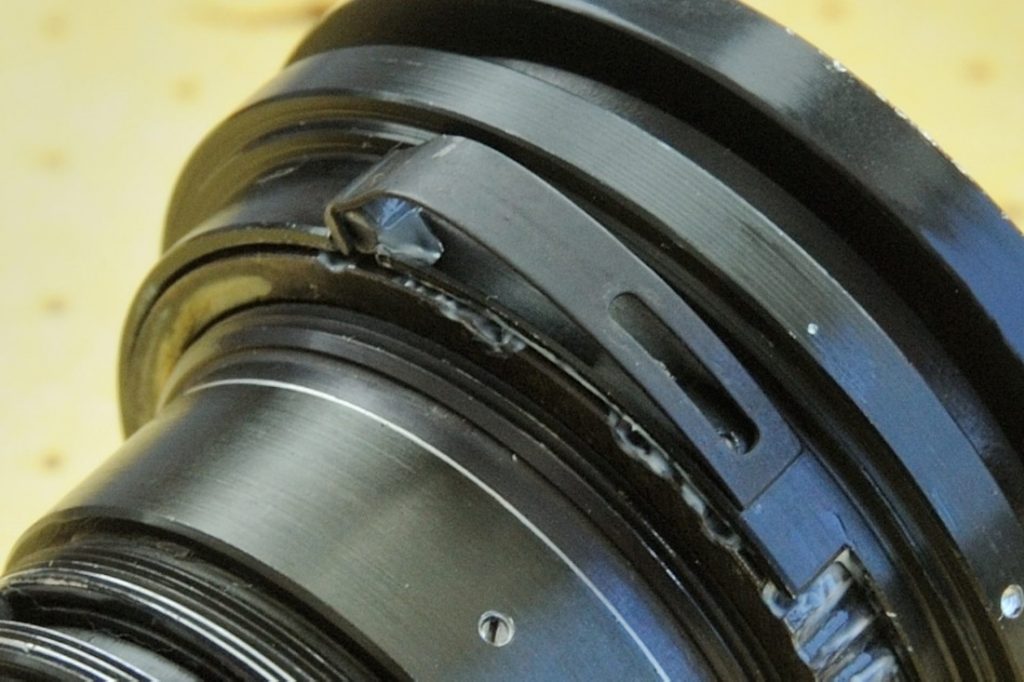
Step 2.Putting back roller and related spring/lever
Put some grease into roller leads/notches.
 The notches that are most apart are for the f2 and f2.8 positions. Put the roller at any notch and once it settle in place, put the spring/lever over it.
 Here is a close-up of that part
 Put first the rear screw that comes into guide slot. Once in place, move the spring/lever back and forth, to adjust its position. Fasten that screw, so that you can test the movement of the preset aperture ring. If everything works as it should, fasten the second screw with which you can adjust the resistance of the preset ring turns to your liking.
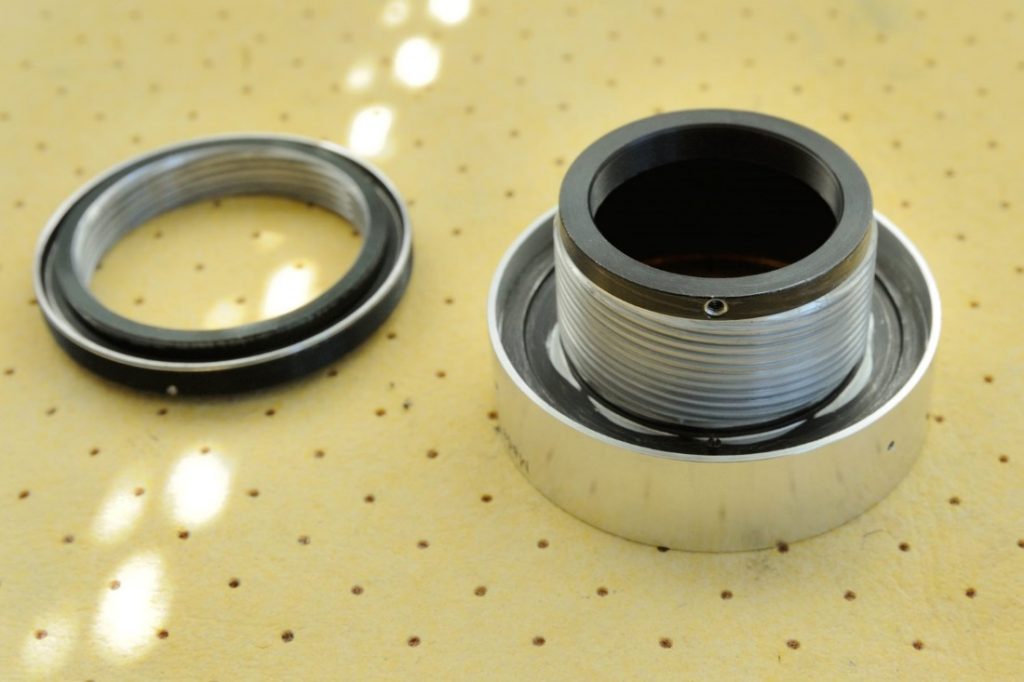
 Step 3. Assembling aluminum outer aperture ring.
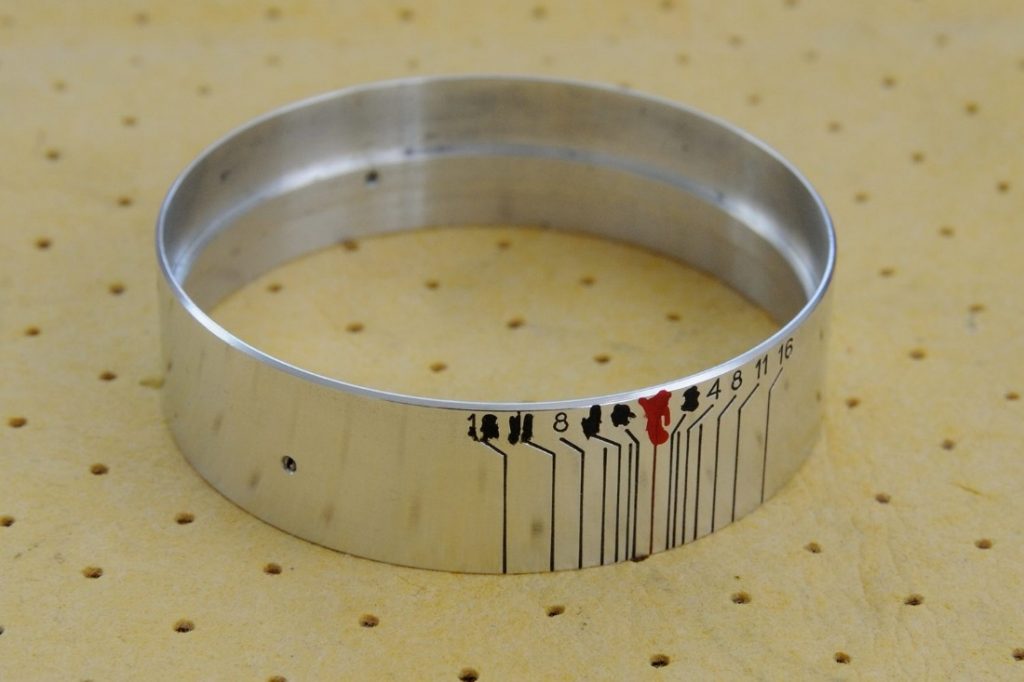
Position the inner preset ring to f2. As written above, this is the notch that is furthest apart from the others. You will now be able to align the number 2 on the aluminum ring, with the red dot on the the lens.
 At this position, holes for three screws should be aligned too. Put the screws back and fasten them, Do not apply too much force, otherwise you might damage screw heads.
Step 4. Assembling the aperture helicoid
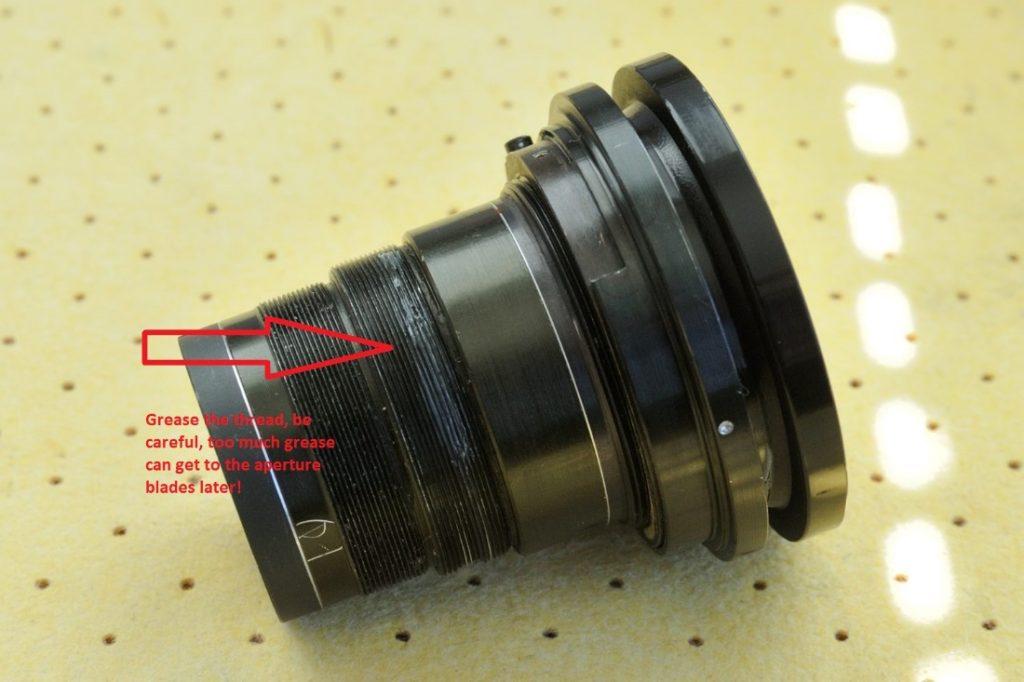
At this moment, you should check if your ring is properly lubricated. I used thinner grease on this lens, for smoother operation, since the focusing ring is wide enough and it doesn’t collide with the aperture ring like on some other lenses, where denser grease, causing stiffer operation (more dampened), might be better in order to prevent accidental turn of the aperture. Be very careful how you grease thread, because this is where »oil on blades« comes from, in this type of Russian lenses. I put a small amount of thinner grease mixture away from the cross-section bellow.
 Put back the aperture helicoid, screw it all the way down and then turn it back a little. Put back the limiter screw, but don’t fasten it yet.
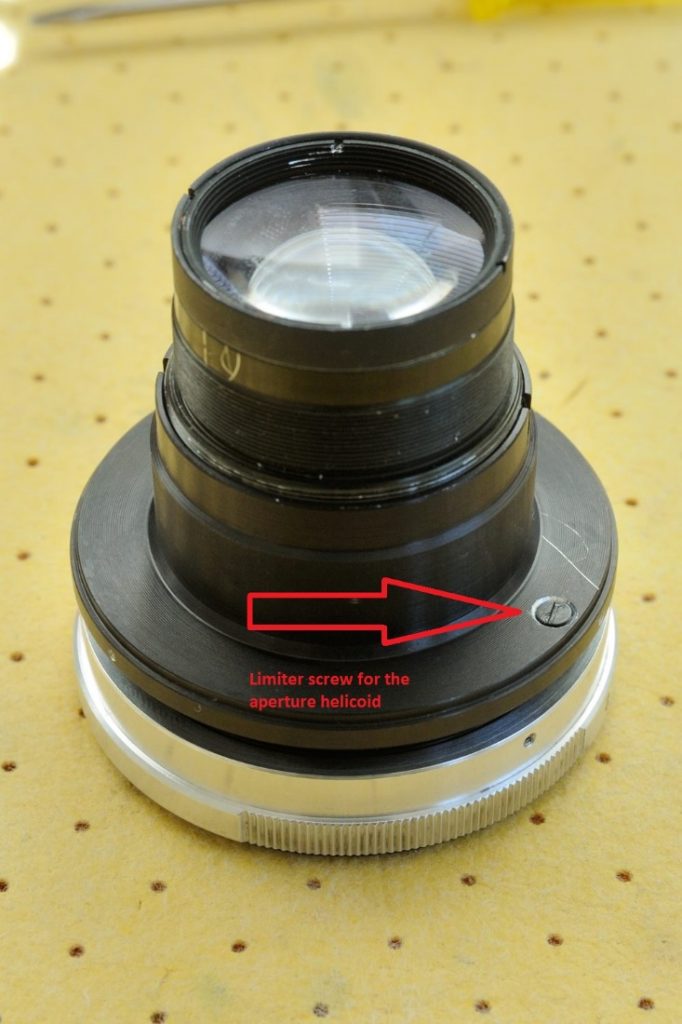 This is where you turn the aperture helicoid slightly CCW to align the position of the limiter screw. Once in place, tighten it up.
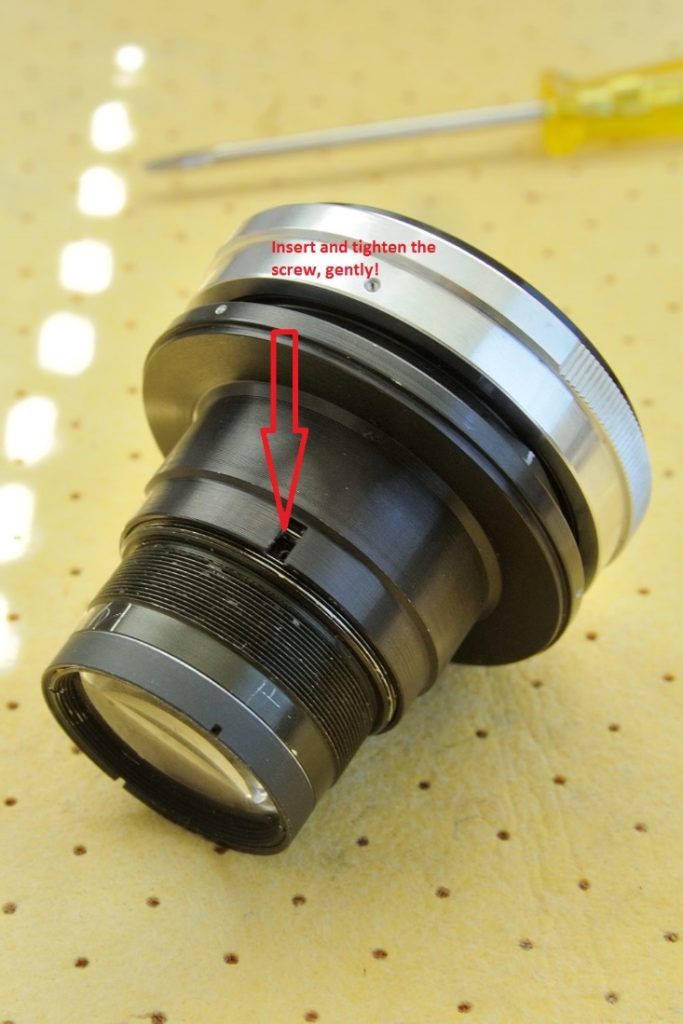
 Step 5. Mounting the aperture helicoid coupling screw
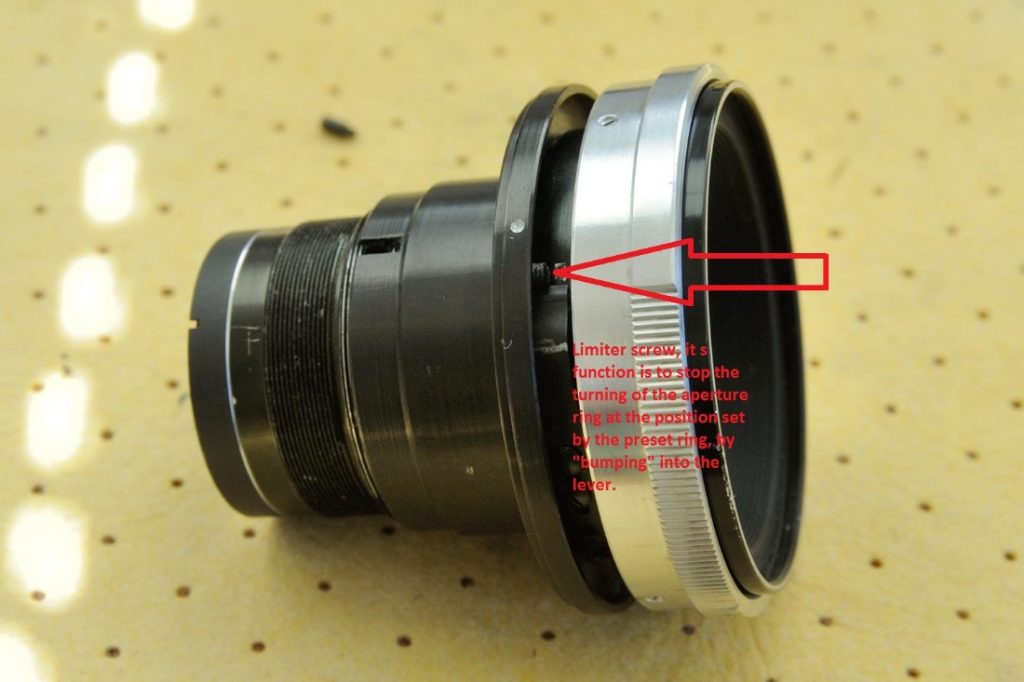
Remember that groove which I suggested you to mark in the Step 4. of the chapter II, because there is another on the opposite side? That mark is now coming handy. If you got everything right, aperture wide open (f/2) marked groove should be aligned with the internal aperture ring and the hole for the screw.
 After you fasten the coupling screw, you should test if aperture works correctly. Turn the preset ring to f16. Now turn the aperture ring all the way until limiter stops you. The aperture blades should almost close (very small opening). You can fine tune the position of the aperture ring a bit if needed. Remove coupling screw and the limiter one (from step 4.). You can make one or two full turns with the aperture ring, bringing it further apart of the preset ring. When you are happy with the result, don’t forget to put both screws back.
Step 6. Assembling the outer aperture ring (aluminum)
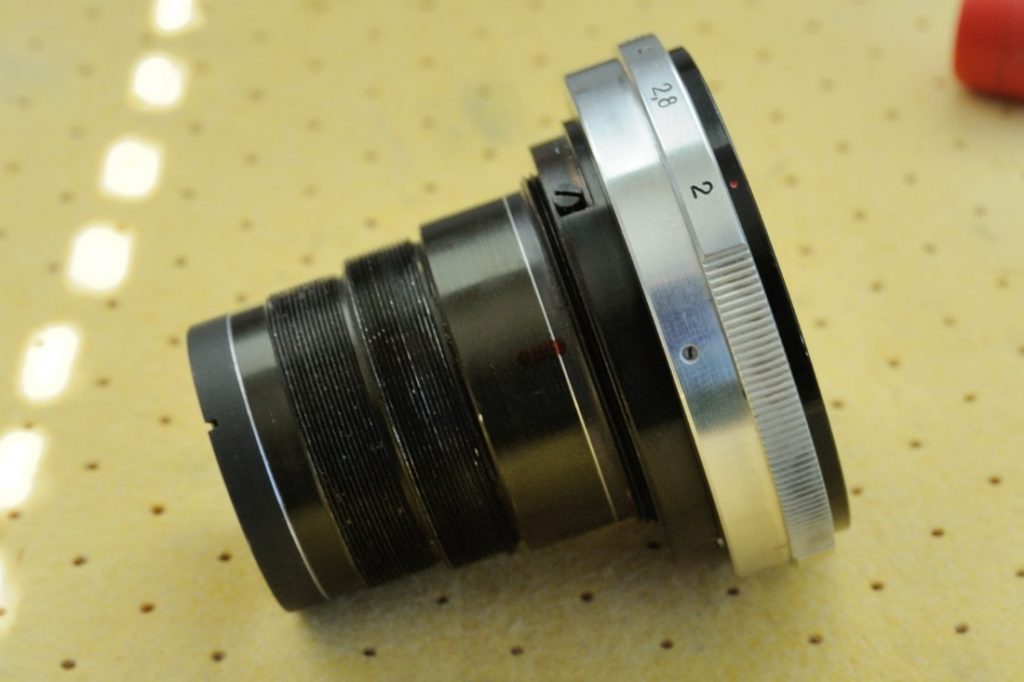
Align everything to wide open (aperture and preset ring) and put back the aluminum outer aperture ring in position. Align the small red dot on this ring to the position f/2.
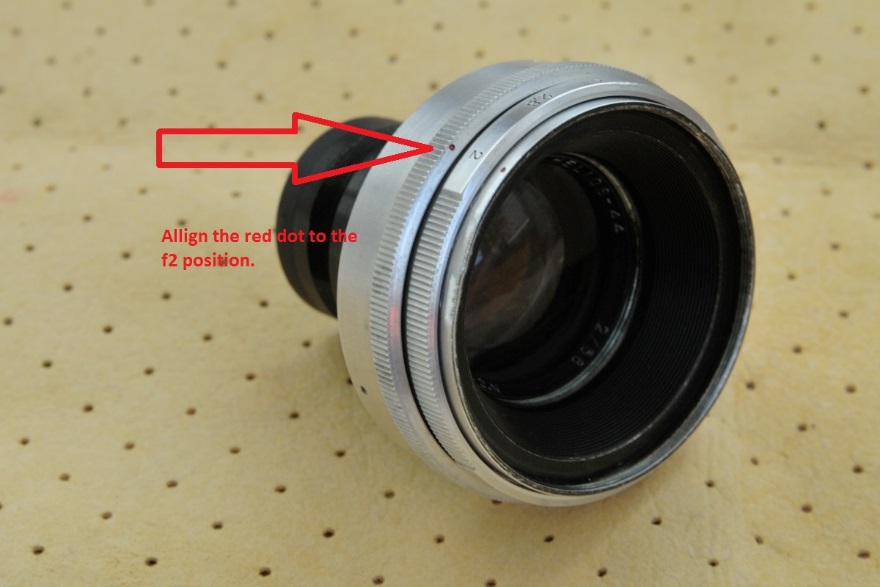 The outer aluminum ring had little tolerance on my lens, it fits pretty tight to the inner ring!
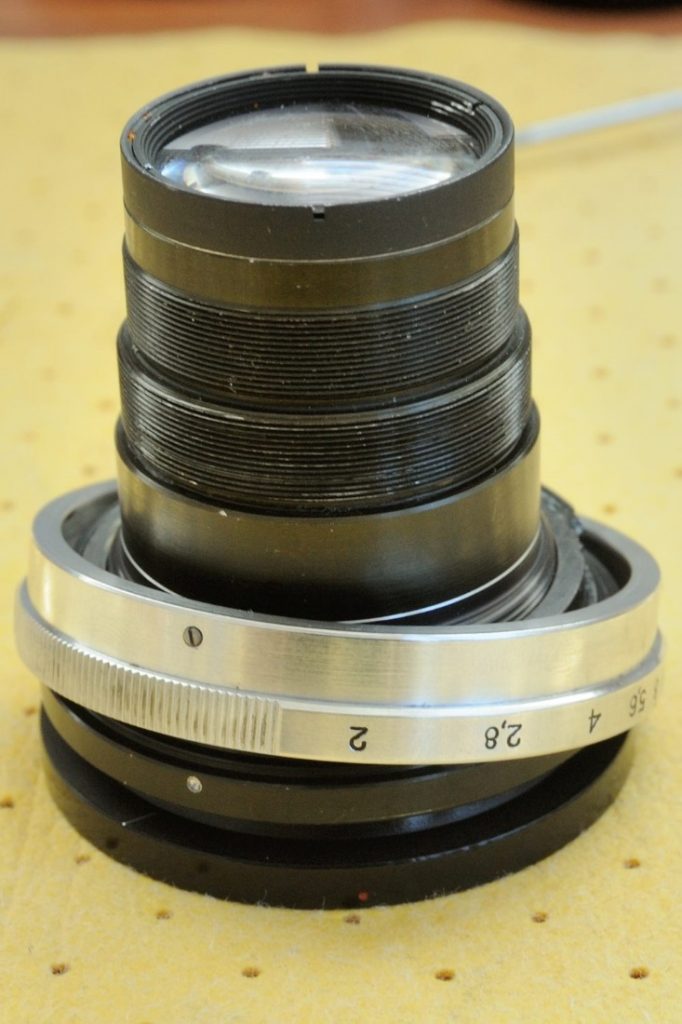
The reassemble of the aperture part of the optical block is finished. We can move to the focus helicoid part.
Before we proceed, you might want to watch the video from the beginning of this chapter once again. https://www.youtube.com/watch?v=fDJfMN_afhQ&t=38s
Step 7. Assembling the front inner focusing ring
I use little grease as a general rule. I usually add a drop of oil to the grease and apply the mixture with a brush. Avoid to put too much grease from the start as it might result in the stiff focusing. This main thread can be accessed later, by removing the outer focusing ring, should you decide to add more grease.
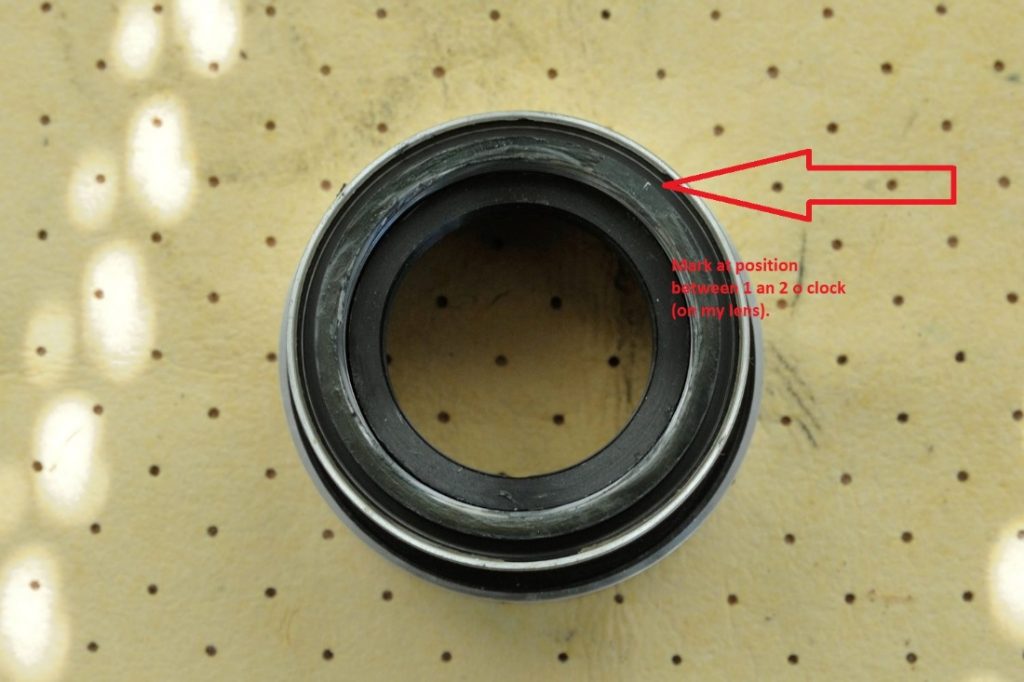
Position the helicoid with the screw hole at 6 o clock position, from the viewer perspective
 Remember that important mark and it’s position that I wrote about in the chapter I, step 5? Place the front inner focusing ring so that your mark is around 2 o’clock position, and by turning it slightly left and right find the entrance step.
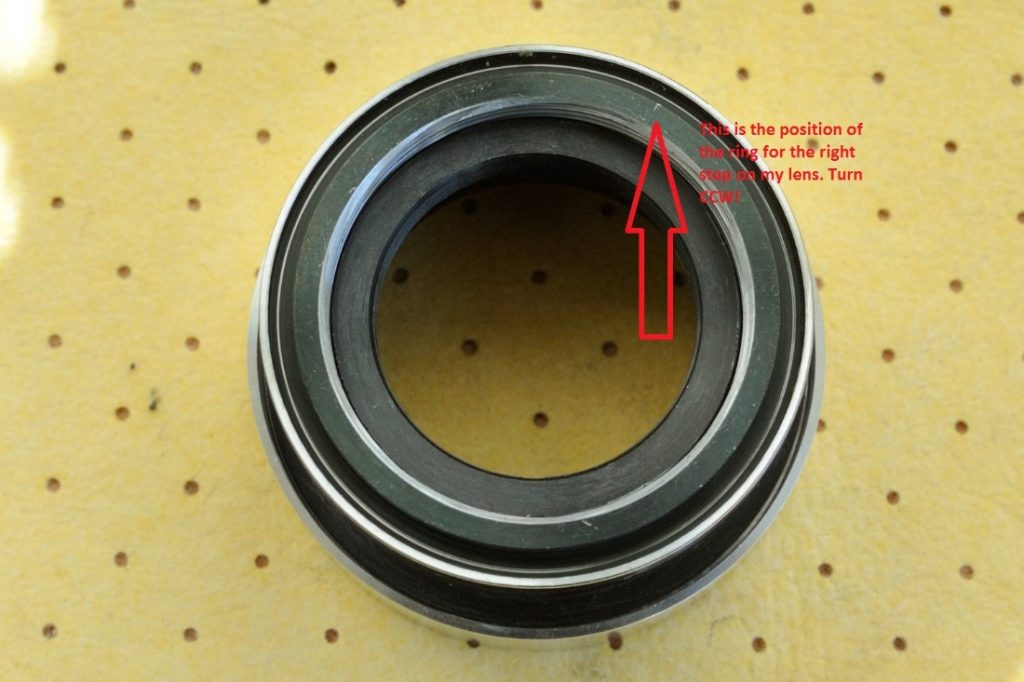 Once it starts, turn it CCW until you reach the marked position bellow the screw hole without any spacing between. This part is explained in detail in the video linked above. If you lost your mark, don’t panic. Watch the video again and you will soon make it right.
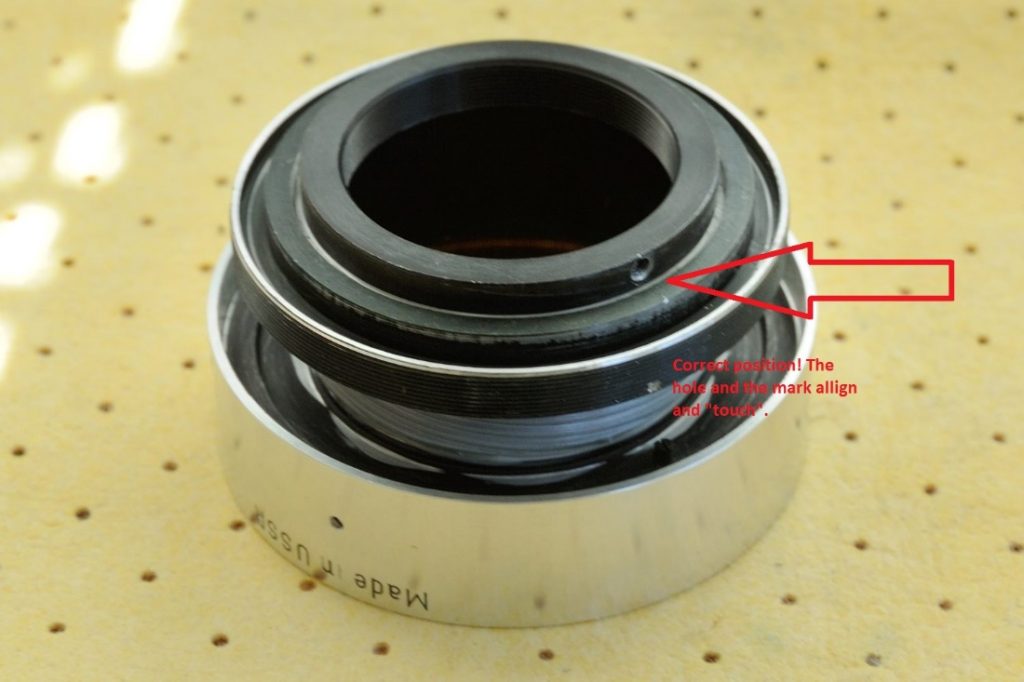 Once you get the ring in the proper position, tighten the limiter screw. Add some grease to the groove on the ring. Go easy with the grease, since this is the actual part, where most of the friction during focusing happen. I suggest a medium thin grease. Too thin (diluted) grease is also not good as these parts might grind and thick grease can be sticky and make focusing stiff
 Step 8. Putting back the aluminum housing of the front inner focusing ring
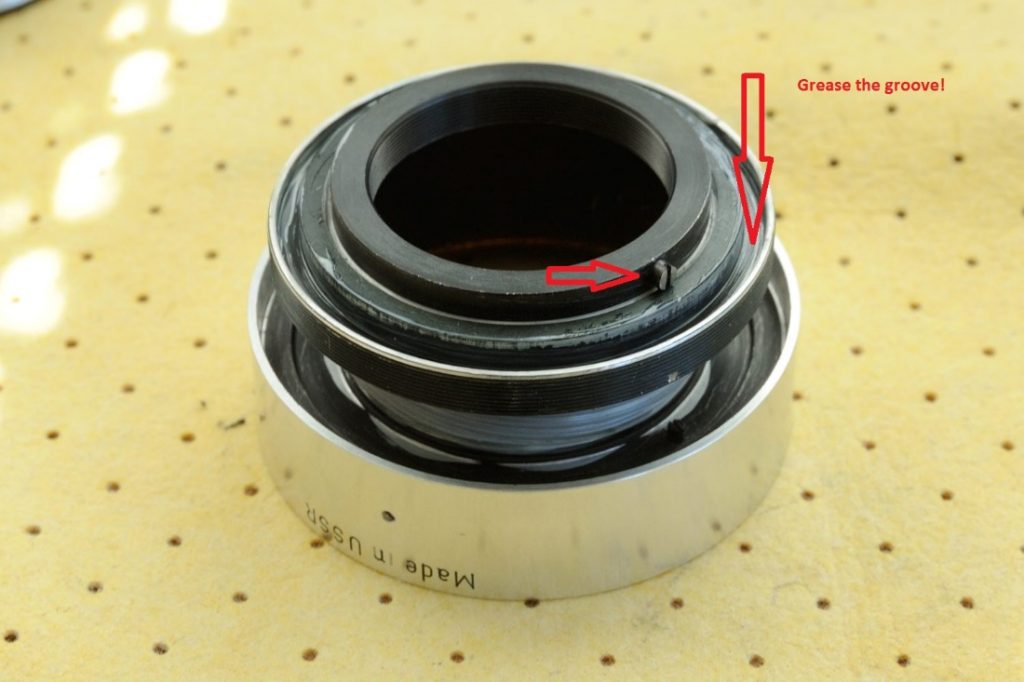
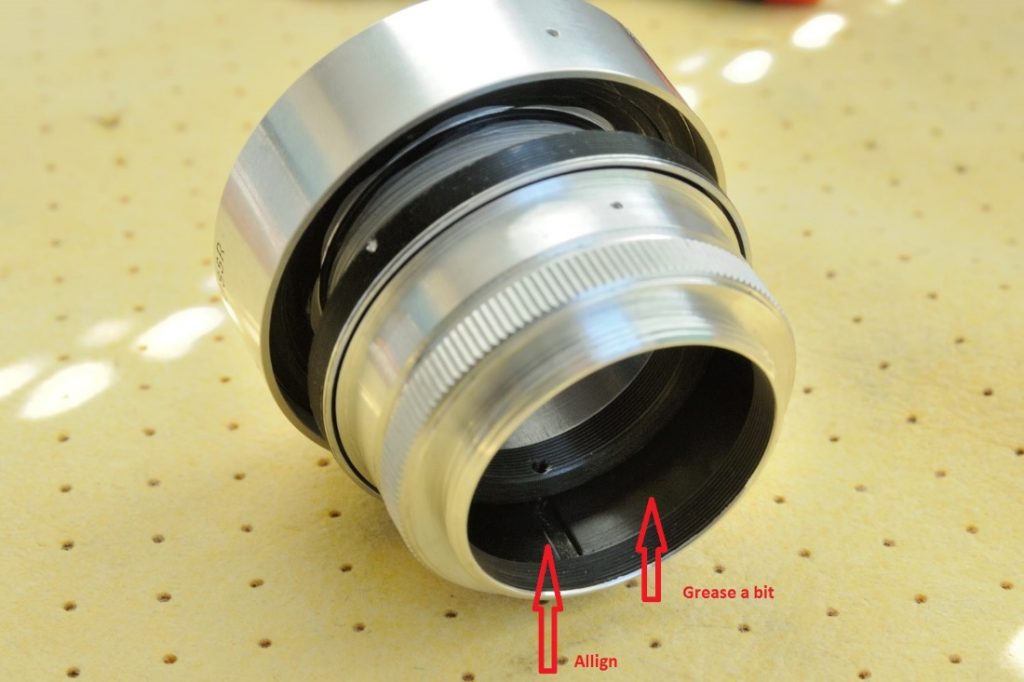
Align the groove on the inner side of the ring with the limiter screw. Grease the groove. This time, the thicker the mixture the better since it will decrease or eliminate possible wobbling of this part. Put a small amount of thicker grease (lithium e.g.) in the groove. You can also grease the inside of the ring, with thinner grease mixture
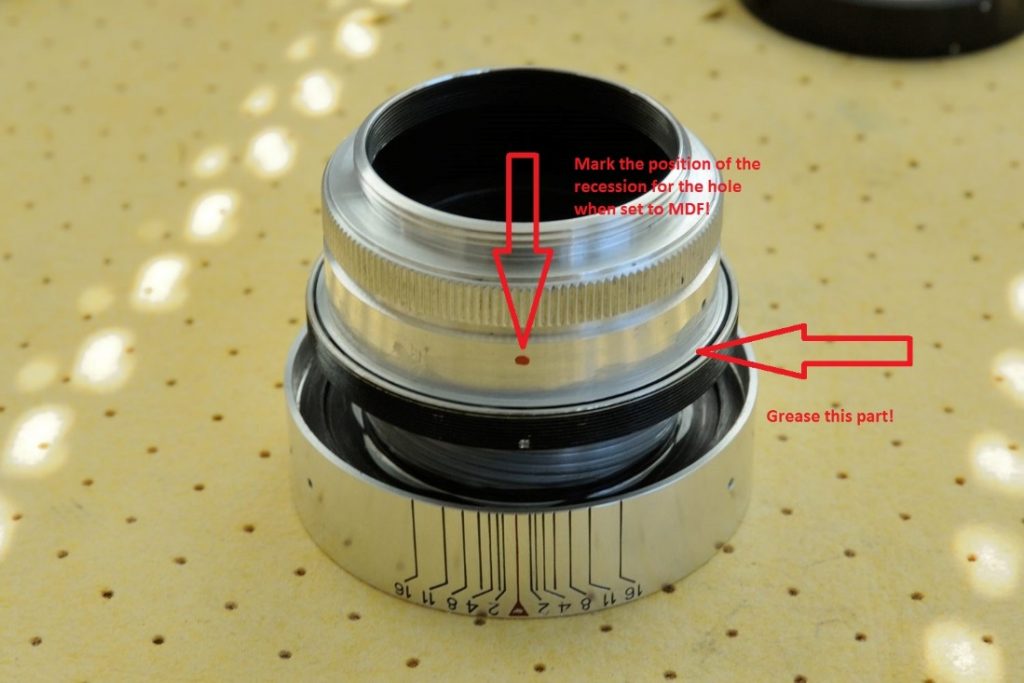
 Check if focus ring is set to minimum focus distance (MFD). That is position when it touches the limiter screw. Put the mark above one of the recessions for the screws on the main inner focusing ring bellow as on the picture bellow. Finally add some grease on the rim part of the aluminum housing.
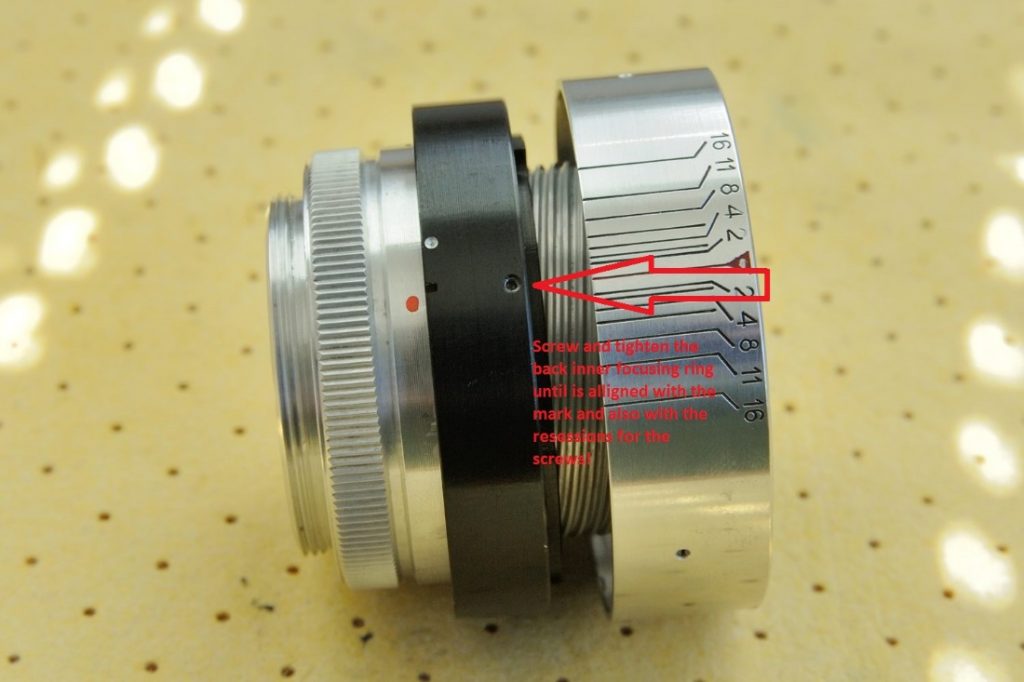
Step 9. Putting back the rear inner focusing ring.
Depending on the quality and state of the threads, this can be challenging task to do. I suggest that you first try to screw those parts (the front and the rear inner focusing rings) together, before you put them on the lens, to see how it goes.
There are the two notches for the spanner on the rear inner focusing ring. If you use spanner to tighten those two parts, be careful how much force you apply. Tightening the rear ring you force the front ring to go against the limiter screw bellows it. Too much force can damage or even break the screw or/and it can flatten it a bit, introducing some play in the focusing mechanism. Don’t hurry, this part needs some patience and probably few attempts before you make it right.
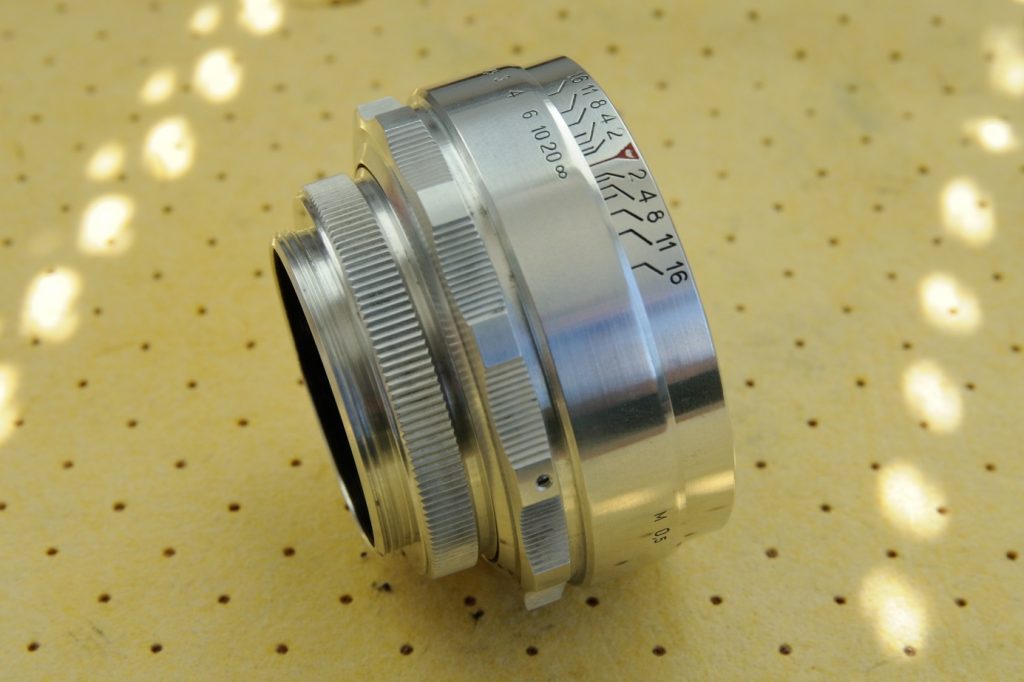
 Step 10. Putting back the aluminum housing of the rear inner focusing ring
After complicated step 9, everything should be easy from here. Turn the focusing ring to infinity and put over the aluminum cover ring. Use the infinity markings for alignment. Fasten three small screws.
 Step 11. Final step
We are almost done, let’s put optical block in the focus helicoid. Put the focus adjustment shim on its place.
 The last step, in the automotive industry would be called “the marriage”. Screw the optical block into focusing helicoid.
I had two copies of this lens and on both, the f16 sign and the infinity mark where slightly off, (for the same amount). It s probably due to the thickness of the shim.
Now take a deep breath and look at your lens. How do you feel?
To help this page survive, your donation will be highly appreciated.