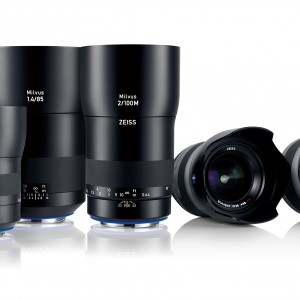
Introduction:
One of the lenses that I always wanted to test, partially because of its great reputation and partially because it represents my favorite focal length for people shots, finally found its way to Verybiglobo.com
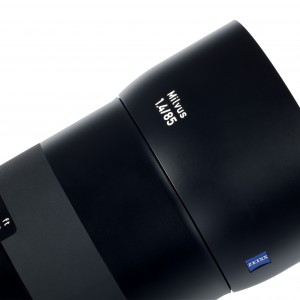
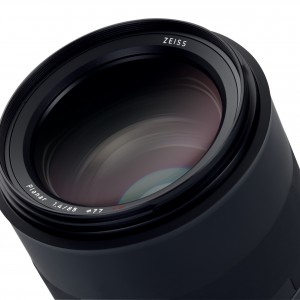
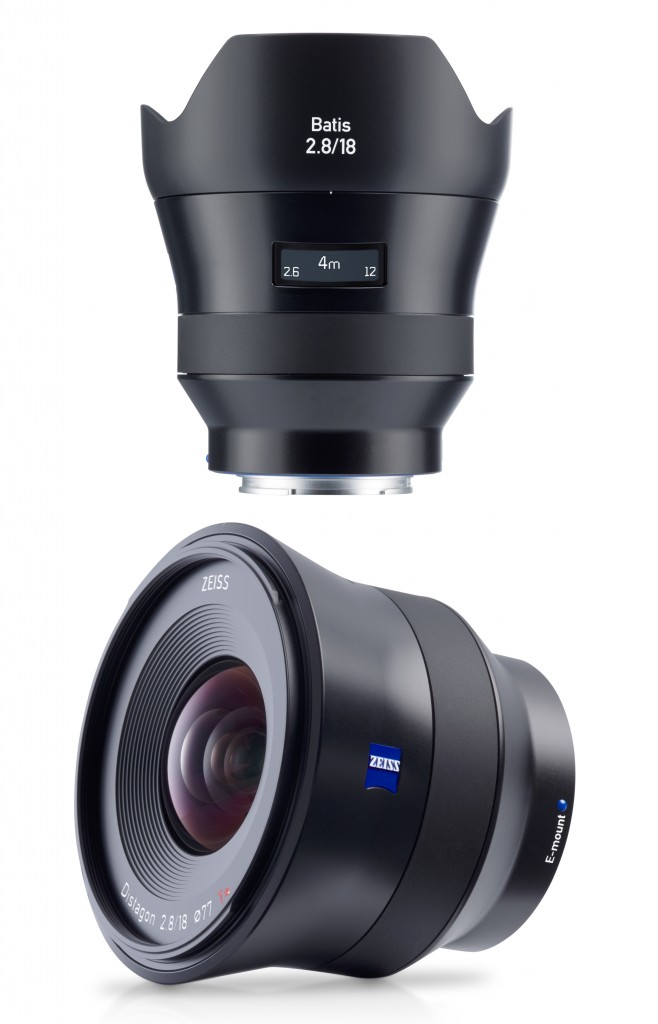
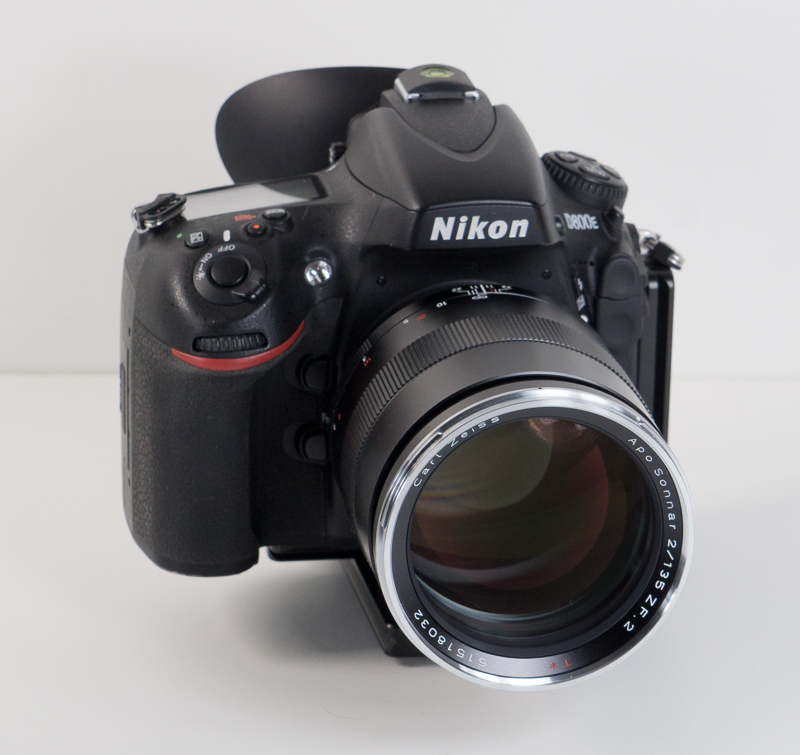
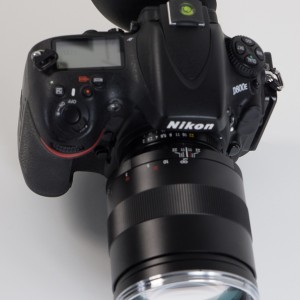
Zeiss APO Sonnar 135mm f/2 in Nikon ZF.2 mount
APO in the name means, that lens is Apochromatically corrected, or in other words – optics of this lens align all three color light components – green, blue and most importantly red into same focus plane. Lenses that are not Apochromatically corrected usually show strong purple (or green) fringing at contrast edges.
APO however is rather generic term. It doesn’t state to which extent lens is apochromatically corrected and especially how large projection area of the lens is corrected. Most lenses would be apochromatically corrected in the center of the frame, but problems starts when we move toward edges.
Marketing experts love this kind of words and thus we can find APO sign on many lenses that are as much apochromatically corrected as our government is willing to reduce taxes. Ok, maybe a bit more…
With modern software capabilities, it is possible to correct CA to certain extent but the problem is not only in removing purple fringing in terms of color, it is sharpness that suffers too (because one part of the light spectra, usually red is slightly out of focus.)
Zeiss APO Sonnar 135 f/2 is supposed to have good apochromatical correction. How good, we are about to see…
BTW I have read that Zeiss APO Sonnar 135mm f/2 shares same optical concept as Zeiss Otus lenses but was introduced before Otus name was invented. I will try to ask Mr. Nasse to confirm or deny this.
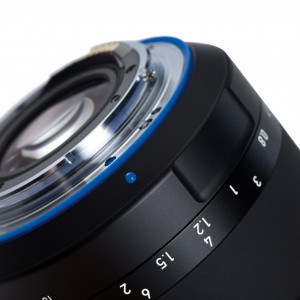
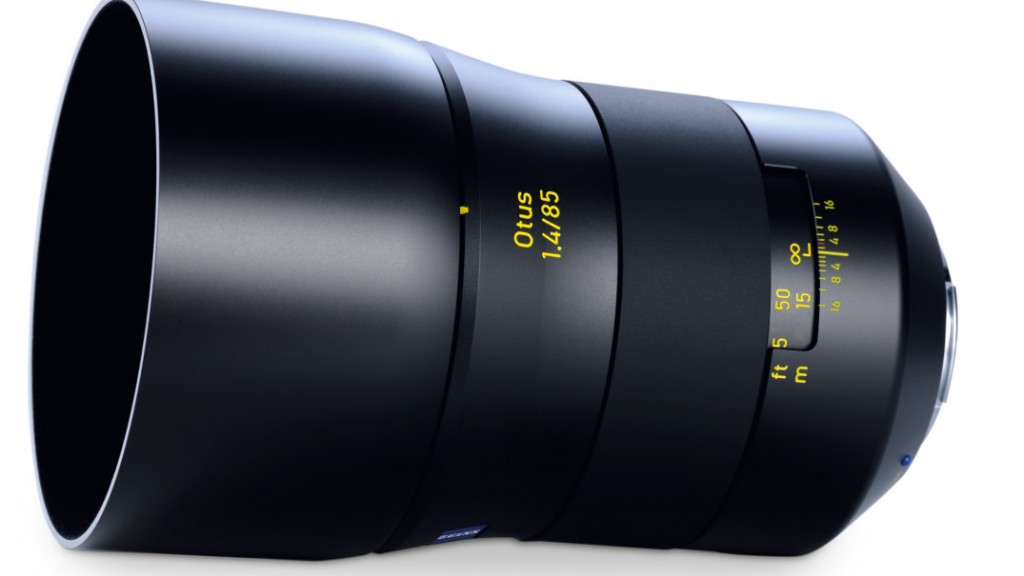
![Zeiss_APO_Sonnar_Product_Shots-09183]()
Mr. Hubert Nasse (Strategic Business Unit Camera Lenses Laboratory, Staff Scientist), one of the most competent people in Zeiss AG, was so kind to reply on above question, making it more clear:
In fact the Apo-Sonnar could have been included in the OTUS line, but at the time of its development the OTUS project was not yet decided. It is at least very near to OTUS in terms of general level of correction, Otus chromatic criteria are still a bit more tight, but nevertheless the 135 deserves the term ‘APO’, since it is clearly different from many other similar lenses.
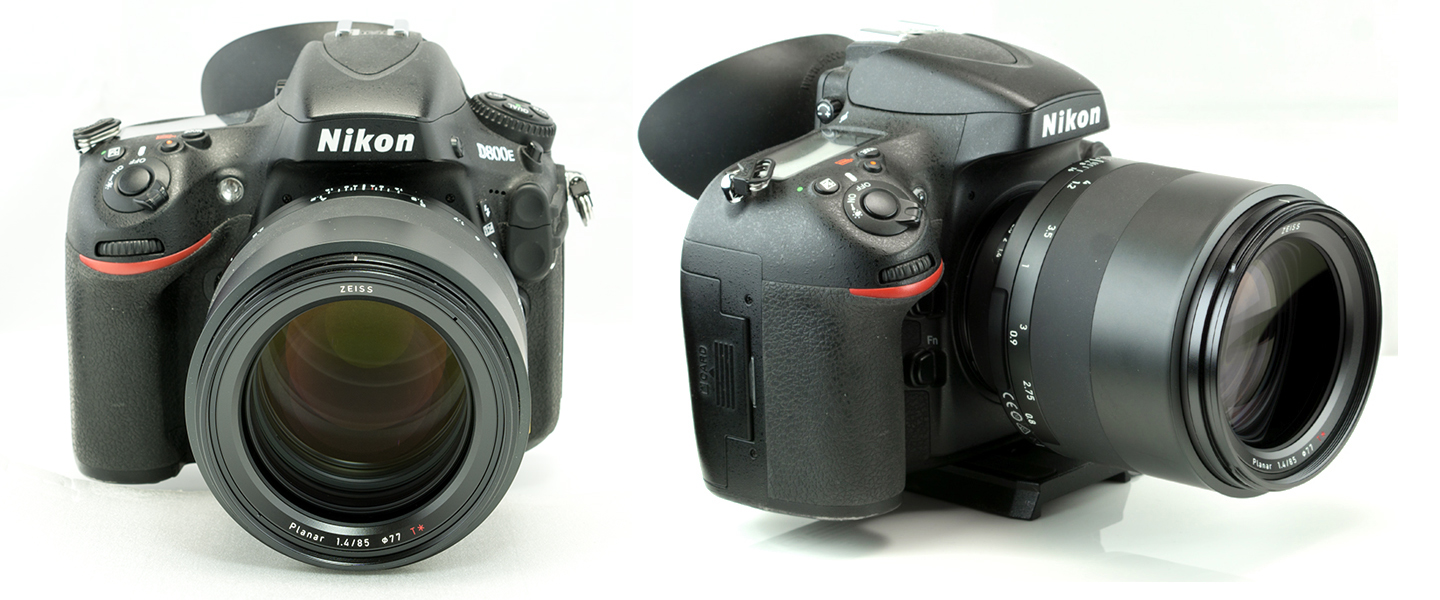
Zeiss APO Sonnar 135mm f/2 is manual focus lens, but it has electronic communication with camera allowing for aperture control, all modes exposure functionality including TTL metering and full Exif record. In my LR 5.7 lens is reported as Zeiss Apo Sonnar T* 2/135 ZF.2.
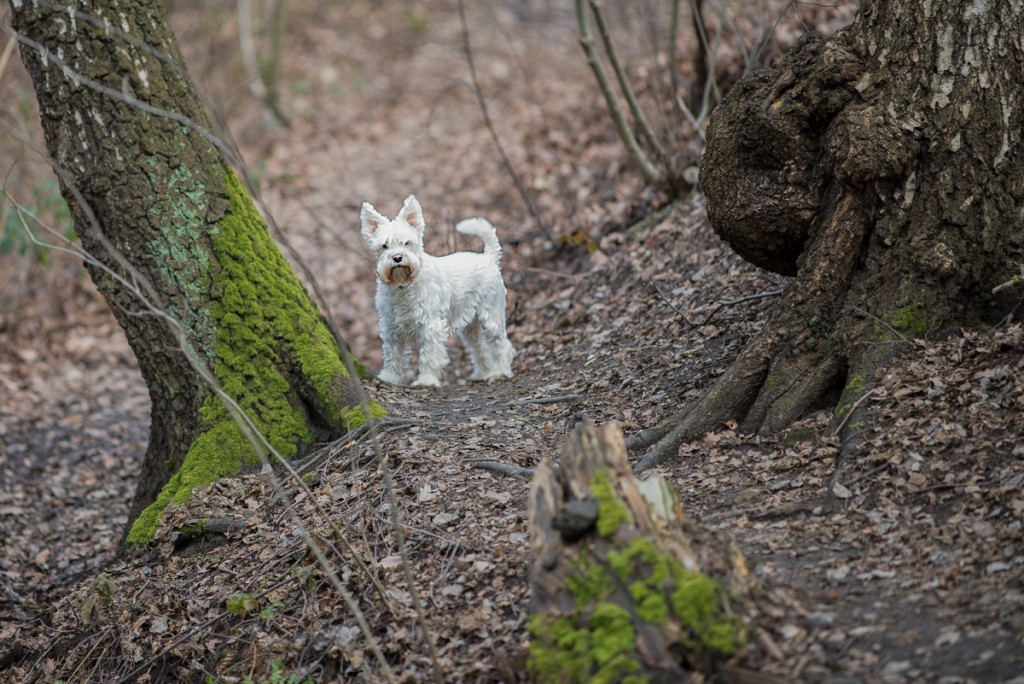
Manual focusing with Zeiss is usually great experience, but in this case, acquiring critical focus with my Nikon D800E wasn’t easy at all. With a scary thin DOF, you’ll need lot of practice or special viewfinder screens to be able to focus properly. This is not a shortcoming of the lens though, but rather of the digital camera behind it.
![Zeiss_APO_Sonnar_13520-4909-Edit]()
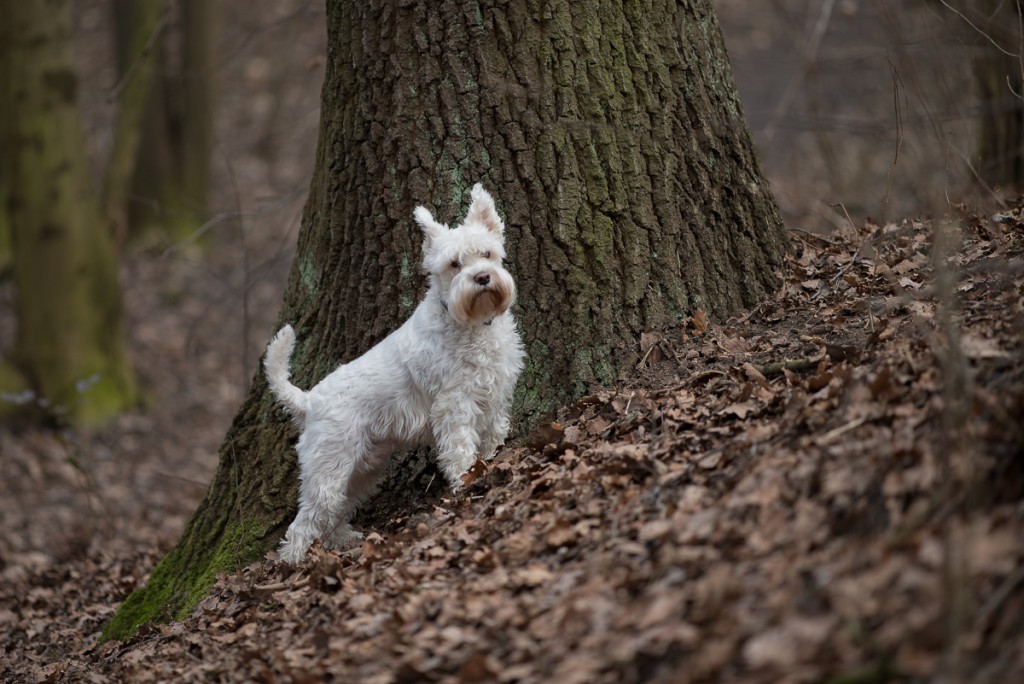
I thought that focus is fine in the shot above, but it wasn’t, which is shame because our dog rarely stands still for longer than couple of milliseconds.
![Zeiss_APO_Sonnar_13520-4924-Edit]()
This time I did better, but still not perfect.
I am shooting using manual focus quite often, but rarely I do so with such a low DOF in perspective. By shooting more and more with this lens, I become more confident and my keepers rate increased, but if you are not experienced with manual focusing, your learning curve might be very steep.
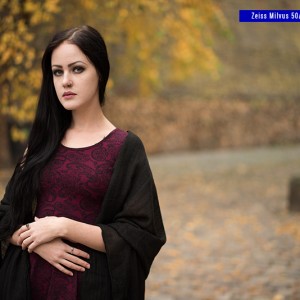
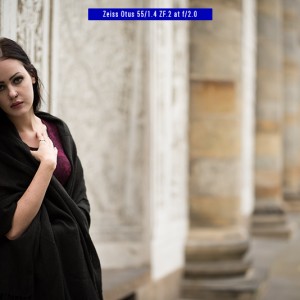
Using lens on my Nikon FM3a was much nicer experience and keepers rate was fine from the beginning. There is also chance that you consider to use this lens with mirrorless camera using EVF. While EVF will make manual focusing more precise using peeking and/or magnification, EVF’s refresh rate lag and low light noise are not ideal either.On top of that, lens is heavy and won’t balance well on most mirrorless cameras that I know.
Let’s first see as usual – what Zeiss says about this lens:
Apo Sonnar T* 2/135
Turning far to near
Enjoying the evocative atmosphere of dusk against a dreamlike backdrop – as an inconspicuous observer, the tele lens lets you experience this unique moment from the distance. Detached from the background, the Apo Sonnar T* 2/135 enables an incomparable interplay of soft evening light and radiant colors.
Offering the utmost flexibility in a wide diversity of situations, this tele lens can also capture the actor’s emotions on the stage from the third row and take breathtaking portrait photos.
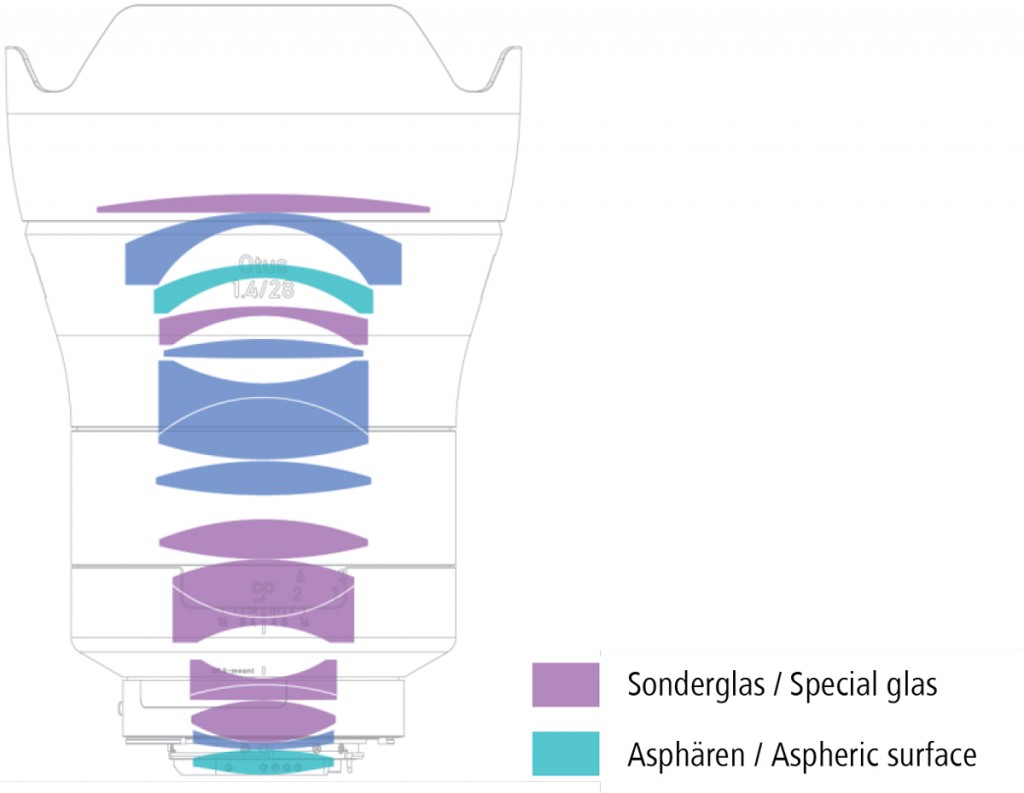
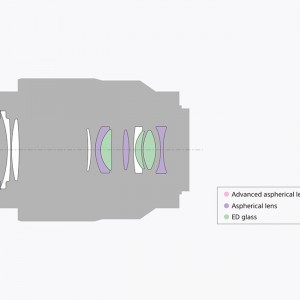
Here is the lens design scheme from Zeiss pages:
![slider_img1]()
![slider_img2]()
Reading further about lens features, there are two most interesting things IMHO:
1. APO Design (as written above)
Apochromat
Because this lens is an apochromat, chromatic aberrations (axial chromatic aberrations) are corrected with elements of special glass with anomalous partial dispersion. The chromatic aberrations are therefore significantly below the defined limits. Bright-dark transitions in the image, and especially highlights, are reproduced almost completely free of color artifacts.
2. Close minimum focus distance
Close focusing distance
The lens design ensures consistent imaging performance throughout the entire focusing range as well as sharpness to the periphery of the image. The asphere’s more complex surface profile can reduce or eliminate spherical aberration and also reduce other optical aberrations compared to a simple lens.
When we look at Apochromat description, we might notice that “CA are significantly bellow the defined limits” formulation. As I wrote, there is no standard according which we can now what this exactly means, so we’ll need to see it in practice. Regarding minimum focus distance, it is very welcomed addition, allowing some tight close-ups at very solid 1:4 magnification ratio. Need more? APO lenses are in theory very good for macro, so just add macro tubes and 135 APO Sonnar can become powerful macro lens too.
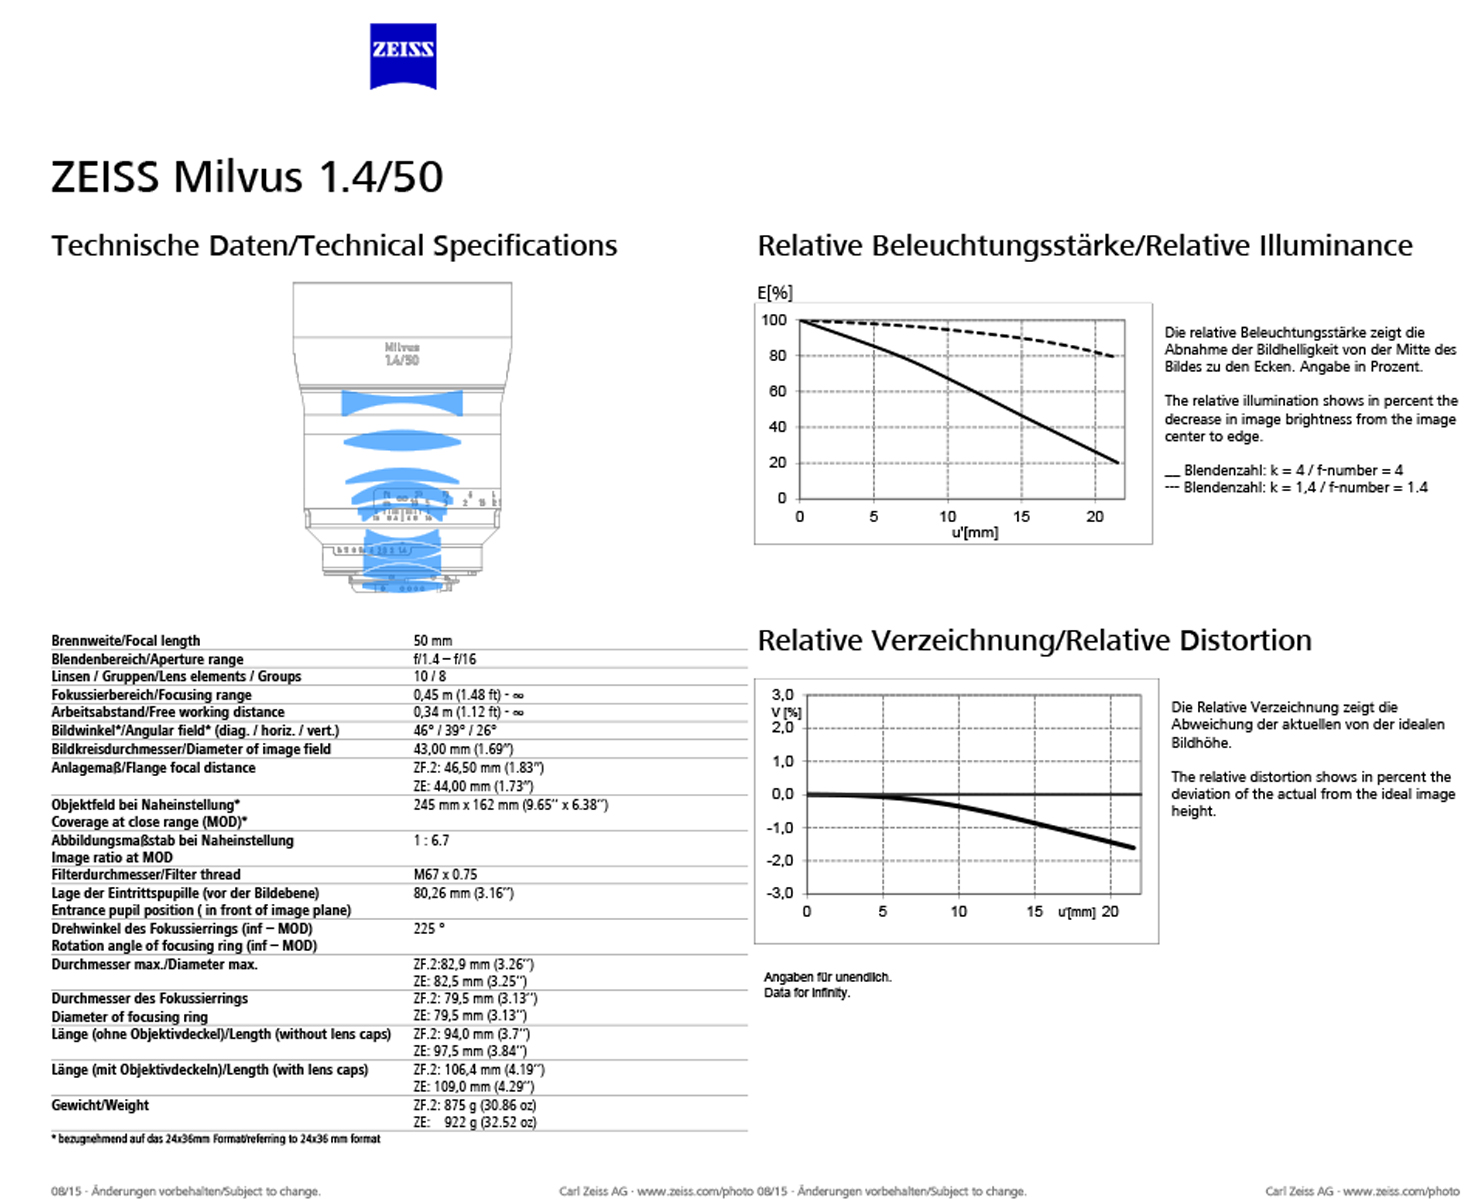
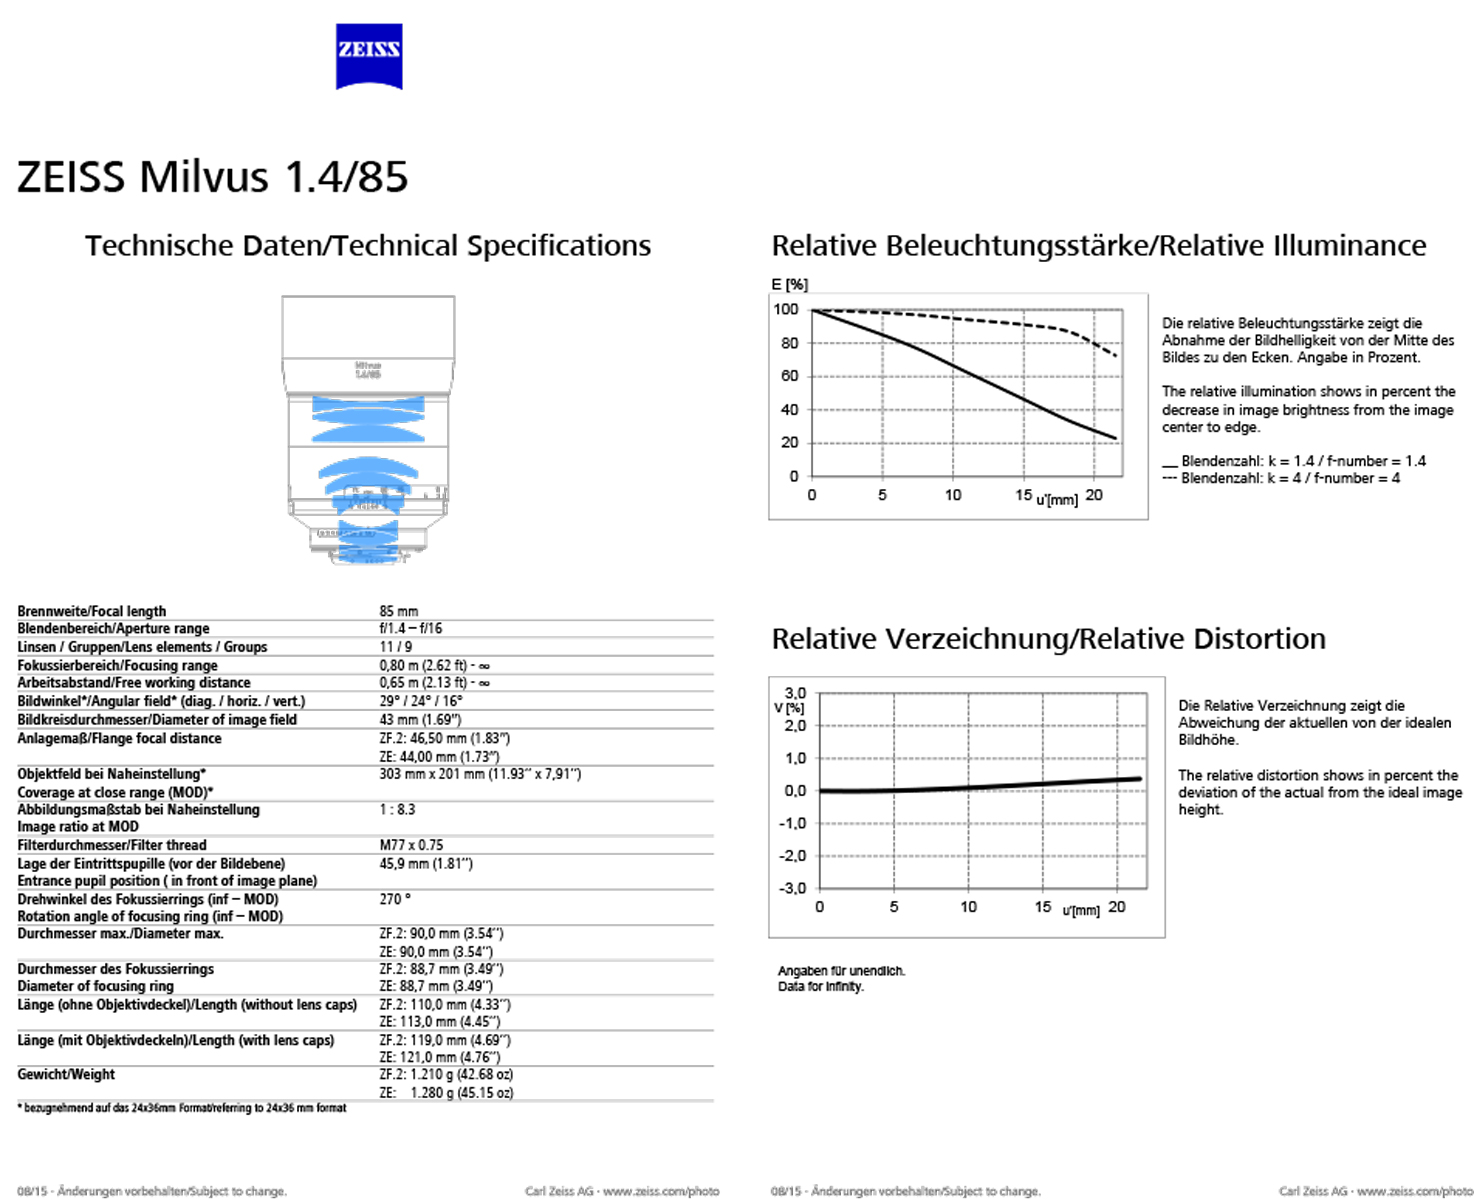
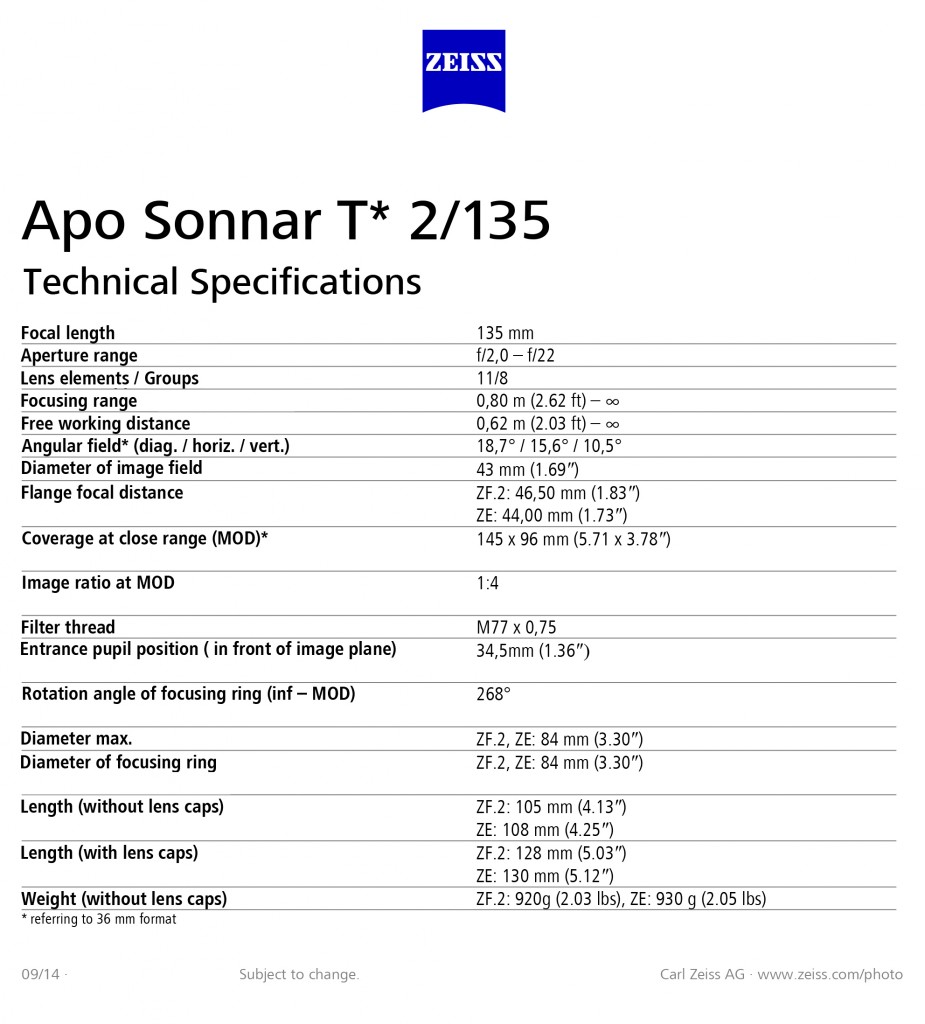
Here is full technical specification:
![Microsoft Word - _Apo_Sonnar_2,0_135.docx]()
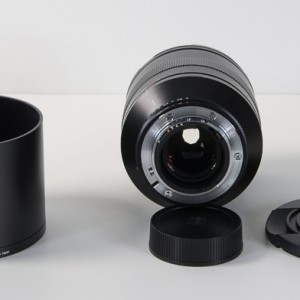
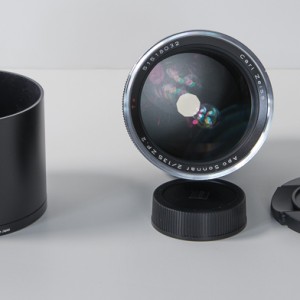
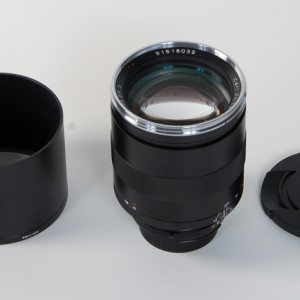
In the box:
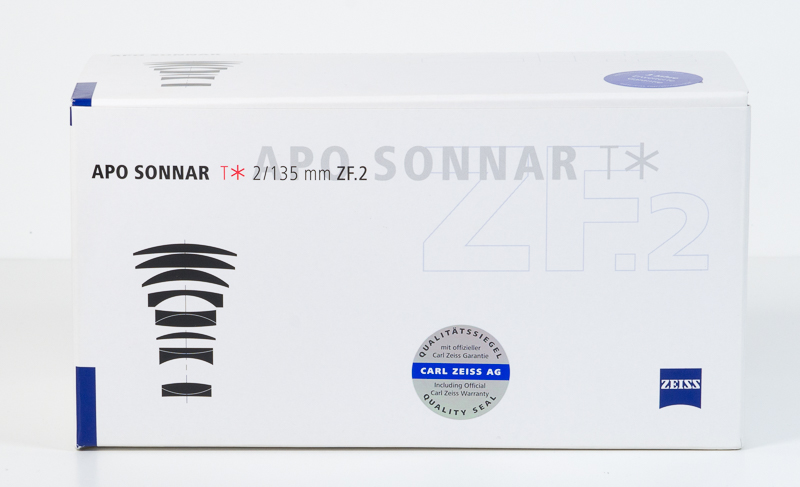
Lens comes in paper box, typical for most Zeiss lenses. Blue logo, black print and famous red *T on white semi glossy background, looks elegant and minimalistic.
![Zeiss_APO_Sonnar_Product_Shots-5969]()
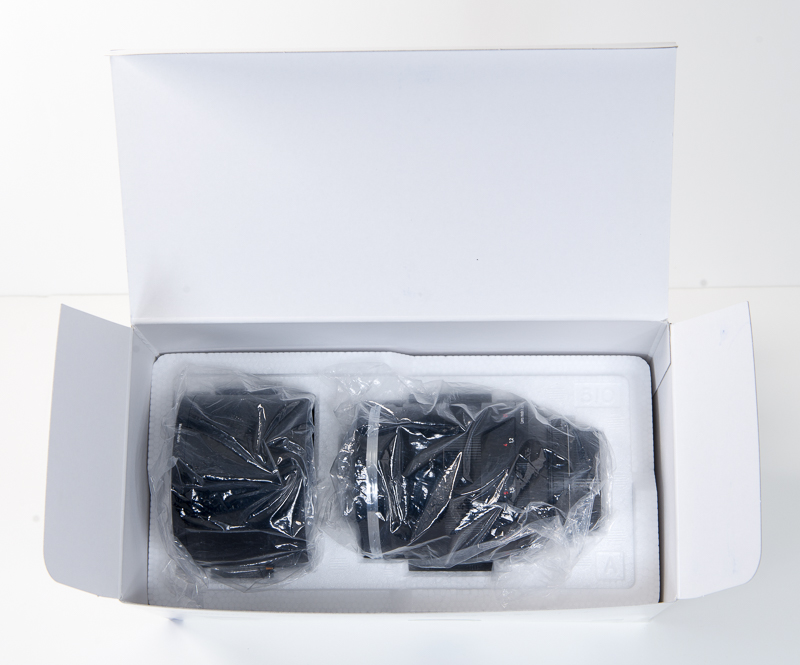
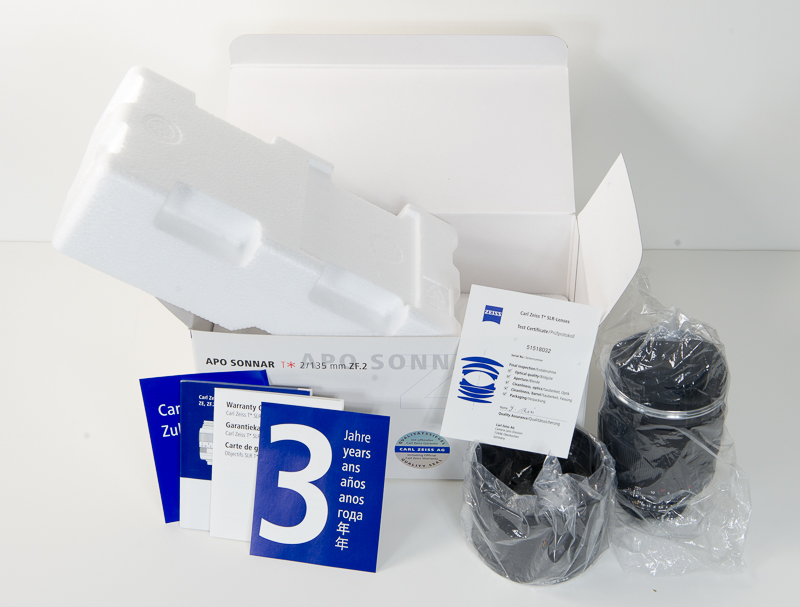
In the box, well protected with polystyrene filling are lens with caps, lens hood, and papers including user manual, 3 years warranty card promotion, warranty card itself, quality control certificate (hand signed) and suggested accessories.
![Zeiss_APO_Sonnar_Product_Shots-5975]()
![Zeiss_APO_Sonnar_Product_Shots-5976]()
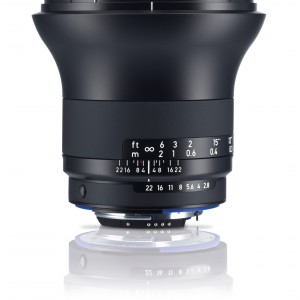
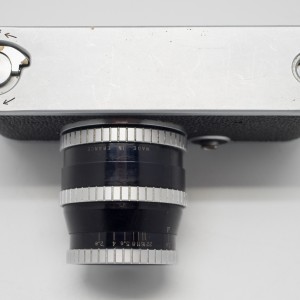
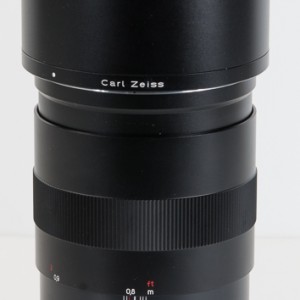
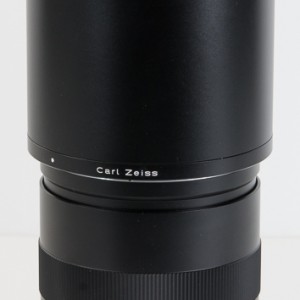
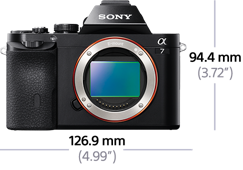
Appearance and build quality:
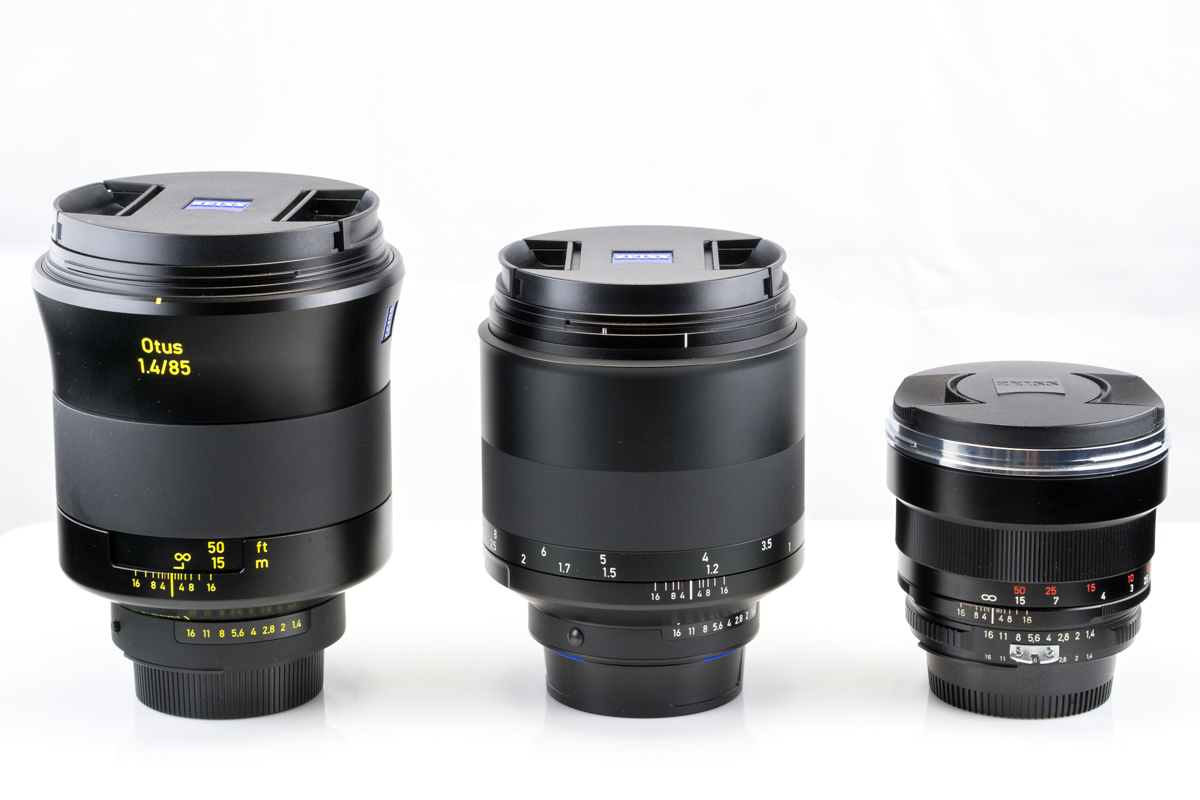
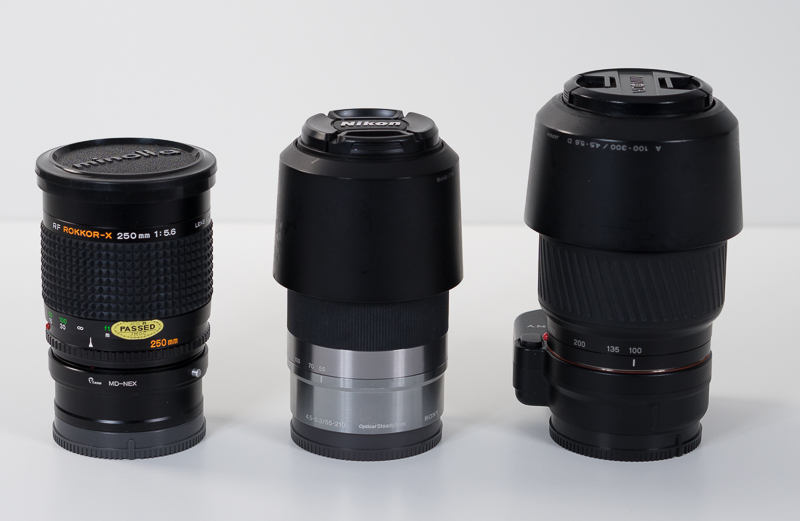
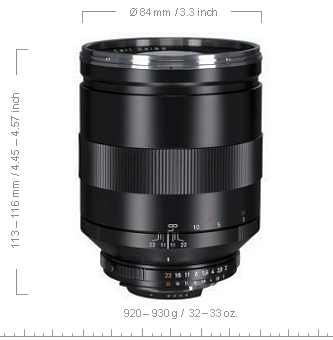
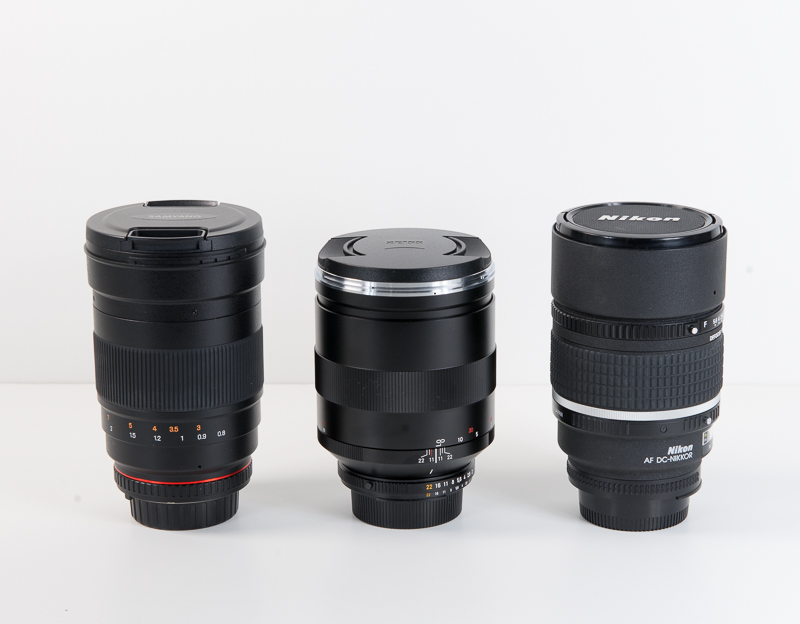
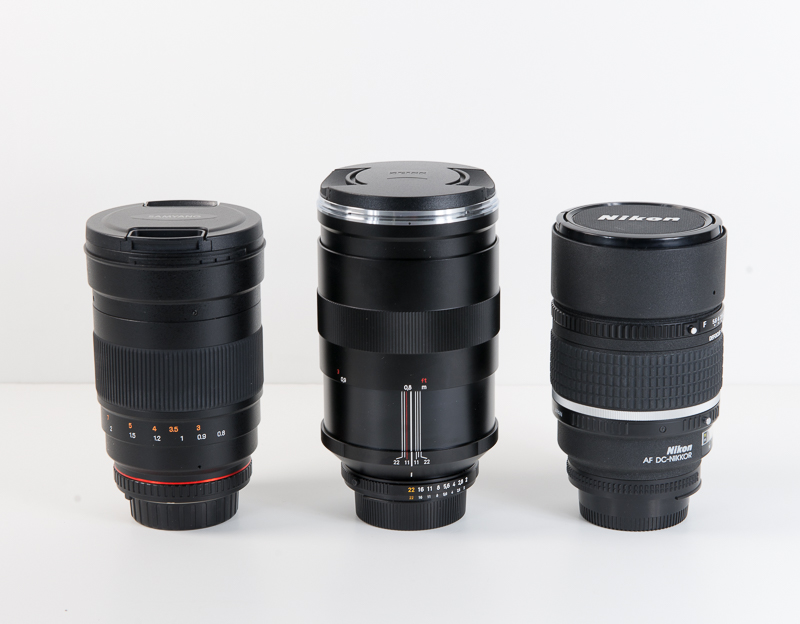
The first thought is – this lens is big and heavy. In reality however, compared to its competitors, it’s not that bad. Unlike most of its competitors Zeiss APO Sonnar extracts when focused to 0.8m so it doesn’t feature internal focusing. Being a manual focus lens, I think this is clever decision, because it can be more compact for transport as we will see in the following comparison images.
(Click on and keep pressing directional arrows button and move slider left or right to reveal corresponding image)
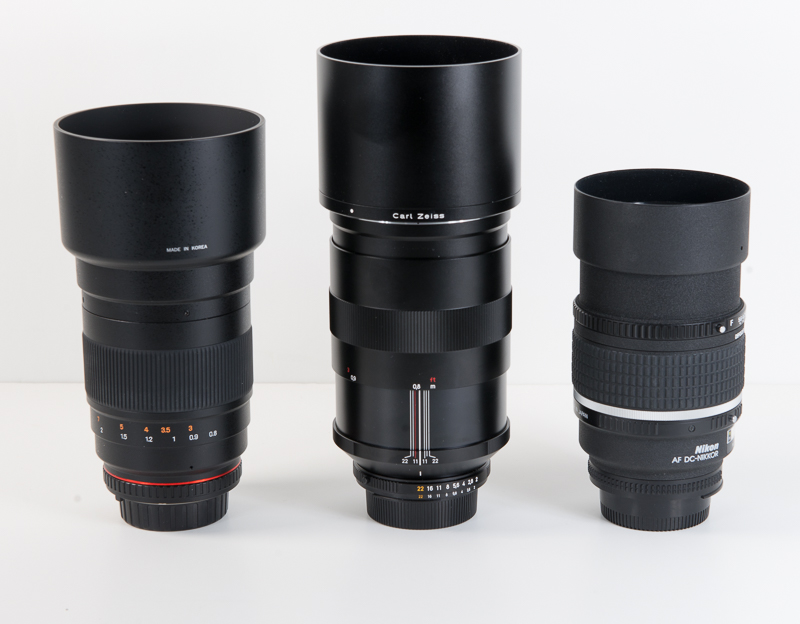
As you can see, when focused to infinity, Zeiss is shortest among its peers (Samyang 135mm f/2 ED UMC on the left and Nikkor 135mm f/2 AF DC on the right), but when focused to MFD, it becomes longest.
With hoods mounted on, situation changes a bit, because of the Zeiss rather deep all metal hood construction. (Nikkor 135/2 AF DC has short built in hood)
![Zeiss_APO_Sonnar_Product_Shots-5995]()
But as I said, size is most important for transport reasons and for that, Zeiss is actually quite small in comparison.
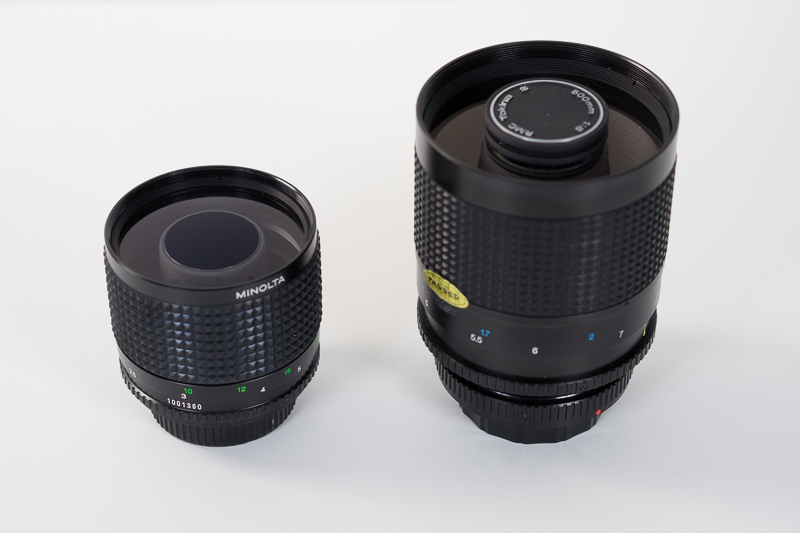
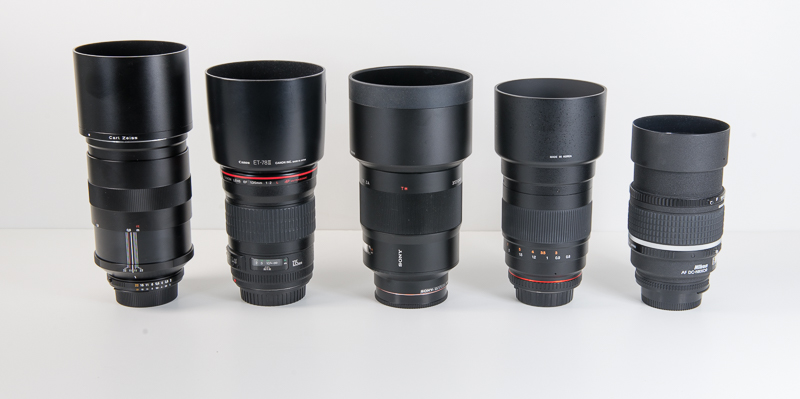
Lets look at some other comparative lenses and respective sizes as well as weight.
![Zeiss_APO_Sonnar_Product_Shots-5996]()
From left to right: Zeiss APO Sonnar 135mm f/2, Canon EF 135mm f/2 L USM, Sony-Zeiss Sonnar 135mm f/1.8 ZA, Samyang 135mm f/2 ED UMC, Nikkor 135mm f/2 AF DC
With hoods mounted and focused to MFD, Zeiss APO Sonnar 135/2 is longest in this comparison. But with hood reversed, collapsed for transport it is the shortest one.
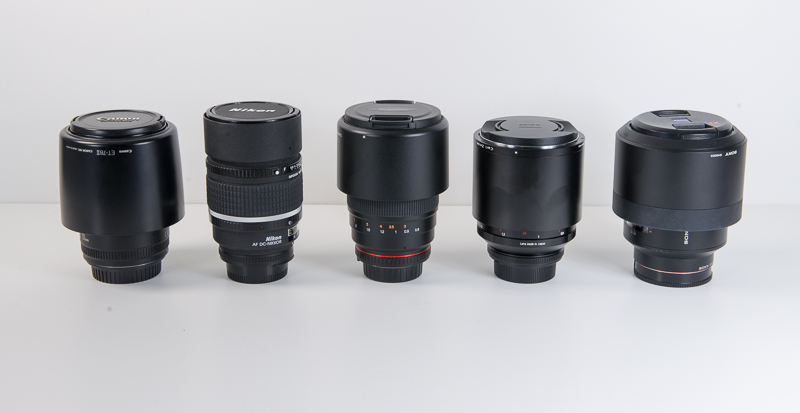
![Zeiss_APO_Sonnar_Product_Shots-5998]()
From left to right: Canon EF 135mm f/2 L USM, Nikkor 135mm f/2 AF DC, Samyang 135mm f/2 ED UMC, Zeiss APO Sonnar 135mm f/2, Sony-Zeiss Sonnar 135mm f/1.8 ZA
When it comes to weight, Zeiss APO 135mm f/2 is second heaviest though.
| Lens |
Sony SAL 135/1.8 ZA |
Zeiss APO Sonnar 135/2 |
Samyang 135/2 ZF.2 |
Nikkor 135/2 AF DC |
Canon EF 135/2 L USM |
| with hood |
1190 gr. |
1052 gr. |
907 gr. |
795 gr. |
786 gr. |
| without hood |
1030 gr. |
957 gr. |
848 gr. |
795 gr. |
731 gr. |
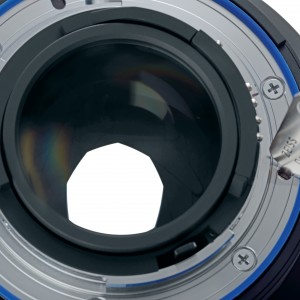
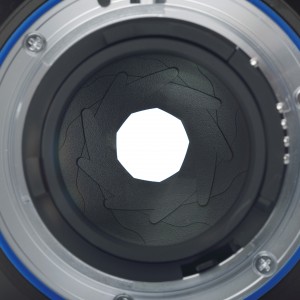
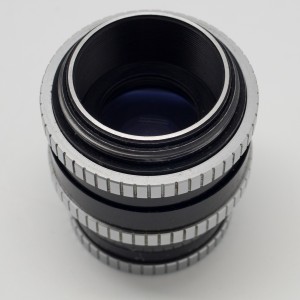
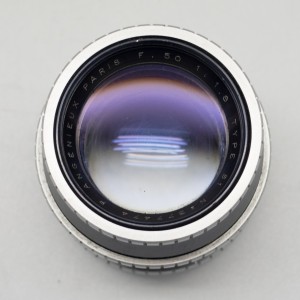
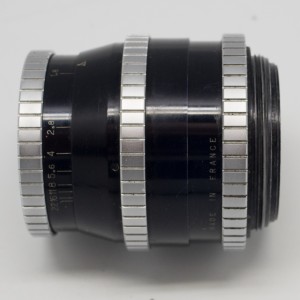
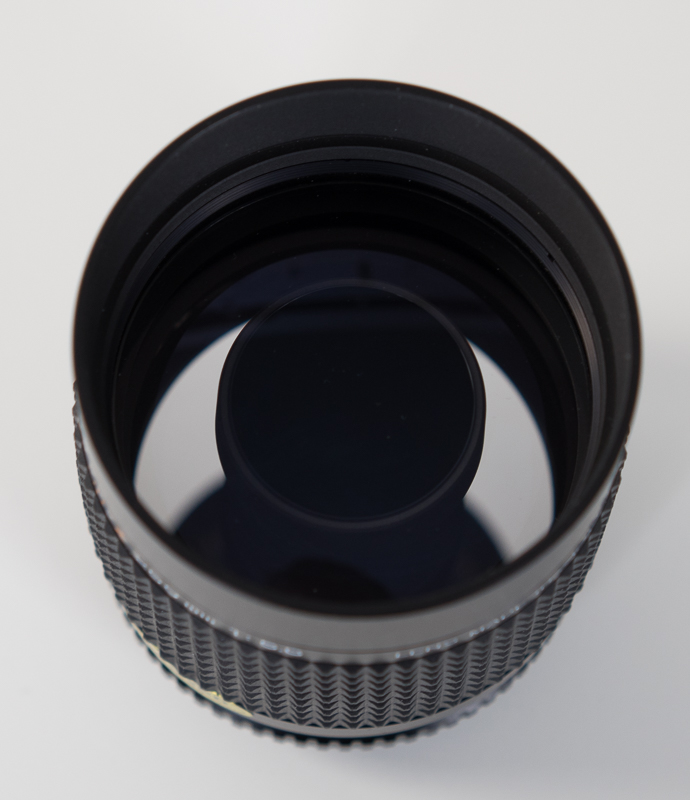
Built quality is exceptional as with other Zeiss lenses made in Cosina factory. Glass and metal. There isn’t any kind of visible protection against dust or moisture, such as rubber gasket on the mount e.g.
![Zeiss_APO_Sonnar_Product_Shots-5990]()
![Zeiss_APO_Sonnar_Product_Shots-5989]()
![Zeiss_APO_Sonnar_Product_Shots-5985]()
![Zeiss_APO_Sonnar_Product_Shots-5983]()
![Zeiss_APO_Sonnar_Product_Shots-5979]()
![Zeiss_APO_Sonnar_Product_Shots-09195]()
![Zeiss_APO_Sonnar_Product_Shots-09183]()
![Zeiss_APO_Sonnar_Product_Shots-09194]()
![Zeiss_APO_Sonnar_Product_Shots-09187]()
Handling:
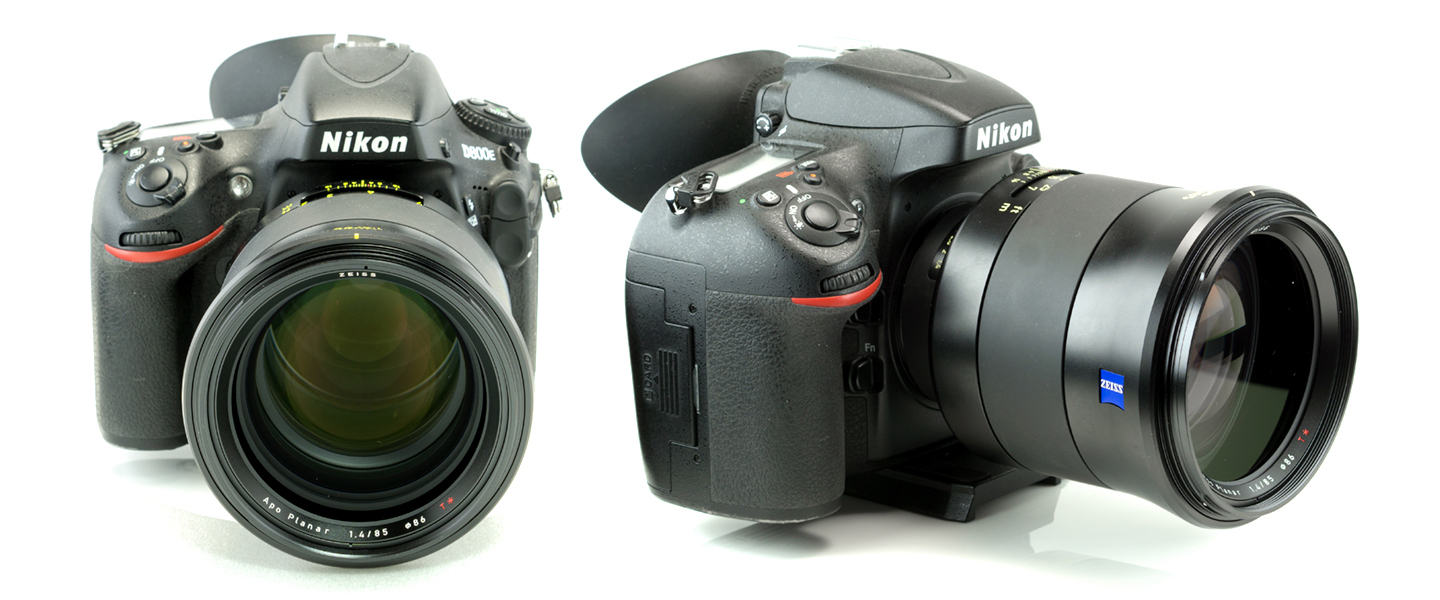
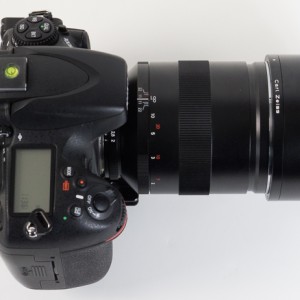
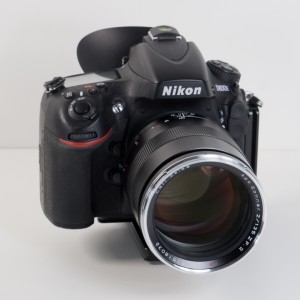
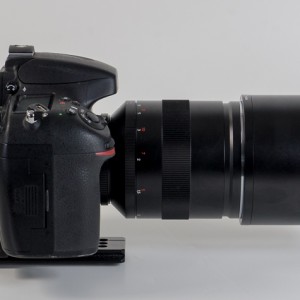
On my Nikon D800E, despite being large and heavy lens, it balances very nicely. Due to slightly thicker body and well positioned focus ring, lens nicely fits in the palm of my left hand and with a buttery smooth focus ring it is easy to fine tune the focus using finger tips. Very long focusing throw of almost 270° however, requires full hand involvement to bring focus near the focus plane zone. On the other hand, long focus thread allow for super precise focus adjustments, which certainly help to deal with thin DOF.
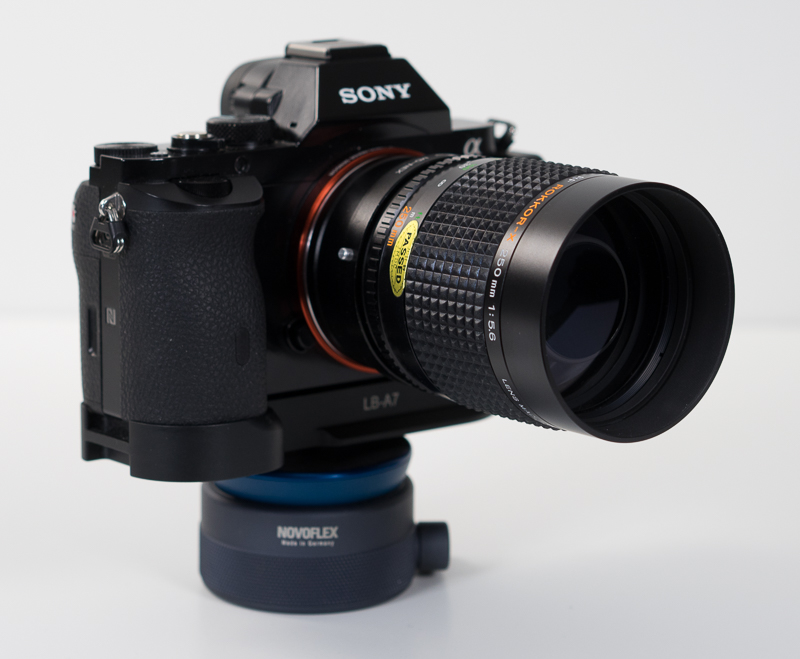
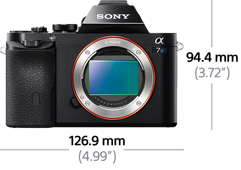
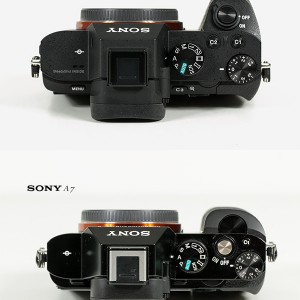
When I mounted lens on my Sony A7 camera using Novoflex adapter, it becomes significantly front heavy combo and overall feeling was not so pleasing. I am sure one can get used to it, but it simply fits much better to larger DSLR body.
Please help support this page and upcomming reviews and buy through affiliate links, with no extra cost for you:
Buy on BHPhoto: 135mm f/2 Apo Sonnar T* ZF.2 Lens for Nikon F Mount
Buy on Adorama: 135mm f/2 Apo Sonnar T* ZF.2 Lens for Nikon F Mount
Buy on Amazon: 135mm f/2 Apo Sonnar T* ZF.2 Lens for Nikon F Mount BEST OFFER!
To help this page survive, your donation will be highly appreciated.
Here are official ![Untitled-4]() data:
data:
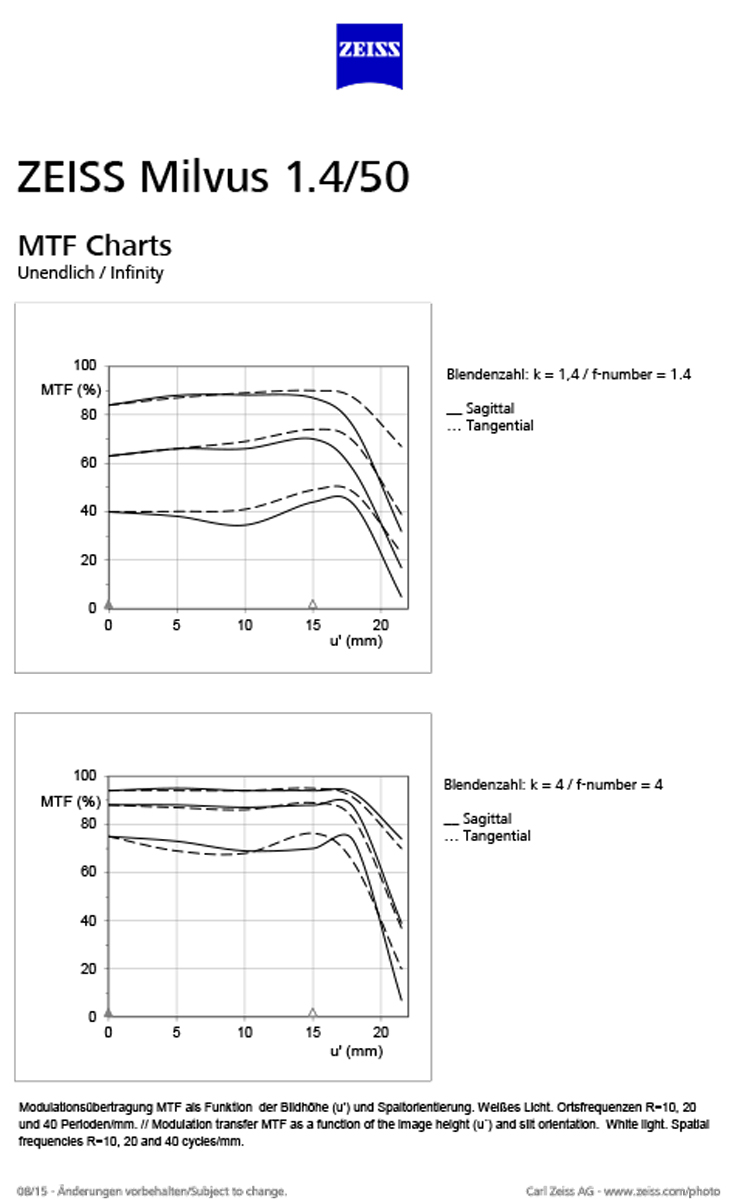
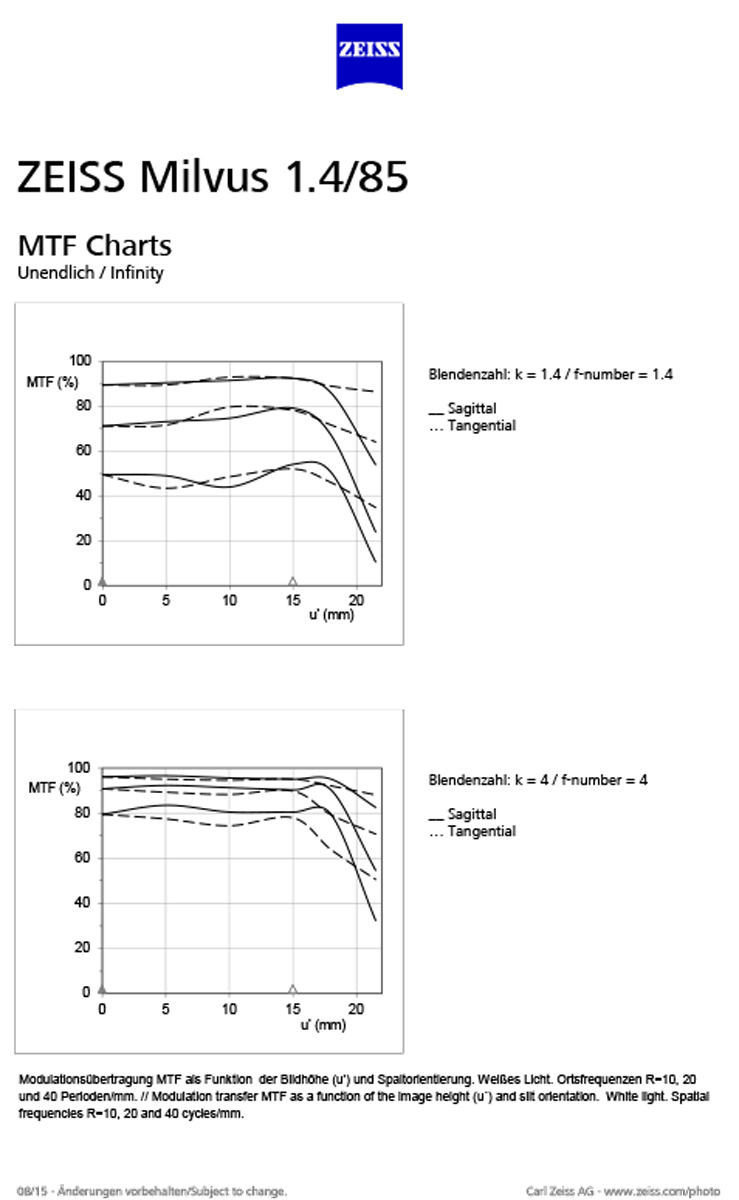
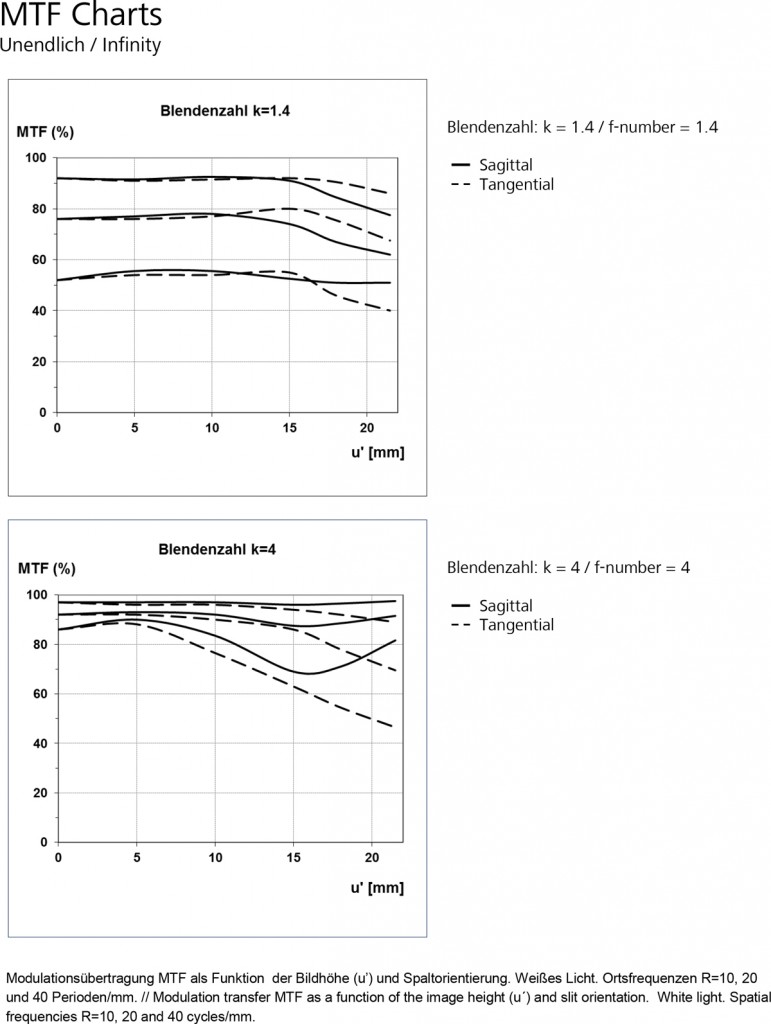
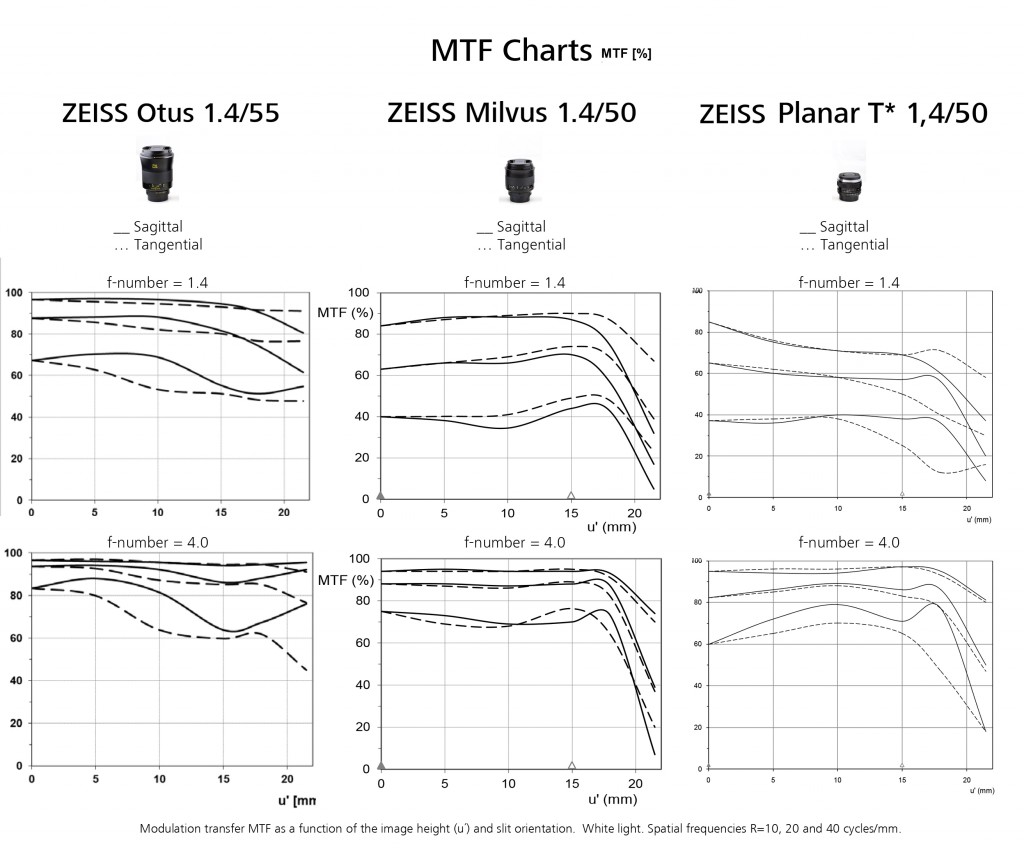
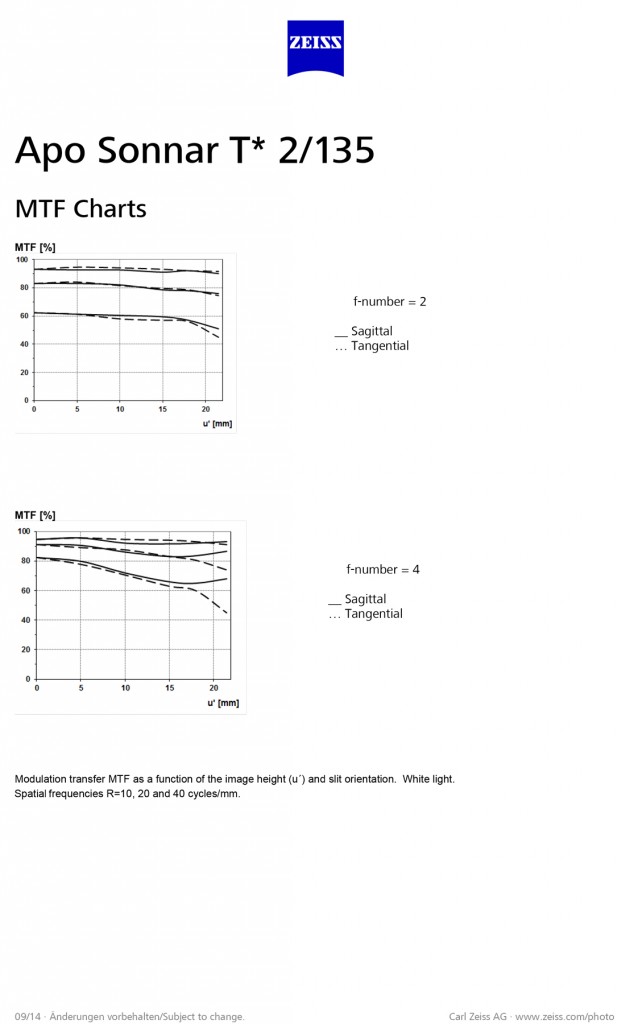
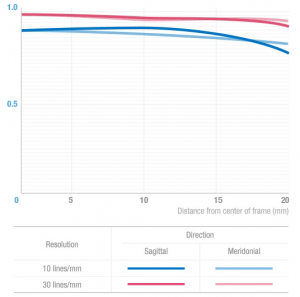
MTF:
![Microsoft Word - _Apo_Sonnar_2,0_135.docx]()
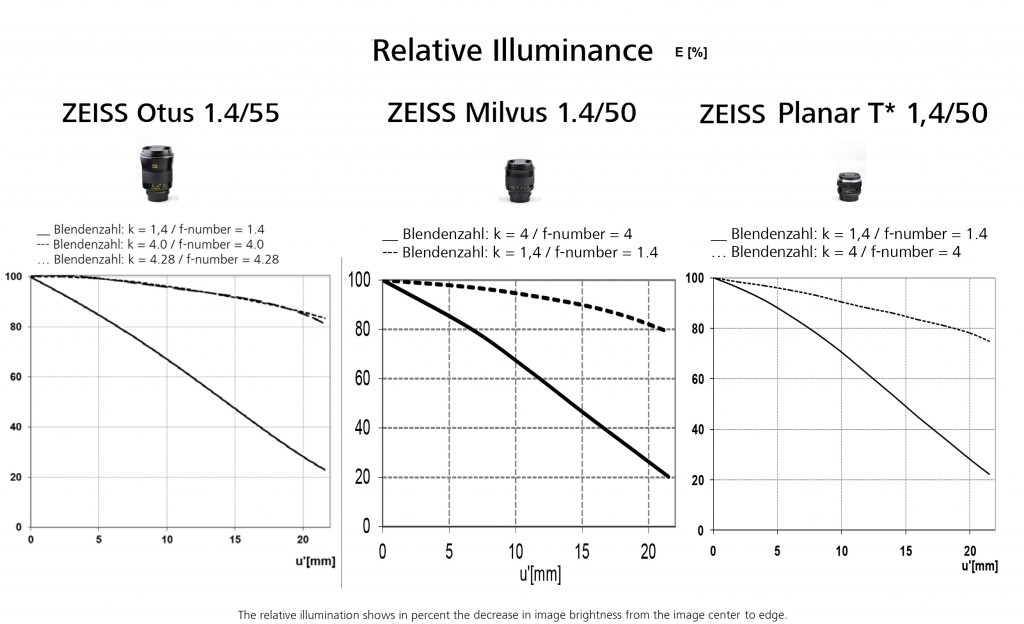
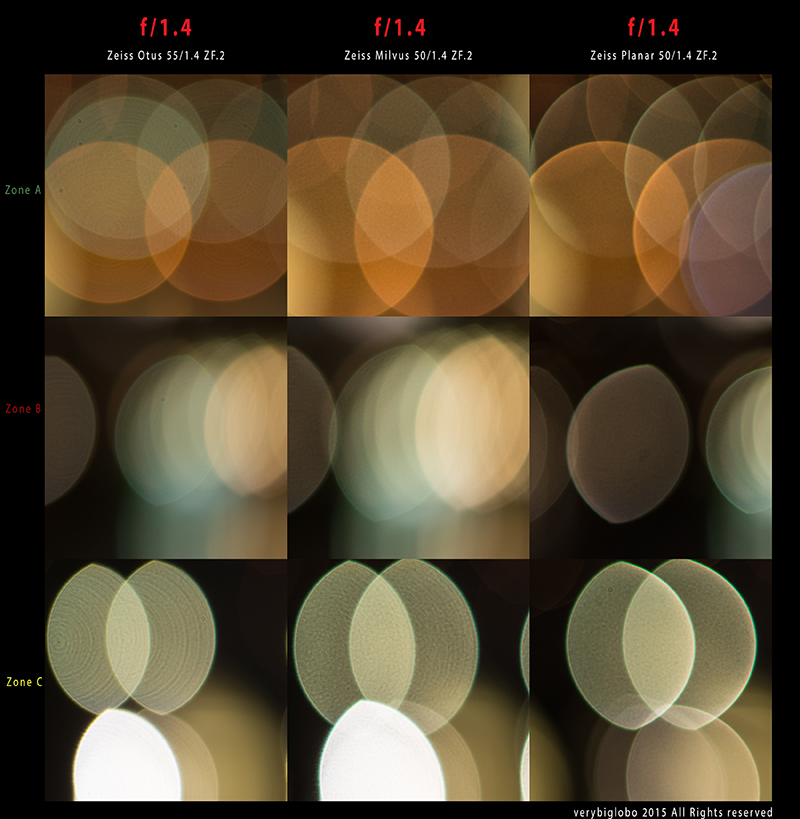
Looking at the MTF chart above we can notice one interesting lens behavior. While at f/2 both Sagital and Tangential lines are keeping close together (indicating low CA), at f/4 they gets apart toward the edges.
On the other hand, considering that those charts are result of real life measuring, it is amazing to see how even contrast and resolution are kept across the frame straight from f/2. By stopping lens down to f/4 we can notice increase of resolution while contrast shows only light boost. Considering that at R10 lens achieve over 95% MTF in almost entire projection and that even at R40 it never really drops bellow 60%, we should be ready to witness breathtaking sharpness in a real life. Razor sharp can’t look much better than this according to this results.
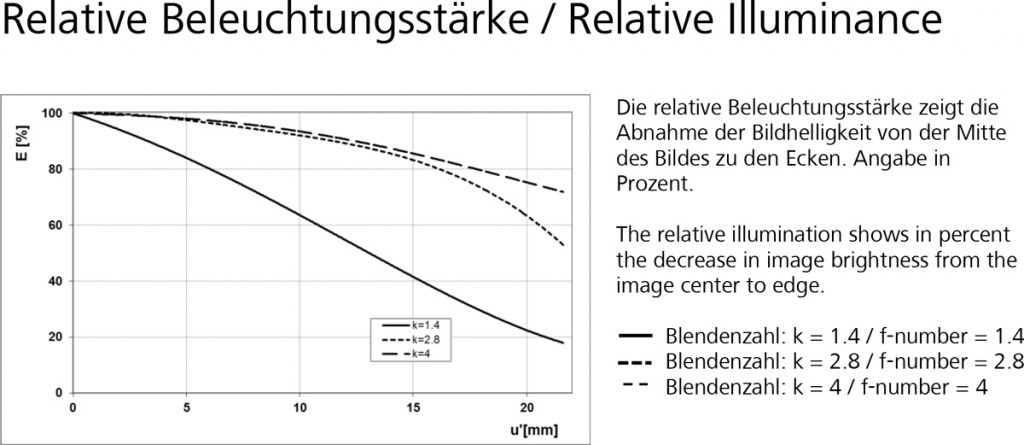
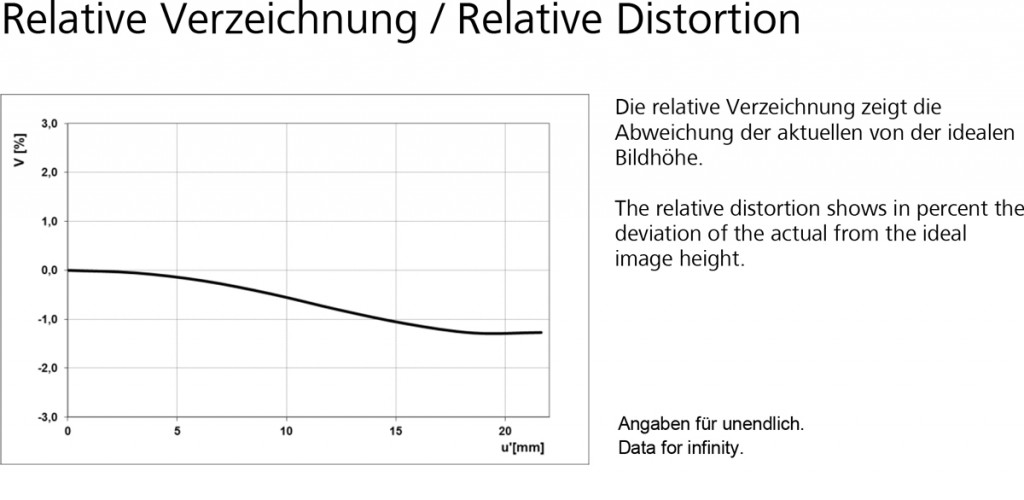
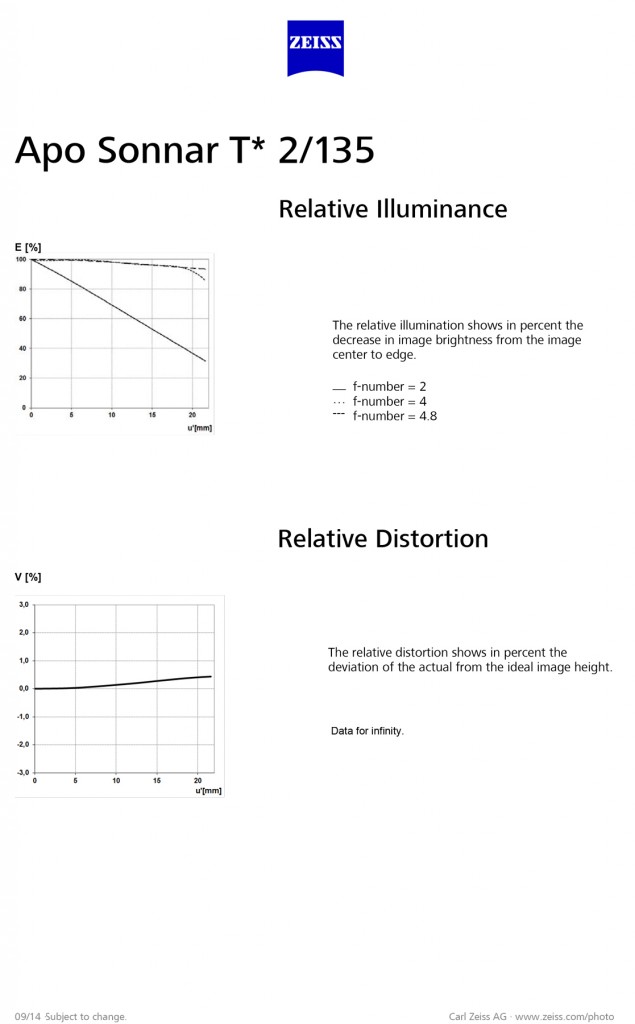
Vignetting and Distortion:
![Microsoft Word - _Apo_Sonnar_2,0_135.docx]()
At wide open aperture lens shows some light fall off toward edges (approx. 2/3rd of EV) but good thing is that vignetting is very linear so you should not notice transition areas. Stopped down to f/2.8 drastically improves performance and at f/4 vignetting becomes non issue. Distortion is hardly noticeable which is to be expected from high quality 135mm lens.
Let’s take a look how those data manifests visually.
(In this review I used Nikon D800E to test the lens, which is probably not the best option because of possible shutter shake issues, but I shot in LCD – mirror up mode with shutter delay. I will also make shoot out with Sony A7 camera that has EFC, just to be sure.)
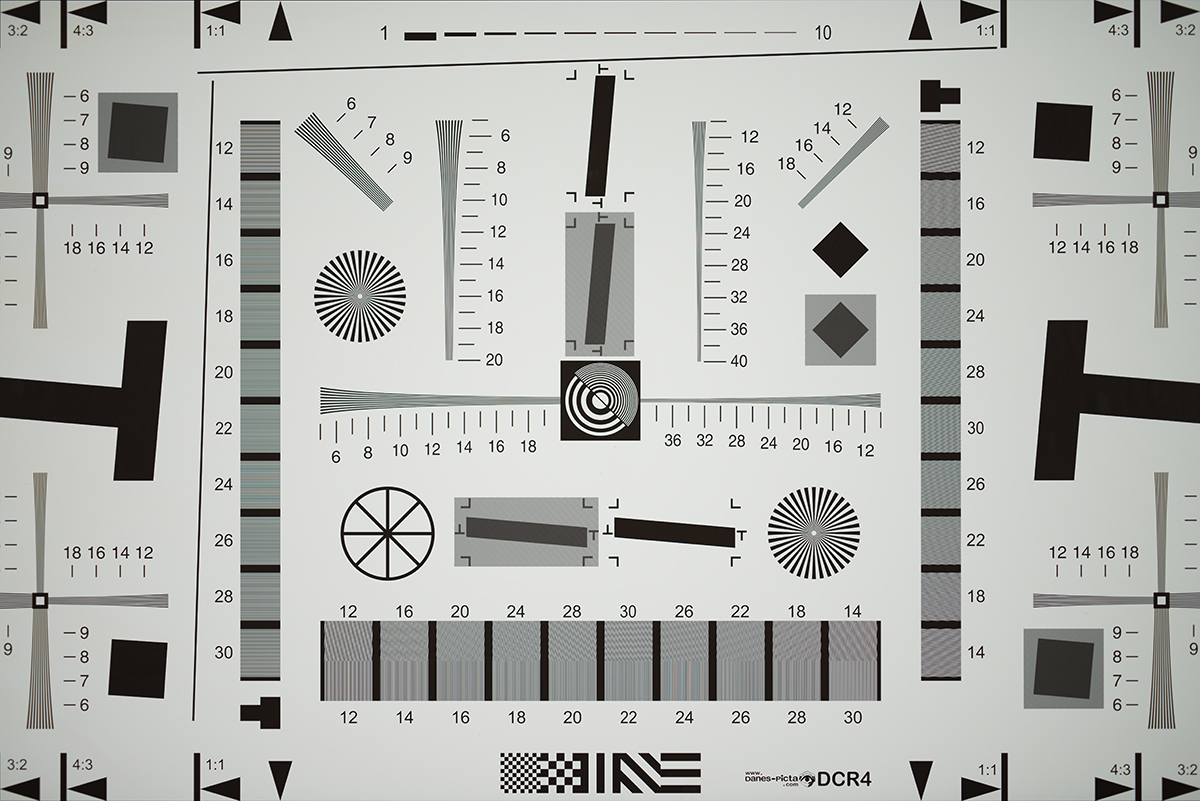
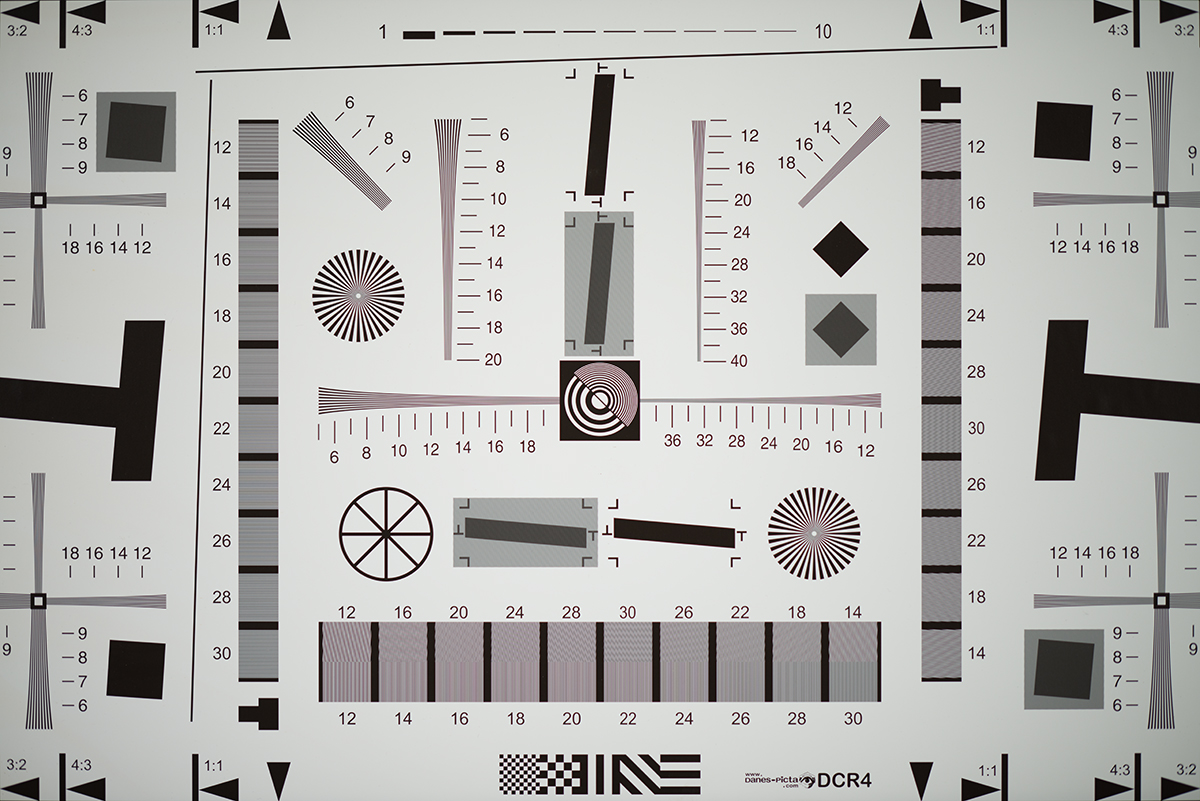
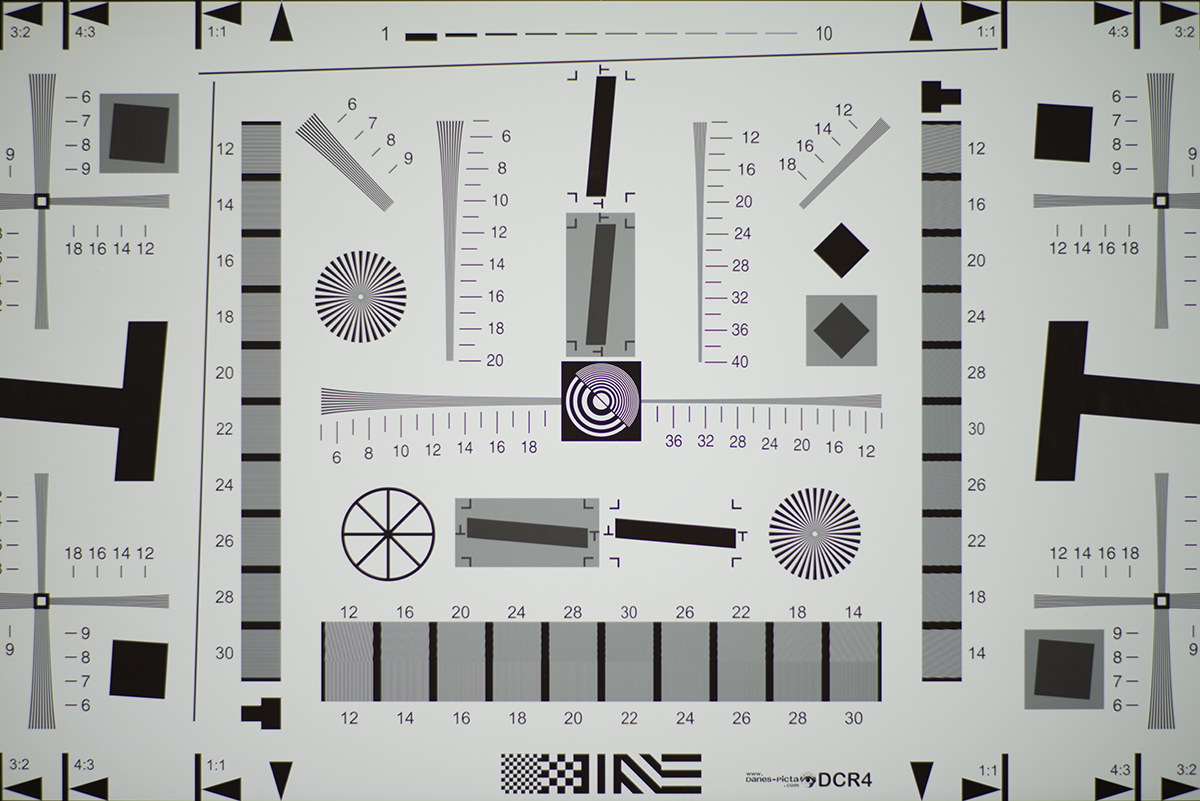
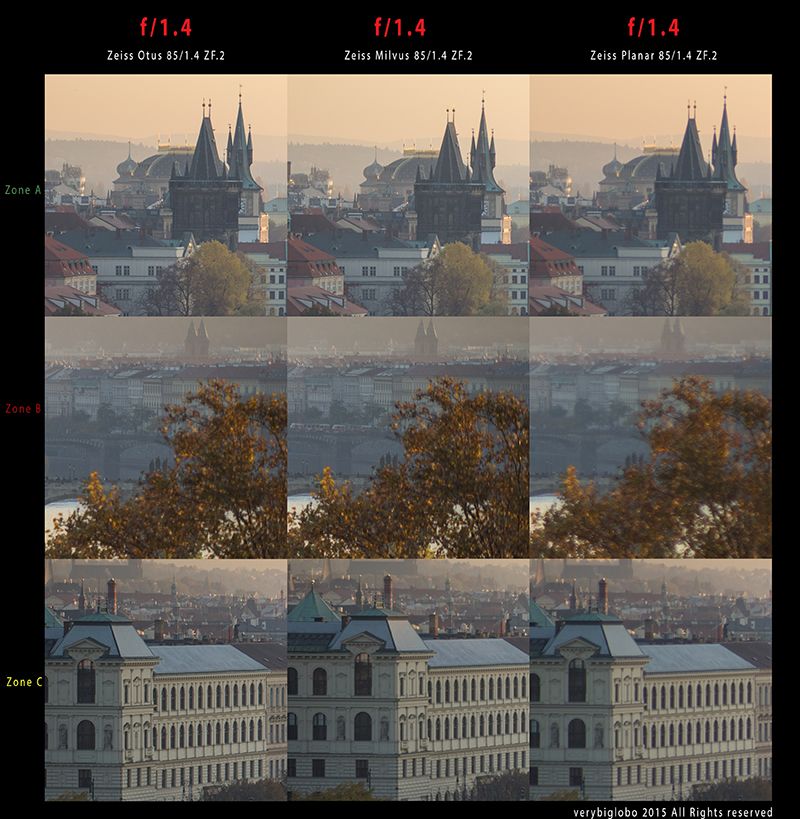
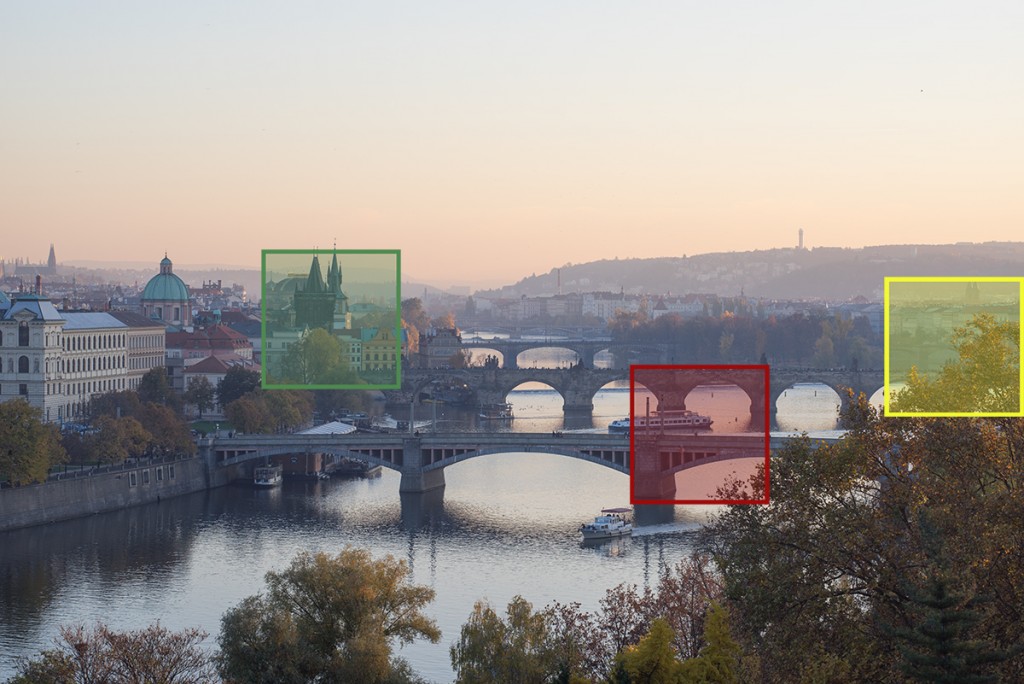
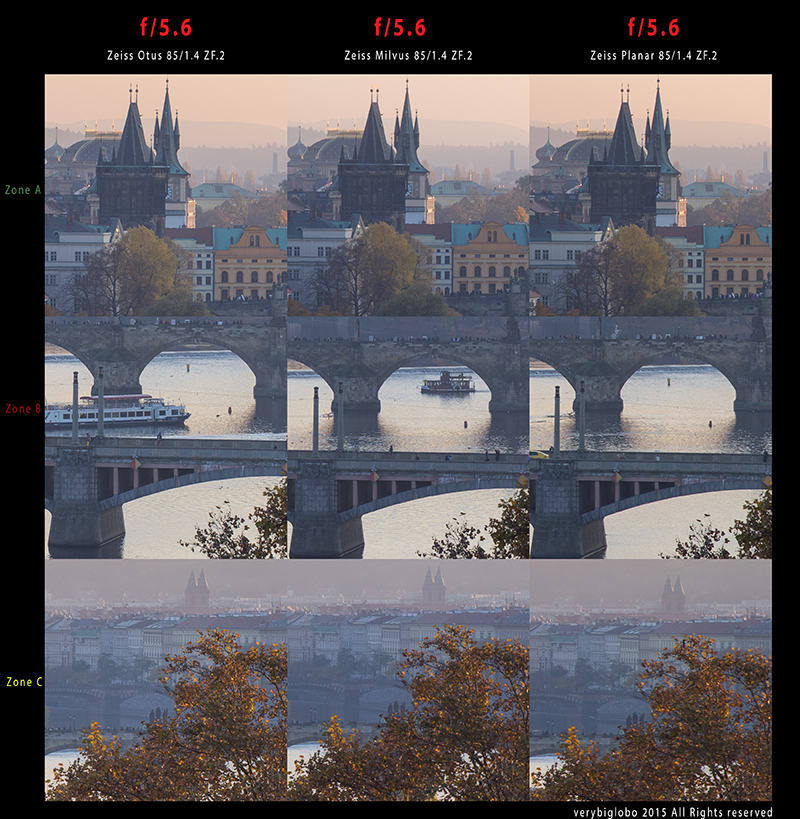
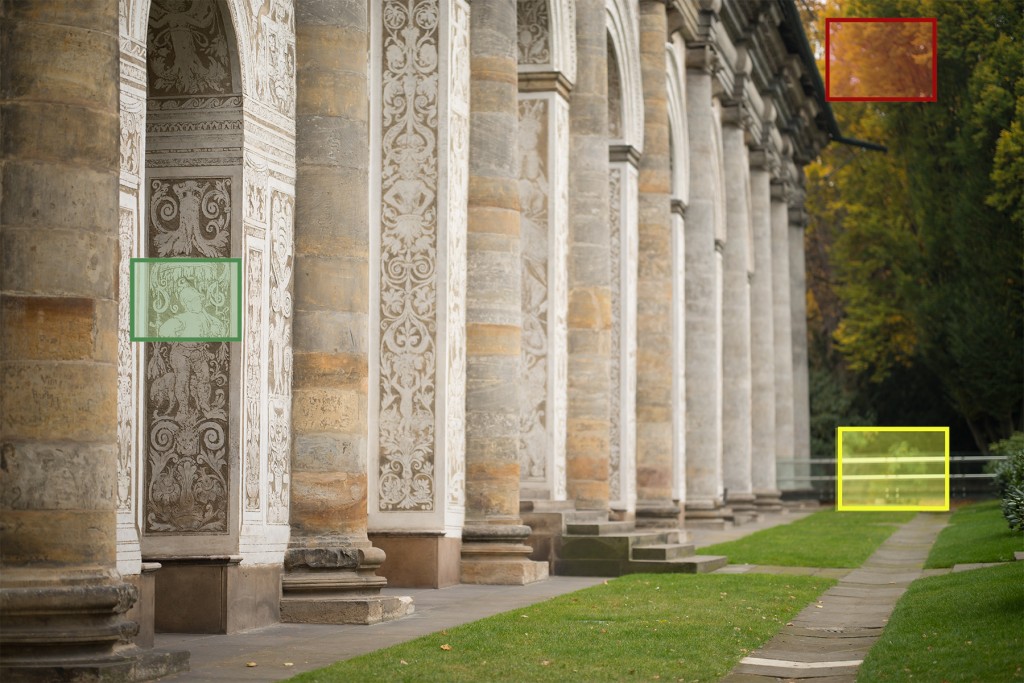
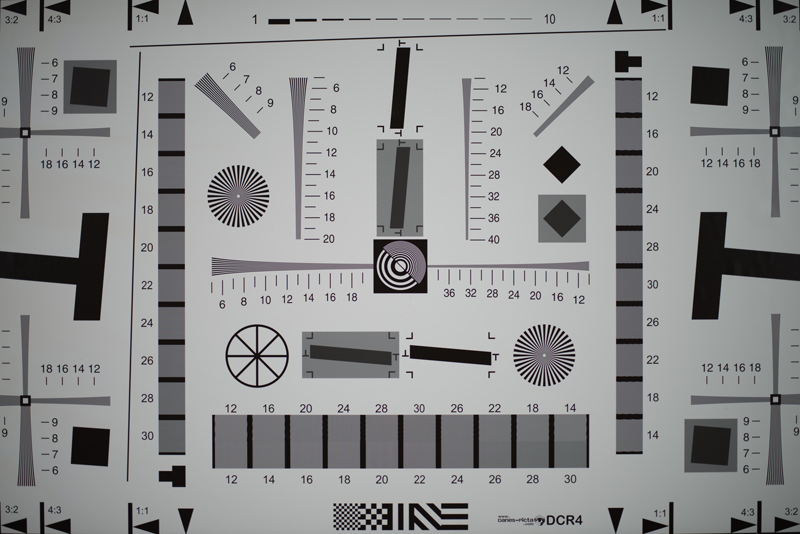
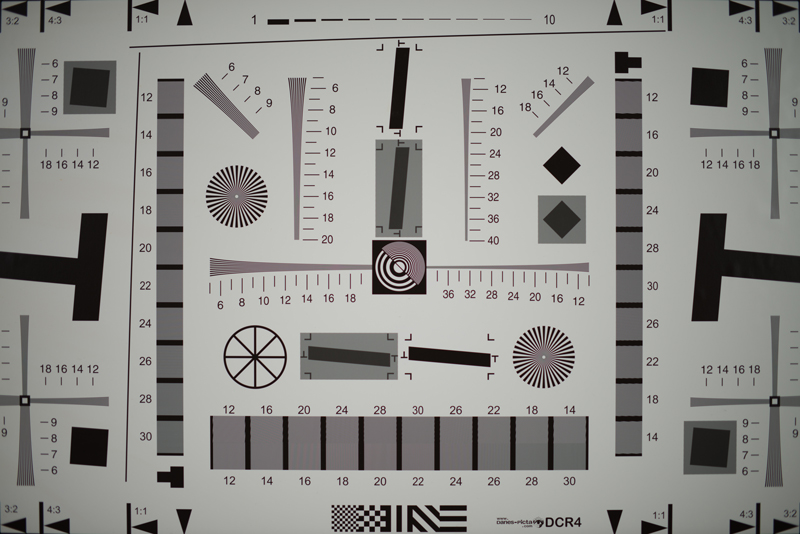
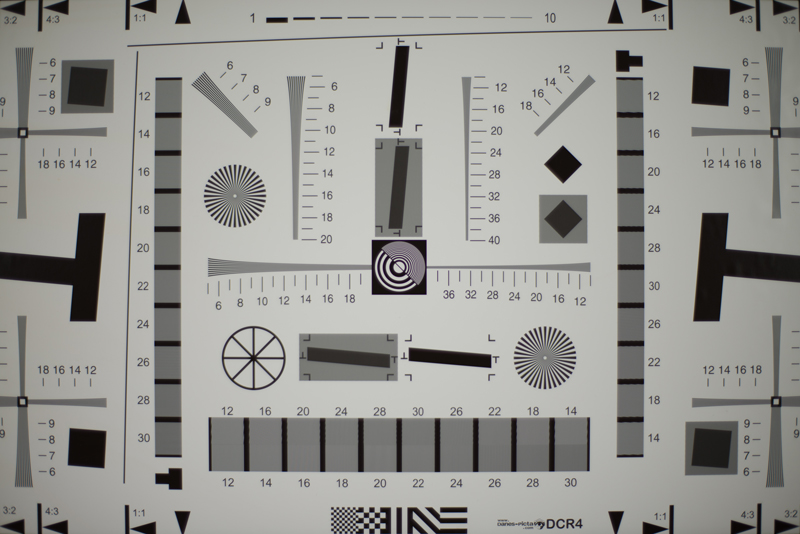
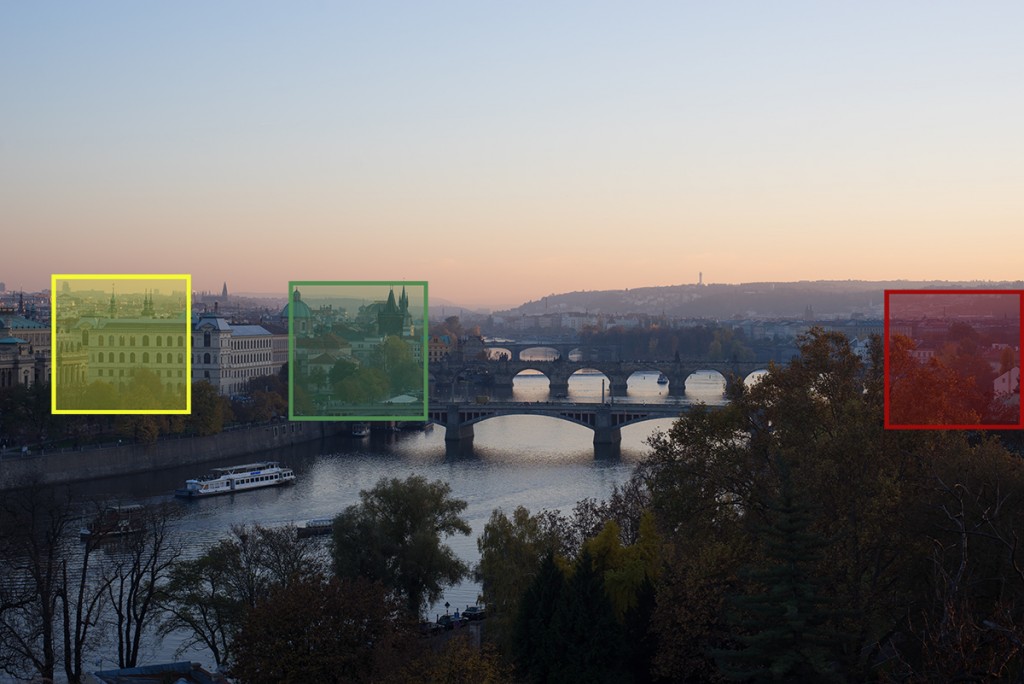
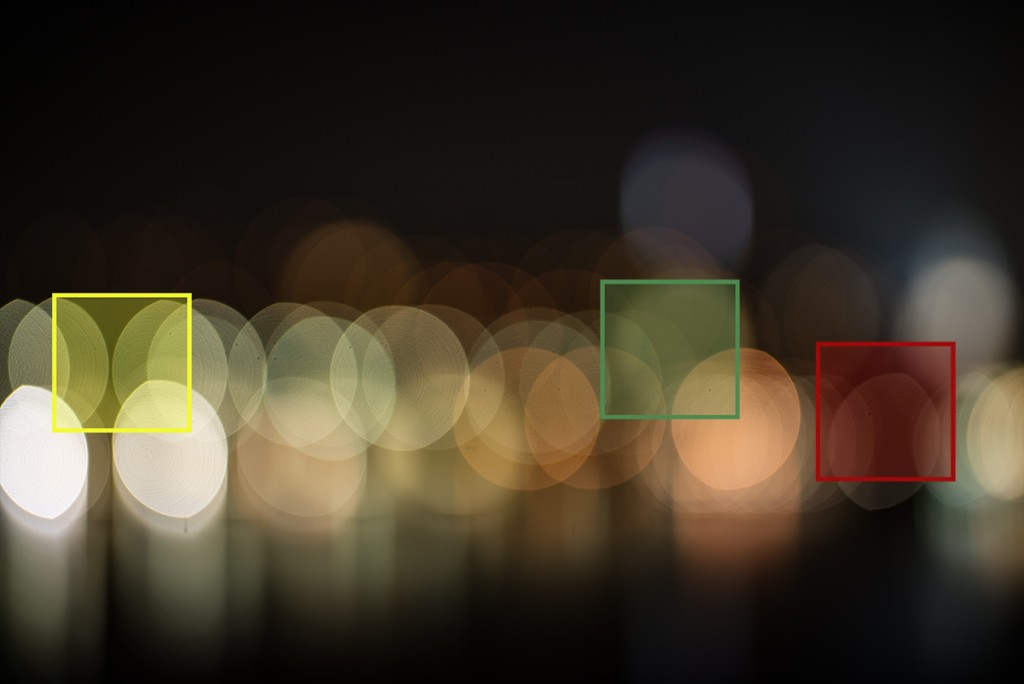
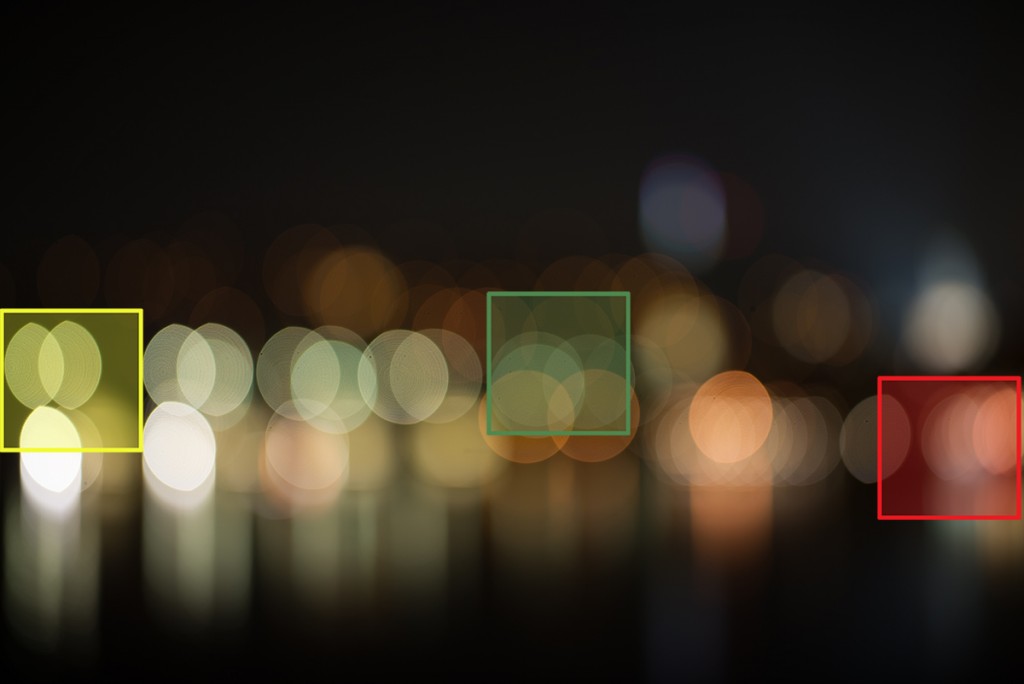
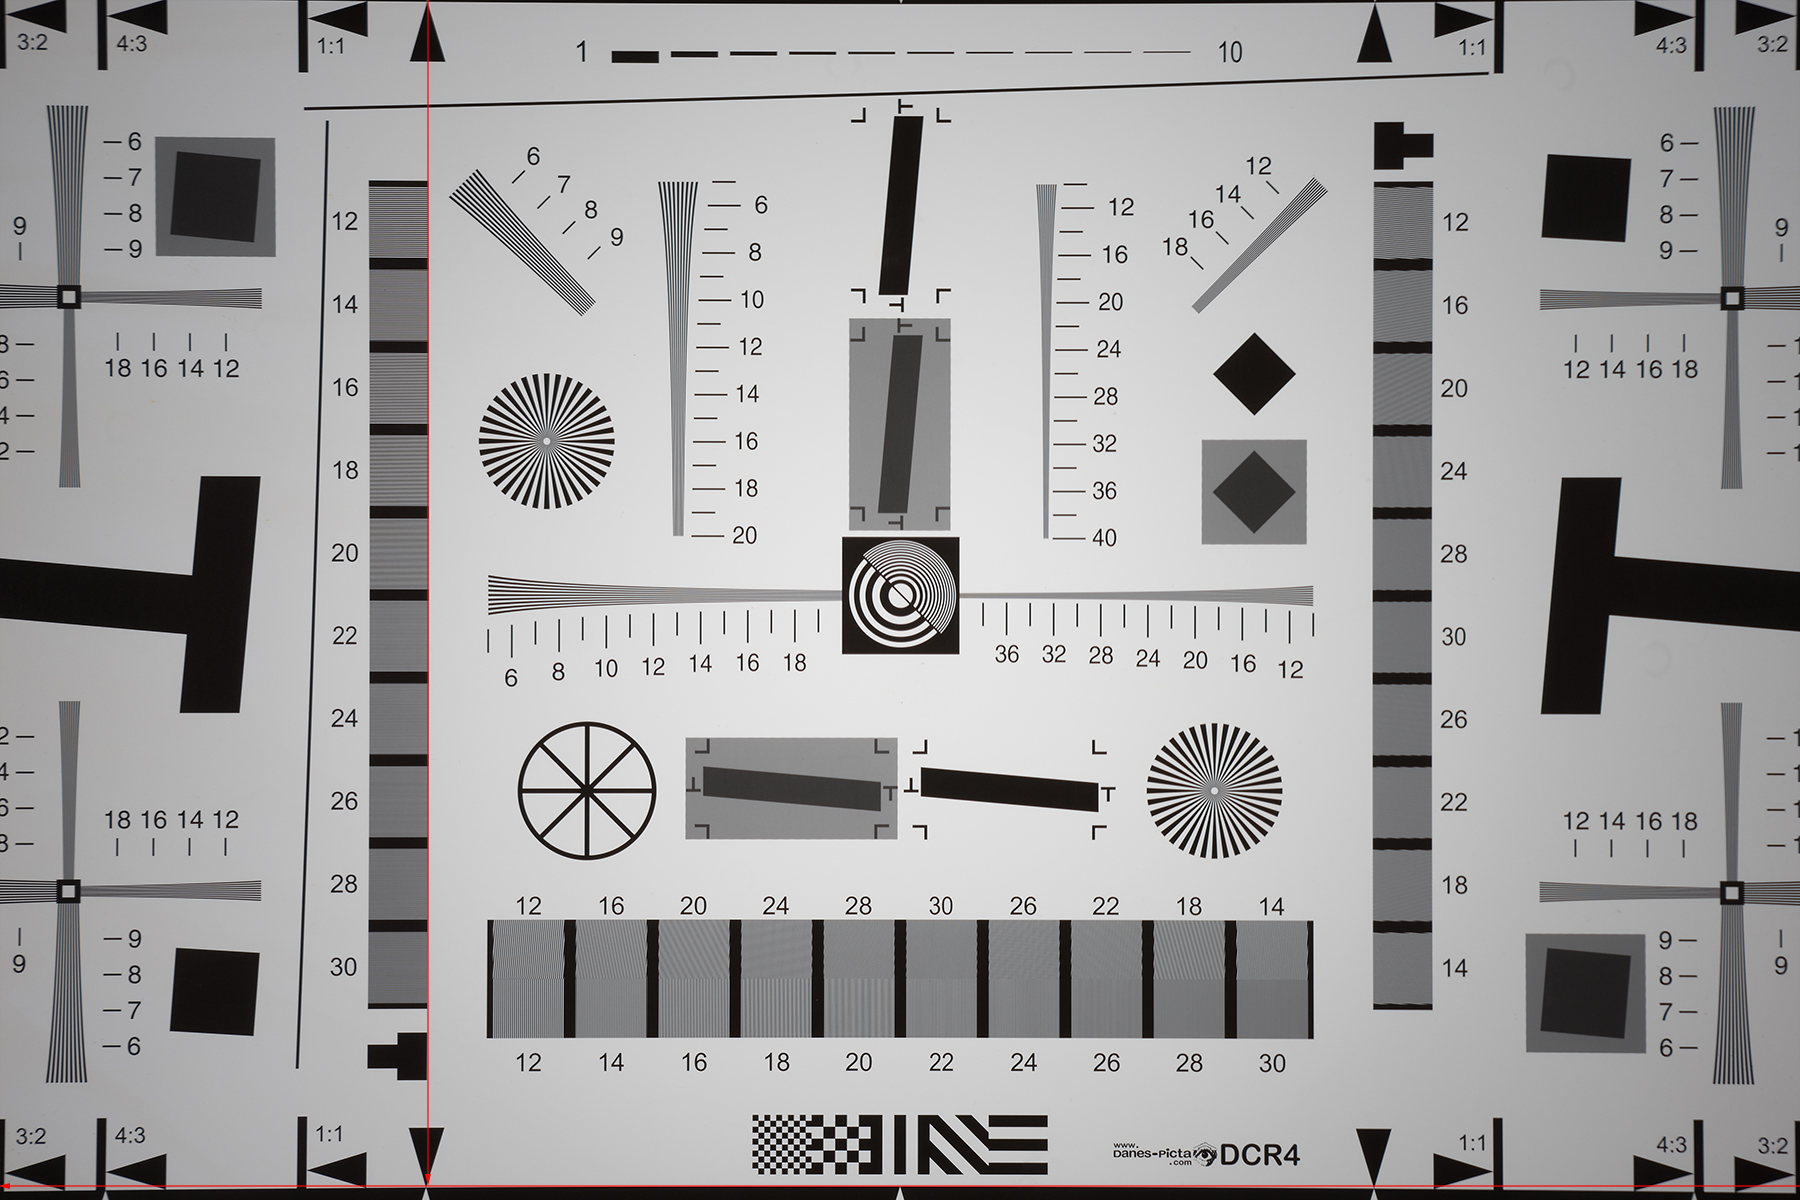
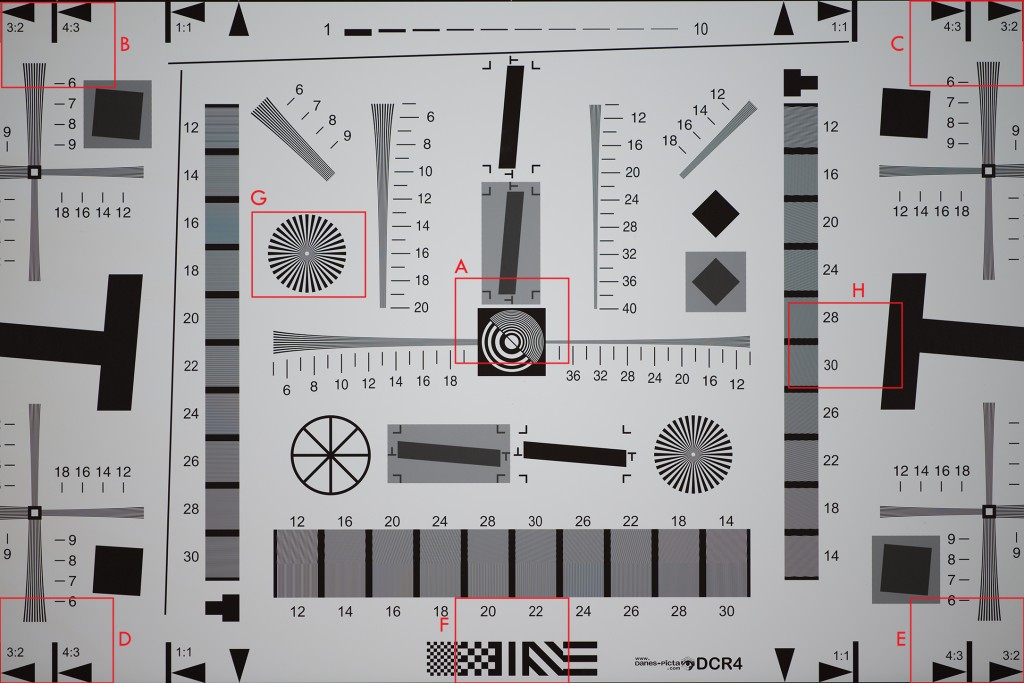
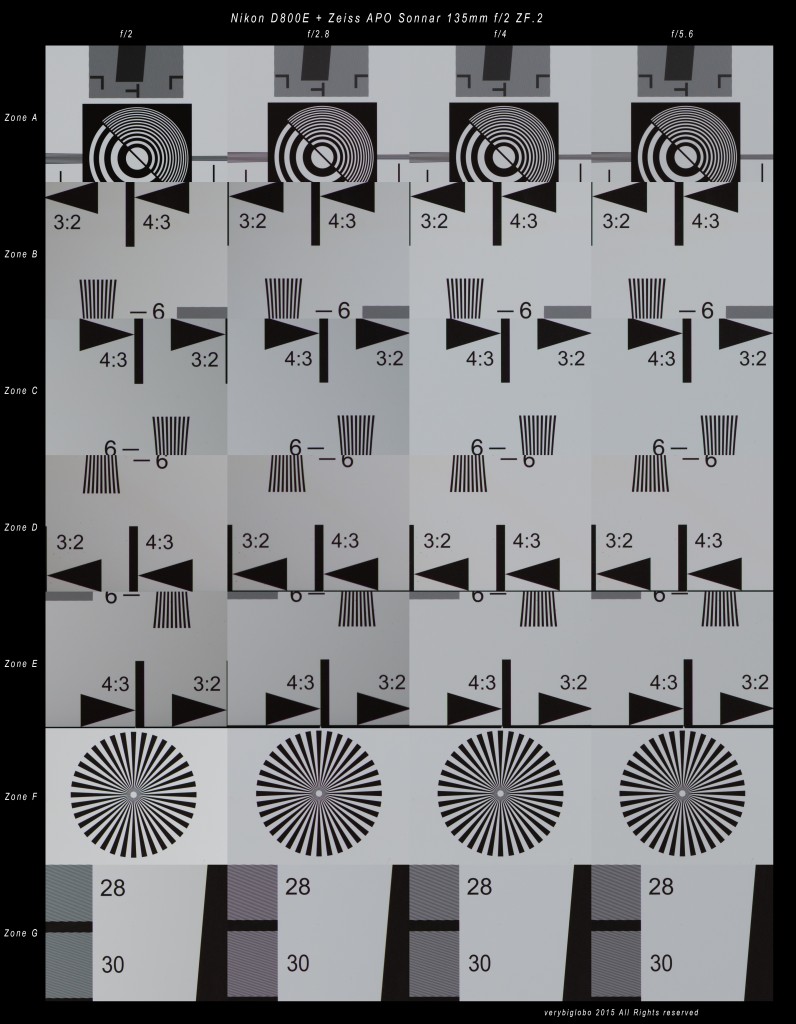
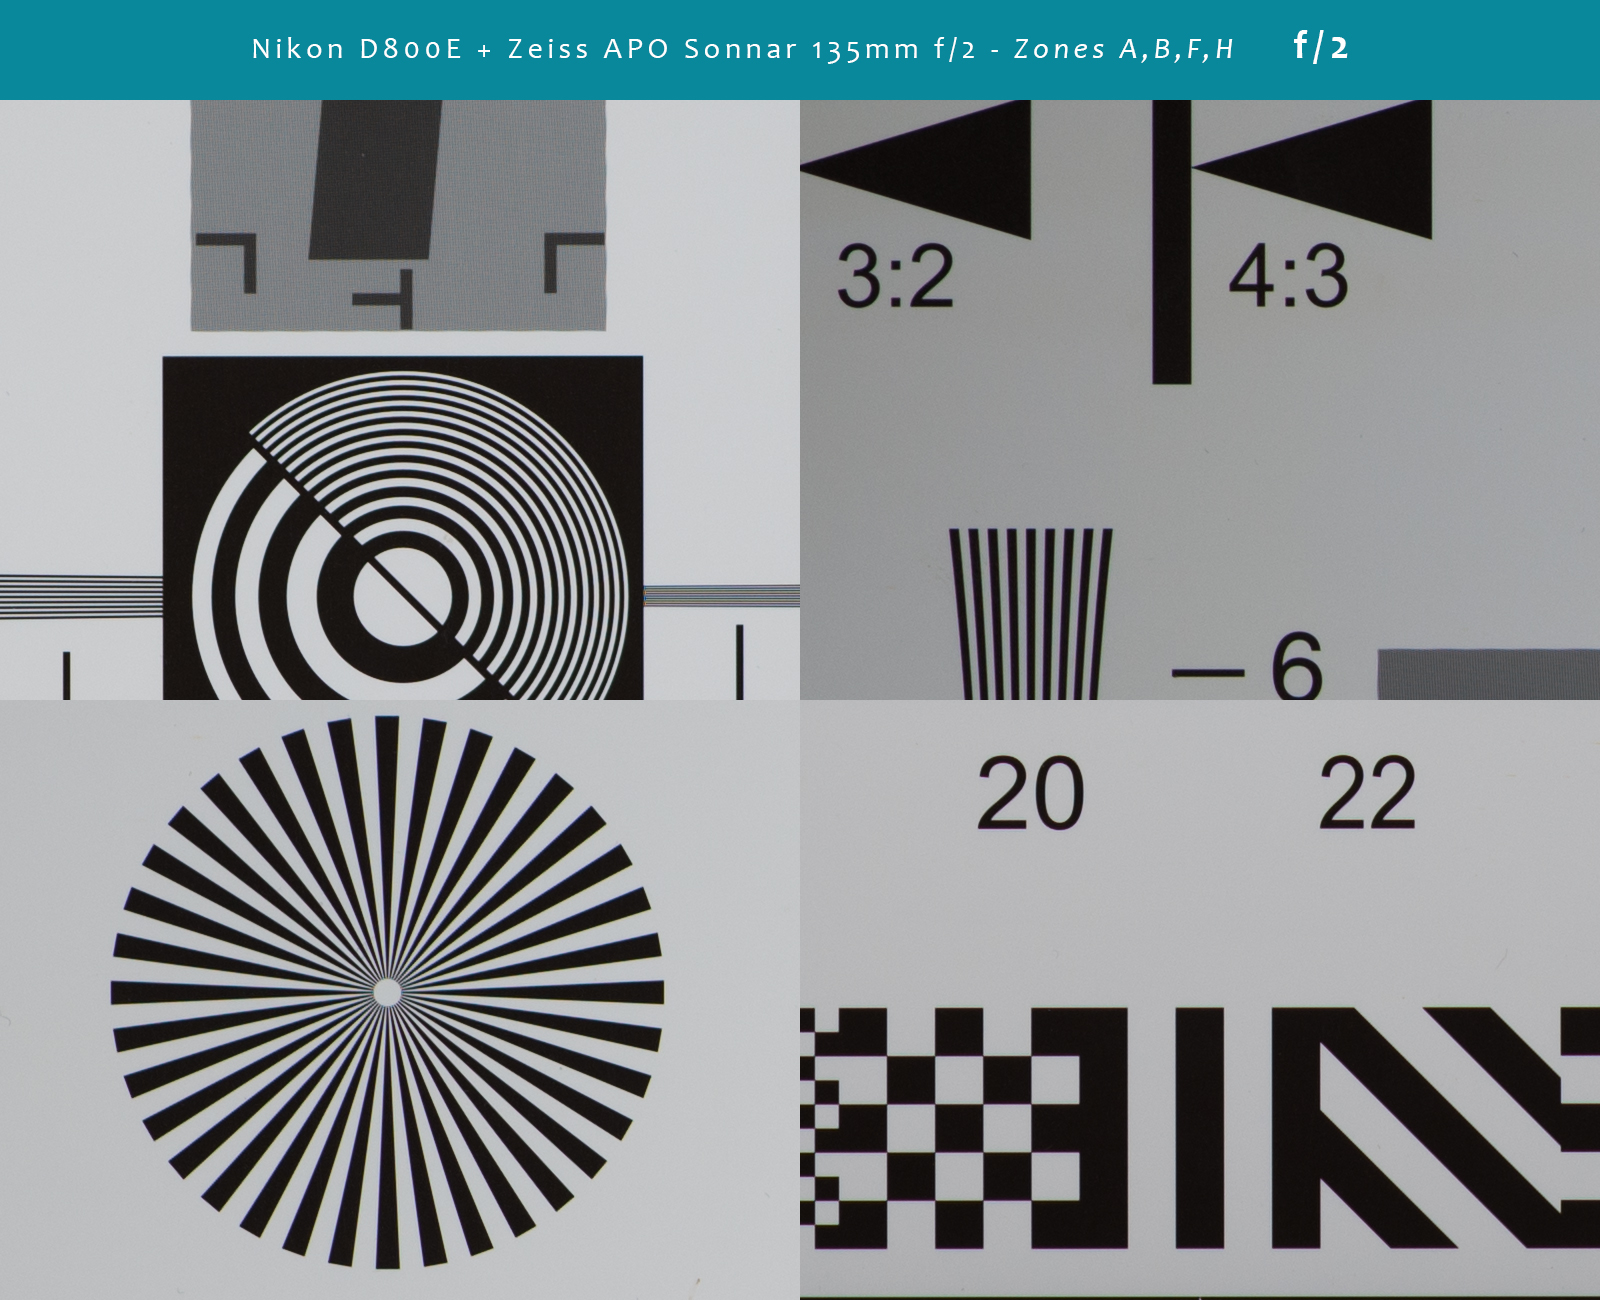
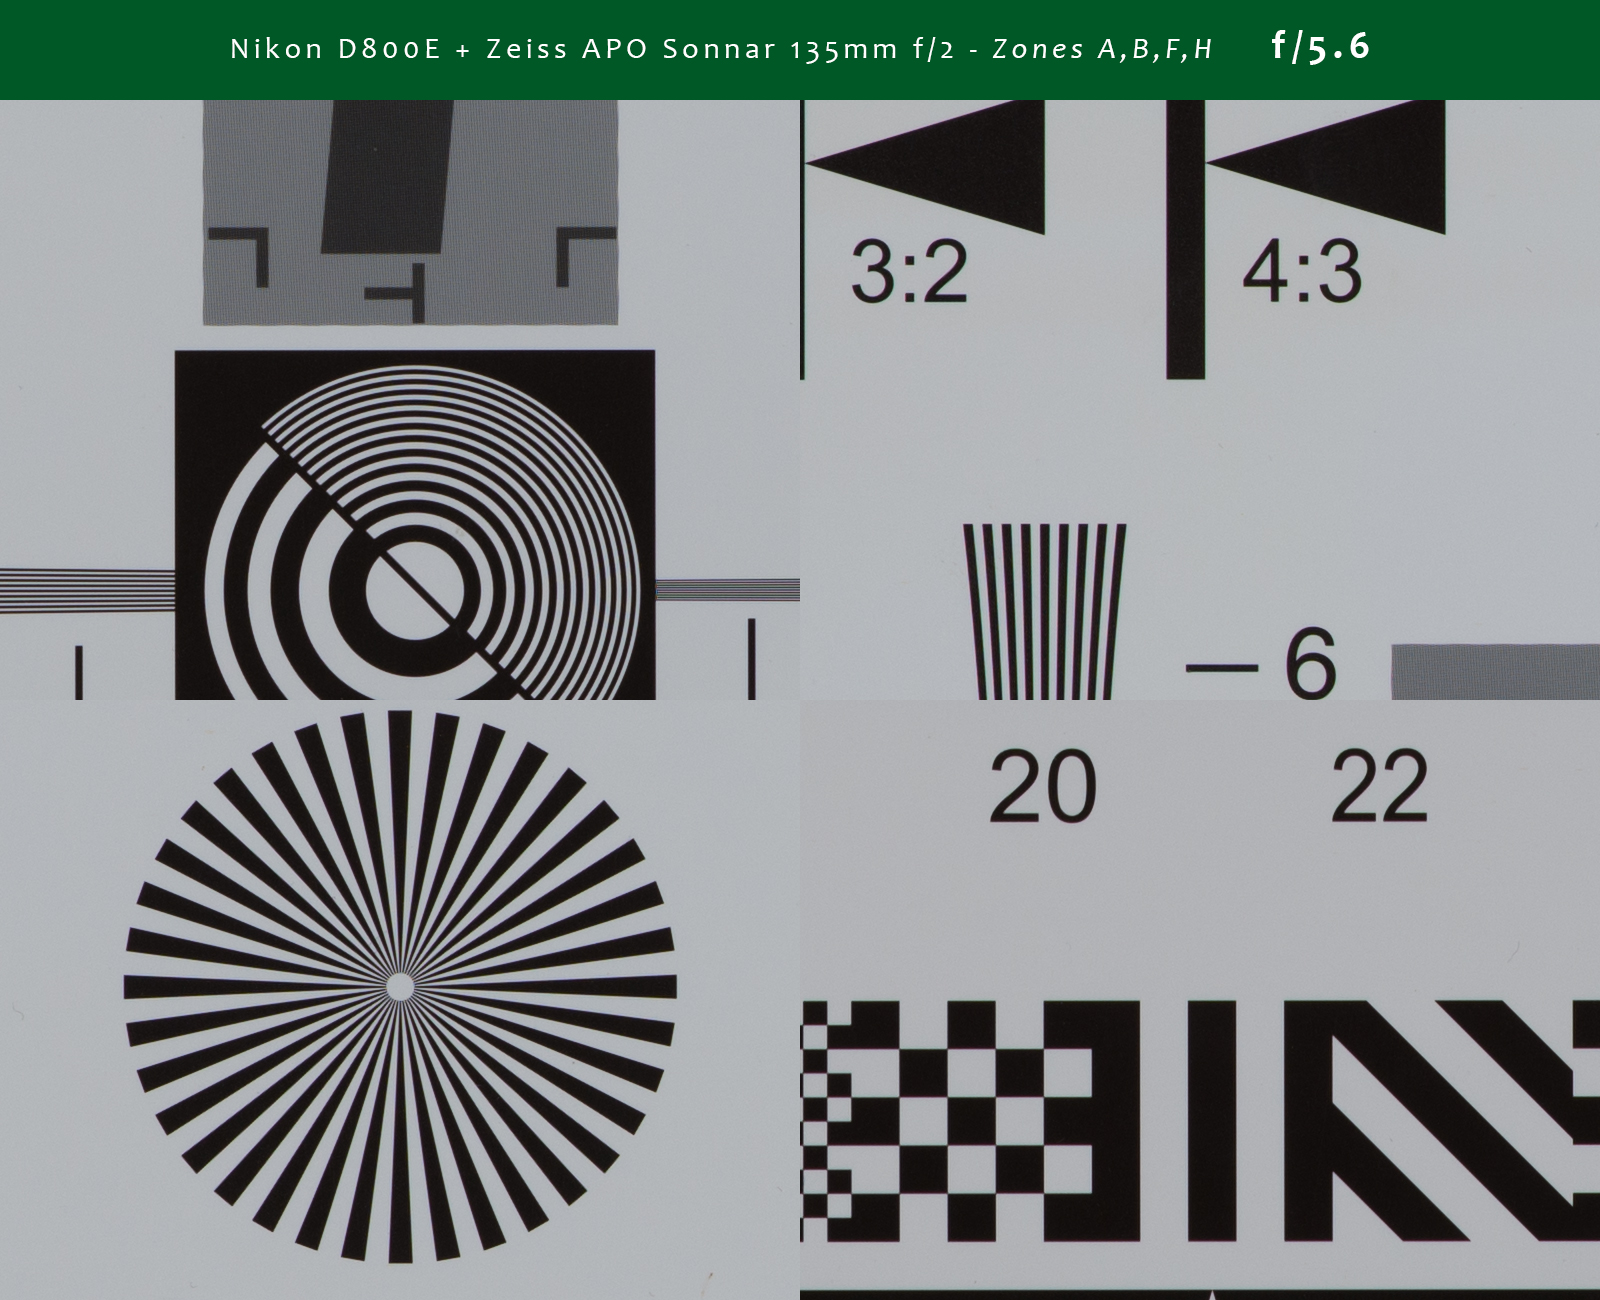
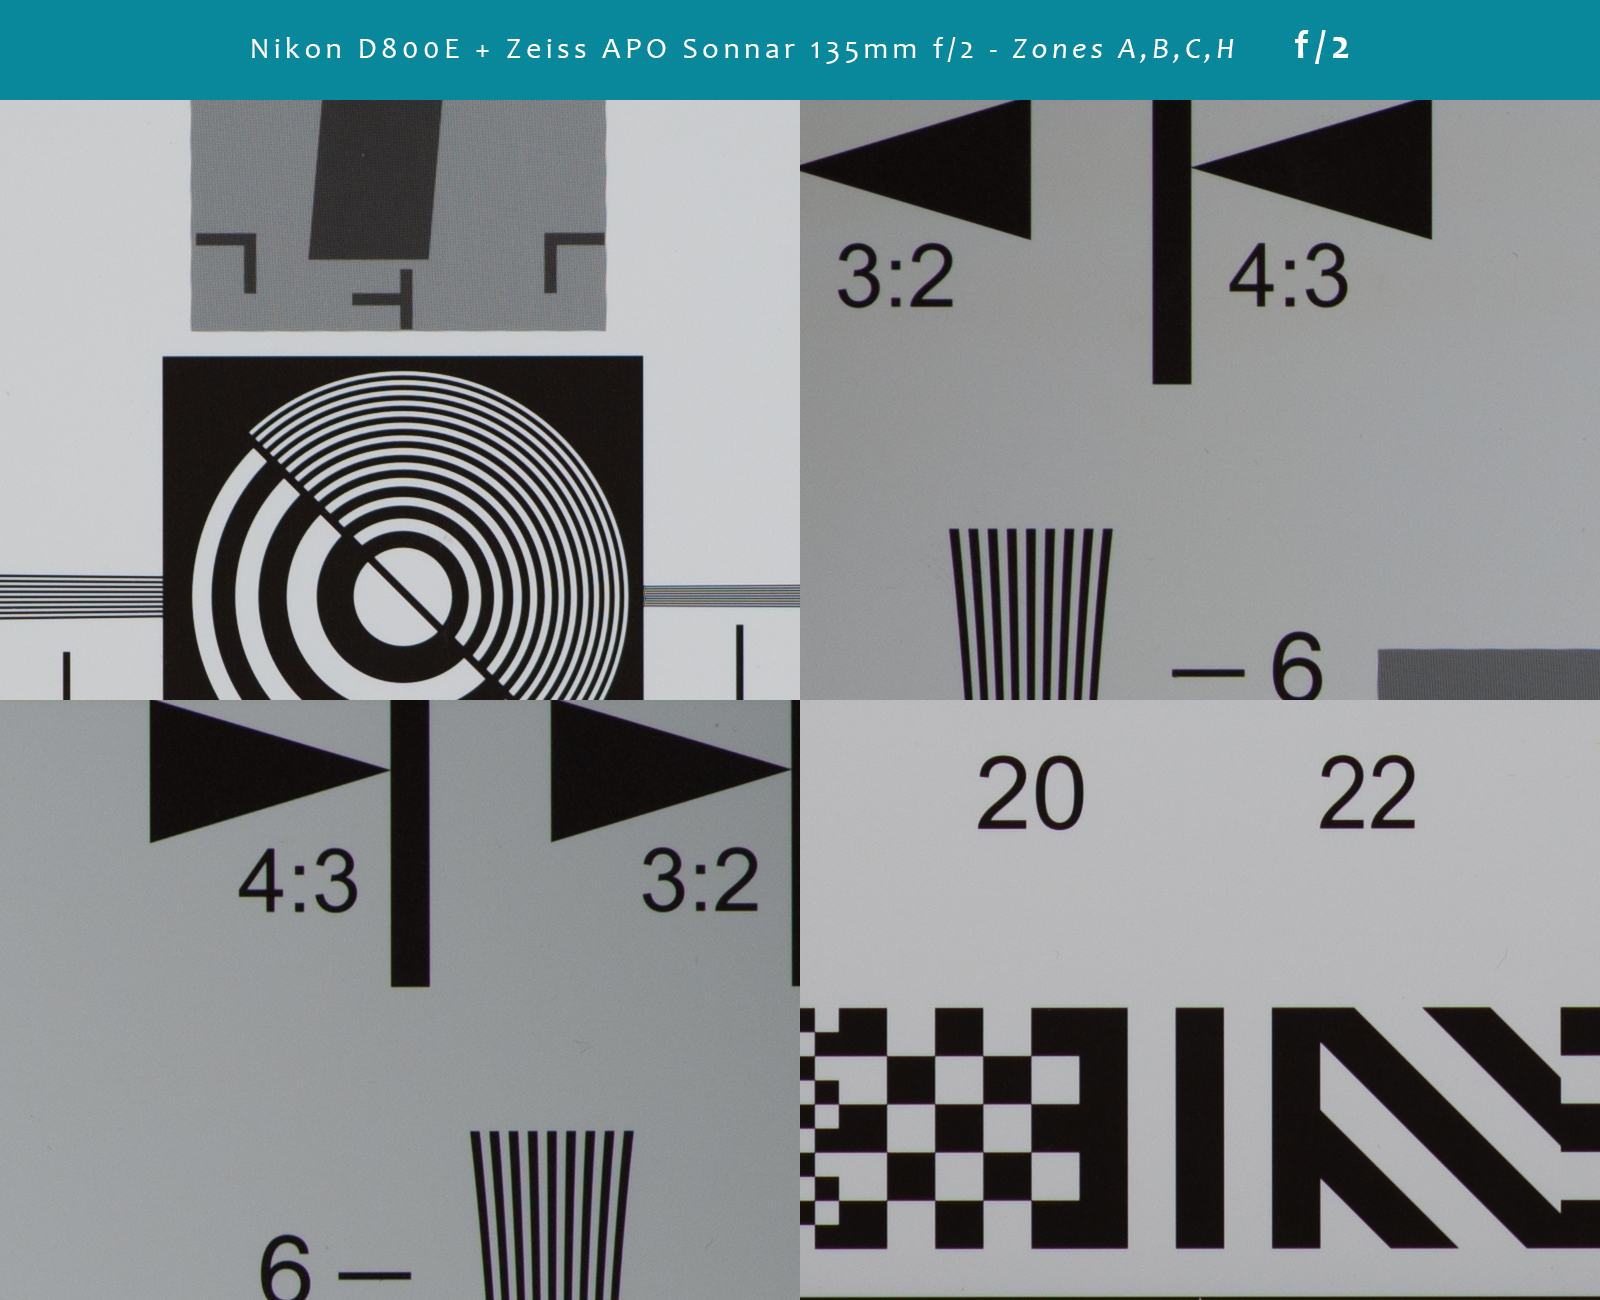
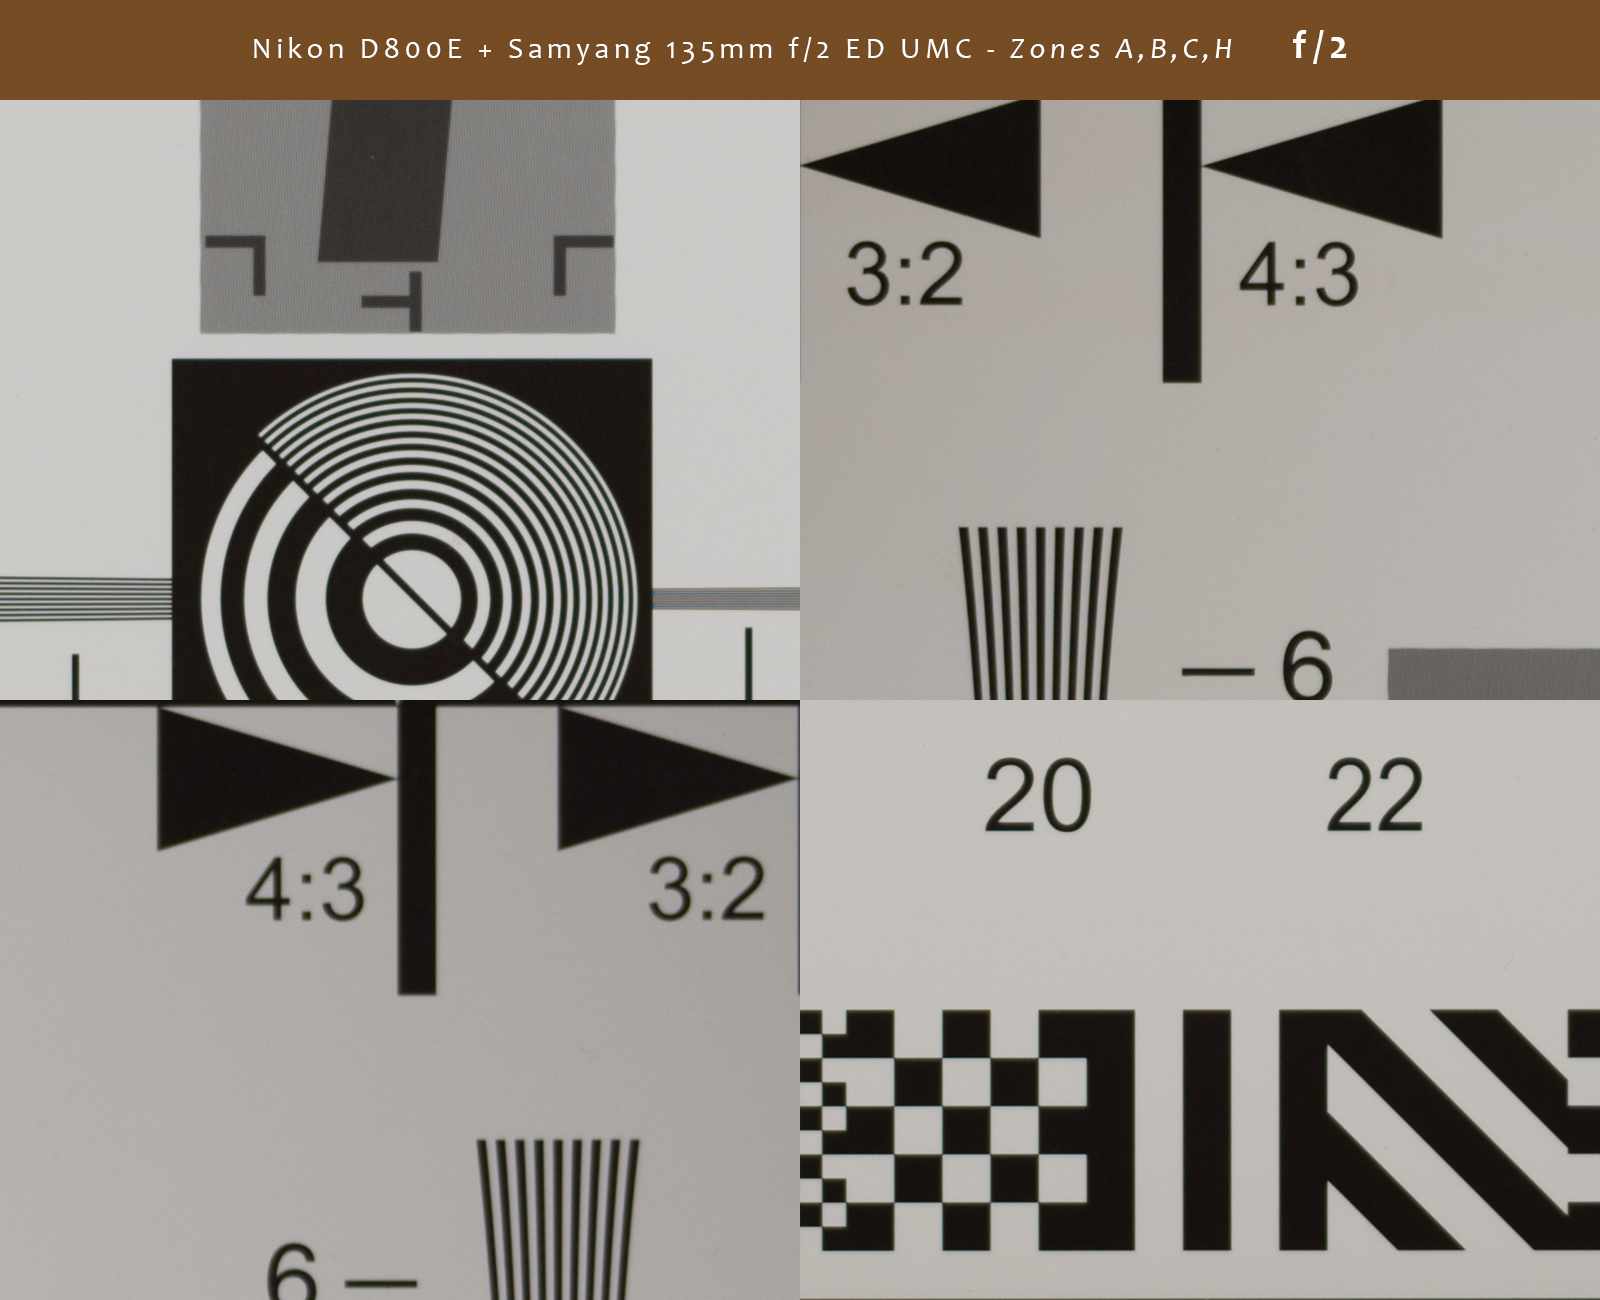
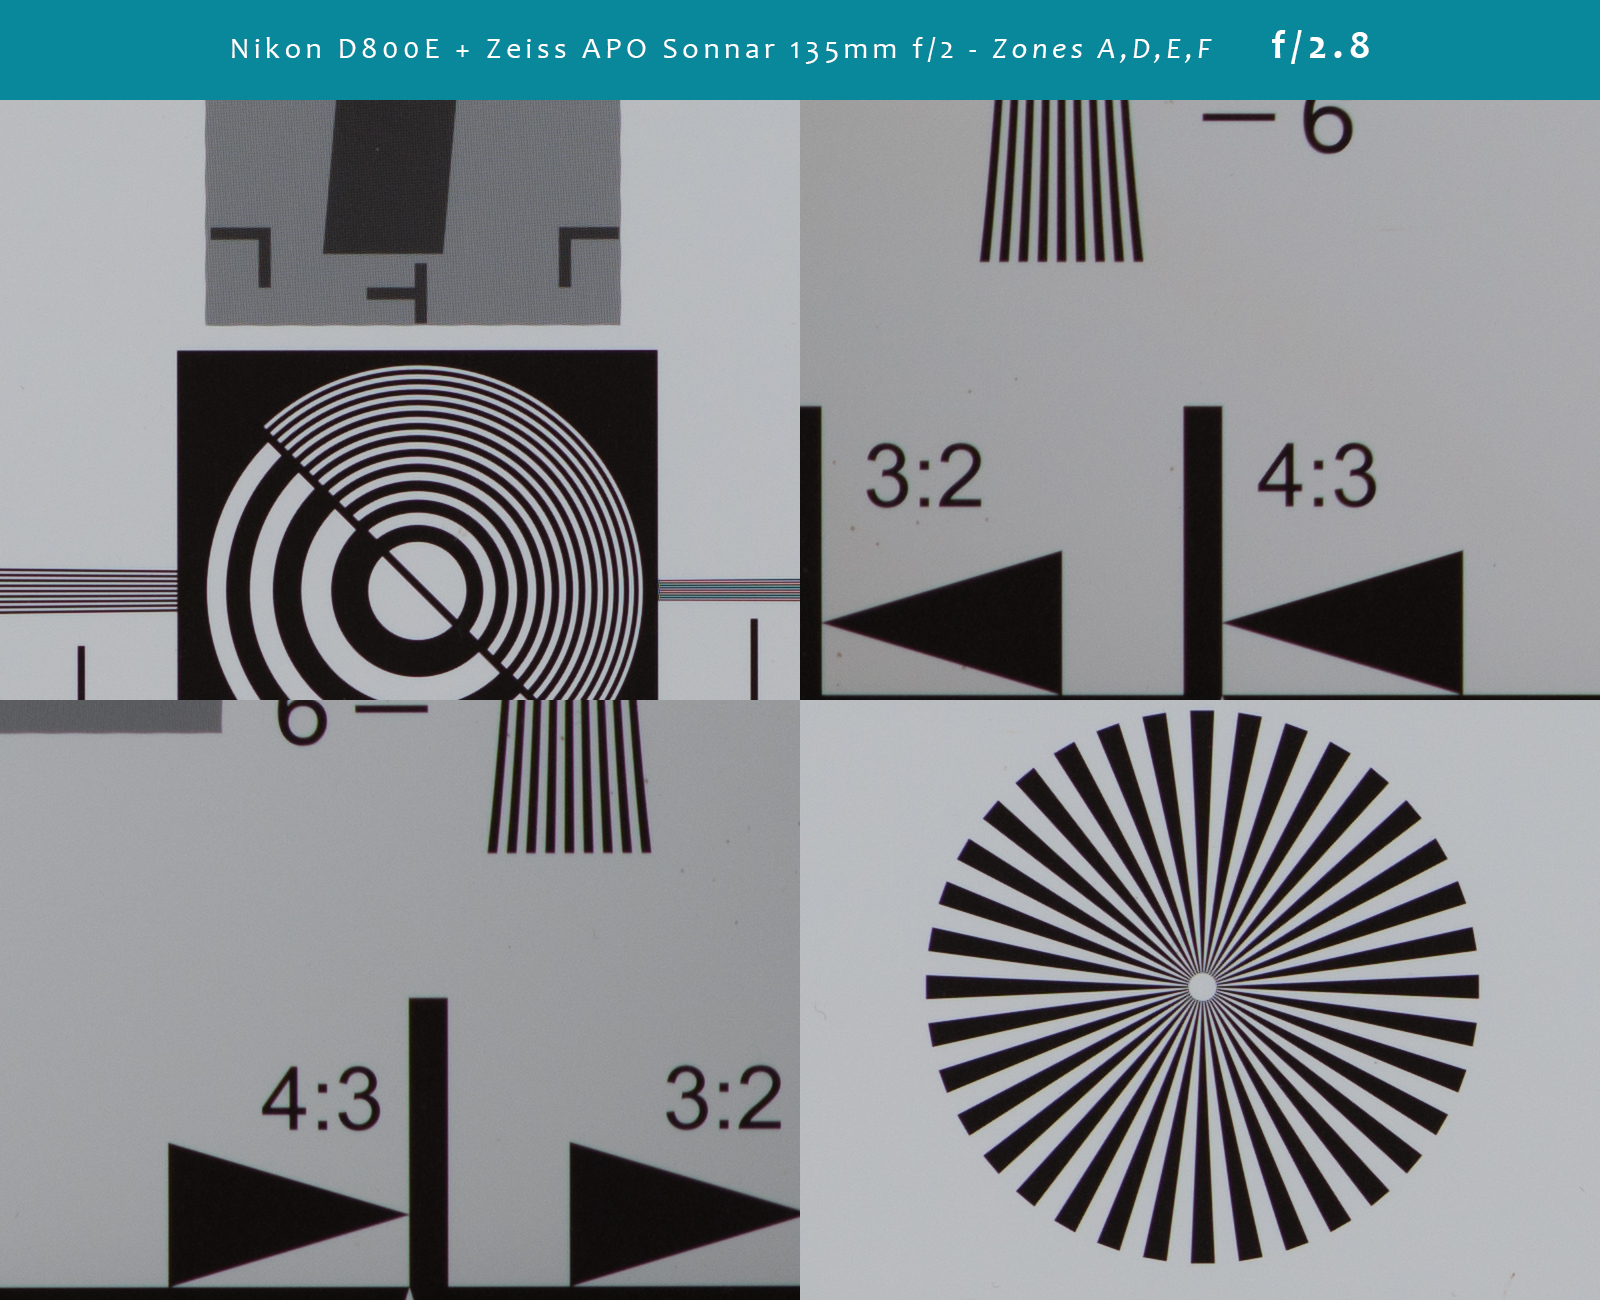
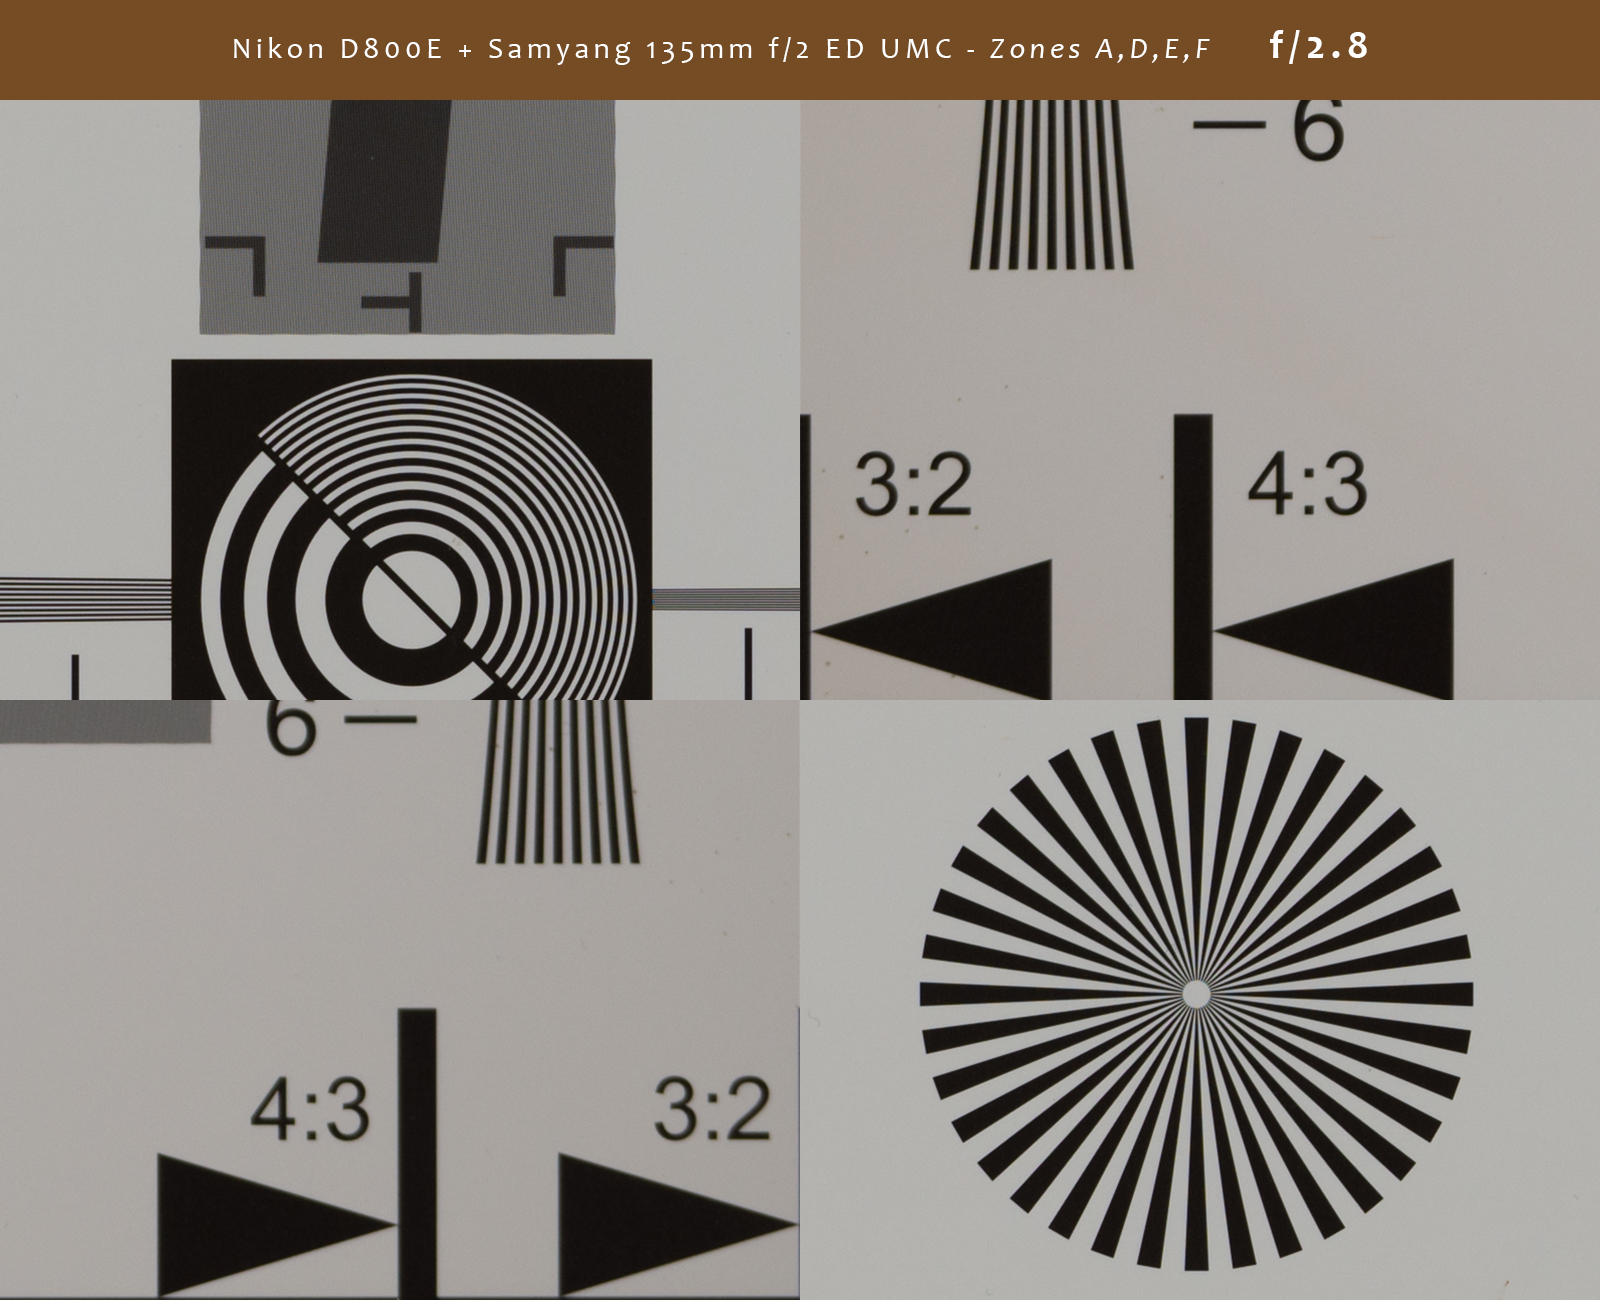
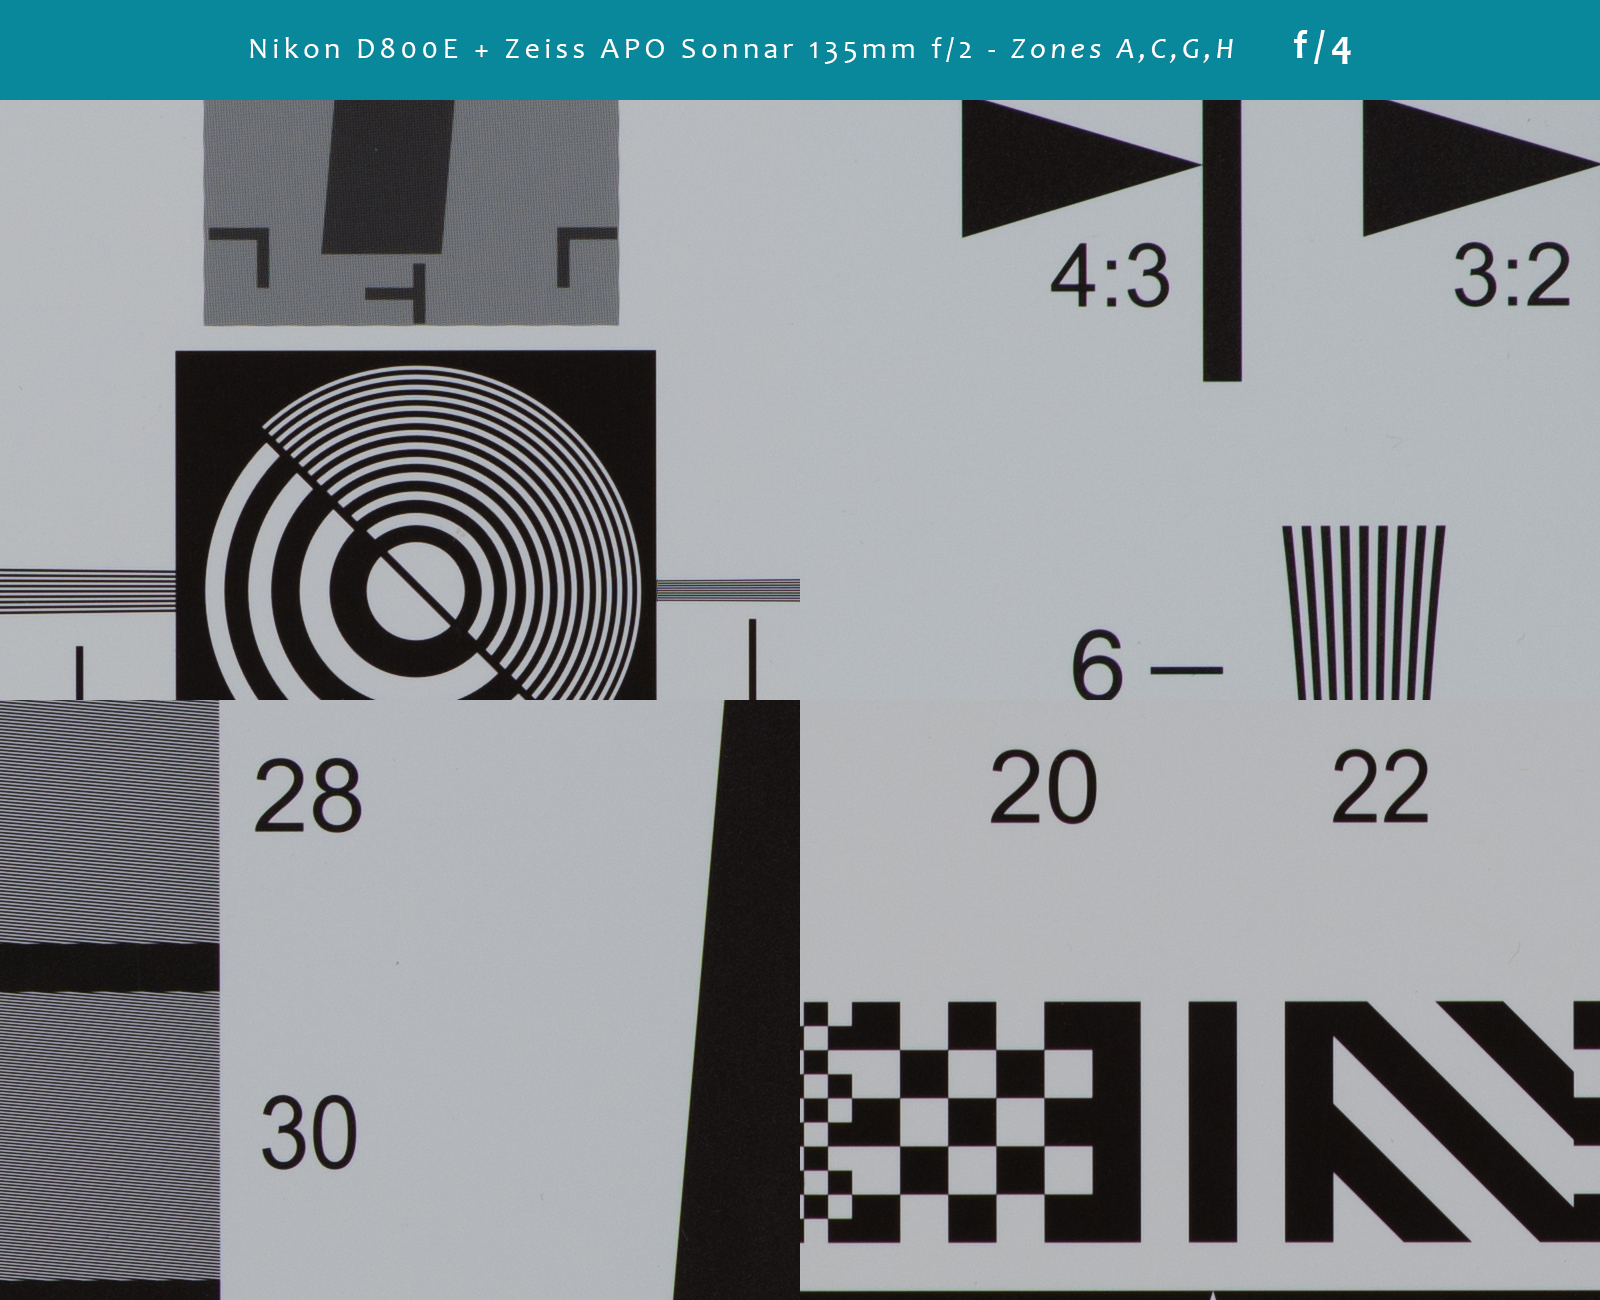
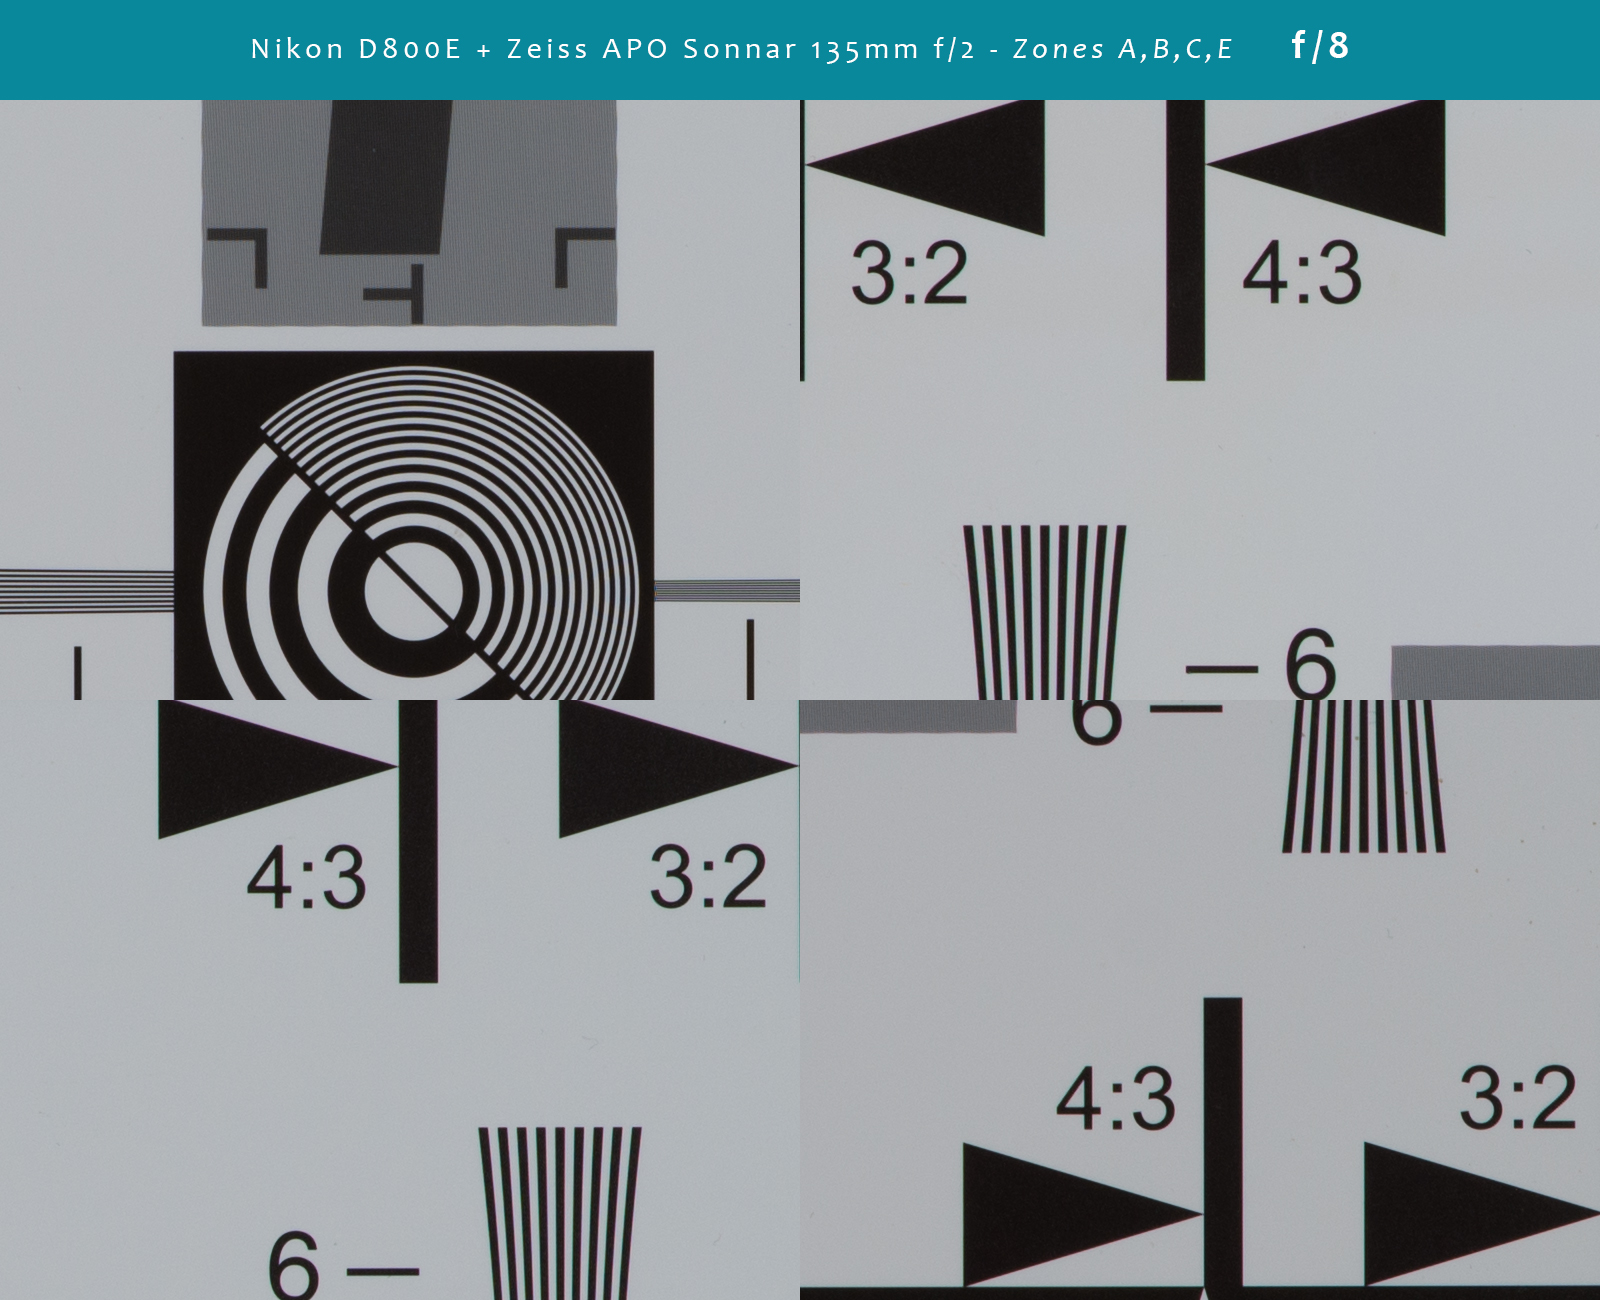
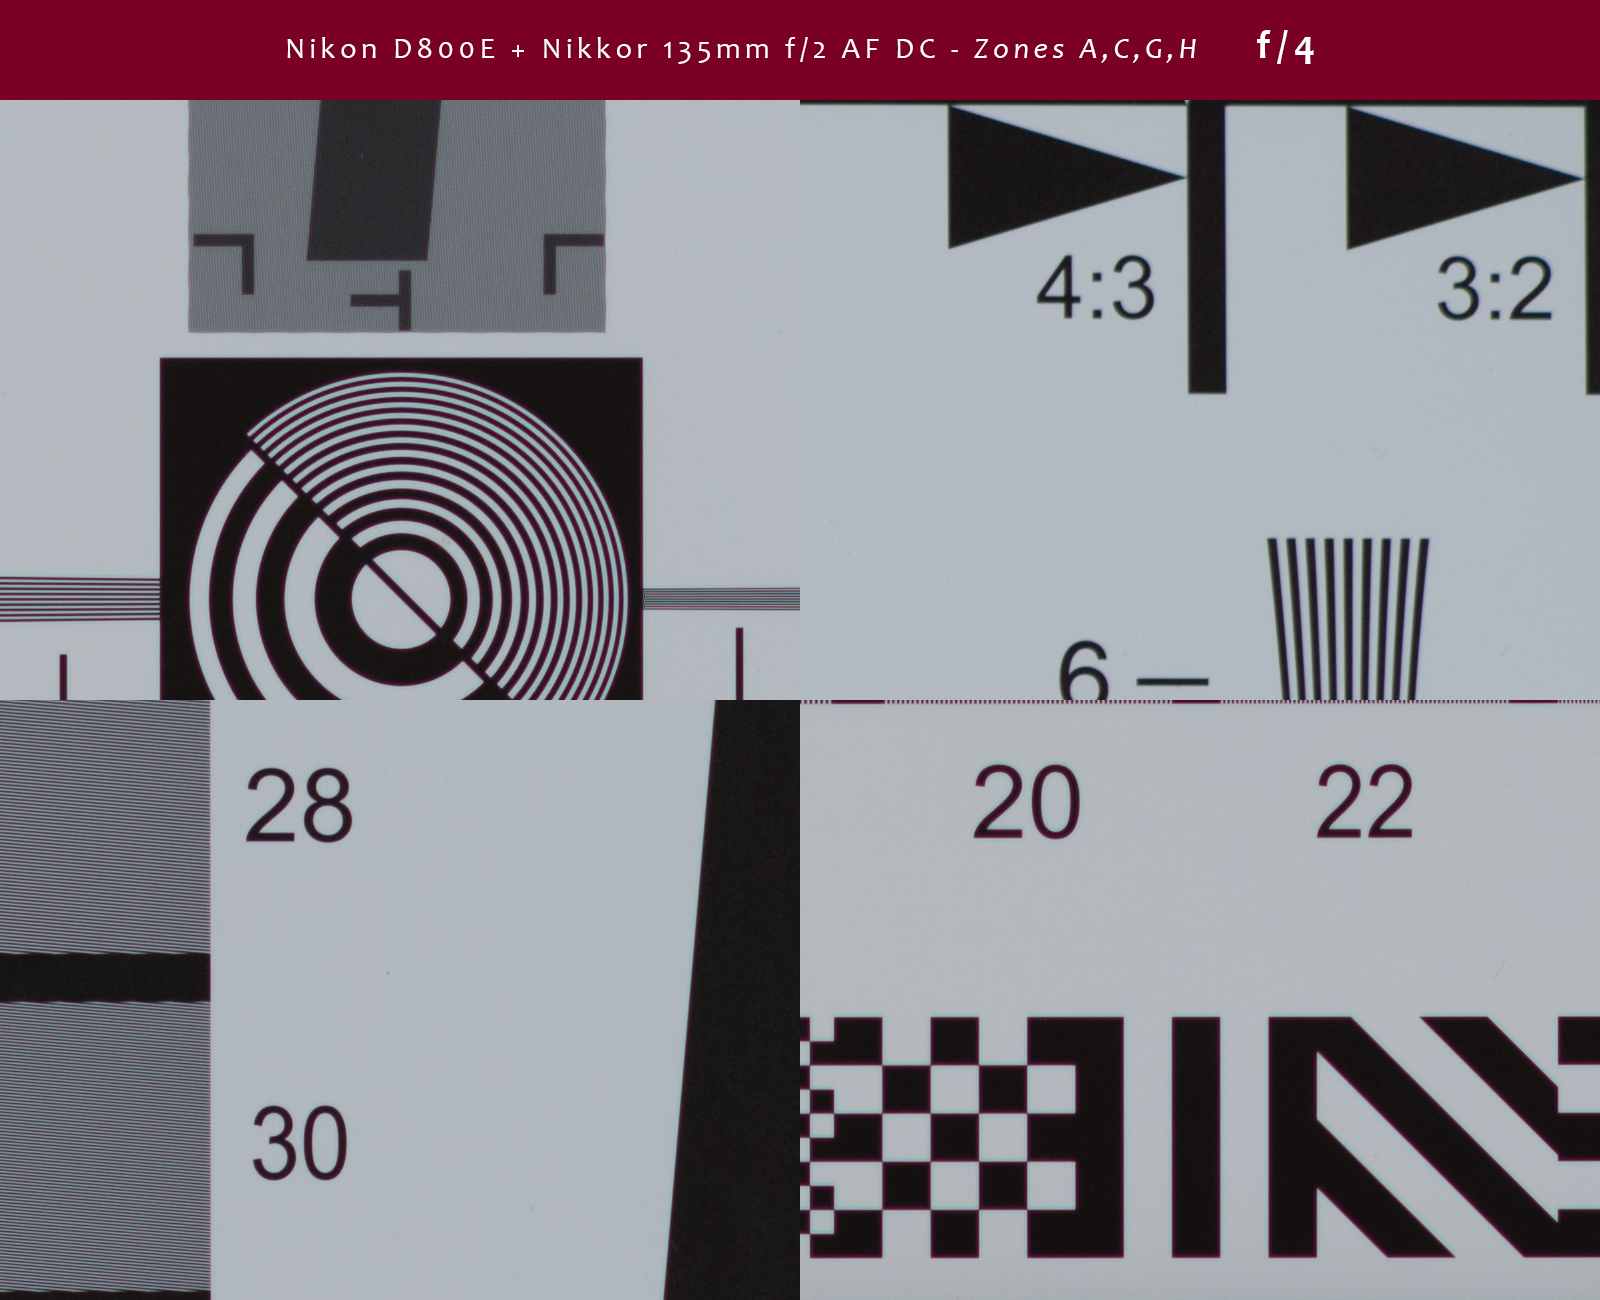
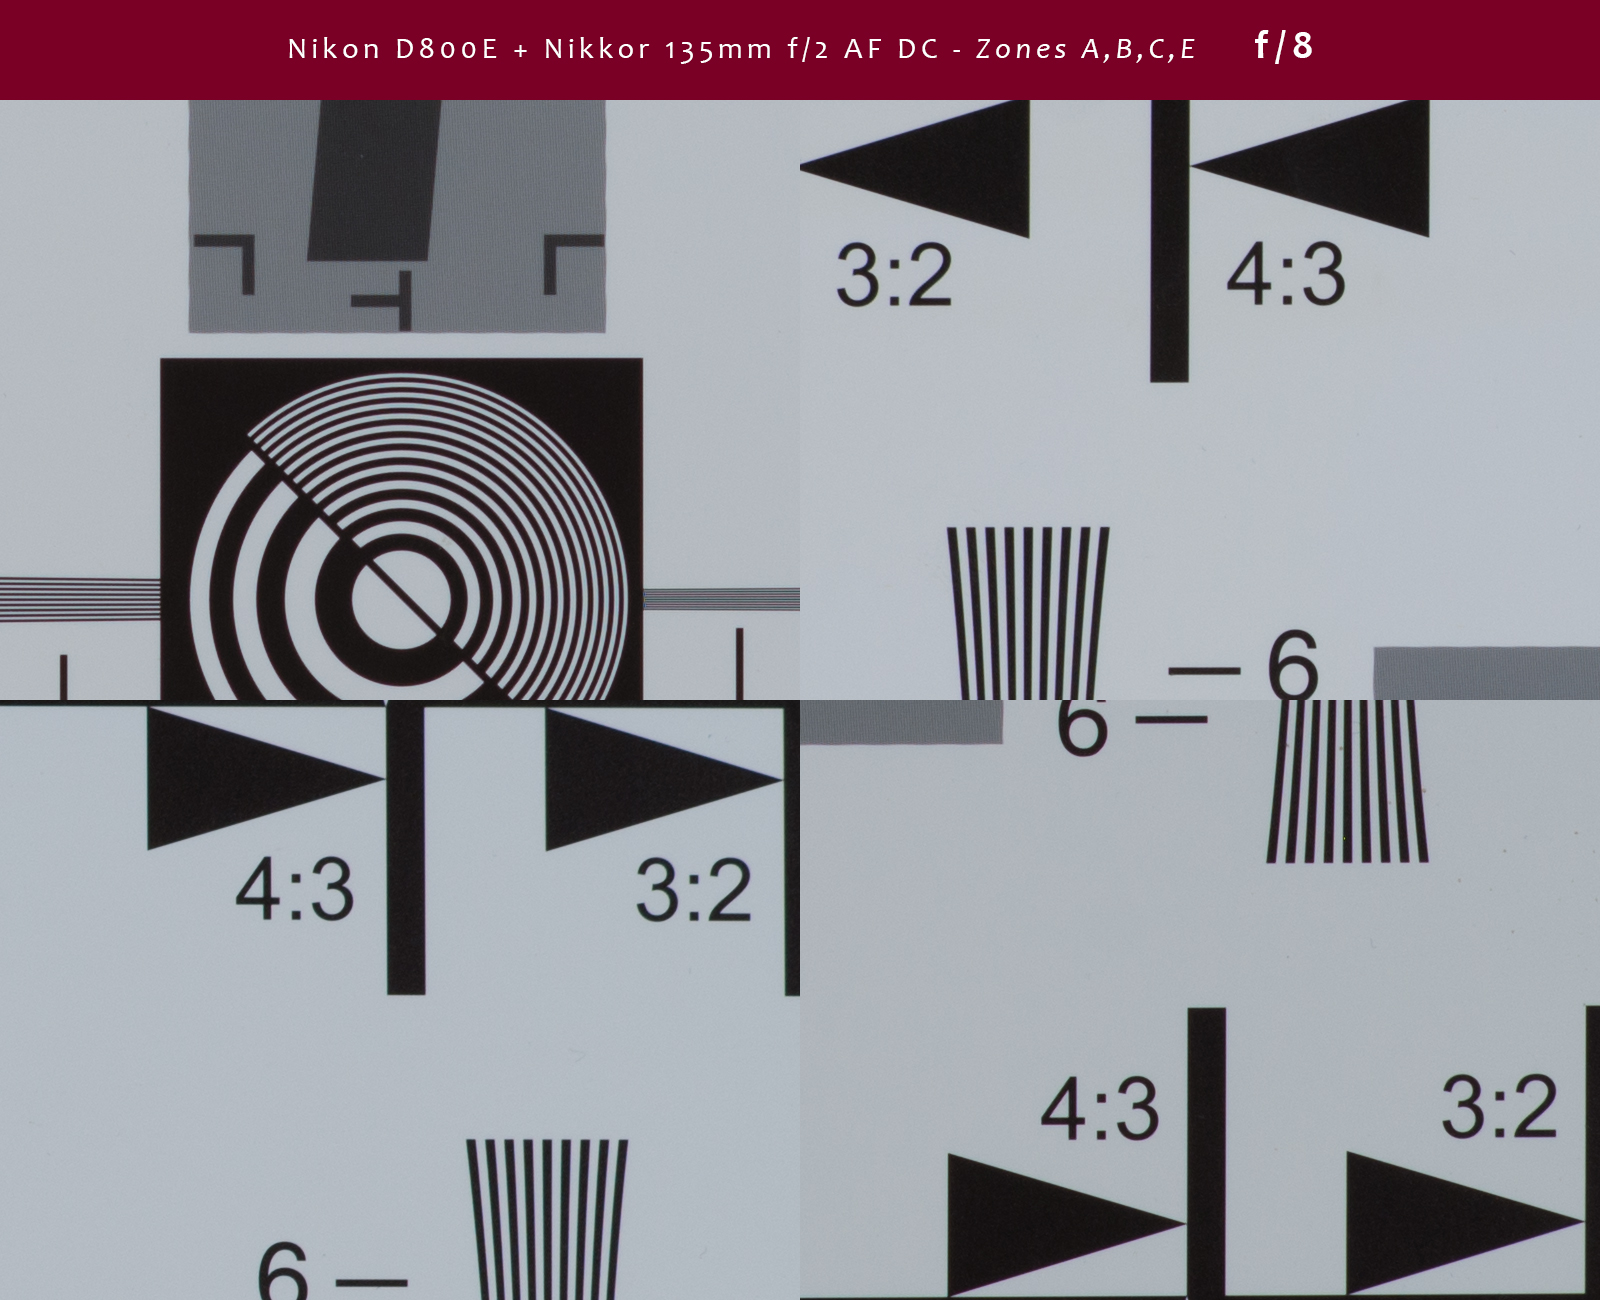
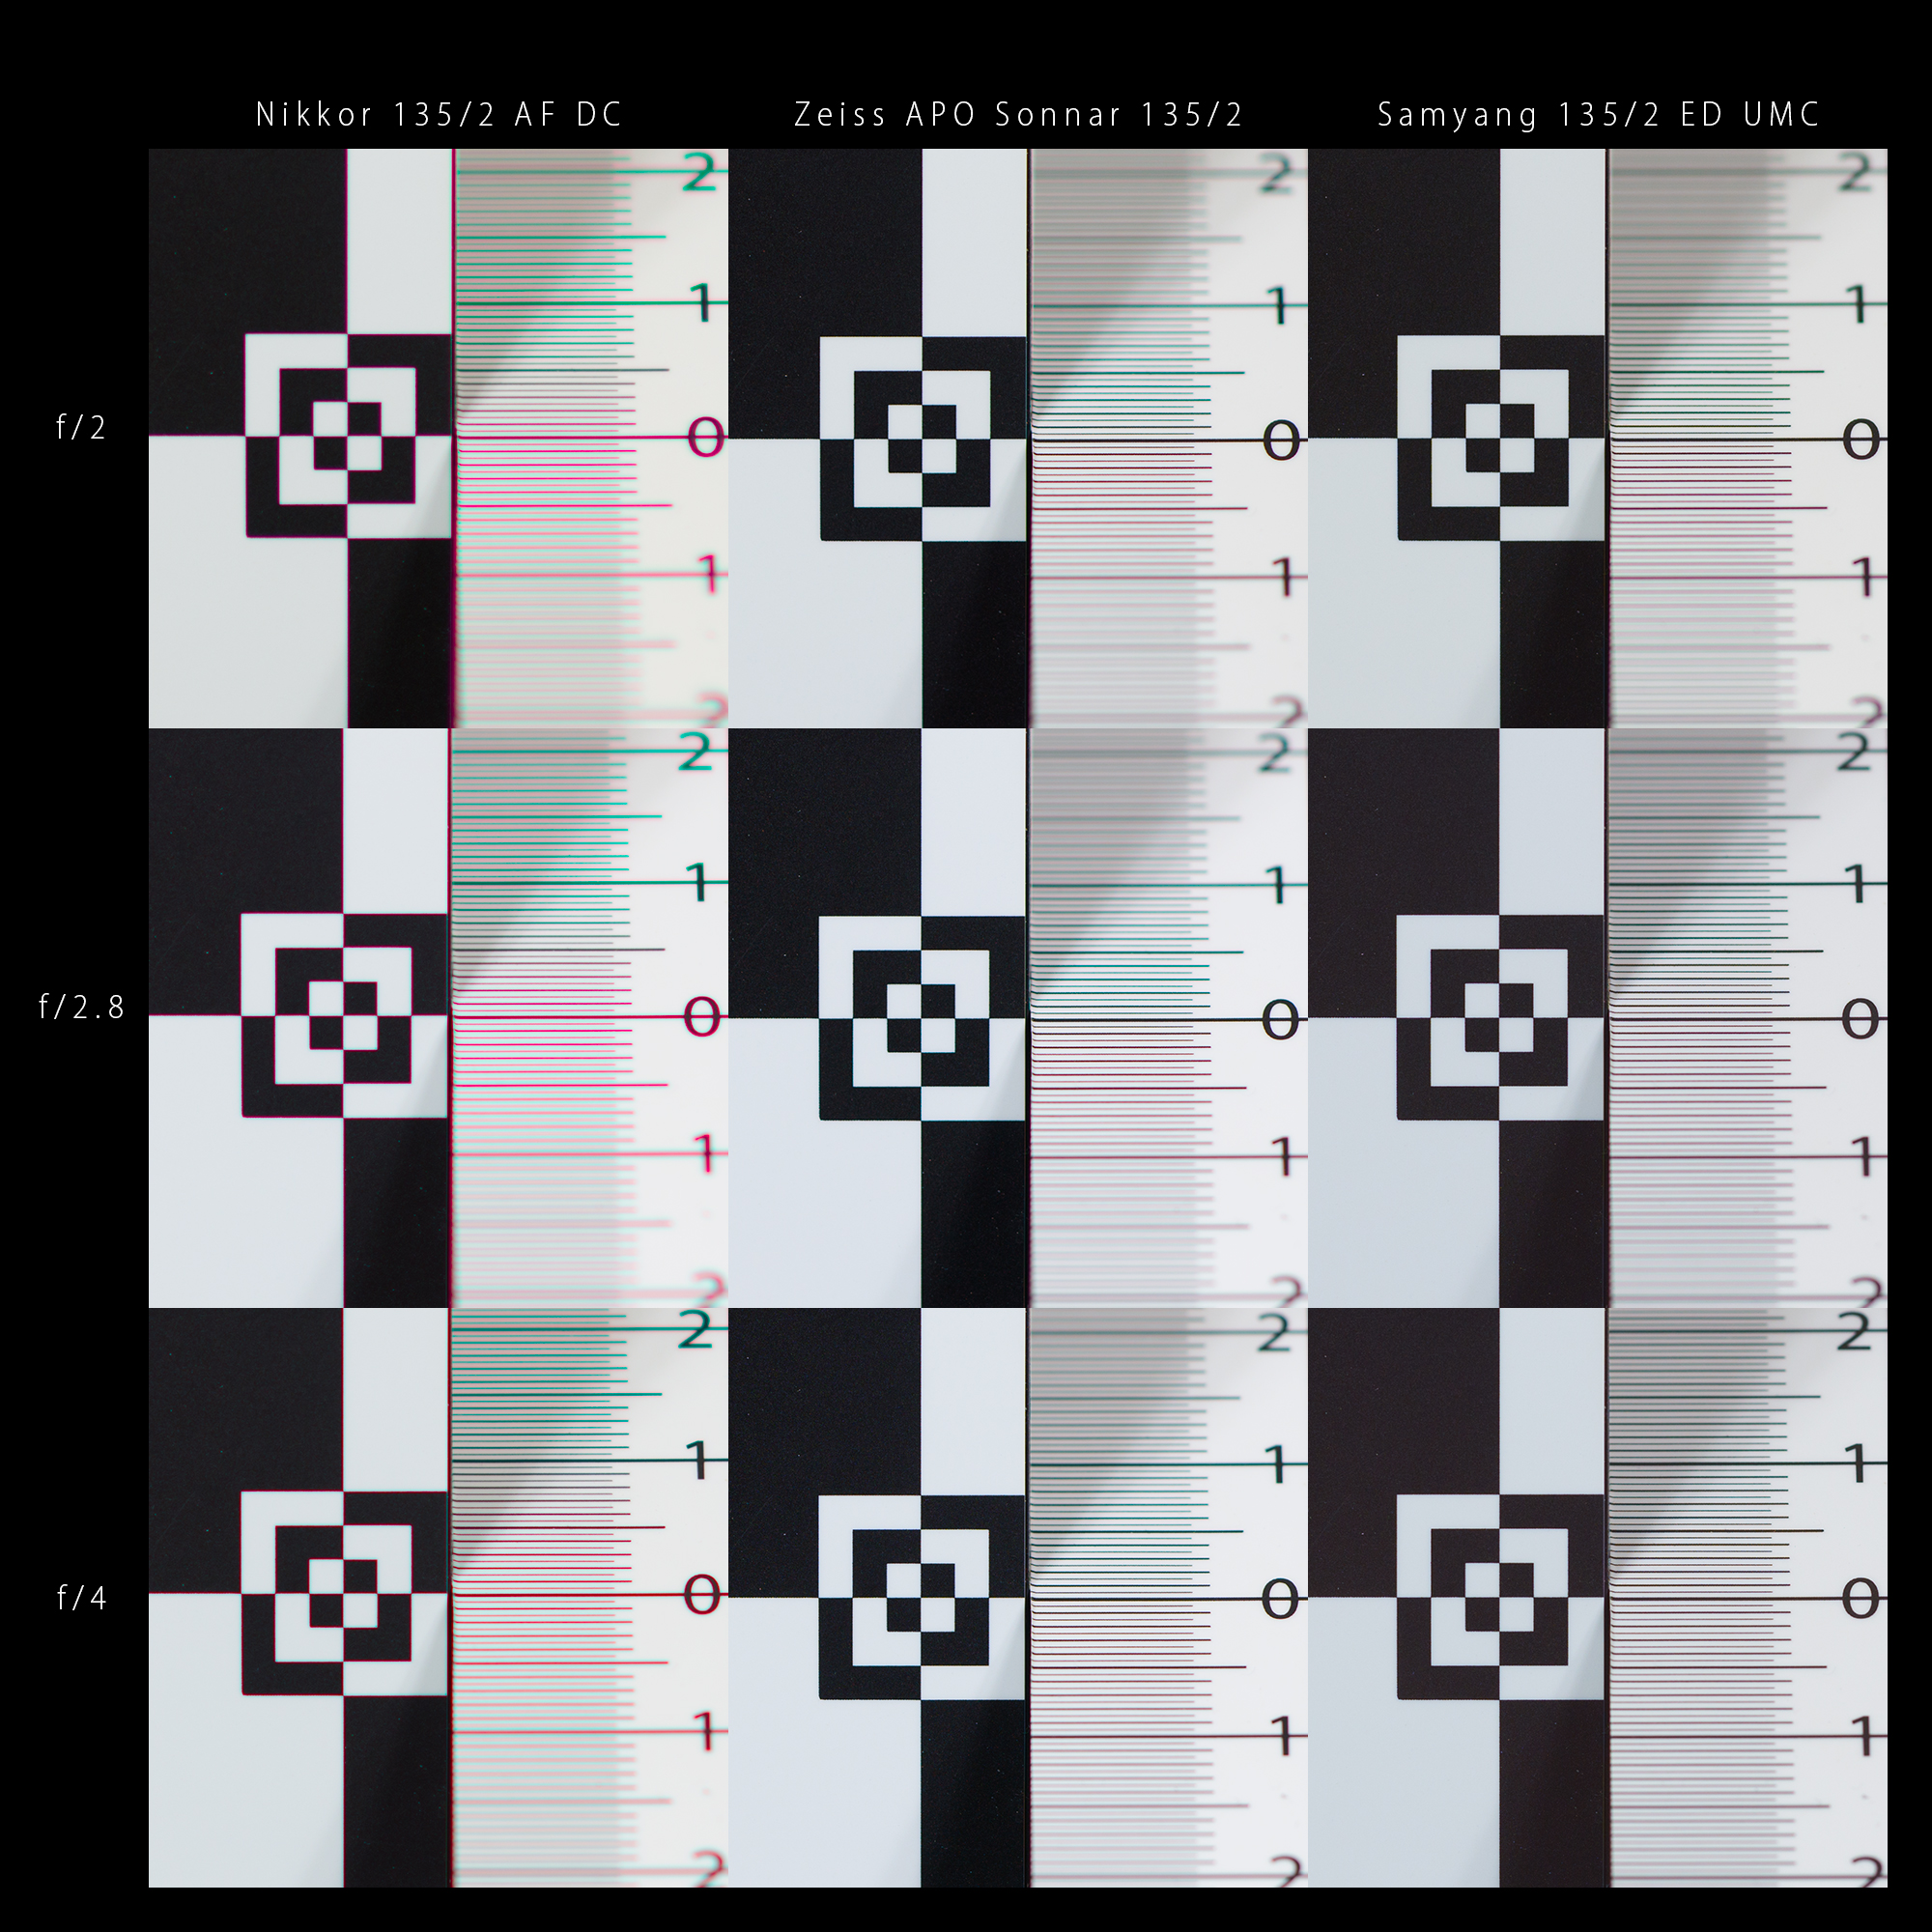
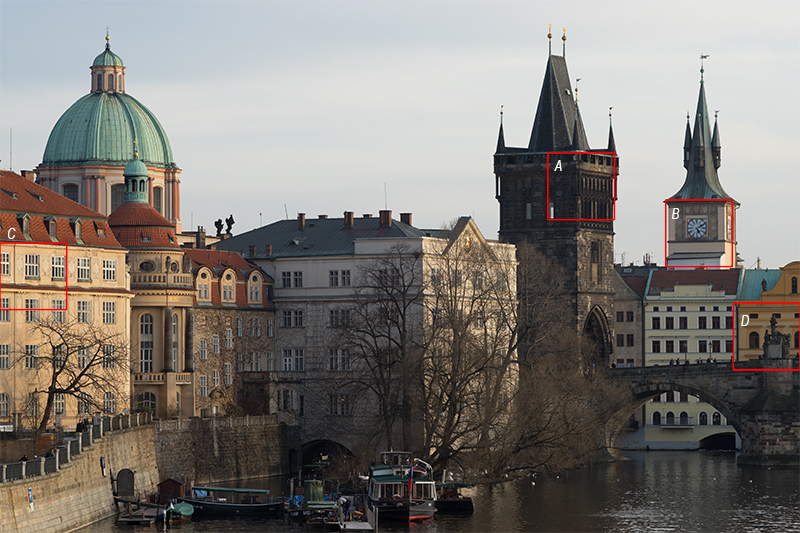
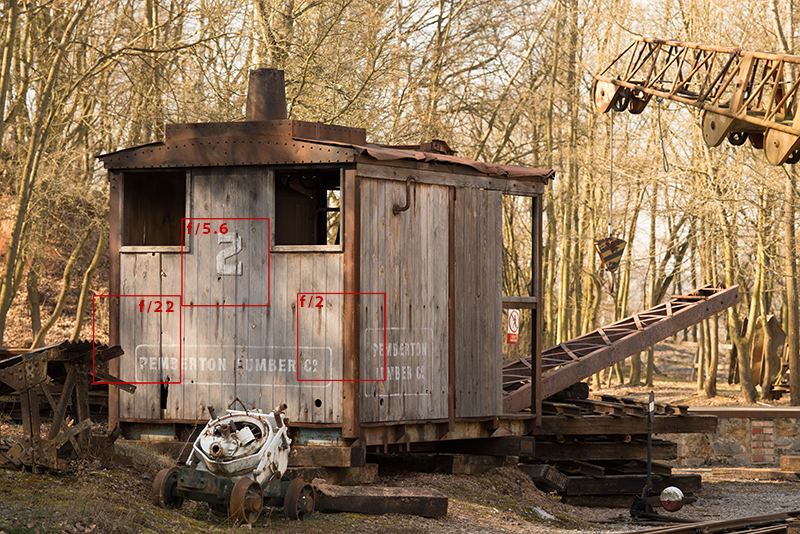
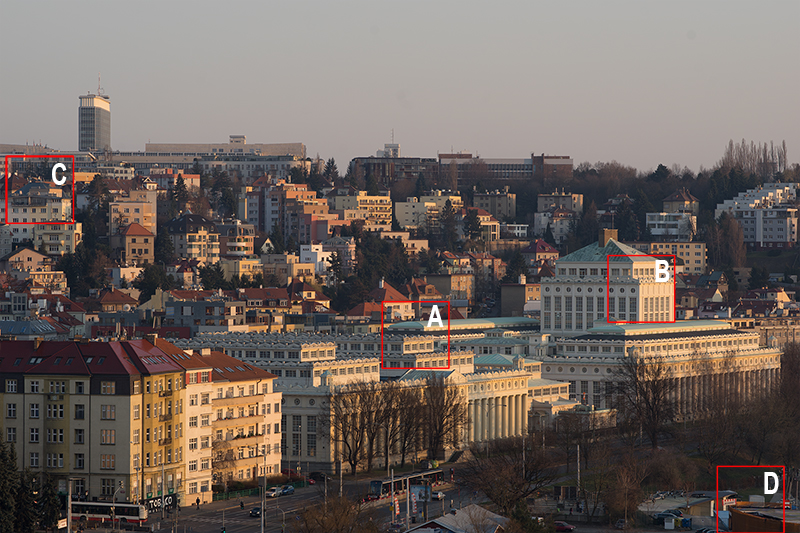
This is test chart and red squares indicate respective zones of 100% crops that will follow.
![Zones]()
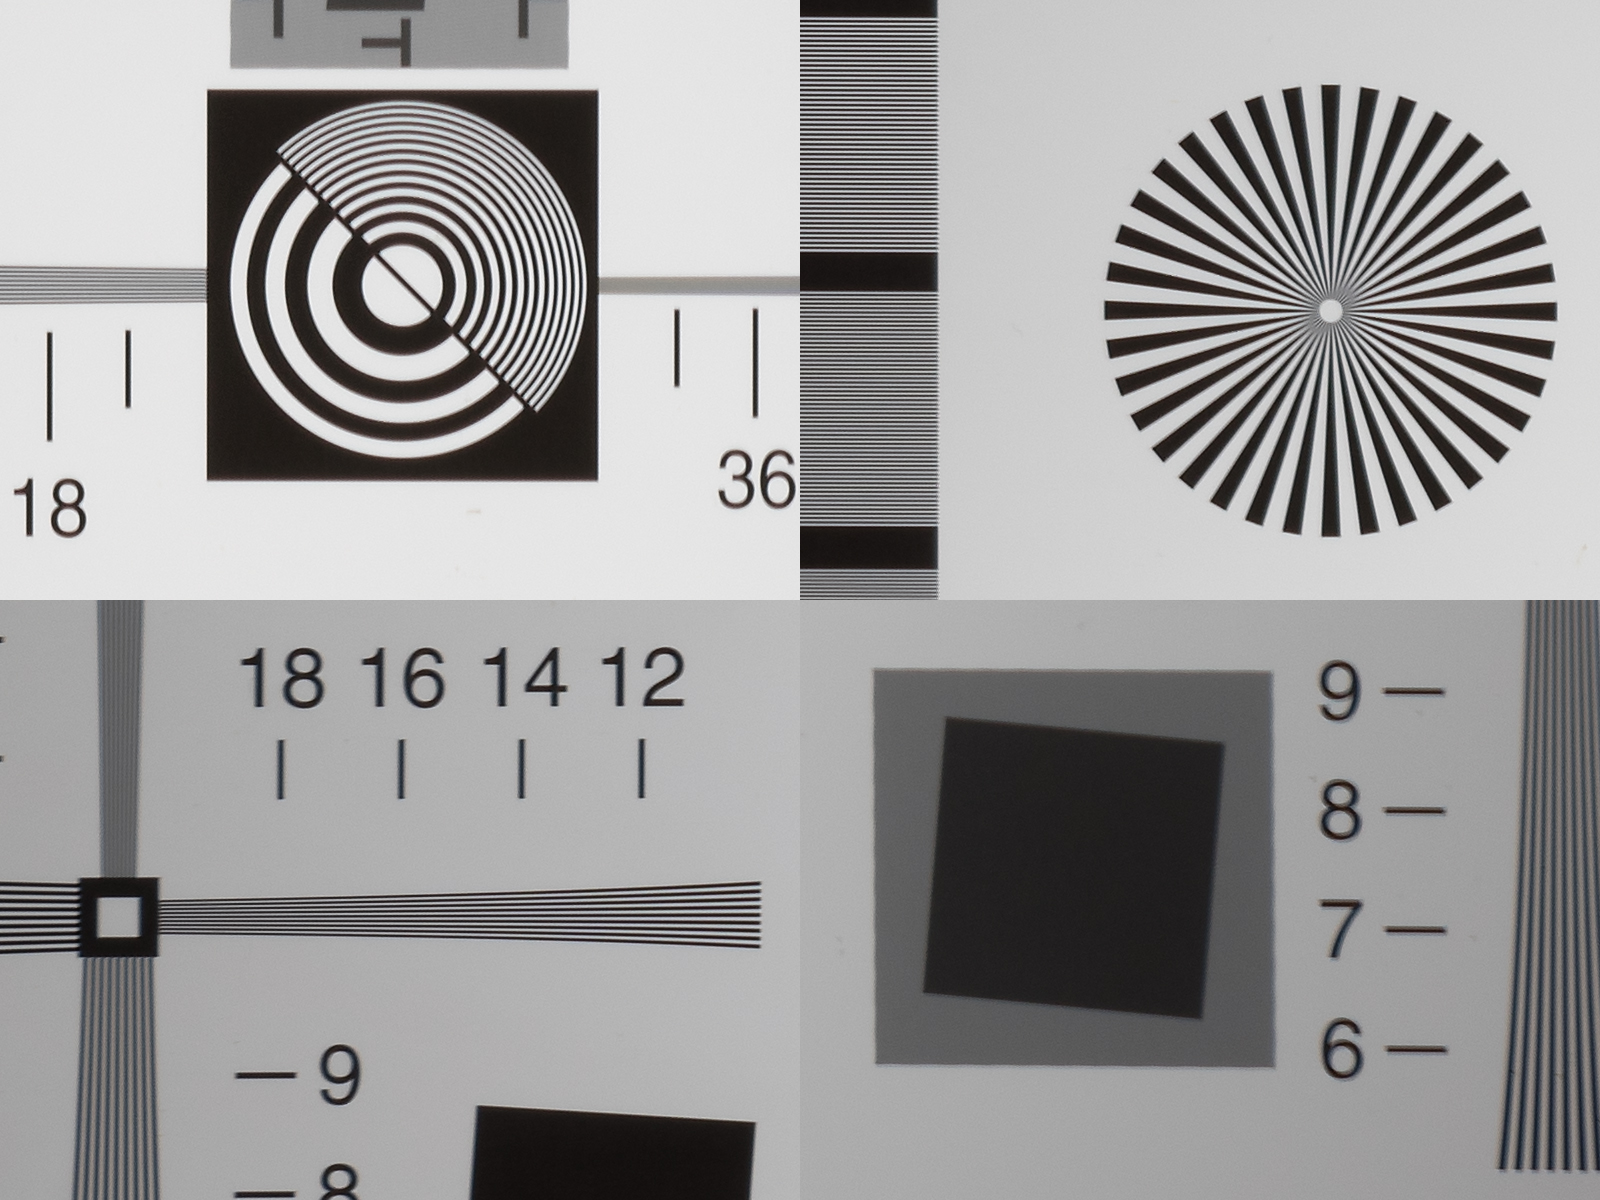
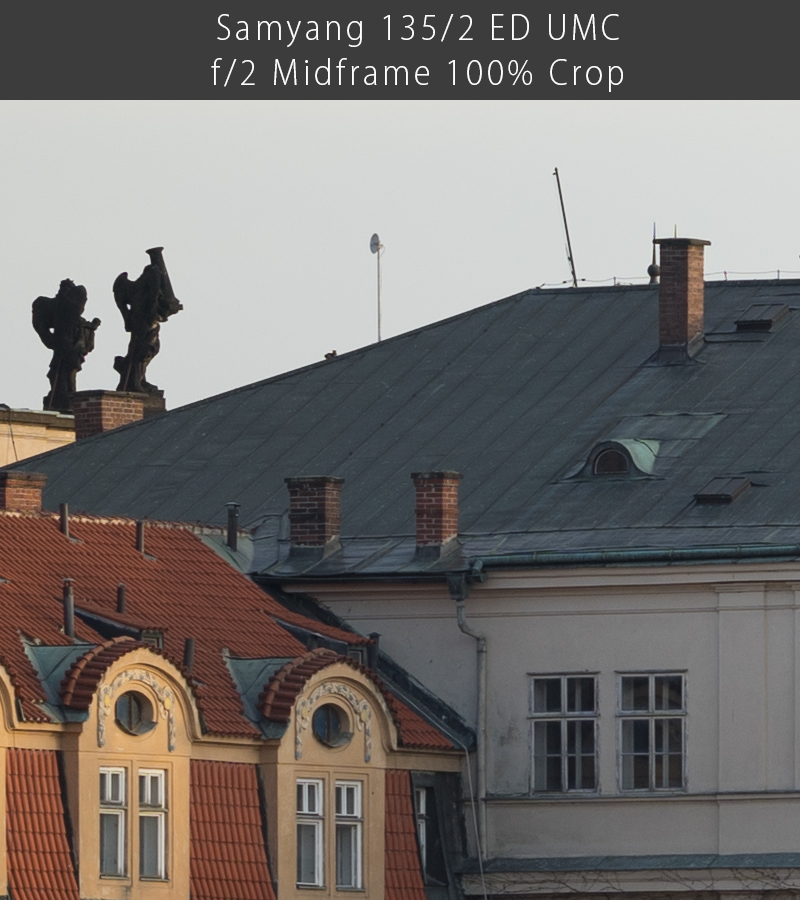
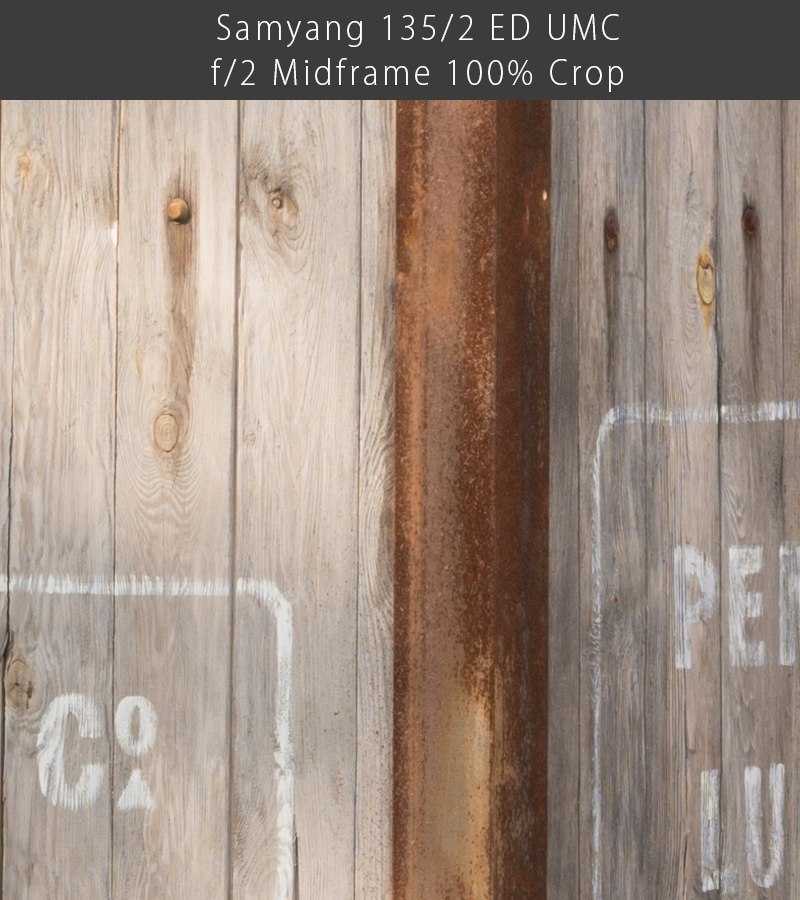
Here are 100% crops of respective zones at aperture stops from left to right – f/2, f/2.8, f/4, f/5.6
![ISO_Crop_from_f2_to_f56]()
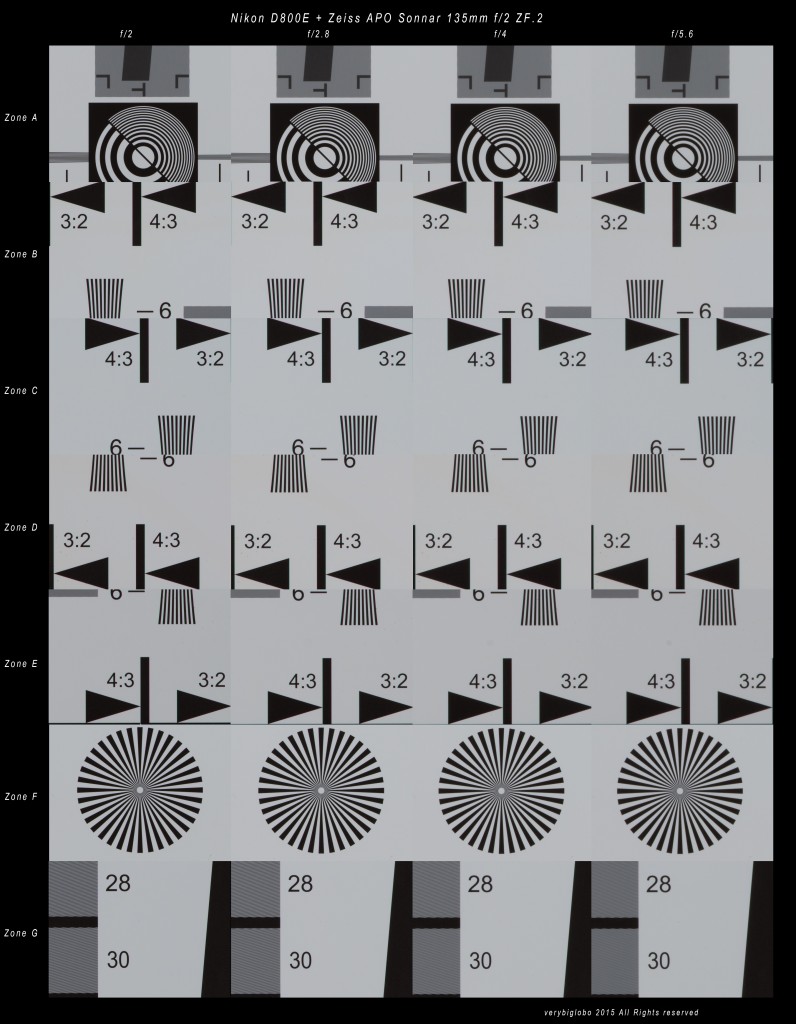
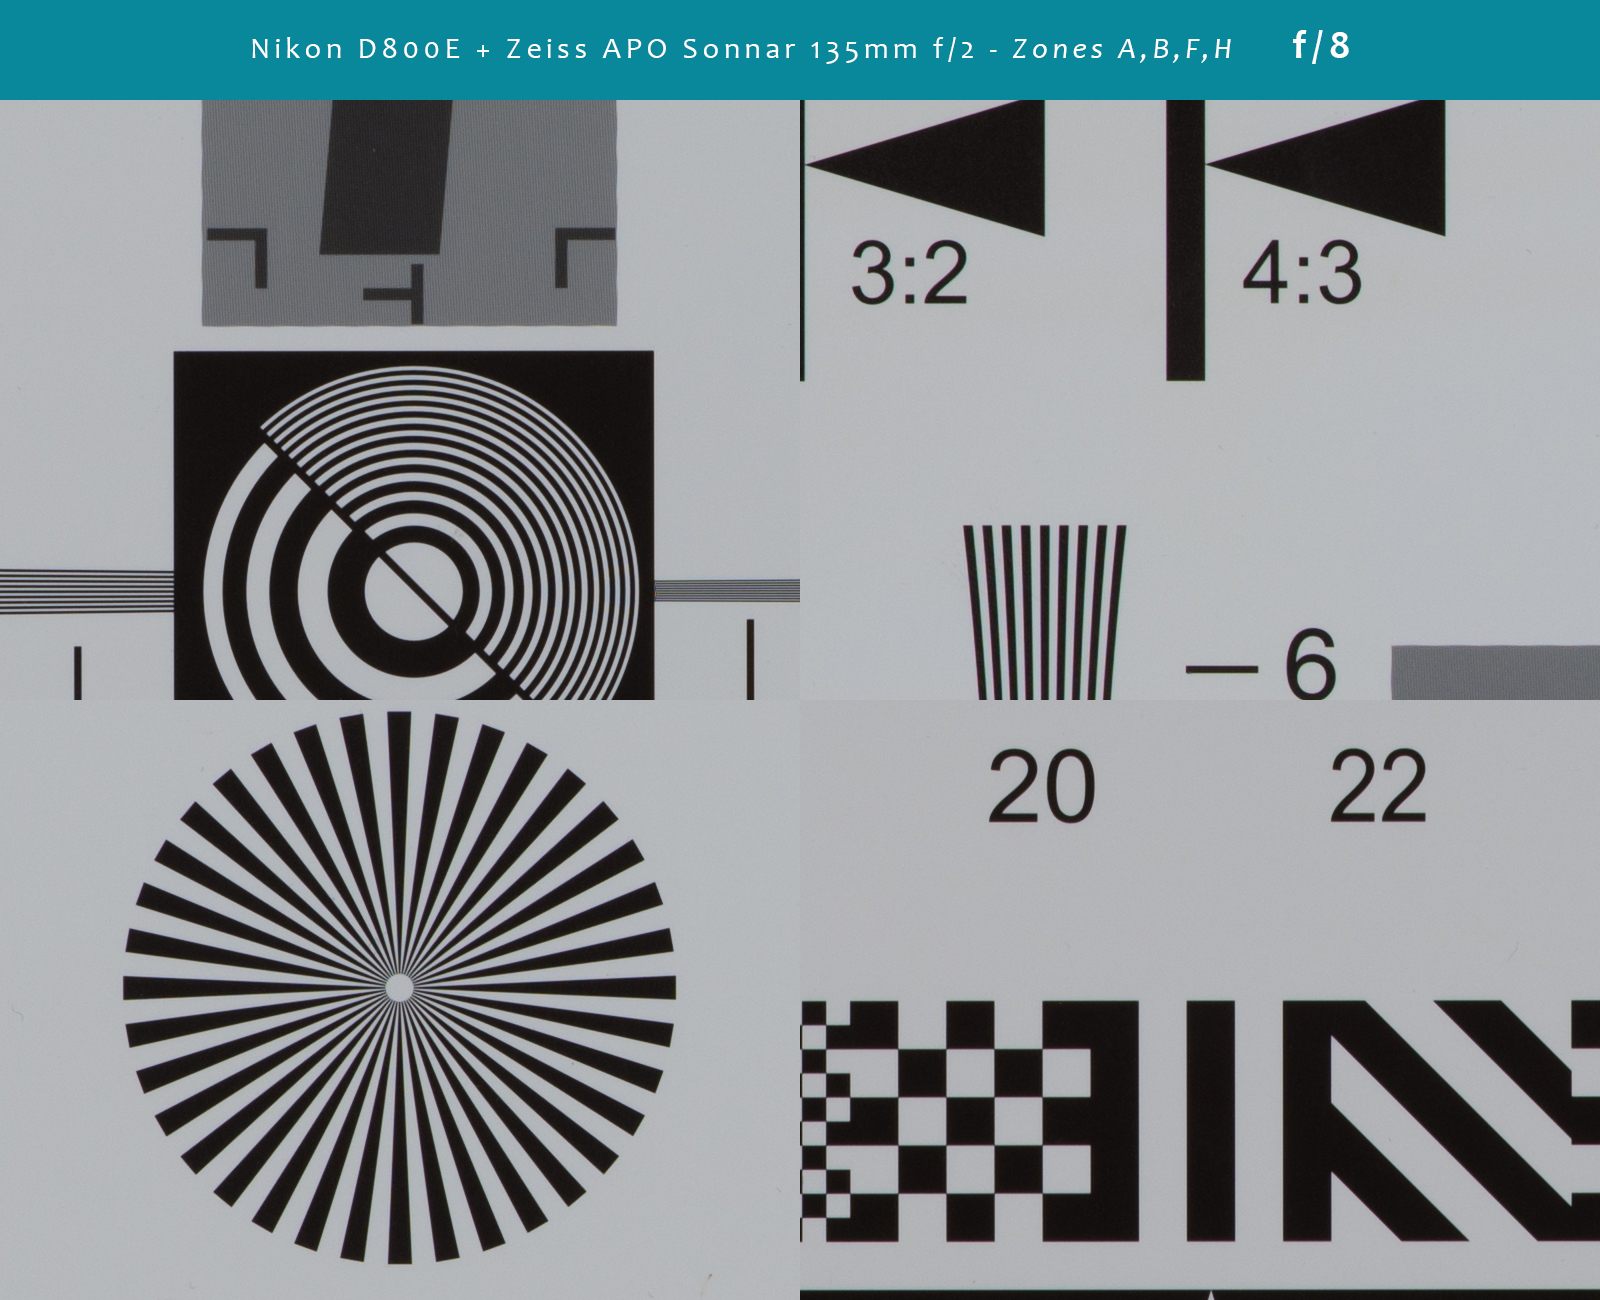
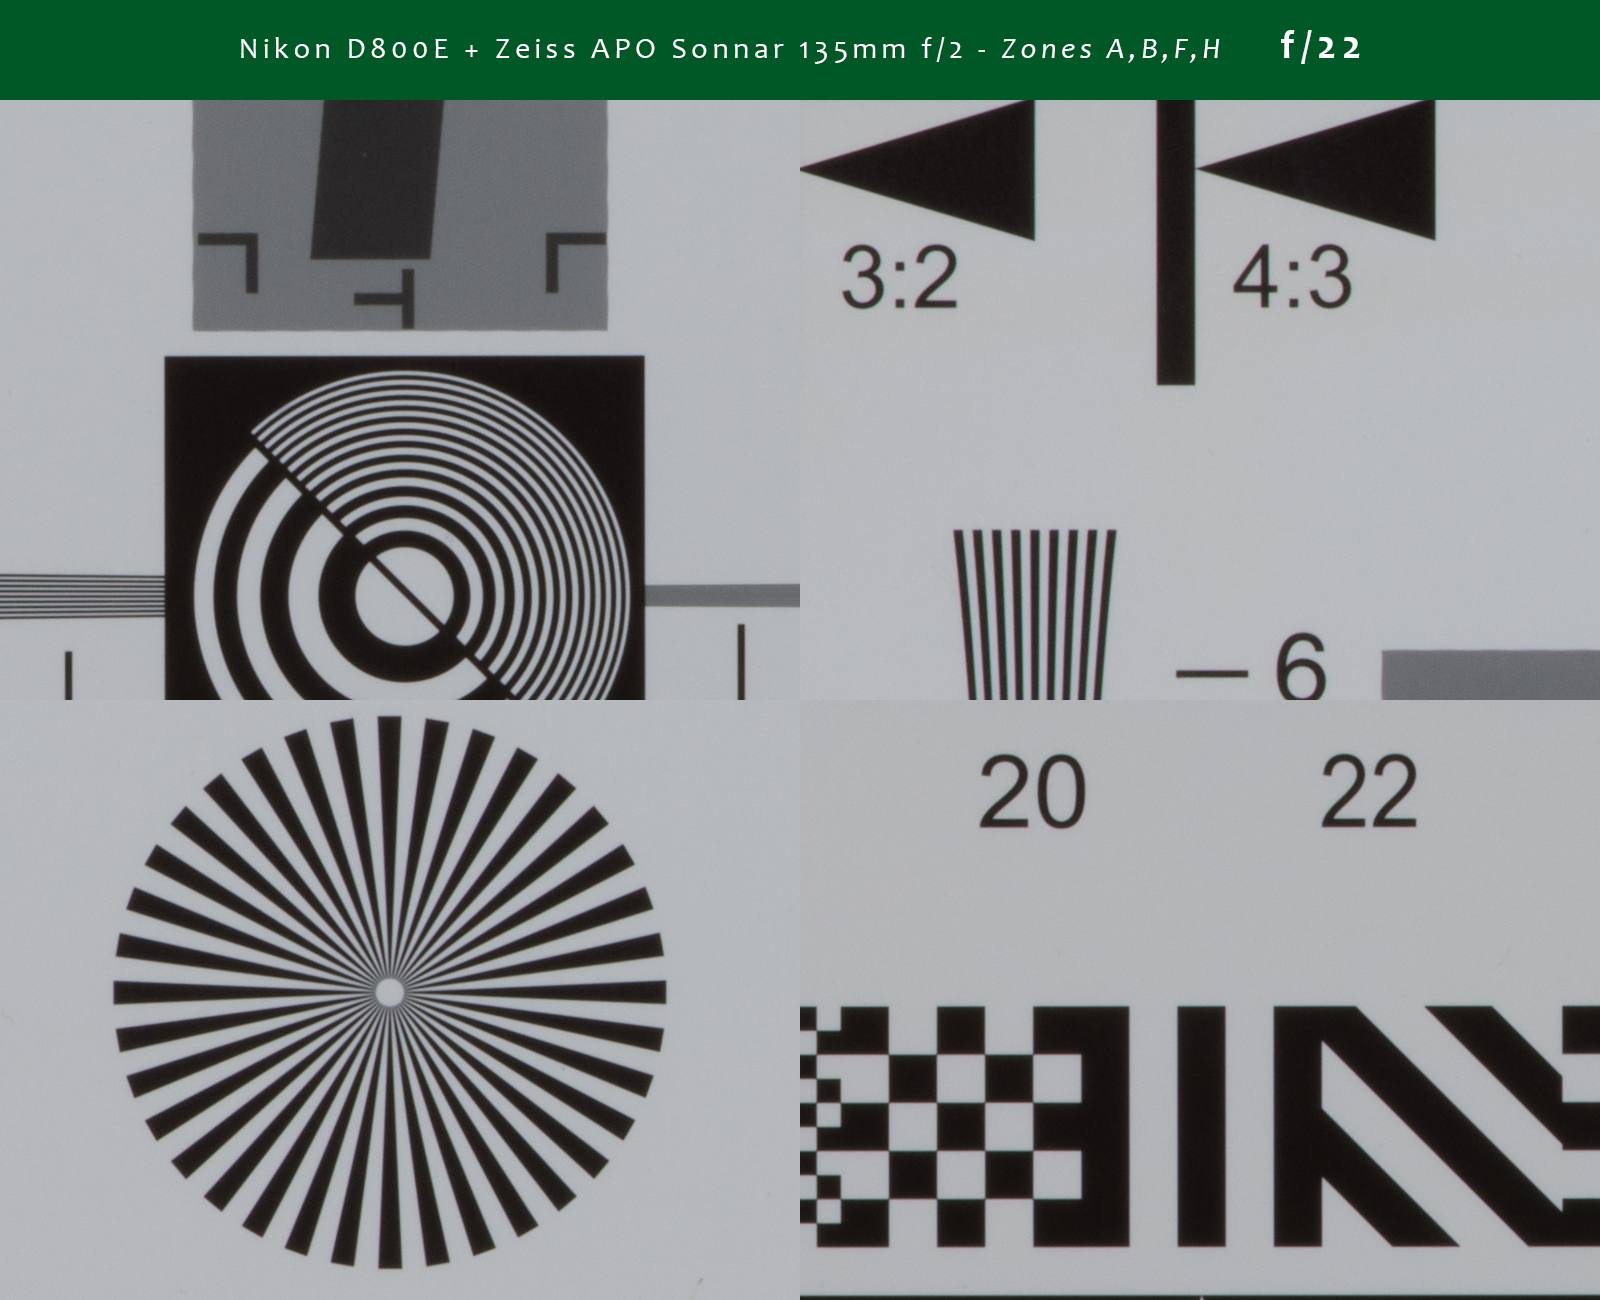
and from f/8 to f/22
![ISO_Crop_from_f8_to_f22]()
By clicking on those images you should be able to open them to original size, where each presented crop (zone) is shown at pixel level of 800x600px. If you prefer to look at original size files, you should find them all on my Flickr Service Album – Nikon D800E + Zeiss APO Sonnar 135mm f/2 ZF.2
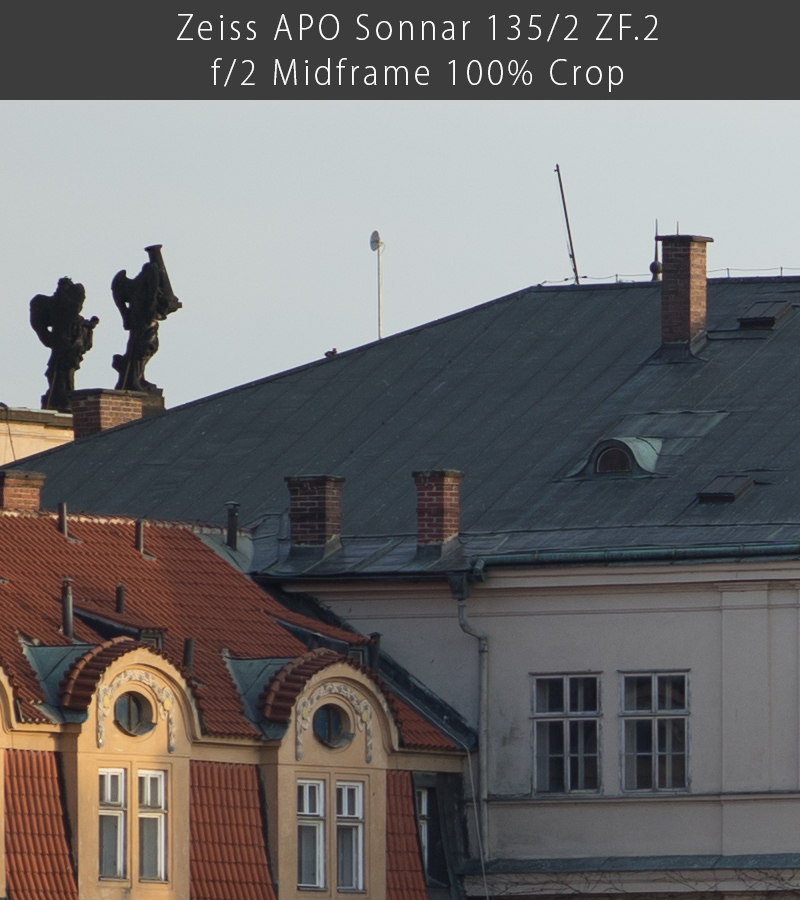
Visually judging contrast and resolution of this lens is unique experience IMHO. Just as MTF results suggest, lens is sharp from f/2 up to the extreme corners. Both resolution and contrast are probably highest that I have ever seen in my tests. Stopping lens down improves sharpness further up to f/5.6 (at pixel level), but this is one of the rare lenses that I would probably feel confident to use wide open even for the landscape shots (if I ever experience the need to do so). Simply outstanding results.
Diffraction starts to affect resolution (start to be notable at a pixel level) from f/8 on and considering how clean and crisp image is at f/5.6, I would consider this f-stop to be optimal for the lens (unless you need extreme DOF).
Here are few comparisons between apertures for your consideration, but don’t forget that you are looking at basically unprocessed RAW files (just standard processing in LR 5.7 without applied lens profiles of course) at pixel level.
f/2 vs f/5.6 – sharpness zone
And f/8 vs f/22 – Diffraction zone
While f/5.6 might look much better than f/2 and f/22 might look unusable, I would say that this lens is perfectly fine at all apertures varying from insanely good to great or very good. I would like to know if there is theoretical (or real life tested) maximum resolution for this lens, because I believe that it can easily out resolve recently announced 50mpx and up sensors.
Let’s make it simple – this is sharpest lens that I have tested in person so far (I still have to find time for Otus line and Sigma Art).
However, for the price balancing at 2000 USD edge, it is to be expected, considering Zeiss experience and knowledge, but…
On the other side of our gray (formerly known as blue) planet, more precisely in South Korea, company that I first heard about related to lens business just few years ago, originally named Samyang (but also known under many other private label brands – Bower, Rokinon e.g.), planted on the market few great lenses especially considering price/performance ratio.
I remember than when I bought my first Samyang lens – 14mm f/2.8 and I went out with my photo friends, they looked at me with compassion as to someone who can’t afford quality optics. One of them wasn’t able to remember the producer name for the whole weekend, calling it all possible variations such as Samtex, Pingpong etc. so it ended with a nice and simple nick – Sam.
When they saw results however, many of them went with Sam and are happily shooting all around.
Samyang lenses are not sexy, they don’t have 3D pop neither 4D corn, built quality is functional at best and QC in Korean probably means Quantifying capitalization, but who ever was responsible for development of already mentioned 14mm/2.8, 35mm/1.4, 85mm f/1.4 or APS-C line (12/2, 16/2.8, 8/2.8 fisheye) is or are very, very talented optician.
Why so much writing about Samyang?
First I really think they deserve more publicity and second, they just introduced new 135mm f/2 on the market and first shy reviews were almost all raving.
Their (theoretical) MTF looks quite amazing and surprisingly similar to Zeiss but it is measured at R10 and R30 while Zeiss is at R10 and R20, but most importantly, Zeiss results (above) are real life tests, while Samyang is theoretical.
![Samyang-135mm-f2-ED-UMC-lens-MTF-chart]()
(Theoretical MTF basically mean, that as many other producers, Samyang shows the result that would apply to ideal conditions – vacuum, 100% even illumination, perfectly crafted and assembled lens, honest politicians, etc. In comparison to the real life test, theoretical (or computerized) is similar to what I expected my life to be when I was 6 y.o. and what it is in reality today. Or there about…)
Well dear Zeiss APO Sonnar (every word in its lens name sounds pricey don’t you think :-)), it seems that you won’t have easy life…
Seriously though, I had to buy Samyang lens from UK in order to get it for this review, but it cost me 500 USD, so almost 4 time less than Zeiss price point.
Challenge was born, but I decided to include also one of my favorite 135mm lenses in the contest – Oldie but Goldie Nikkor 135mm f/2 AF DC.
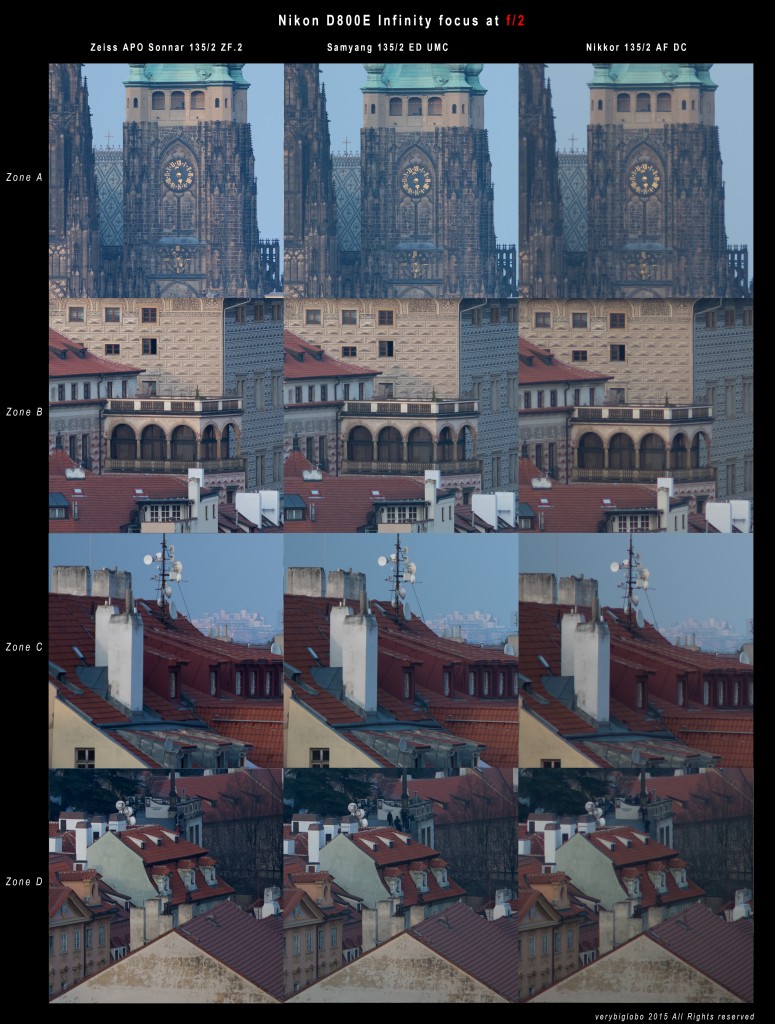
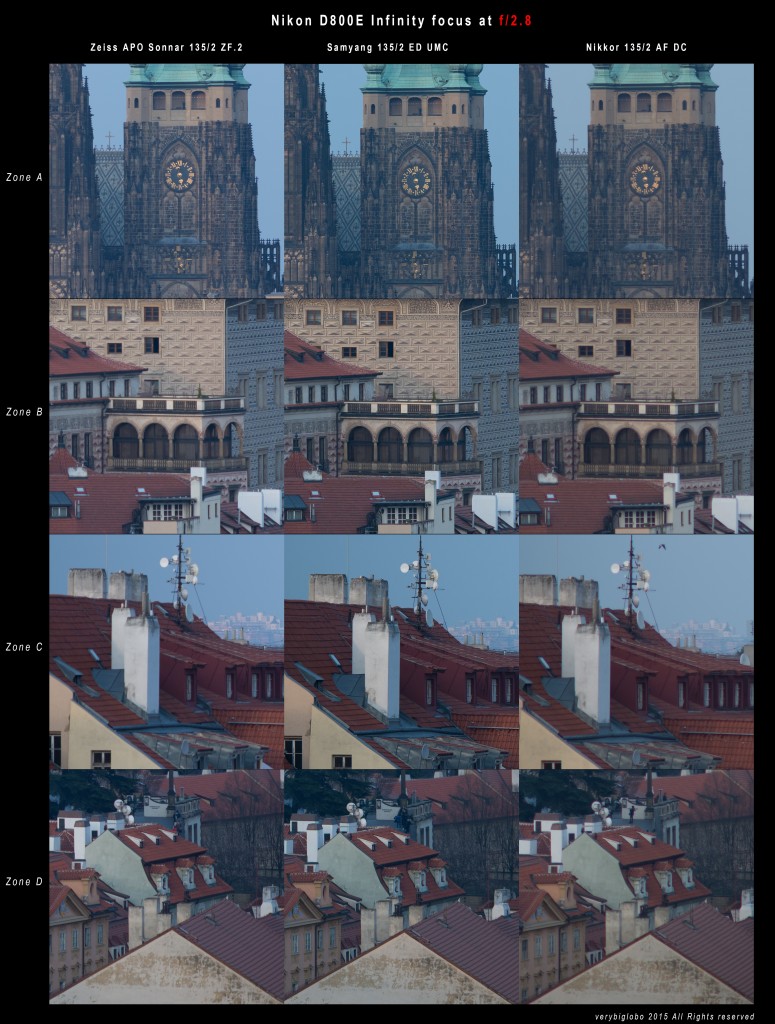
All tests were performed using Nikon D800E (Studio tripod, laser aligning, professional target, even permanent illumination etc.)
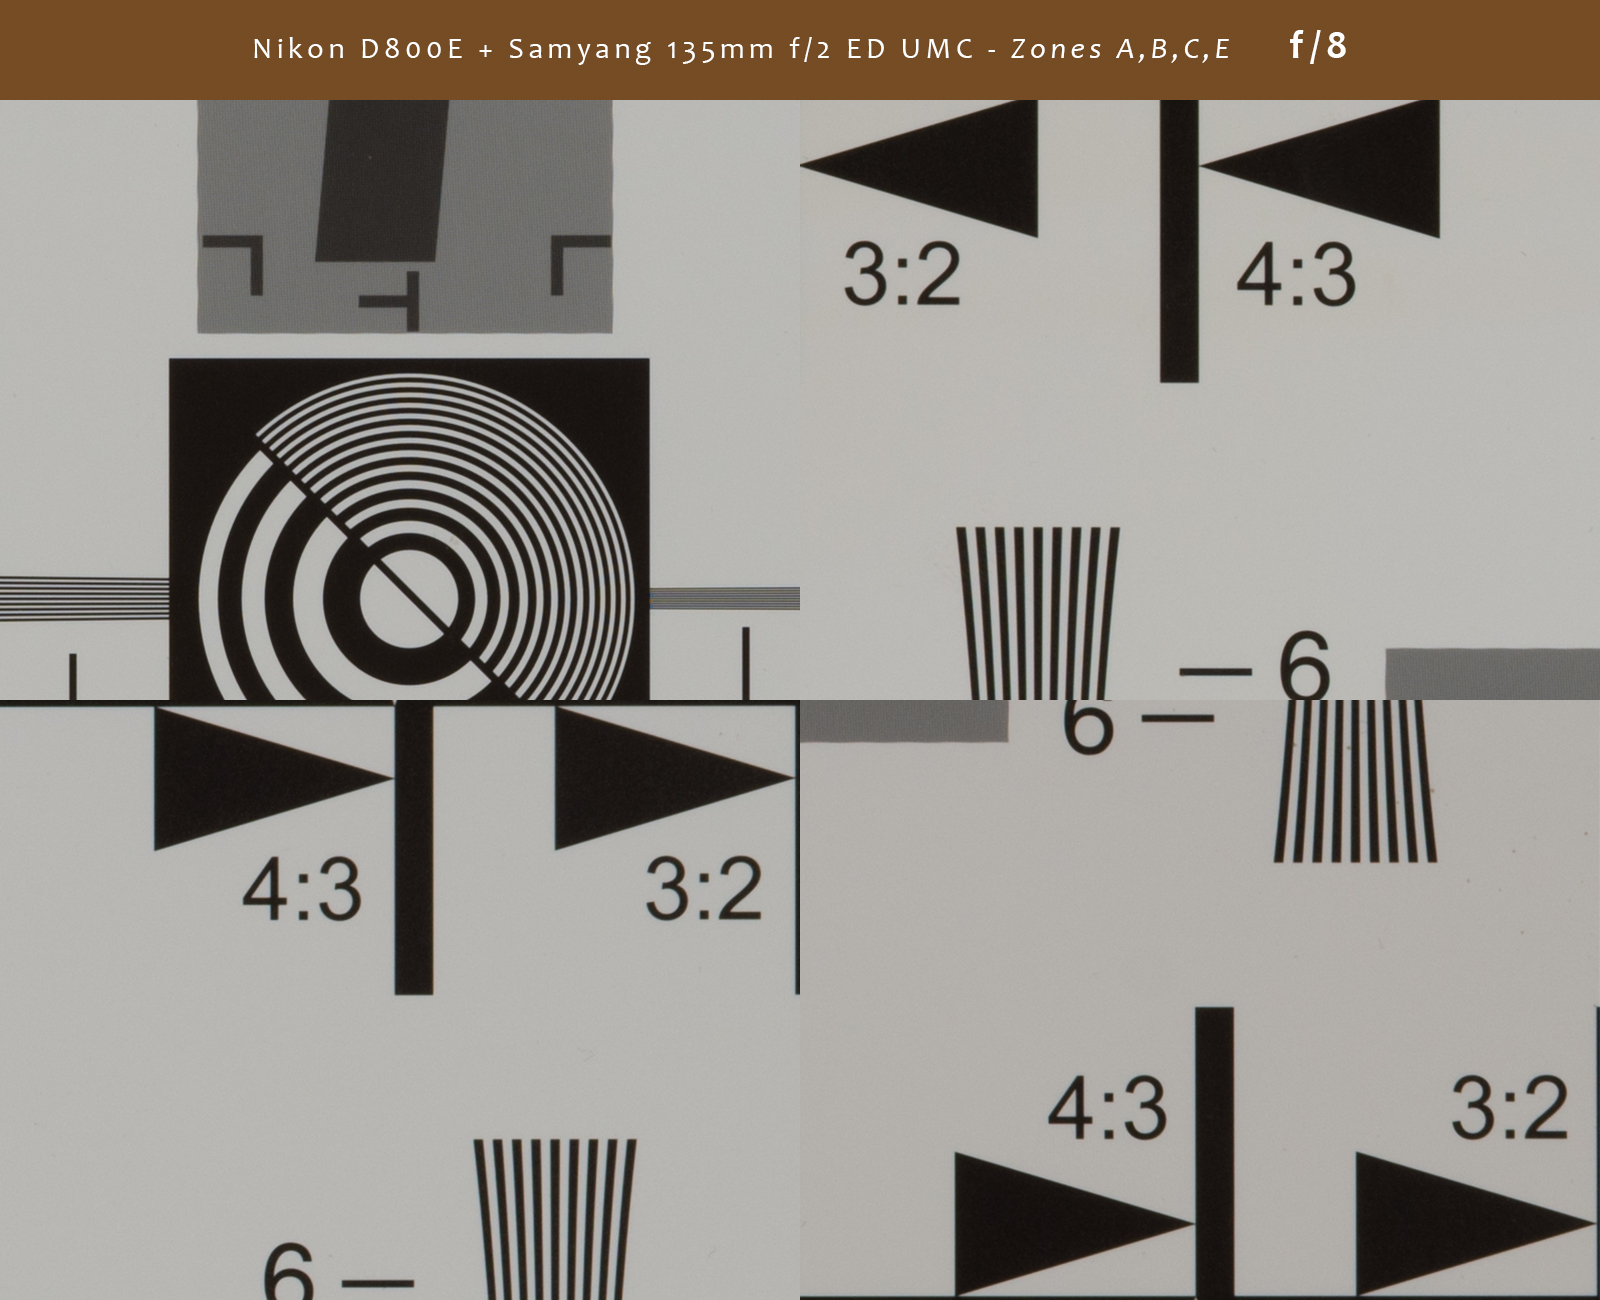
Following comparison zone crops are related to the same zones listed above, but I am posting it here once more, so that you don’t have to scroll up and down.
![Zones]()
To use our slider comparison tool, click and hold with cursor on the circle with arrows in the middle of the image and move it left or right to reveal image bellow. Color bars on the top with lens name and tested aperture, as well with zones listed from left to right and from top to bottom, should help you in orientation.
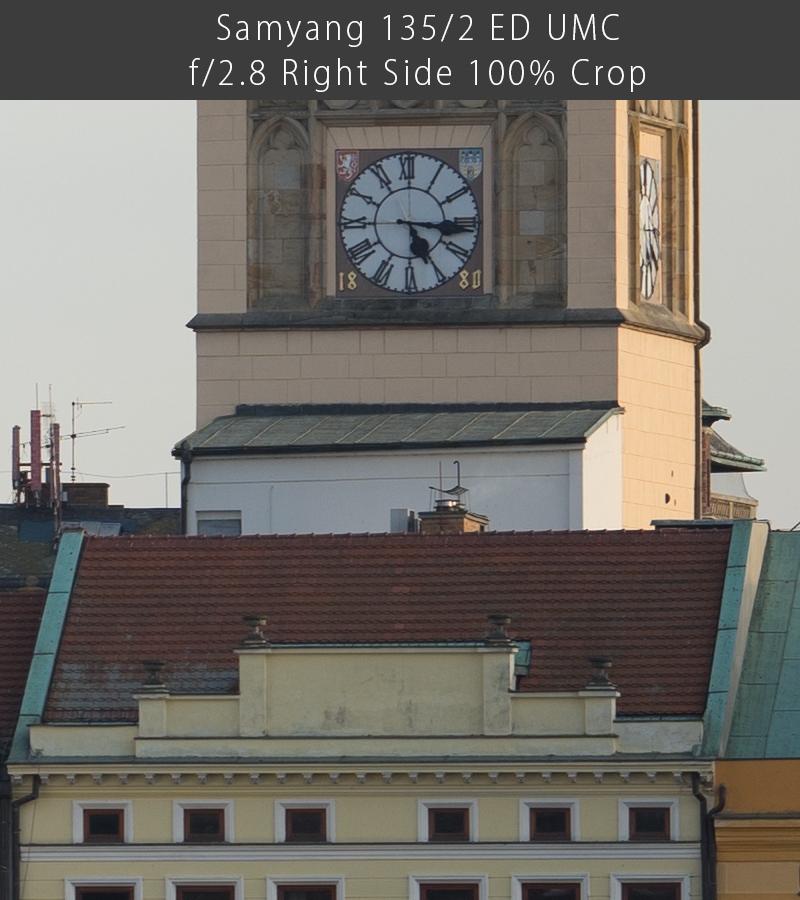
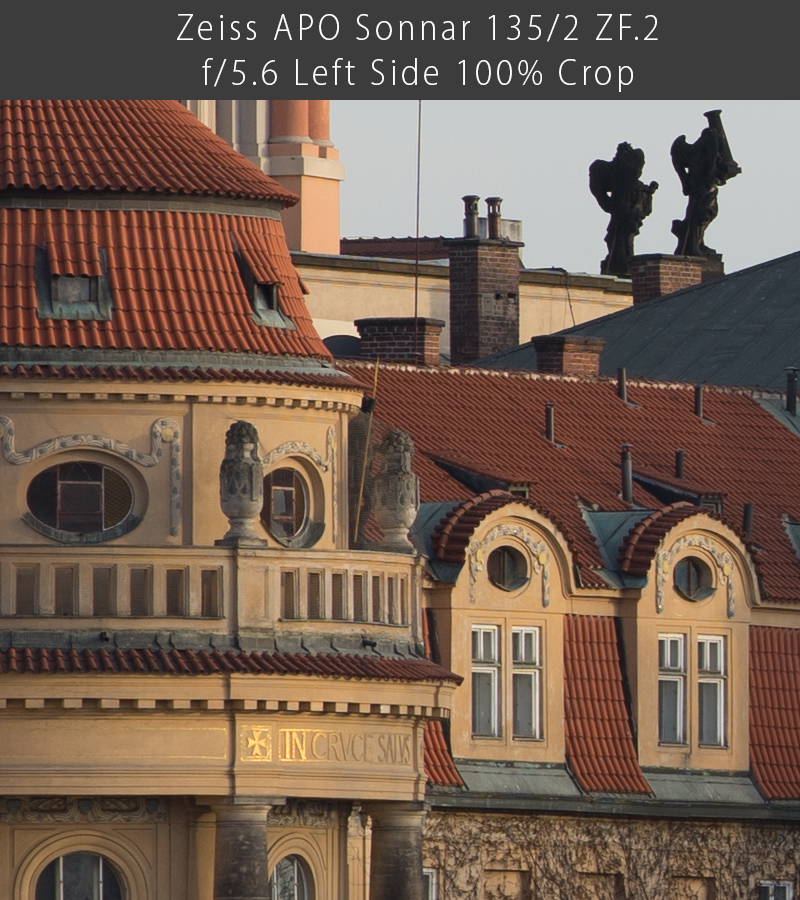
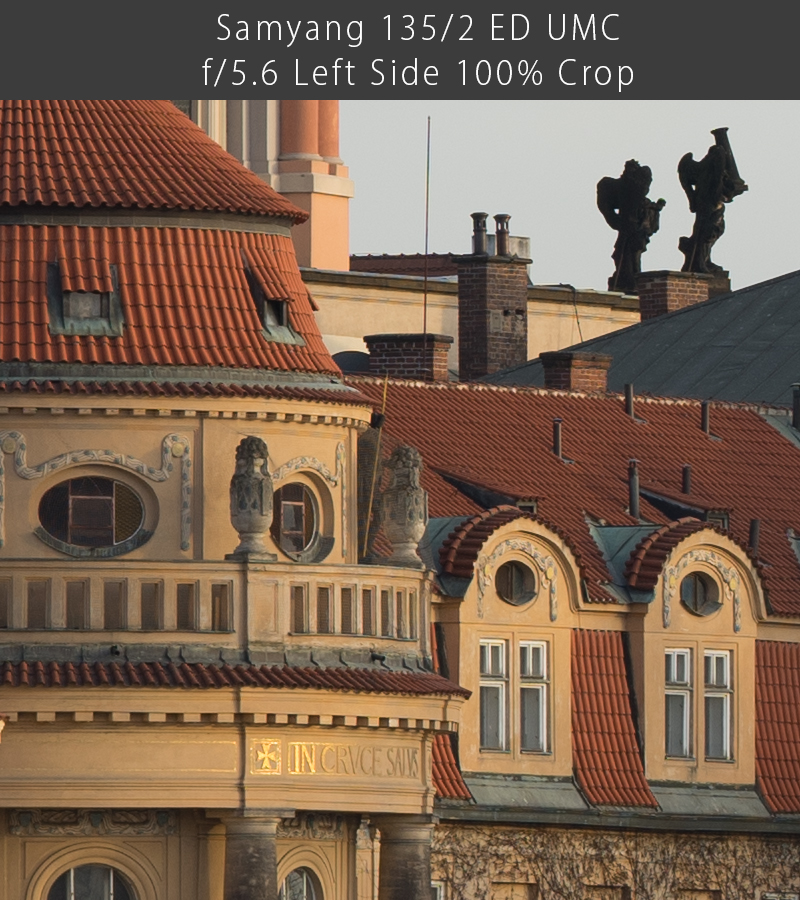
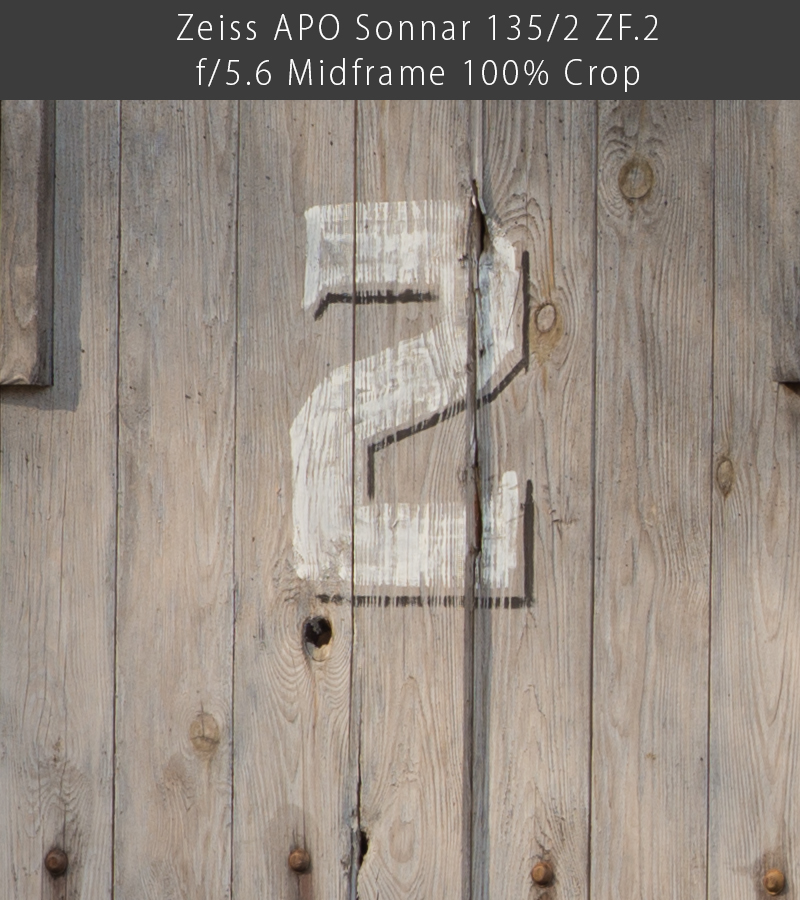
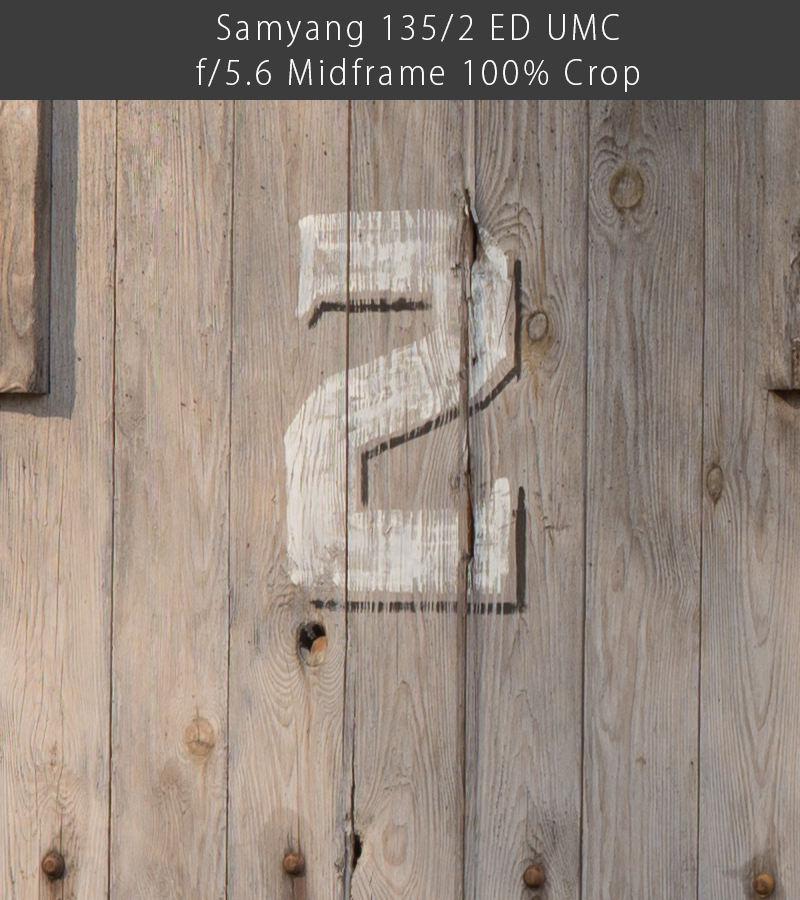
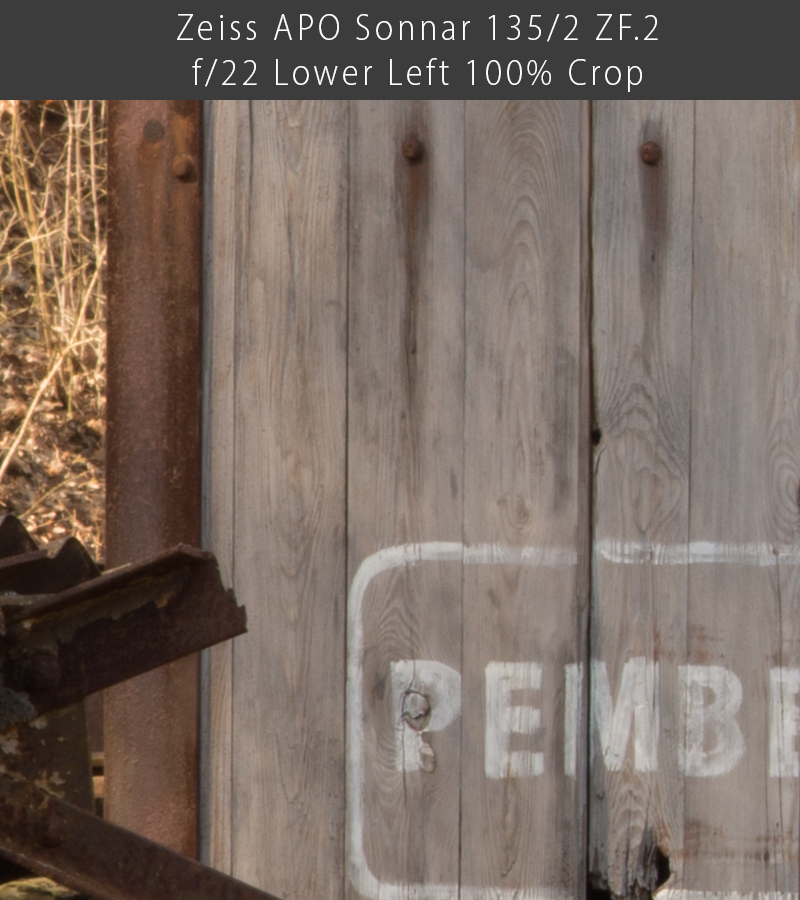
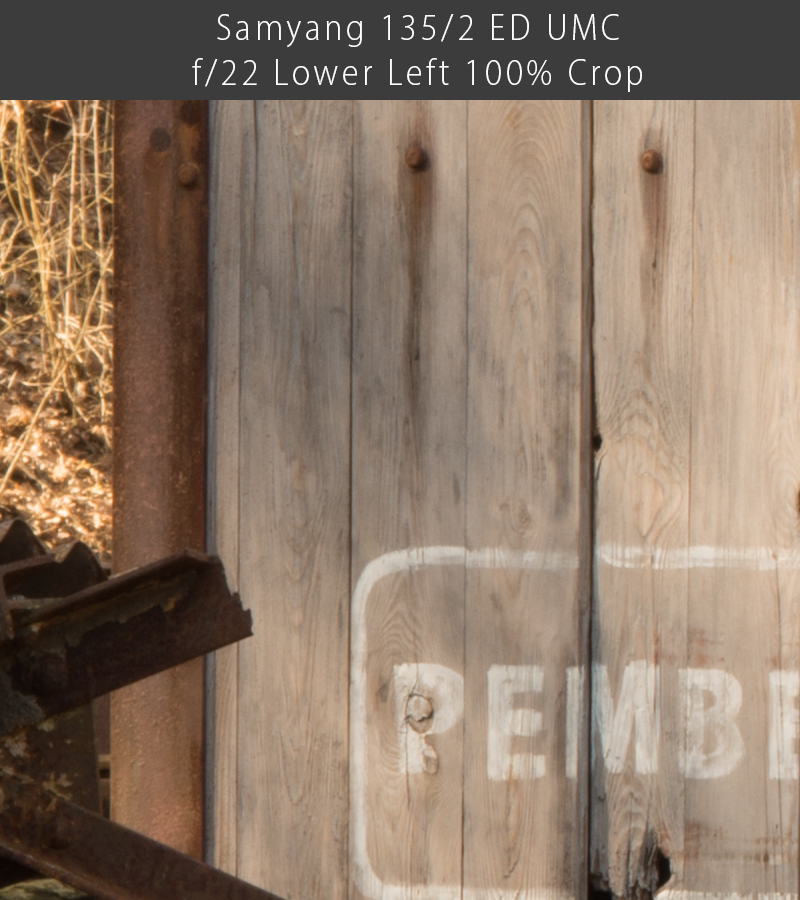
1. Zeiss APO Sonnar 135mm f/2 ZF.2 vs Samyang 135mm f/2 ED UMC ZF.2
f/2
f/2.8
f/4
f/8
In this Test chart comparison, shot from a close distance of about 1.5m, Zeiss is winner at all apertures. But in real life tests at medium and long distances, Samyang often surpassed Zeiss in center sharpness. Different focus plane optimization?
Beside differences in sharpness, you might notice different rendering of white/gray color. While Zeiss is neutral, Samyang has quite strong shift toward warm tones. This proved to be true in a real life as you will see in the following parts of the review – difference is quite significant in that regard.
Finally, while aligning test chart I noticed that Samyang has somewhat wider FOV than Zeiss and Nikkor.
If you want to see original size files, they are available on my Flickr Service Albums:
Zeiss
Samyang
But don’t be fooled, Samyang still performs well wide open when compared with older Nikkor e.g.
And I am not talking about lack of CA, we will come to this later…
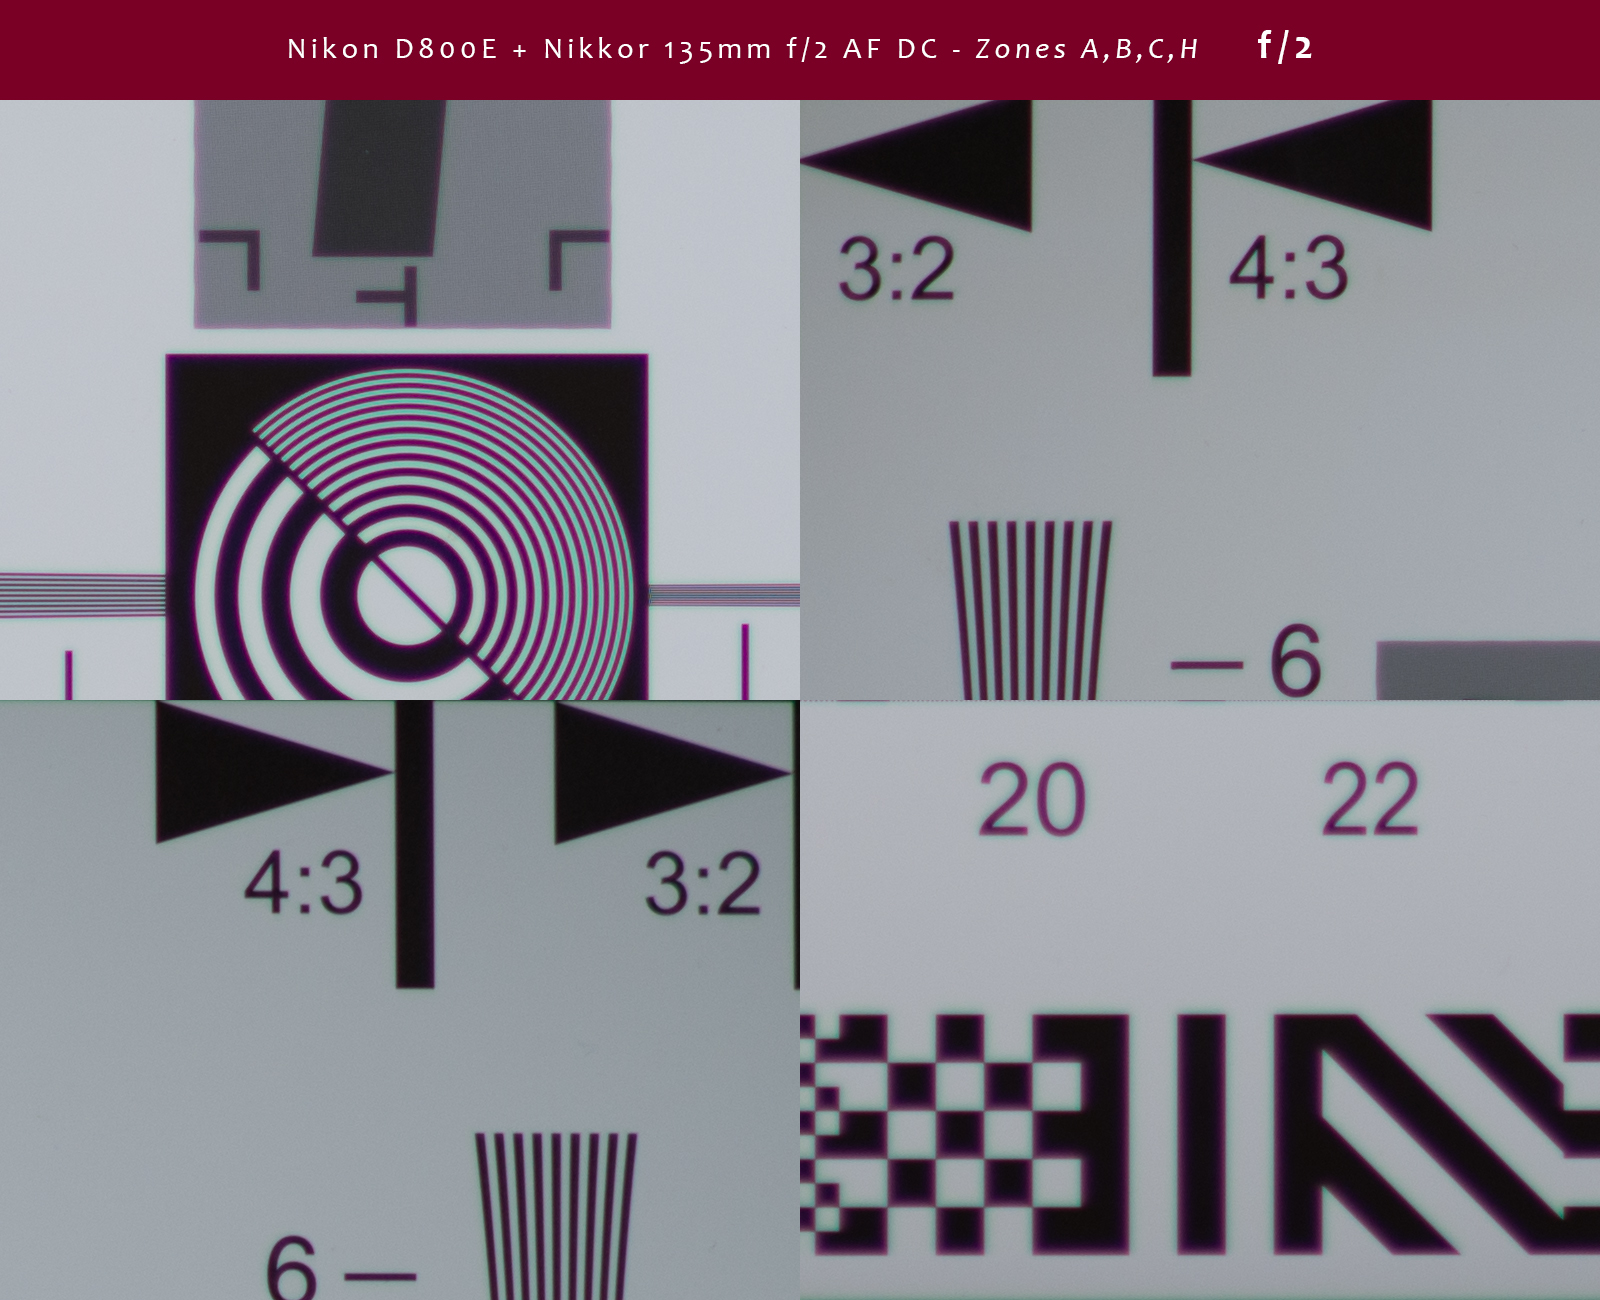
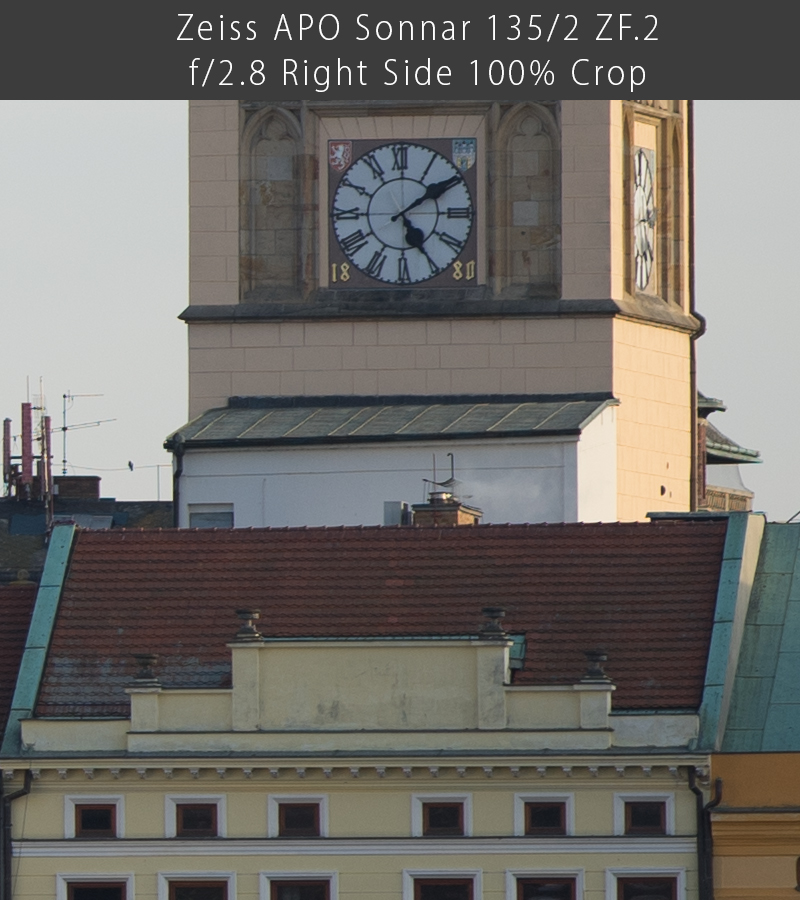
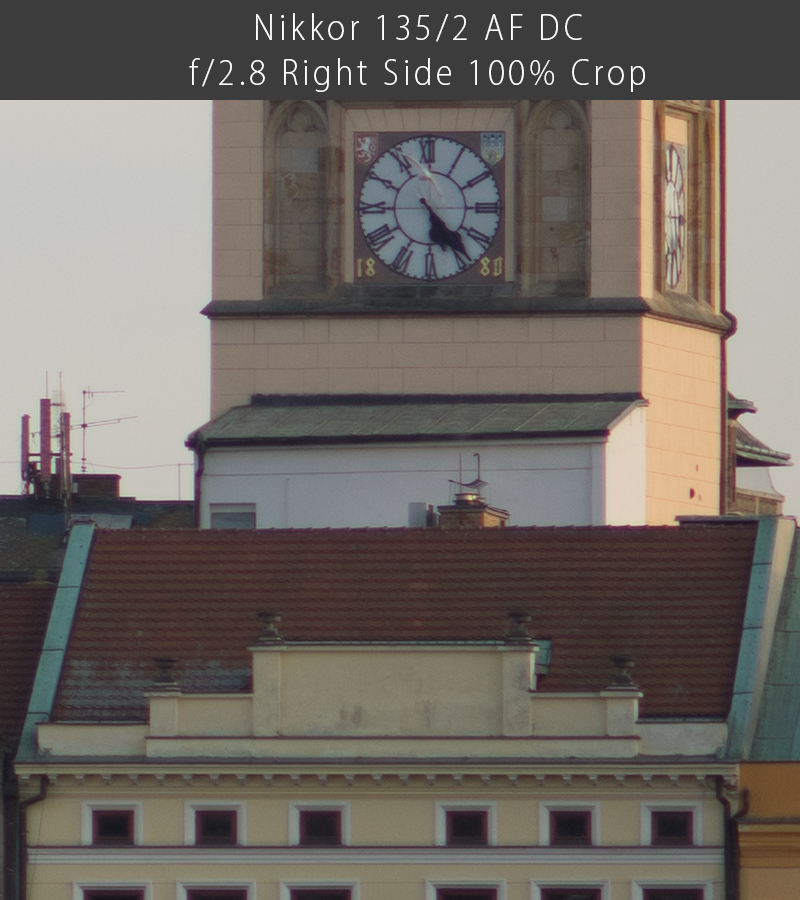
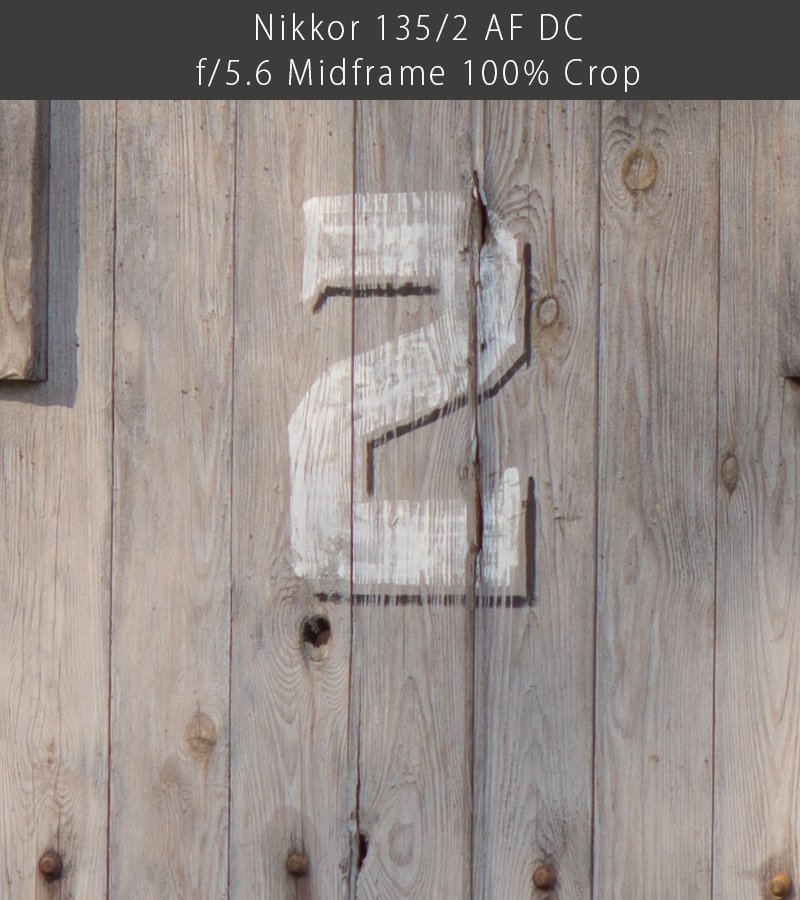
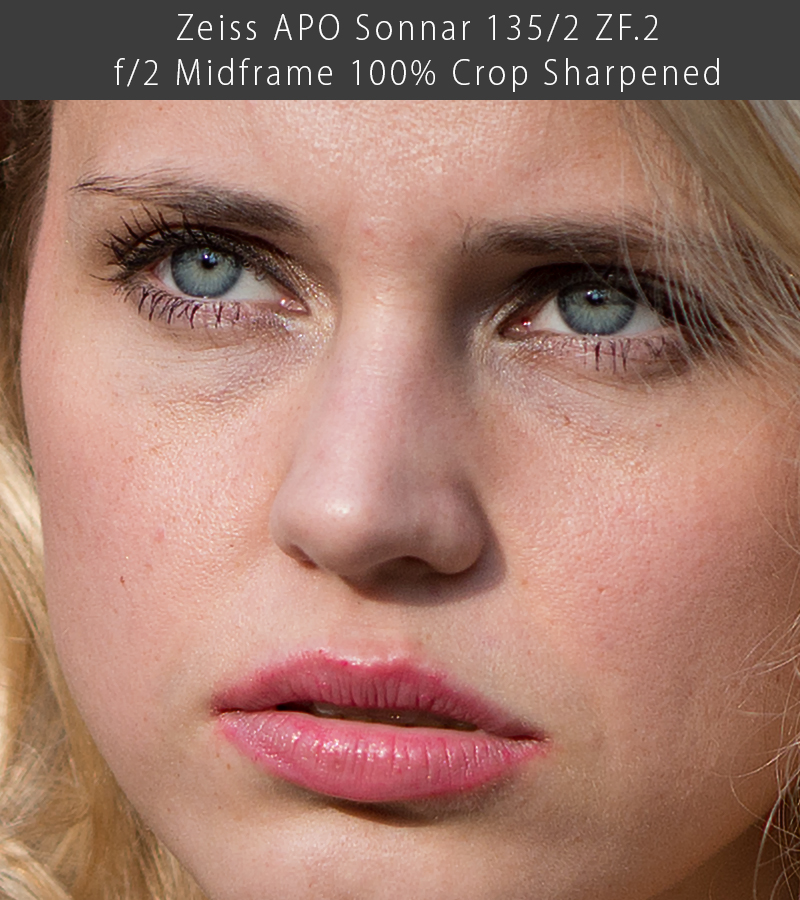
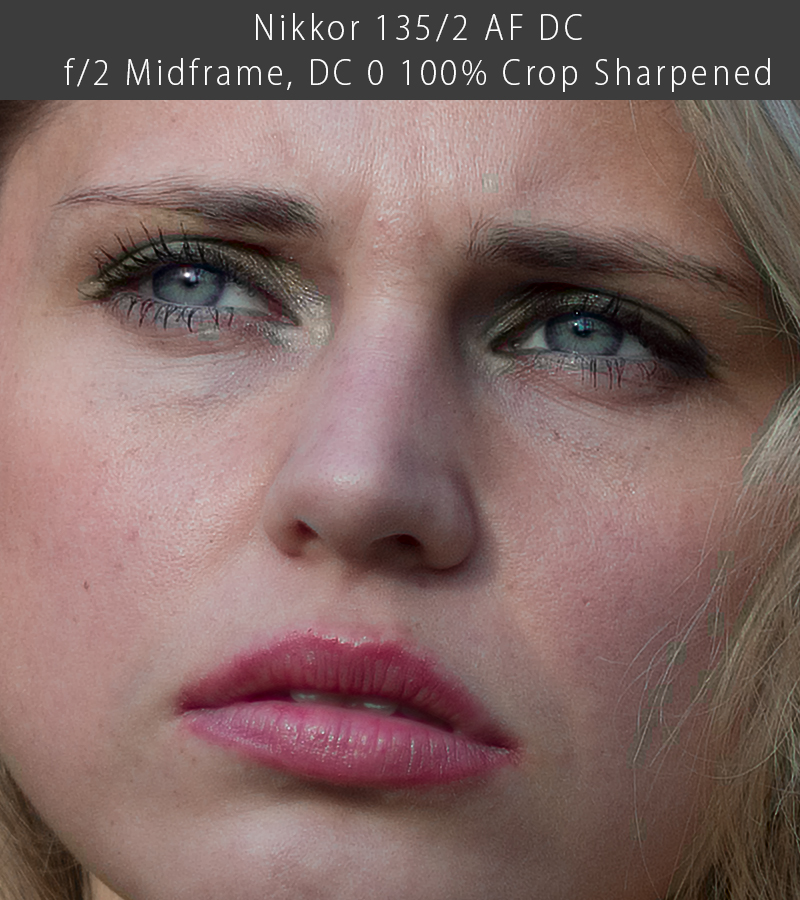
2. Zeiss APO Sonnar 135mm f/2 ZF.2 vs Nikkor 135mm f/2 AF DC (DC set to neutral)
f/2
f/2.8
f/4
f/8
You can find original size Nikkor files by clicking here.
There is no doubt that Zeiss APO Sonnar in this studio test is a clear winner. However even if I would stop review here, I can still see many reasons to go with other two lenses, because their performance is still very good. I am not worried about Samyang center sharpness result here, because in a real life situations it often surpassed Zeiss in the center, but extreme corners could be a tad better. On the other hand, if you look carefully to those crops, you might notice a very tinny bit of persisting purple fringing in Zeiss APO Sonnar samples, while Samyang is absolutely CA free in my eyes, despite lacking fancy APO sign.
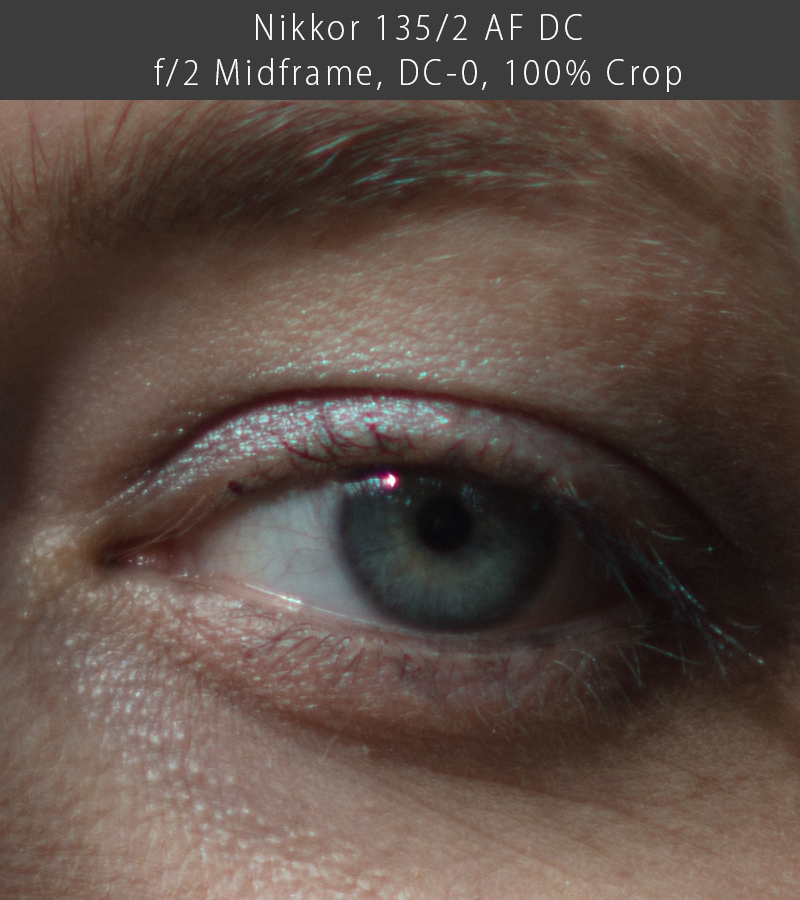
Nikkor despite its age is still capable of excellent results, beside very strong purple fringing wide open. Stopped down to just f/2.8 cures most of it and Nikkors power is hidden in DC feature, allowing it to create very smooth foreground/background blurriness and dreamy softness on the subject at the same time.
But yeah… Zeiss wins this one!
Please help support this page and upcoming reviews and buy through affiliate links, with no extra cost for you:
Buy on BHPhoto: 135mm f/2 Apo Sonnar T* ZF.2 Lens for Nikon F Mount
Buy on Adorama: 135mm f/2 Apo Sonnar T* ZF.2 Lens for Nikon F Mount
Buy on Amazon: 135mm f/2 Apo Sonnar T* ZF.2 Lens for Nikon F Mount BEST OFFER!
To help this page survive, your donation will be highly appreciated.
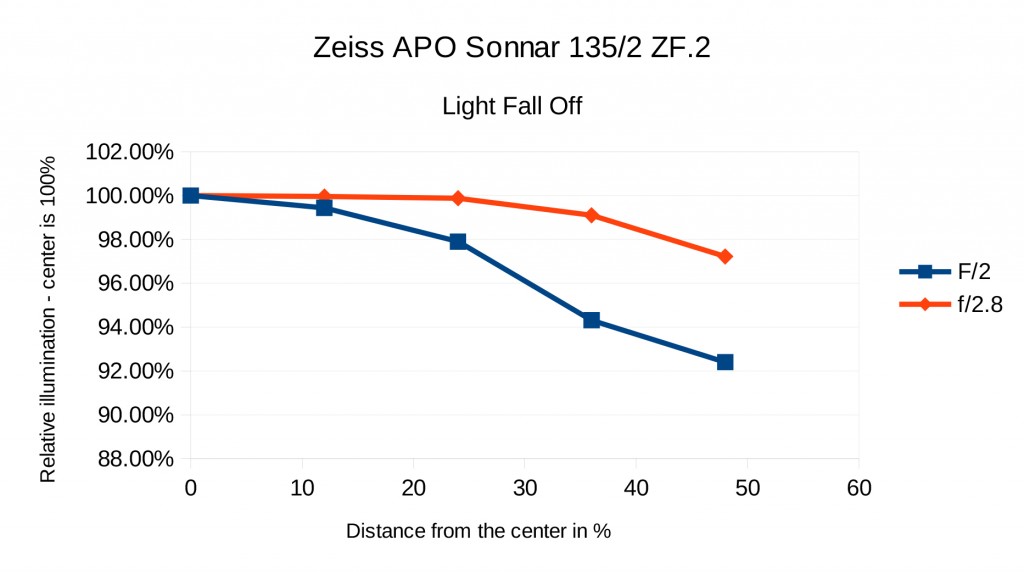
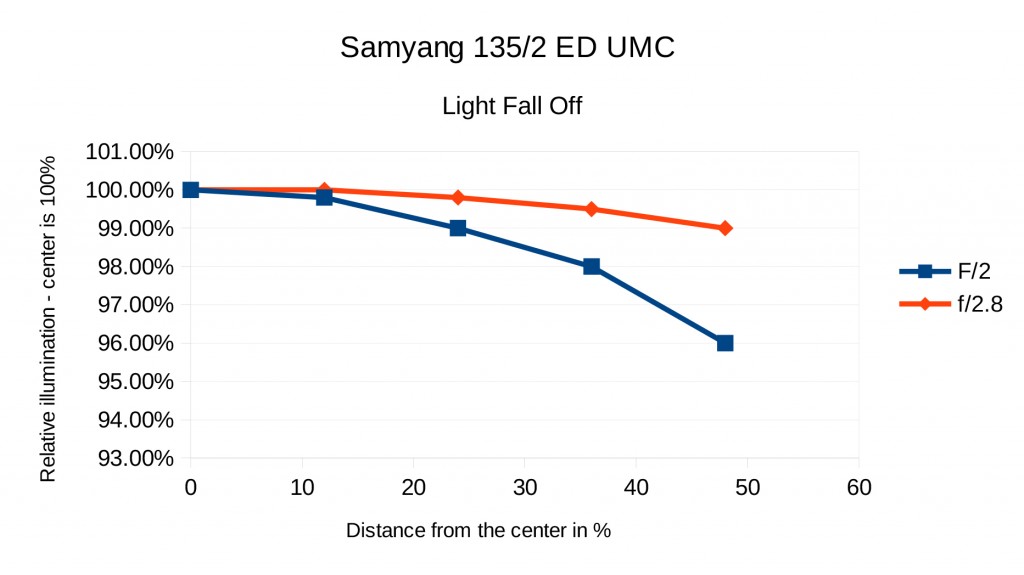
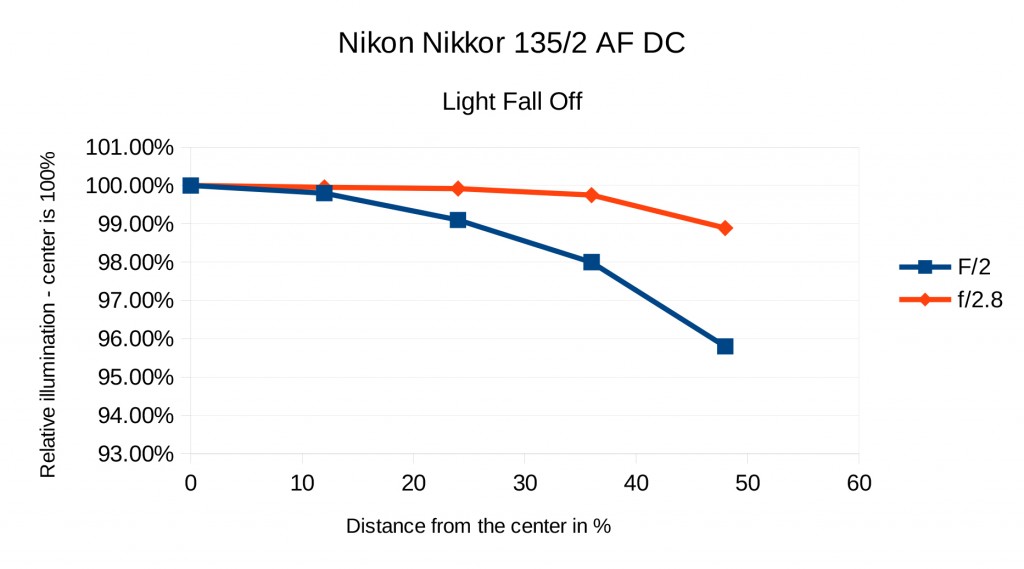
Vignetting:
Vignetting in particular is most notable on Zeiss APO Sonnar 135/2 wide open. Normally I would trust Zeiss data and wouldn’t bother to repeat tests, but in order to compare it with other two lenses, I simply had to make equal conditions.
Following graphs show relative fall off toward edges for all three lenses as we measured it here.
![Zeiss-Fall-Off-1]()
![Samyang-Fall-Off-1]()
![Nikon-Fall-Off-1]()
Zeiss shows most pronounced vignetting wide open, while Nikkor and Samyang are almost equal in that respect. I have to say that I noticed vignetting on Zeiss in a real life (shooting mostly wide open) and while it is certainly not a big problem, it could be less pronounced. Stopping lens to f/2.8 already get rid most of it, while at f/4 and smaller, vignetting is virtually non-existent.
While Samyang performed very well in terms of vignetting, it was consistently “darkest” lens of the three. I found Nikkor to be the brightest lens with a T-number of around 2.1, Zeiss is lagging behind with T-number around 2.2, but Samyang is significantly slower at T-stop approaching 2.4. (Samyang claims T number to be 2.2)
If you are not familiar with f stops and T numbers, let me put it this way – if Nikkor let you shot at f/2 and 1/250s, Zeiss will need to slow down to 1/200s, While Samyang will need to go to 1/160s approx. assuming same aperture and ISO settings (for approx. same exposure values).
This is bigger issue than vignetting IMHO, but still not a deal breaker.
Field Of View:
On paper, all three lenses should have similar FOV (Nikkor 18°, Zeiss 18.7°and Samyang 18.8°). But on paper, we should trust our government too.
Thing is that either something with my Samyang lens is very wrong, or it lost some of its angle tightness. While testing all three lenses I simply realized that Samyang is quite a bit wider than Nikkor, and Nikkor is somewhat wider than Zeiss.
Samyang and Zeiss are proud of their minimum focusing distance of just 0.8m, Nikkor is ashamed with 30cm longer one. (Rare case, where shorter is better). But when the field of view is wider, closer MFD isn’t always benefit for possible tighter framing.
Thinking how to best show you framing differences I decided to use real head model, because at the end, those are mainly portrait lenses.
Unfortunately it was 3 a.m. when I started to work on it and all my models were happily sleeping. I could use some of my lovely dolls, but none of them has size of the head of an adult (well I have one doll with such a large head, but I am afraid that it is faulty and will blow the air…) so I needed to find different solution.
Finally, I decided to make selfie. Who can better show you framing differences, than Verybiglobo in person, right?
So here I am in a T-shirt that we all use in our family when we support our son Max on his tennis matches. (I mean we all have our own T-shirts, not that we share this particular one).
![Verybiglobo-model]()
I was a bit tired, so please take my apologize for a little grumpy face expression.
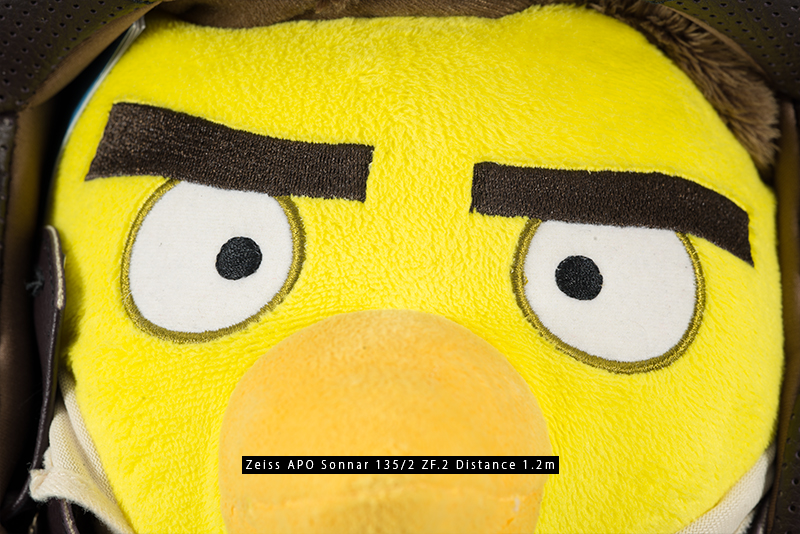
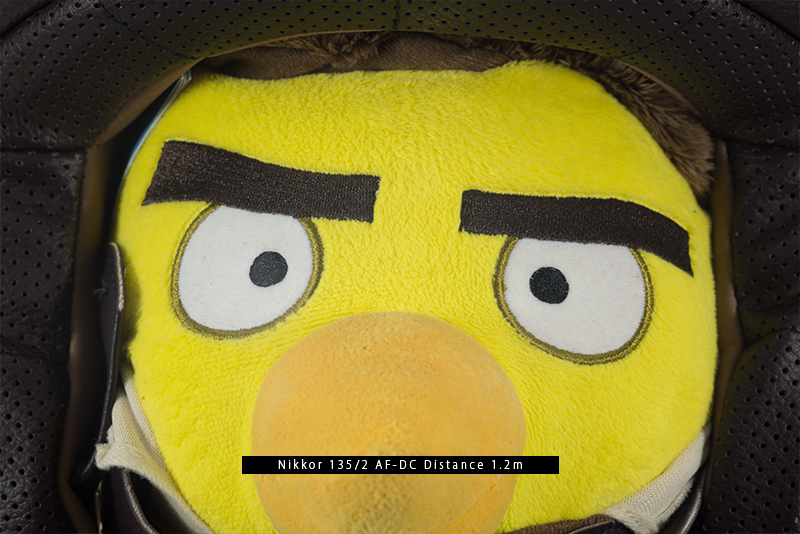
This is framing that I got with Zeiss from approx. 2m distance. Because Nikon can go closest to 1.1m in order to focus properly, I moved the camera to around 1.2m and compared all three lenses.
![Zeiss_APO_Sonnar_13520_FOV]()
![Nikkor_AF_DC_13520_FOV]()
![Samyang_ED_UMC_13520_FOV]()
Ups! As you can see, obviously 18° is not always 18°, similar as 20cm is not always 20cm.
I don’t want to blame Samyang though, what if Zeiss and Nikkor are simply longer?
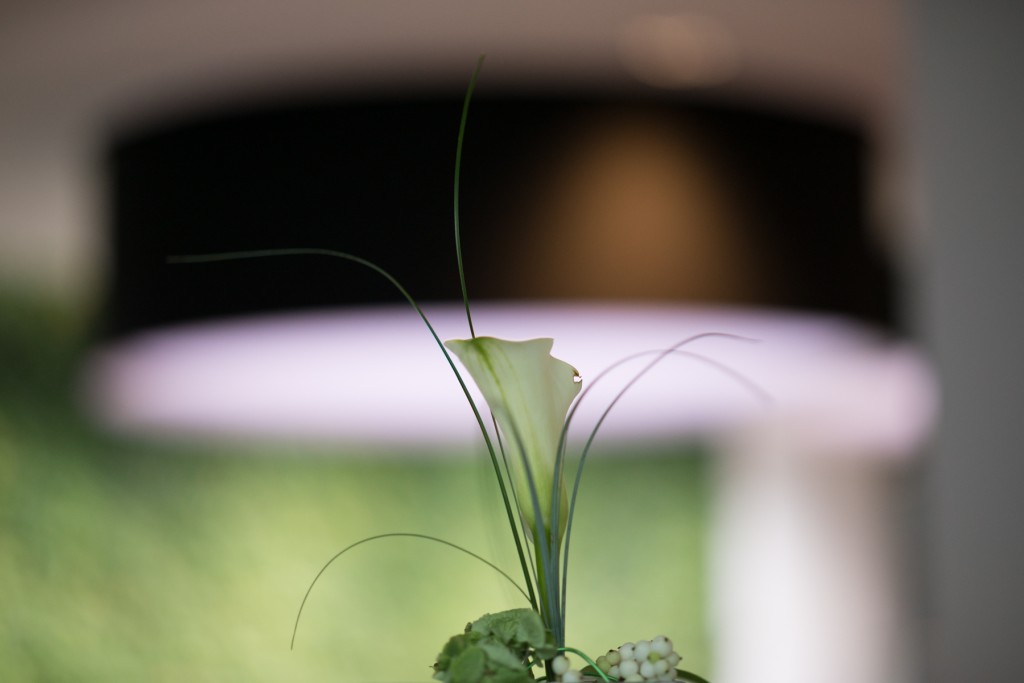
In any case, while for portrait it is not a big deal to have super tight close-up, if you consider to use one of those lenses for smaller subjects, such as flower e.g., Zeiss will certainly let you get closer.
Mr. Hubert Nasse was kind to respond on this subject too and here is his statement:
The field size of the Samyang at close distance is larger, because in this design the focal length decreases a lot with focusing to shorter distance.
Color Rendition:
During testing I noticed another specific of Samyang lens. Its color rendering is considerably warmer than Zeiss, but Zeiss is still warmer than Nikkor.
In all respect to Zeiss famous colors and 3D Pop, I found old Nikon to deliver closest to reality and most pleasing colors to my eye.
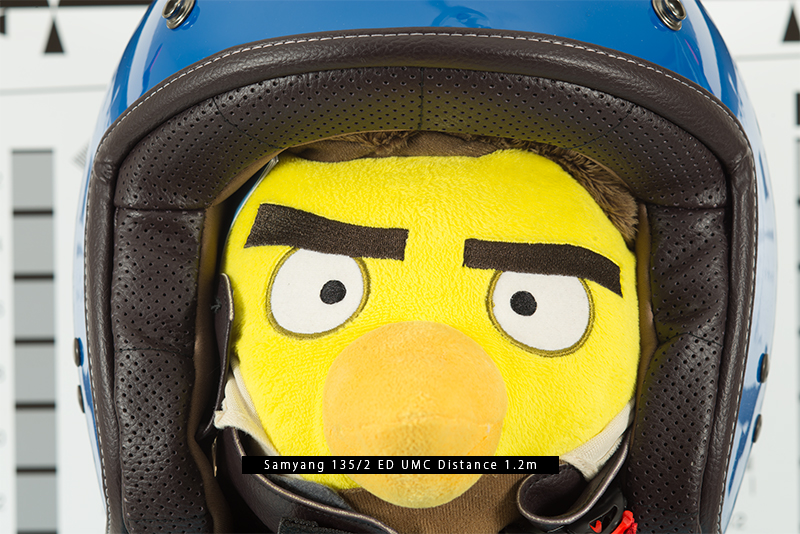
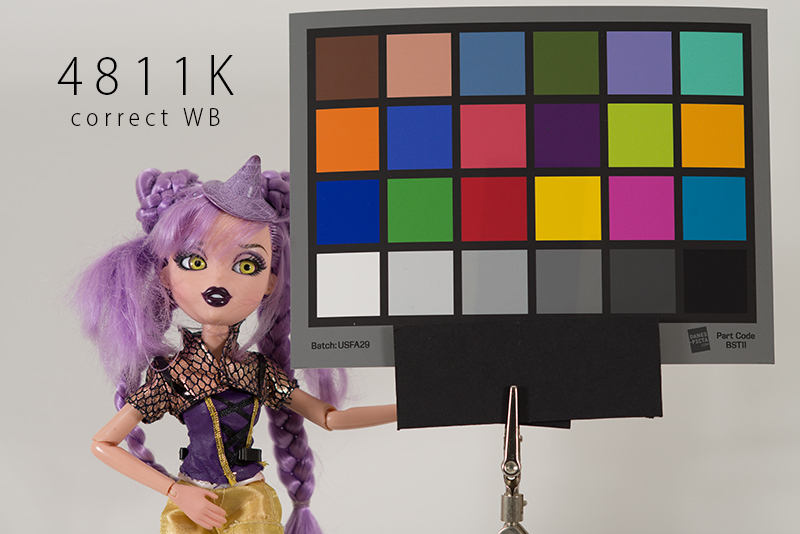
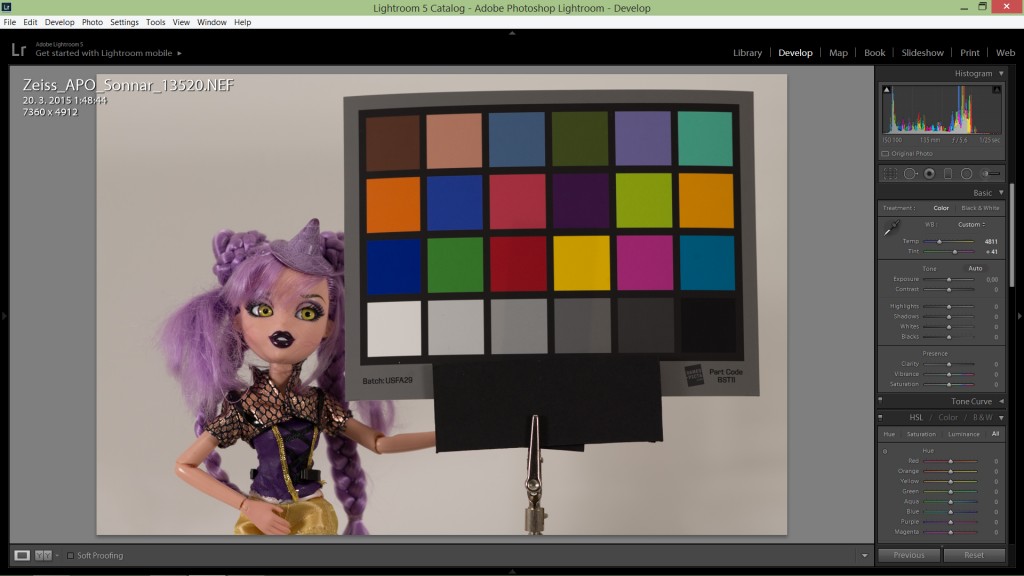
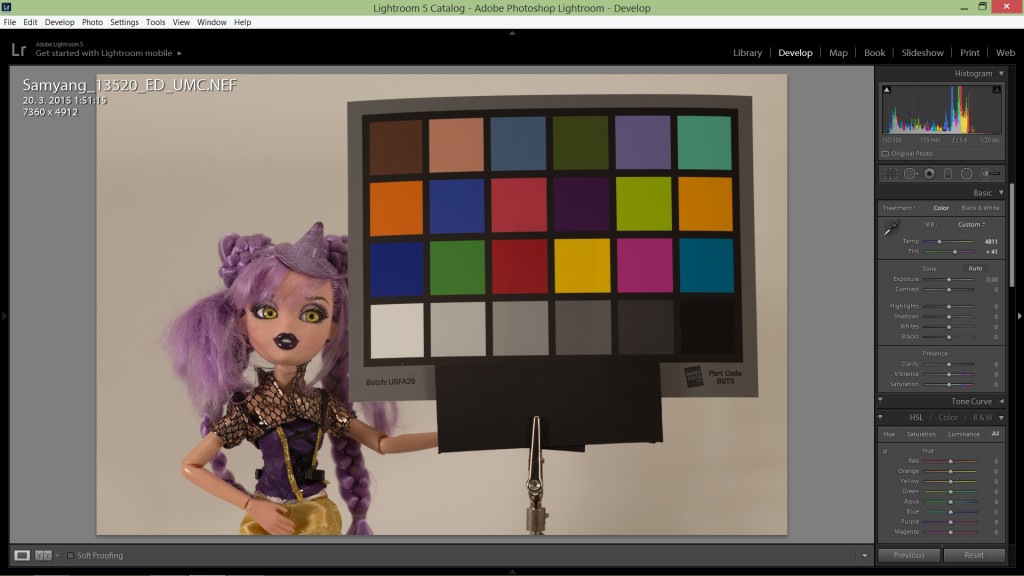
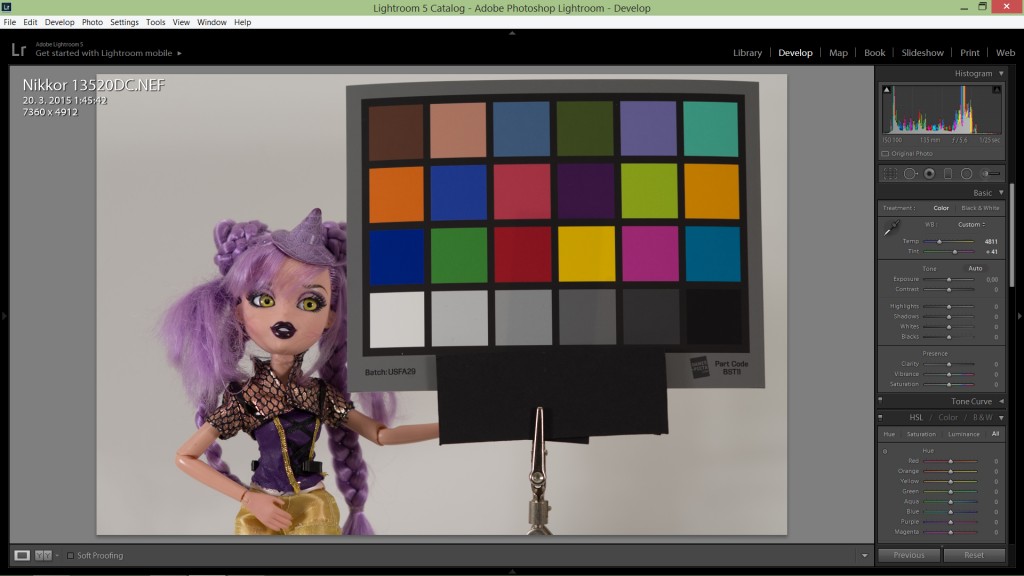
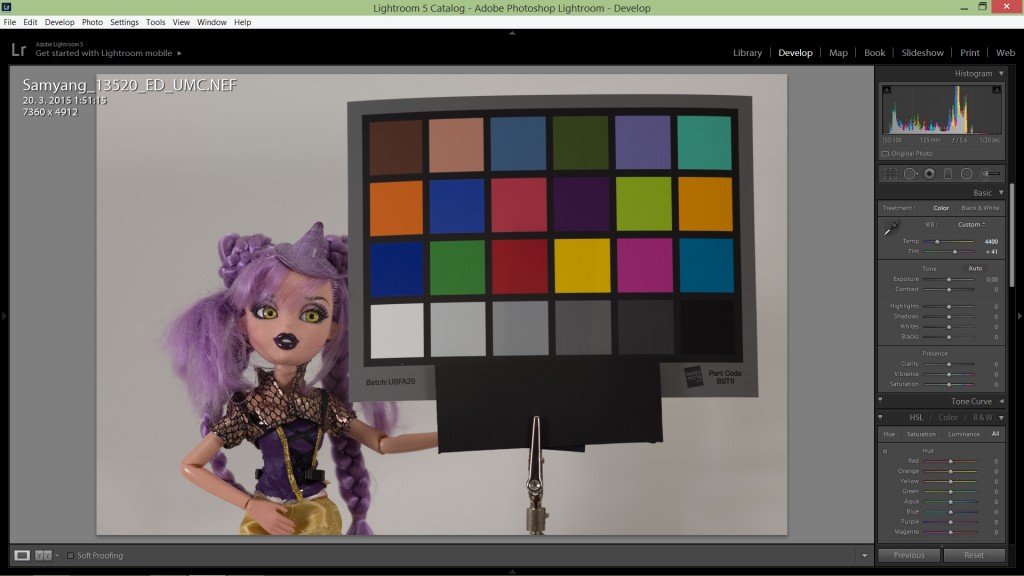
Here is a comparison between the three with a small color chart. My Minolta color meter showed 4811 K for the following scene:
![Zeiss_APO_Sonnar_13520_Color-Test-4411K_Correct_WB]()
When set to 4811K in LR 5.7 following results are obtained…
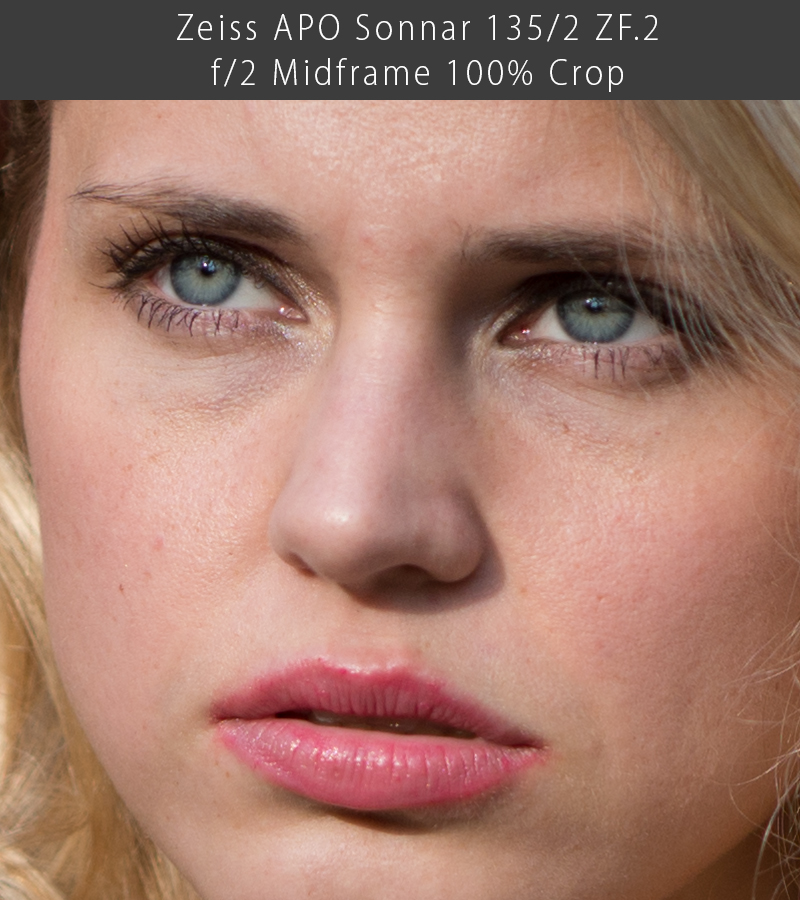
Zeiss APO Sonnar 135/2
![Zeiss_4811]()
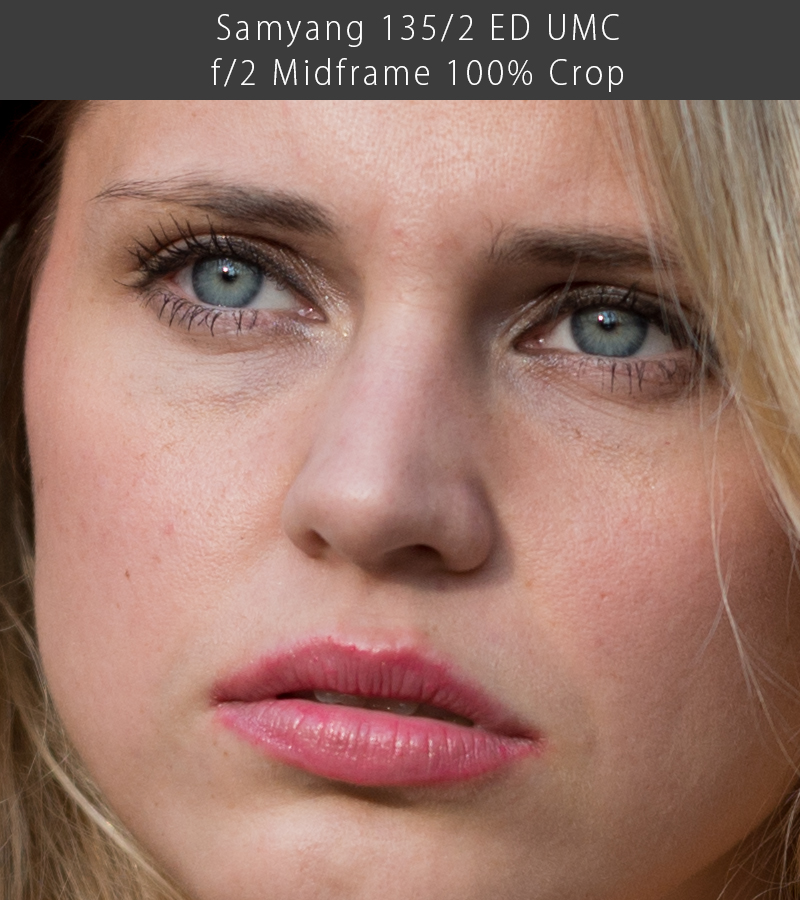
Samyang 135/2
![Samyang_4811]()
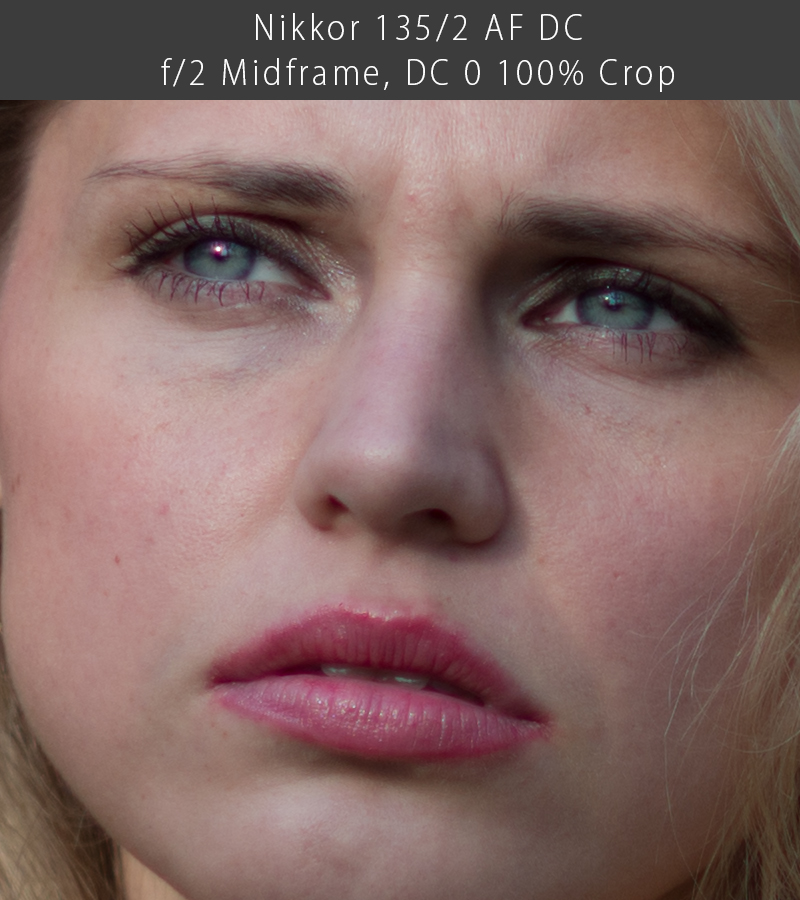
Nikkor 135/2 DC
![Nikkor]()
When WB picker was used on gray square on the chart (third from right), following results were obtained:
Zeiss went to 4650K
![Zeiss-4650]()
Samyang jumped to 4400K
![Samyang-4400]()
And Nikkor was almost there at 4750 K
![Nikkor-4750]()
Strong Samyang shift toward yellow tones was very apparent in the field testing too as you would be able to see later.
CA control:
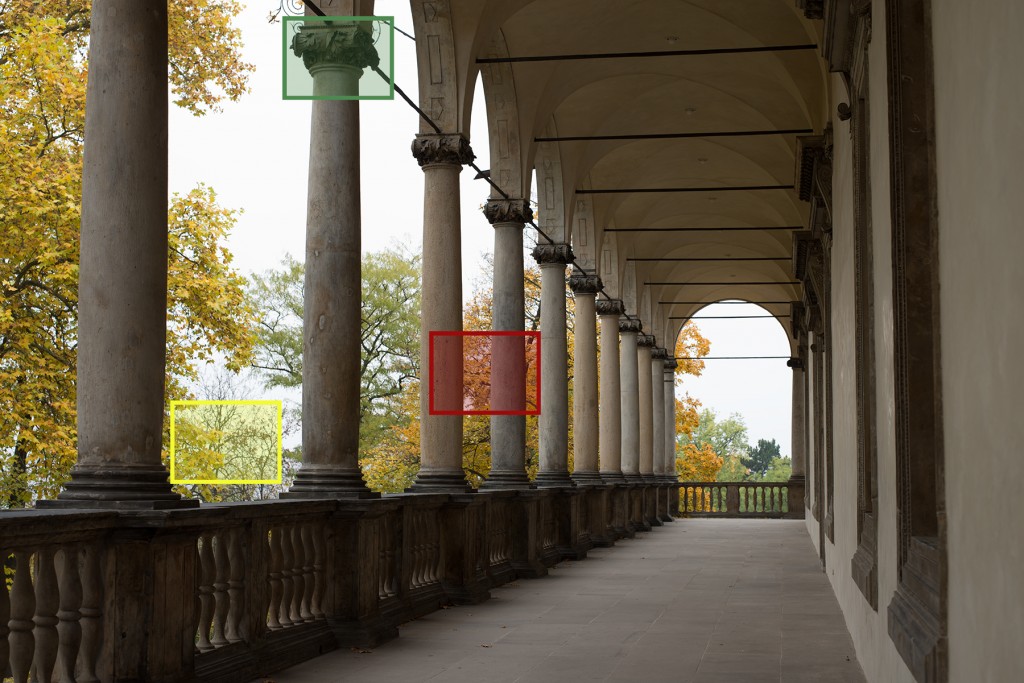
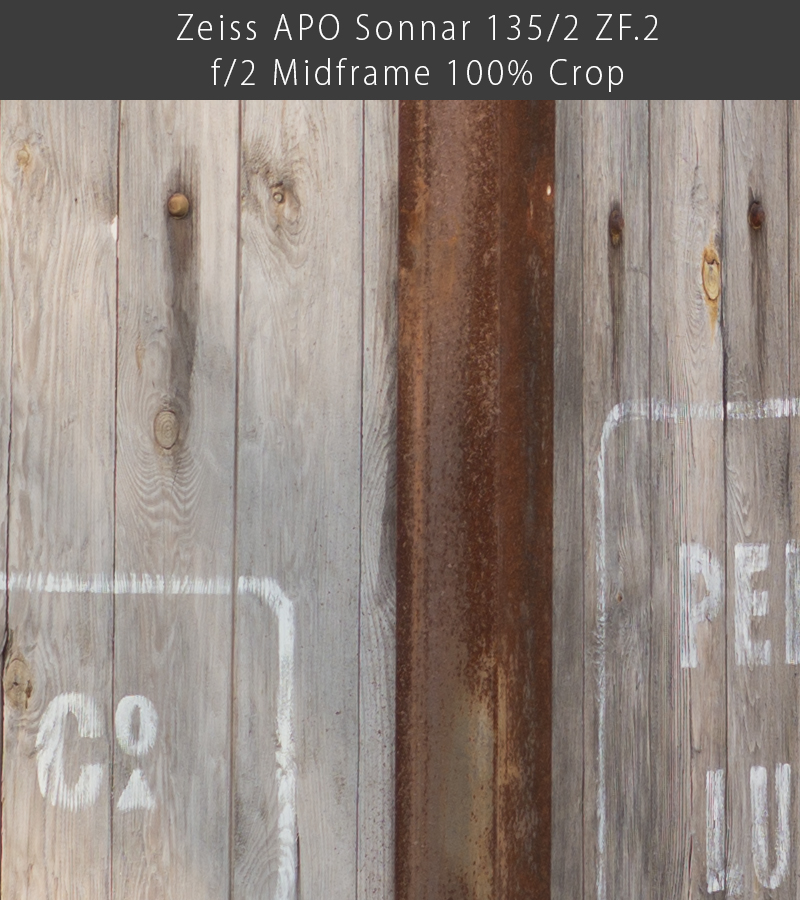
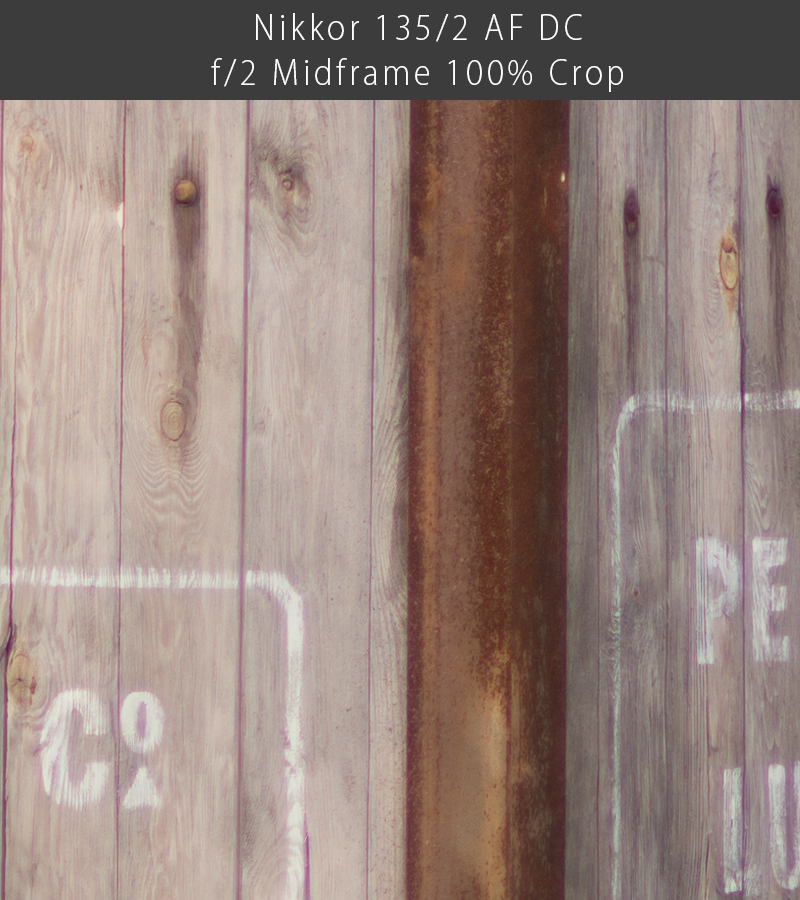
Last test which I would like to show you here is related to CA. Here are 100% crops from small target which serves well the purpose…
![Lens-Target]()
In order to show differences between CA correction I boosted saturation in those shots. This is however black and white target only, so all colors that we can see here, are related to CA.
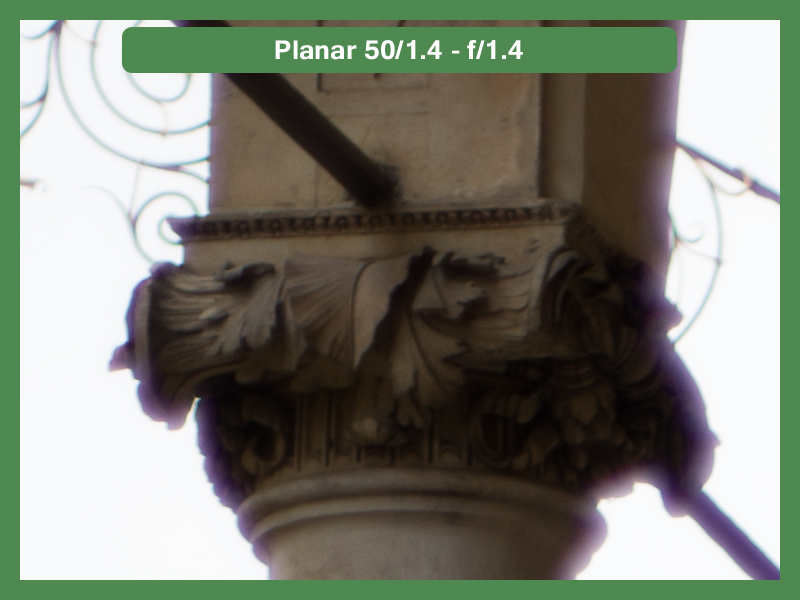
It is clear that Nikkor suffers most from CA, especially wide open. Stopped down to f/4, CA shouldn’t be a field relevant problem any more (with normal saturation setting) except in some most critical situations. While lack of CA should be main selling point of the Zeiss APO design, in reality (and I noticed that in a real life shooting too), lens rendering is not entirely CA free. It shouldn’t be a problem in 99.9% scenarios, but non APO Samyang is in fact slightly better in that regard.
To end this chapter in a positive manner, distortion is virtually non-existent on any of those three lenses.
I think that it was enough of looking at the charts and studio set-ups. In the following chapters we will move outside and test the lenses in most common situations. (Paparazzi etc…)
Please help support this page and upcoming reviews and buy through affiliate links, with no extra cost for you:
Buy on BHPhoto: 135mm f/2 Apo Sonnar T* ZF.2 Lens for Nikon F Mount
Buy on Adorama: 135mm f/2 Apo Sonnar T* ZF.2 Lens for Nikon F Mount
Buy on Amazon: 135mm f/2 Apo Sonnar T* ZF.2 Lens for Nikon F Mount BEST OFFER!
To help this page survive, your donation will be highly appreciated.
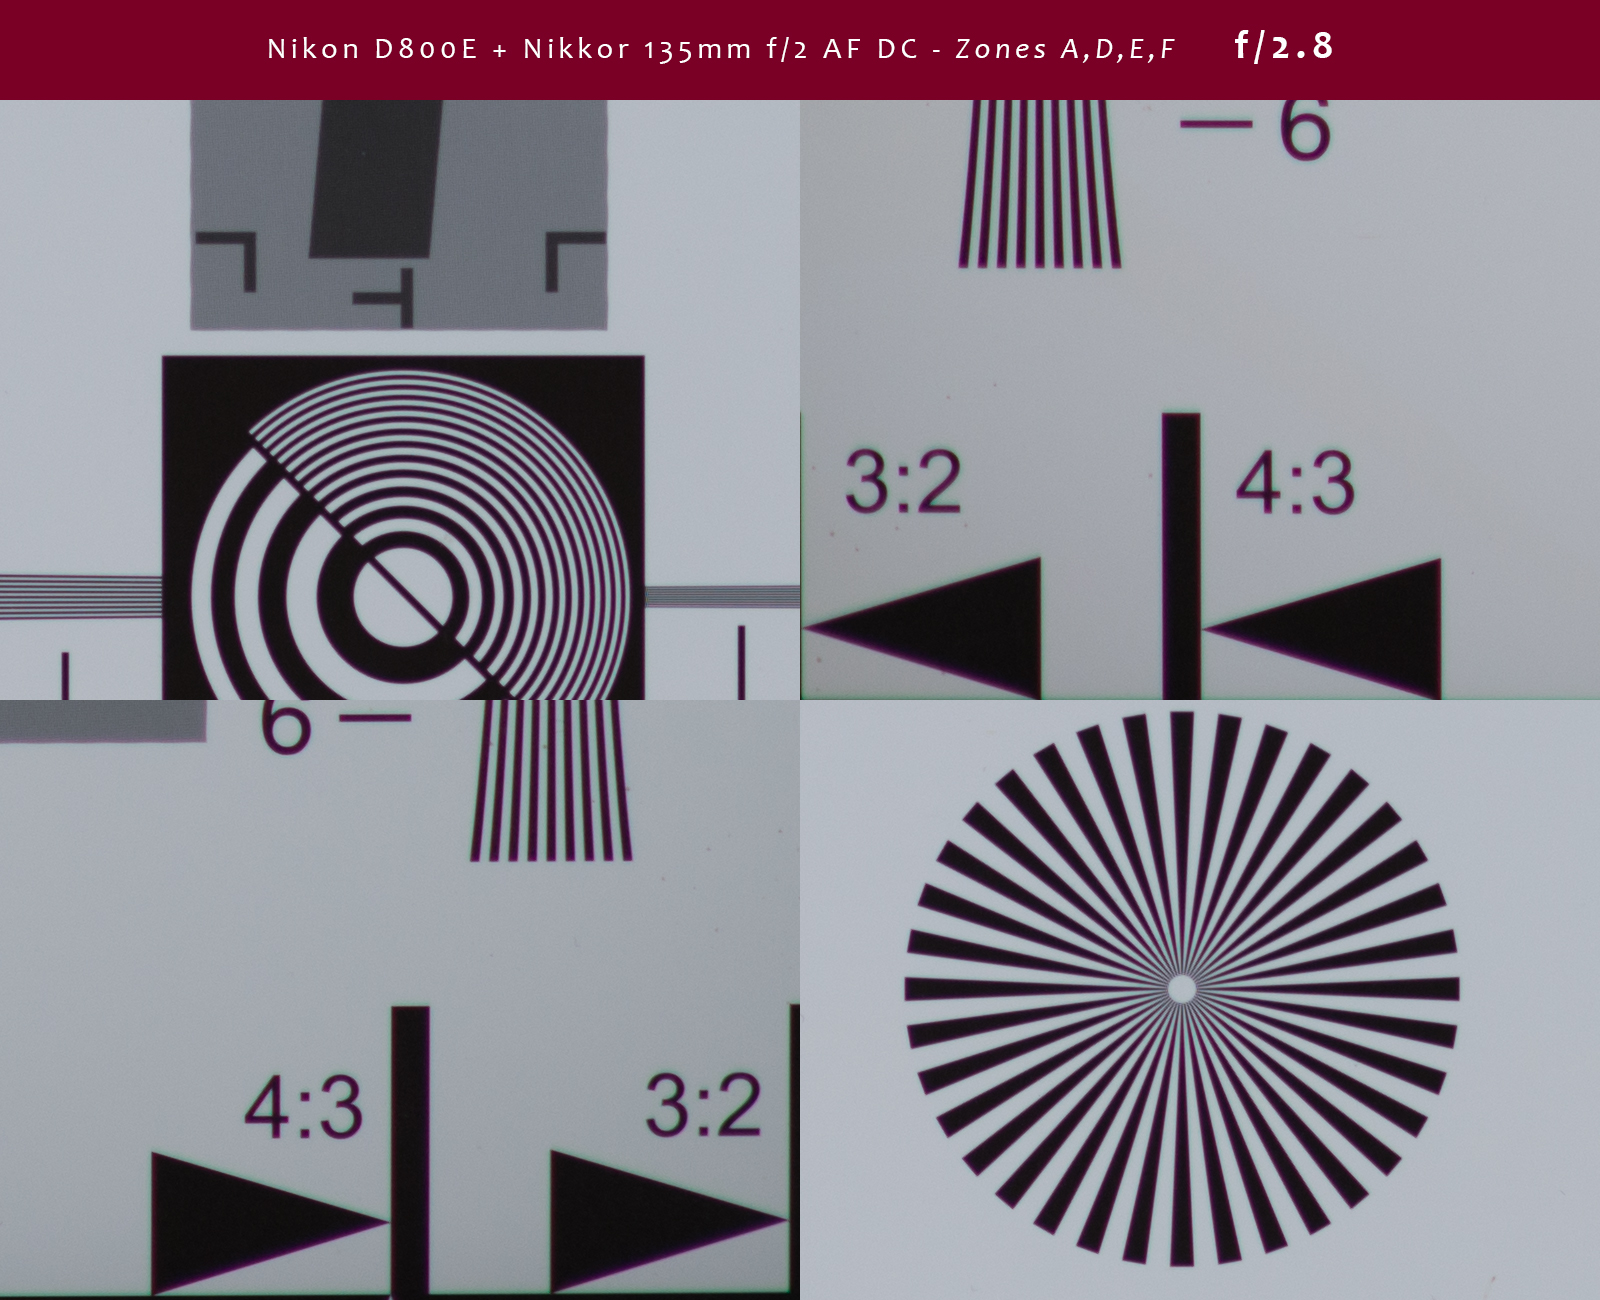
As written many times before, MTF charts are usually based on close to minimum focusing distance of the lens. Changing focus plane might influence “sharpness” significantly, almost like stopping lens down one or more stops.
Testing lens for medium and infinity distance in a field, is however very tricky, and such tests should be always taken with a grain of salt.
In the following example I would like to show you why this is so tricky and why you should be careful, making any conclusion based on real life shots.
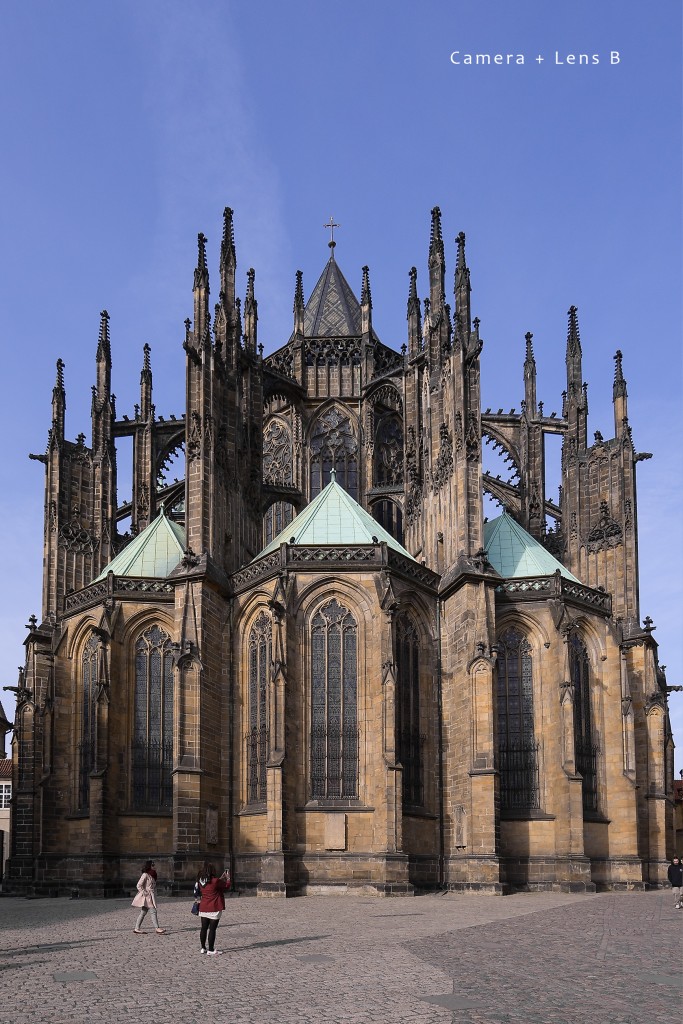
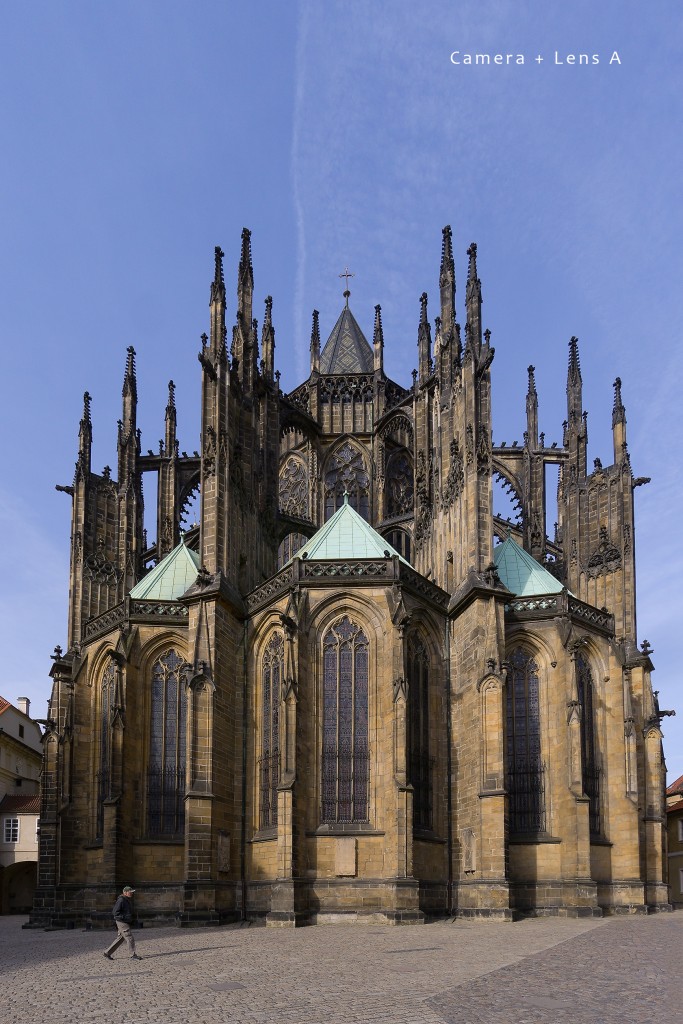
Bellows are two shots taken with two different lenses in en effort to compare sharpness at infinity. Because infinity mark on the lens doesn’t correspond with actual focus plane on neither lens I had to focus using magnification on LCD screen.
Lens A
![focus-fault_lens_2]()
Lens B
![focus-fault_lens_1]()
While they both looks acceptably sharp at this size, it is enough to shift the focus for less than 1° and results at pixel level will be compromised. Outside in the direct day light, even using hood loop for LCD makes critical focusing… critically difficult. While closest subjects in the images are over 70m far and further around 100m and that should be well into DOF for those lenses in theory, when looking at pixel level… forget about theory.
Maybe less than 1°caused those differences in 100% crops. Left is lens A, right is lens B.
![focus-fault]()
Critical focus is just one of the problems that can be expected. Focus breathing and related difference in FOV, lighting conditions that keeps changing during test, temperature, humidity and other aspects that can affect visibility at longer distances and many other variables are just some of the reasons why real life tests shouldn’t be taken too seriously, when judging or comparing “sharpness”.
On the other hand, when there is time to repeat enough different tests, there will be good chance to minimize those variables in order to come to conclusion if the lens is rather sharp or not.
Among three lenses that I compared so far – Zeiss, Samyang and Nikkor, only Nikkor stays slightly behind in terms of sharpness at medium to infinity distances and rather in contrast than resolution itself. Adding much more pronounced CA in Nikkor 135/2 AF DC, makes this older design somewhat insufficient for large resolution modern sensors at its widest aperture, but on the other hand, those lenses are mainly portrait lenses and as we would be able to see in one of the following chapters, slight softness wide open is not always bad thing.
Stopping Nikkor down to just f/2.8 significantly improves its sharpness perception, and from f/8 it is hard to tell lenses apart in both resolution and contrast.
When it comes to sharpness differences between Zeiss APO Sonnar 135mm f/2 ZF.2 and Samyang 135mm f/2 ED UMC ZF.2, I have to say that they are field irrelevant IMHO. Zeiss kept slight edge wide open in most of my tests, especially moving further from the center, but that edge is really very thin and resulting sharpness will be much more affected with other things mentioned above (critical focus, visibility conditions, lighting).
As I wrote at the very beginning of this review, Zeiss APO Sonnar 135mm f/2 is one of few lenses that can be used wide open even for landscape shots e.g. without sacrificing much sharpness.
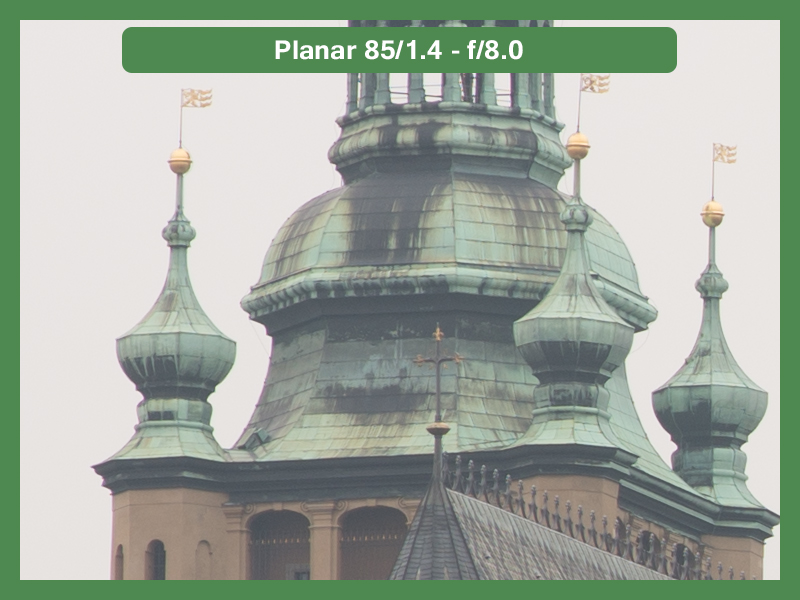
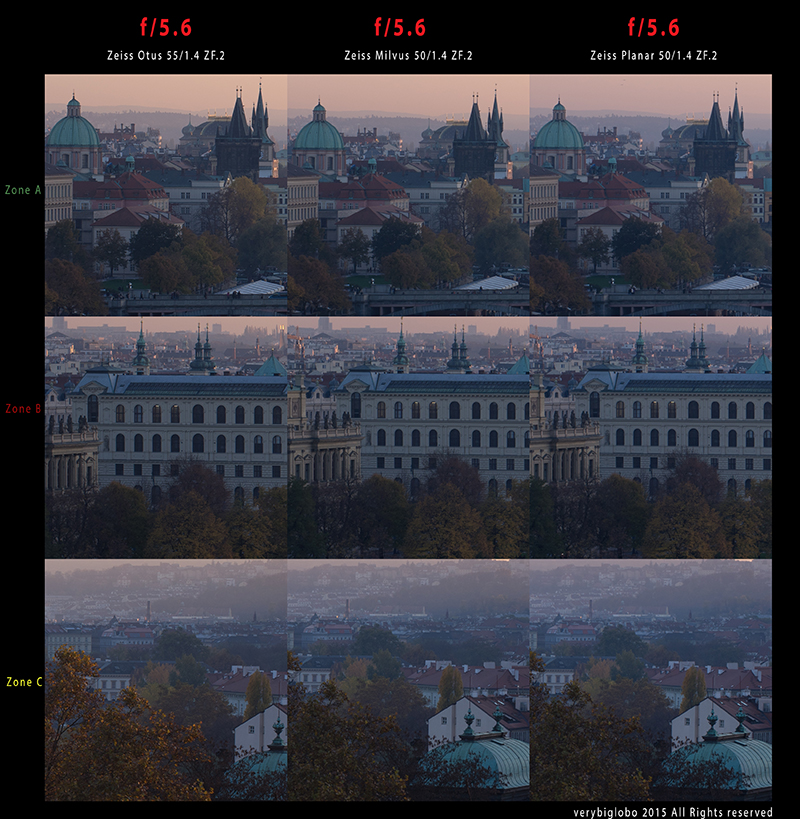
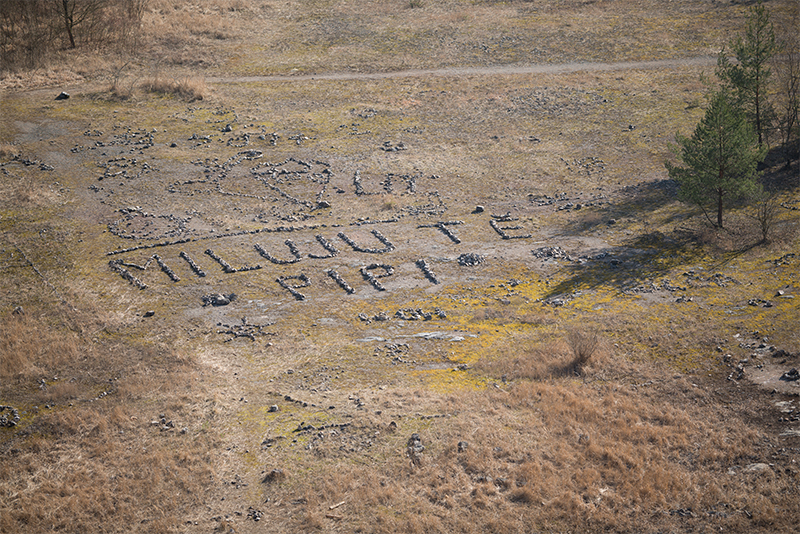
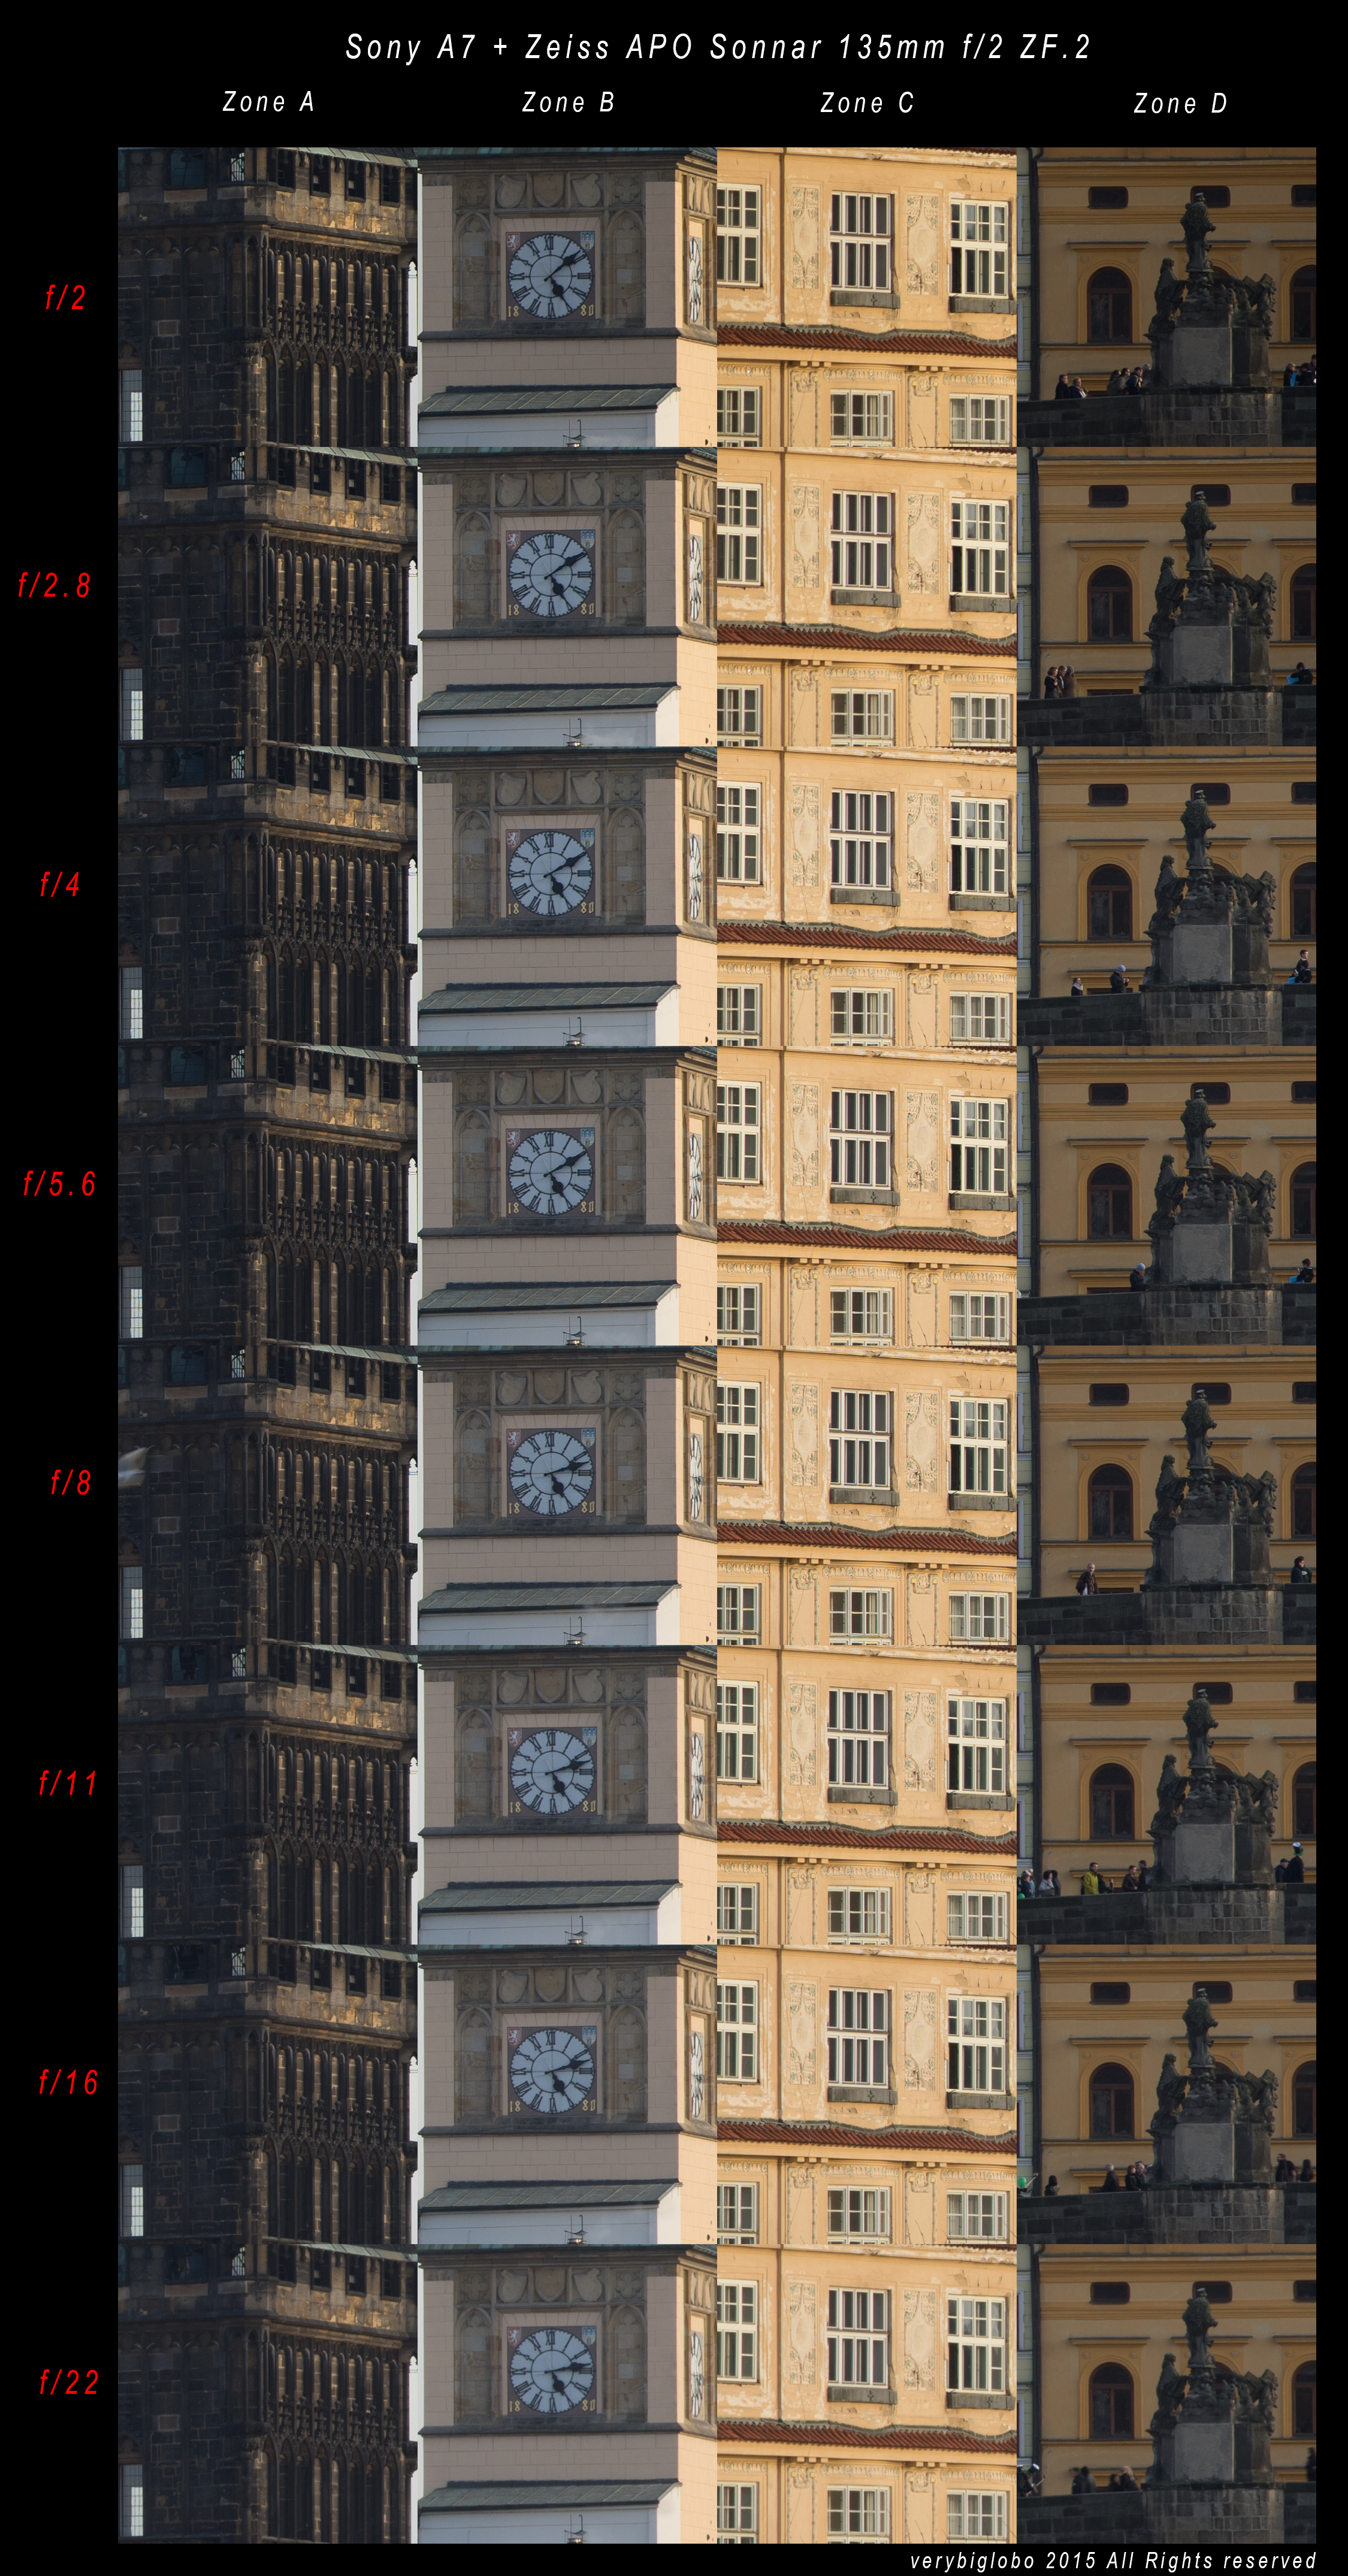
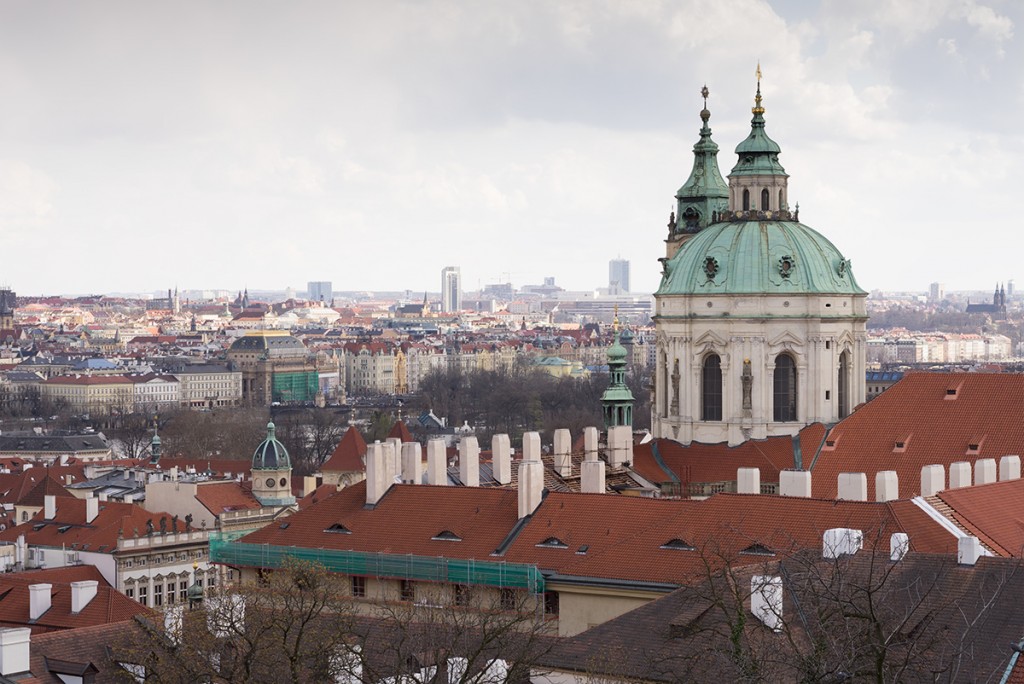
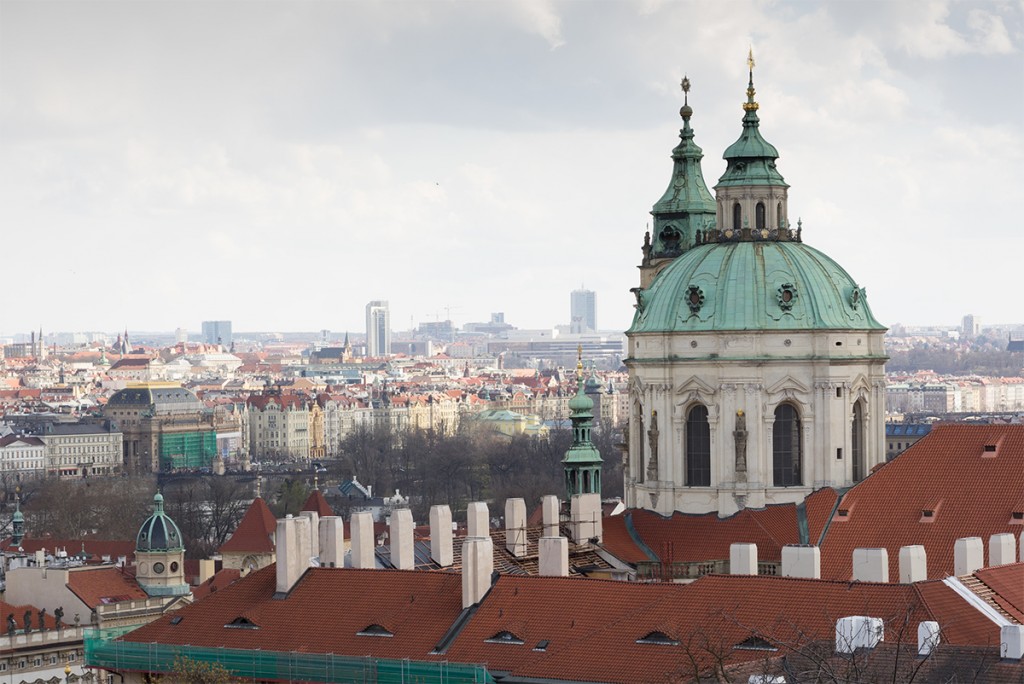
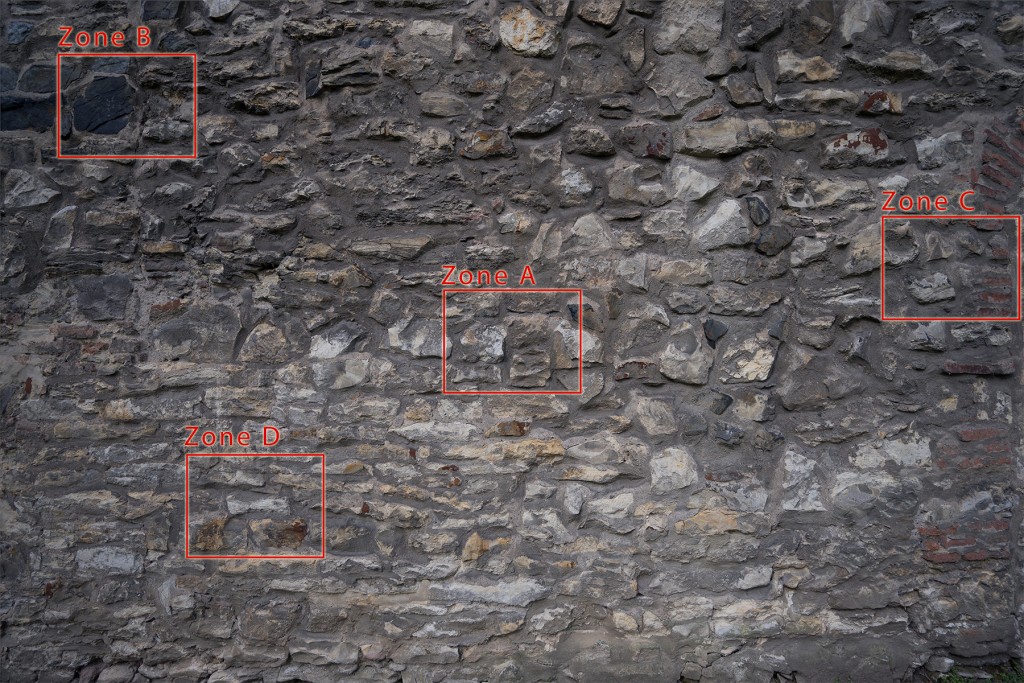
Let’s look at this image e.g.
![Zones]()
I made 100% crops from related zones (A,B,C,D) in the large composite image bellow, to show how little differences in sharpness can be observed through the whole aperture range.
![Zeiss_all_apertures_crop_FR_04]()
You will notice that from f/16 diffraction starts to affect sharpness, but believe me, even f/22 can be used with additional sharpening for very large prints. In this case however, there won’t be many situations, where you will need more than f/5.6 for usual landscape composition and that (and f/4) is at the peak of lens performance anyway.
Bellow is set of comparable images between tested lenses.
Zeiss vs Nikkor at f/2
Zeiss vs Samyang at f/2
Zeiss vs Nikkor at f/2.8
Zeiss vs Samyang at f/2.8
Zeiss vs Nikkor at f/5.6
Zeiss vs Samyang at f/5.6
Original size files of test posted above are in this Flickr collection – https://www.flickr.com/photos/97543230@N02/collections/72157651629343231/ if you wish to explore them more in detail.
This test images were focused at near to infinity distance. While at close distance Zeiss had narrower FOV, at medium and infinity distances it seems that some focus breathing enter the game, because it gets closer to original Samyangs FOV, while Nikkor keeps its real FOV best of the three and become narrower among them (larger magnification).
I am lazy to measure focus breathing because it is not significant, so I am happy just to know about it. It shouldn’t make any difference in a real life shooting though. (It also make sense to get largest magnification possible at close distances while at infinity it shouldn’t matter).
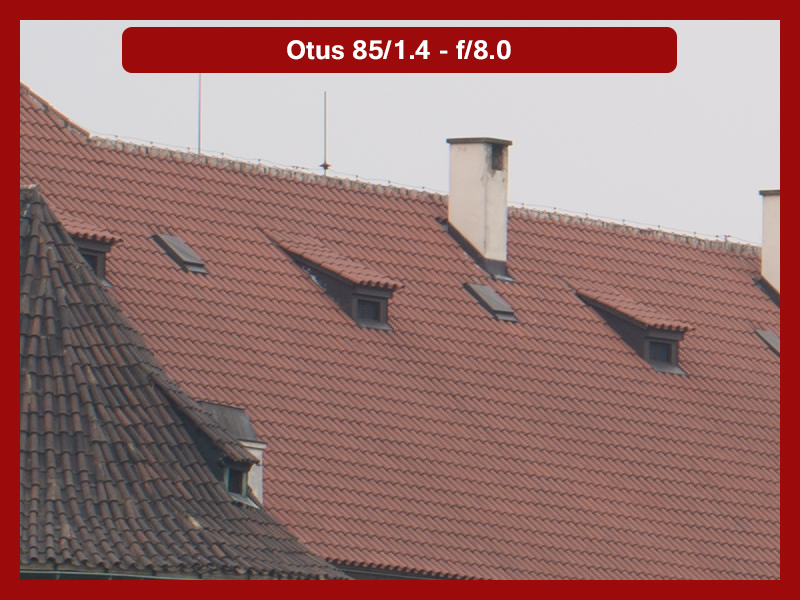
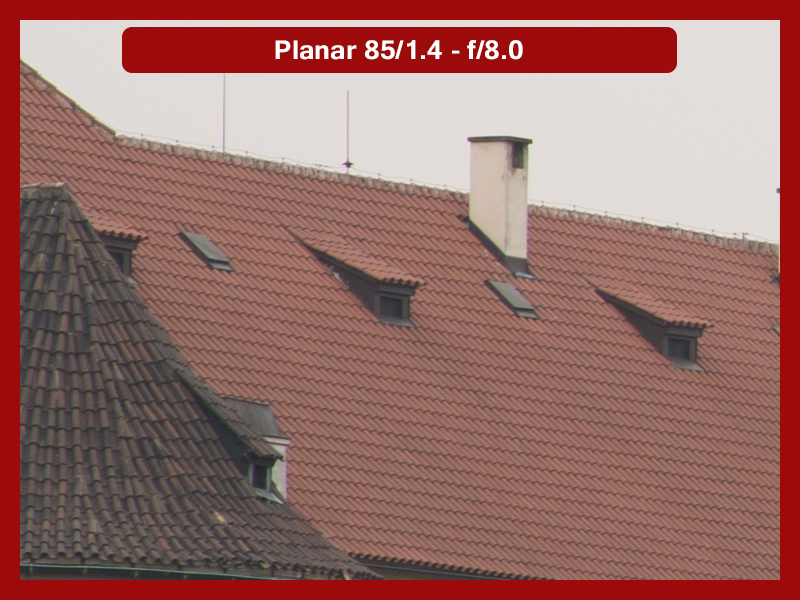
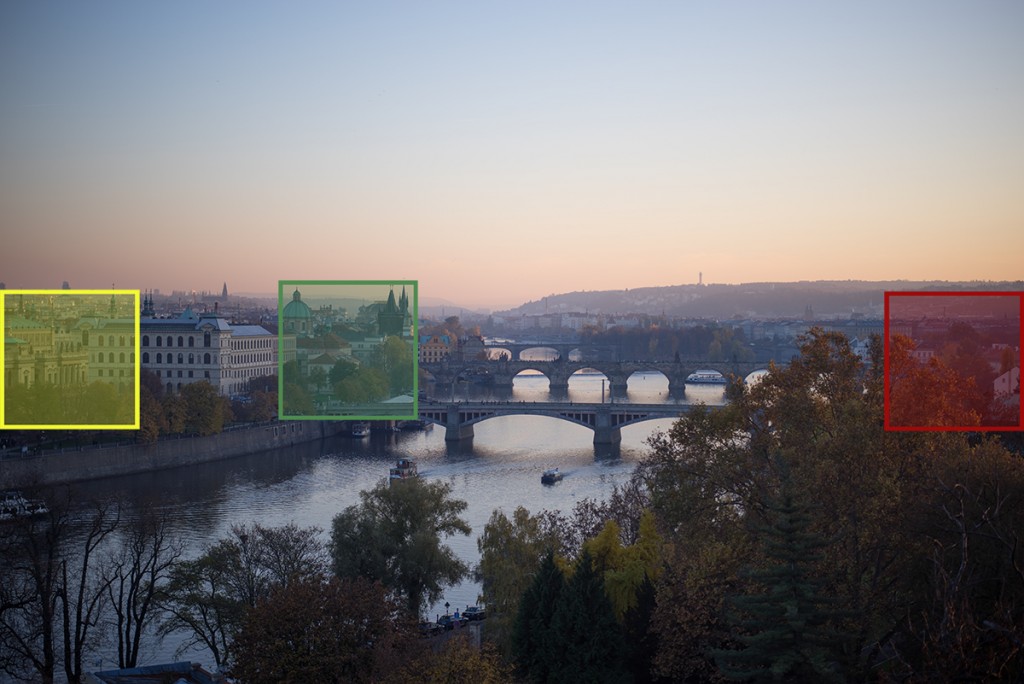
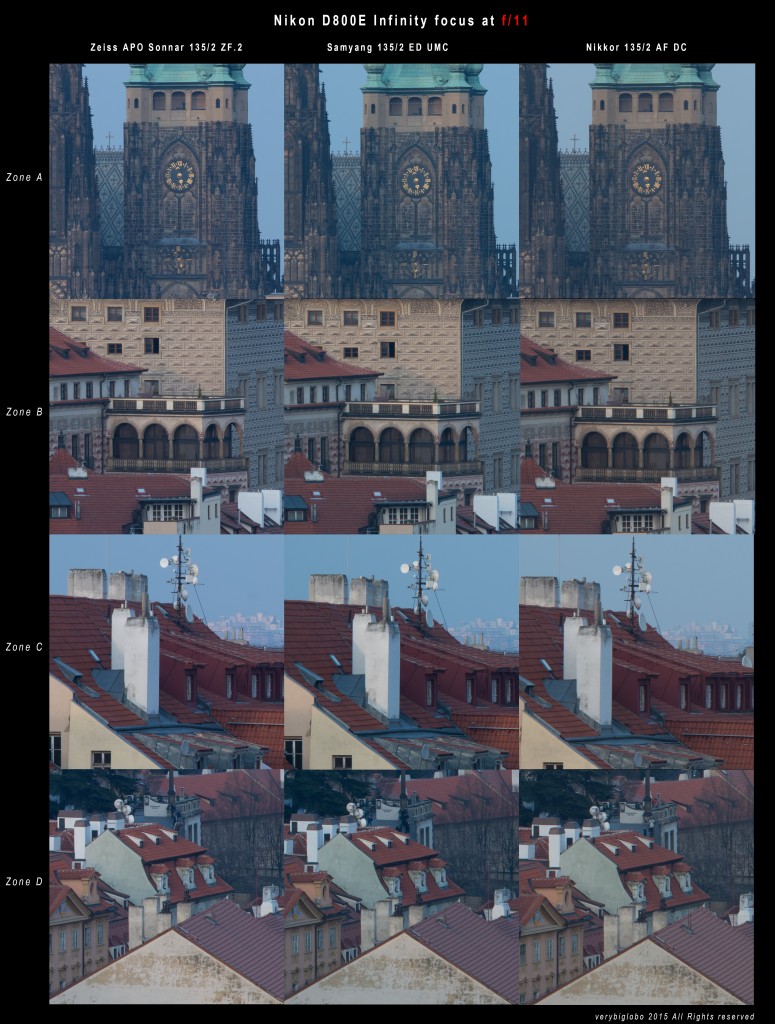
In another of many comparative tests that I did, I tried to compare sharpness at infinity. Here is test image with marked zones.
![Zeiss_Samyang_Nikkor_FR_02_Zones]()
Bellows are 100% crops compared directly between lenses.
At f/2
![Zeiss_Samyang_Nikkor_FR_02_f2]()
At f/2.8
![Zeiss_Samyang_Nikkor_FR_02_f28]()
At f/11
![Zeiss_Samyang_Nikkor_FR_02_f11]()
Similar pattern can be observed on those images. Zeiss has slight edge wide open and Nikkor lags behind both. Already at f/2.8 Nikkor improves a lot while Zeiss and Samyang are hard to tell apart. At f/11, I really don’t see much differences in terms of sharpness among those three lenses.
At medium distance, I checked only for mid frame sharpness and conclusion is basically same as with long and infinity focus distances.
![Zones_FR_01]()
Zeiss vs Nikkor at f/2
Zeiss vs Samyang at f/2
Zeiss vs Nikkor at f/5.6
Zeiss vs Samyang at f/5.6
To check for diffraction at smallest aperture I compared Zeiss and Samyang at f/22 (Nikkor goes only to f/16)
Zeiss vs Samyang at f/22
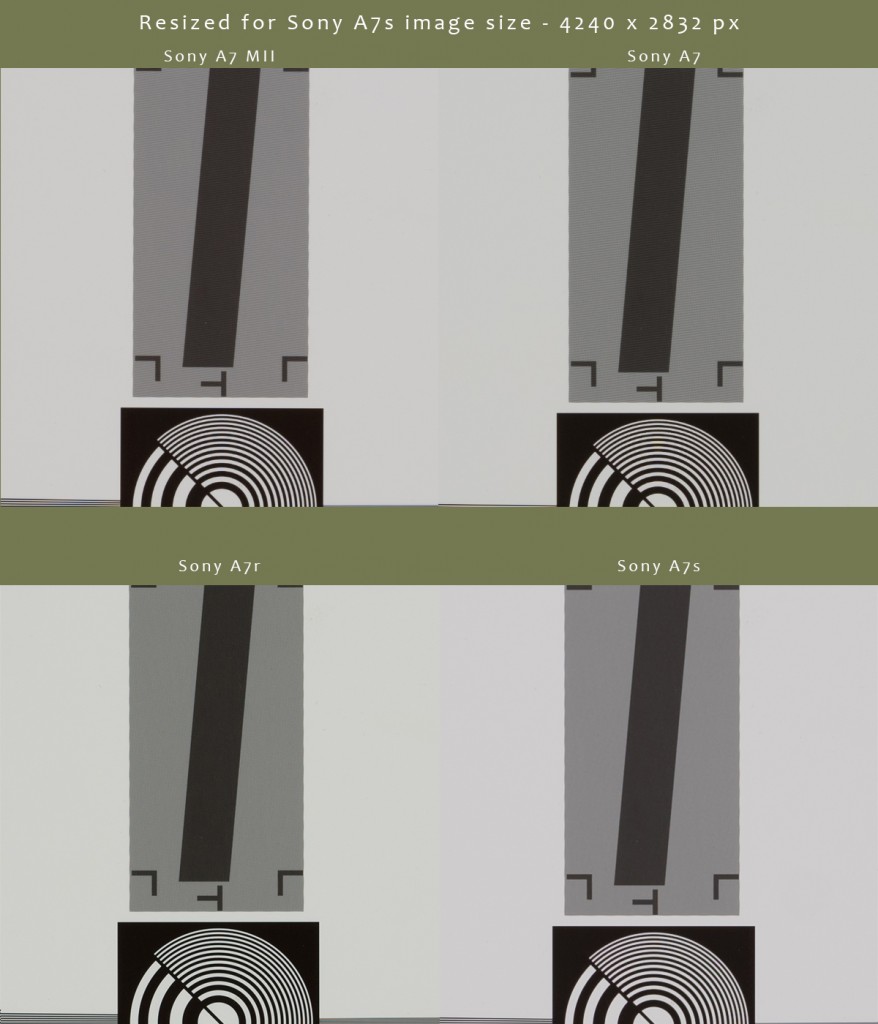
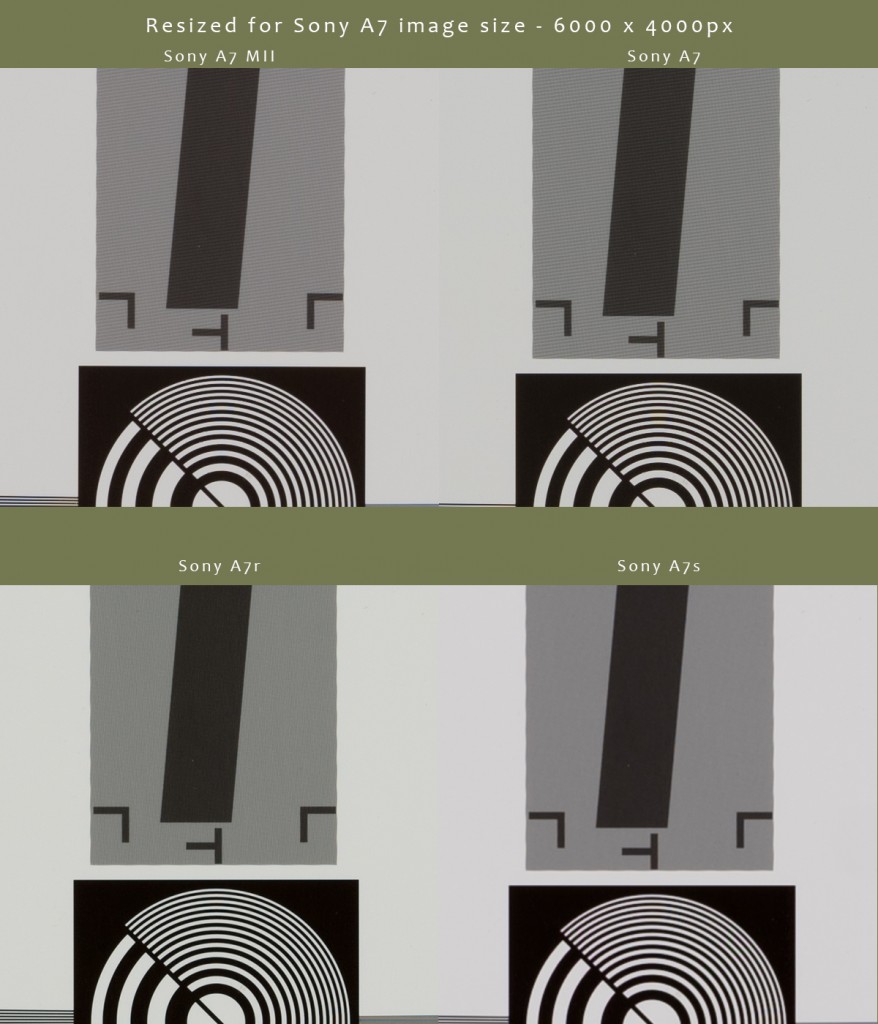
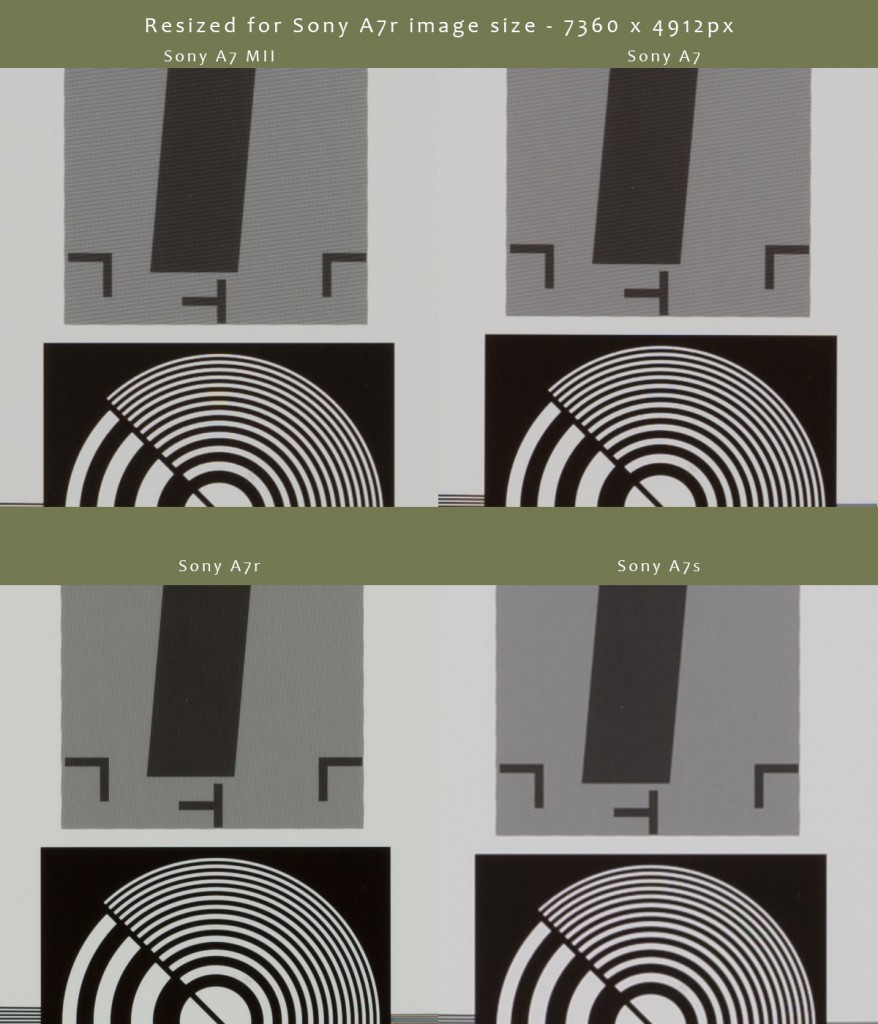
There are of course many more 135mm lenses. Together with 50mm and 35mm FL, 135mm is probably most represented focal length for 35mm format and there are often at least two models from most producers.
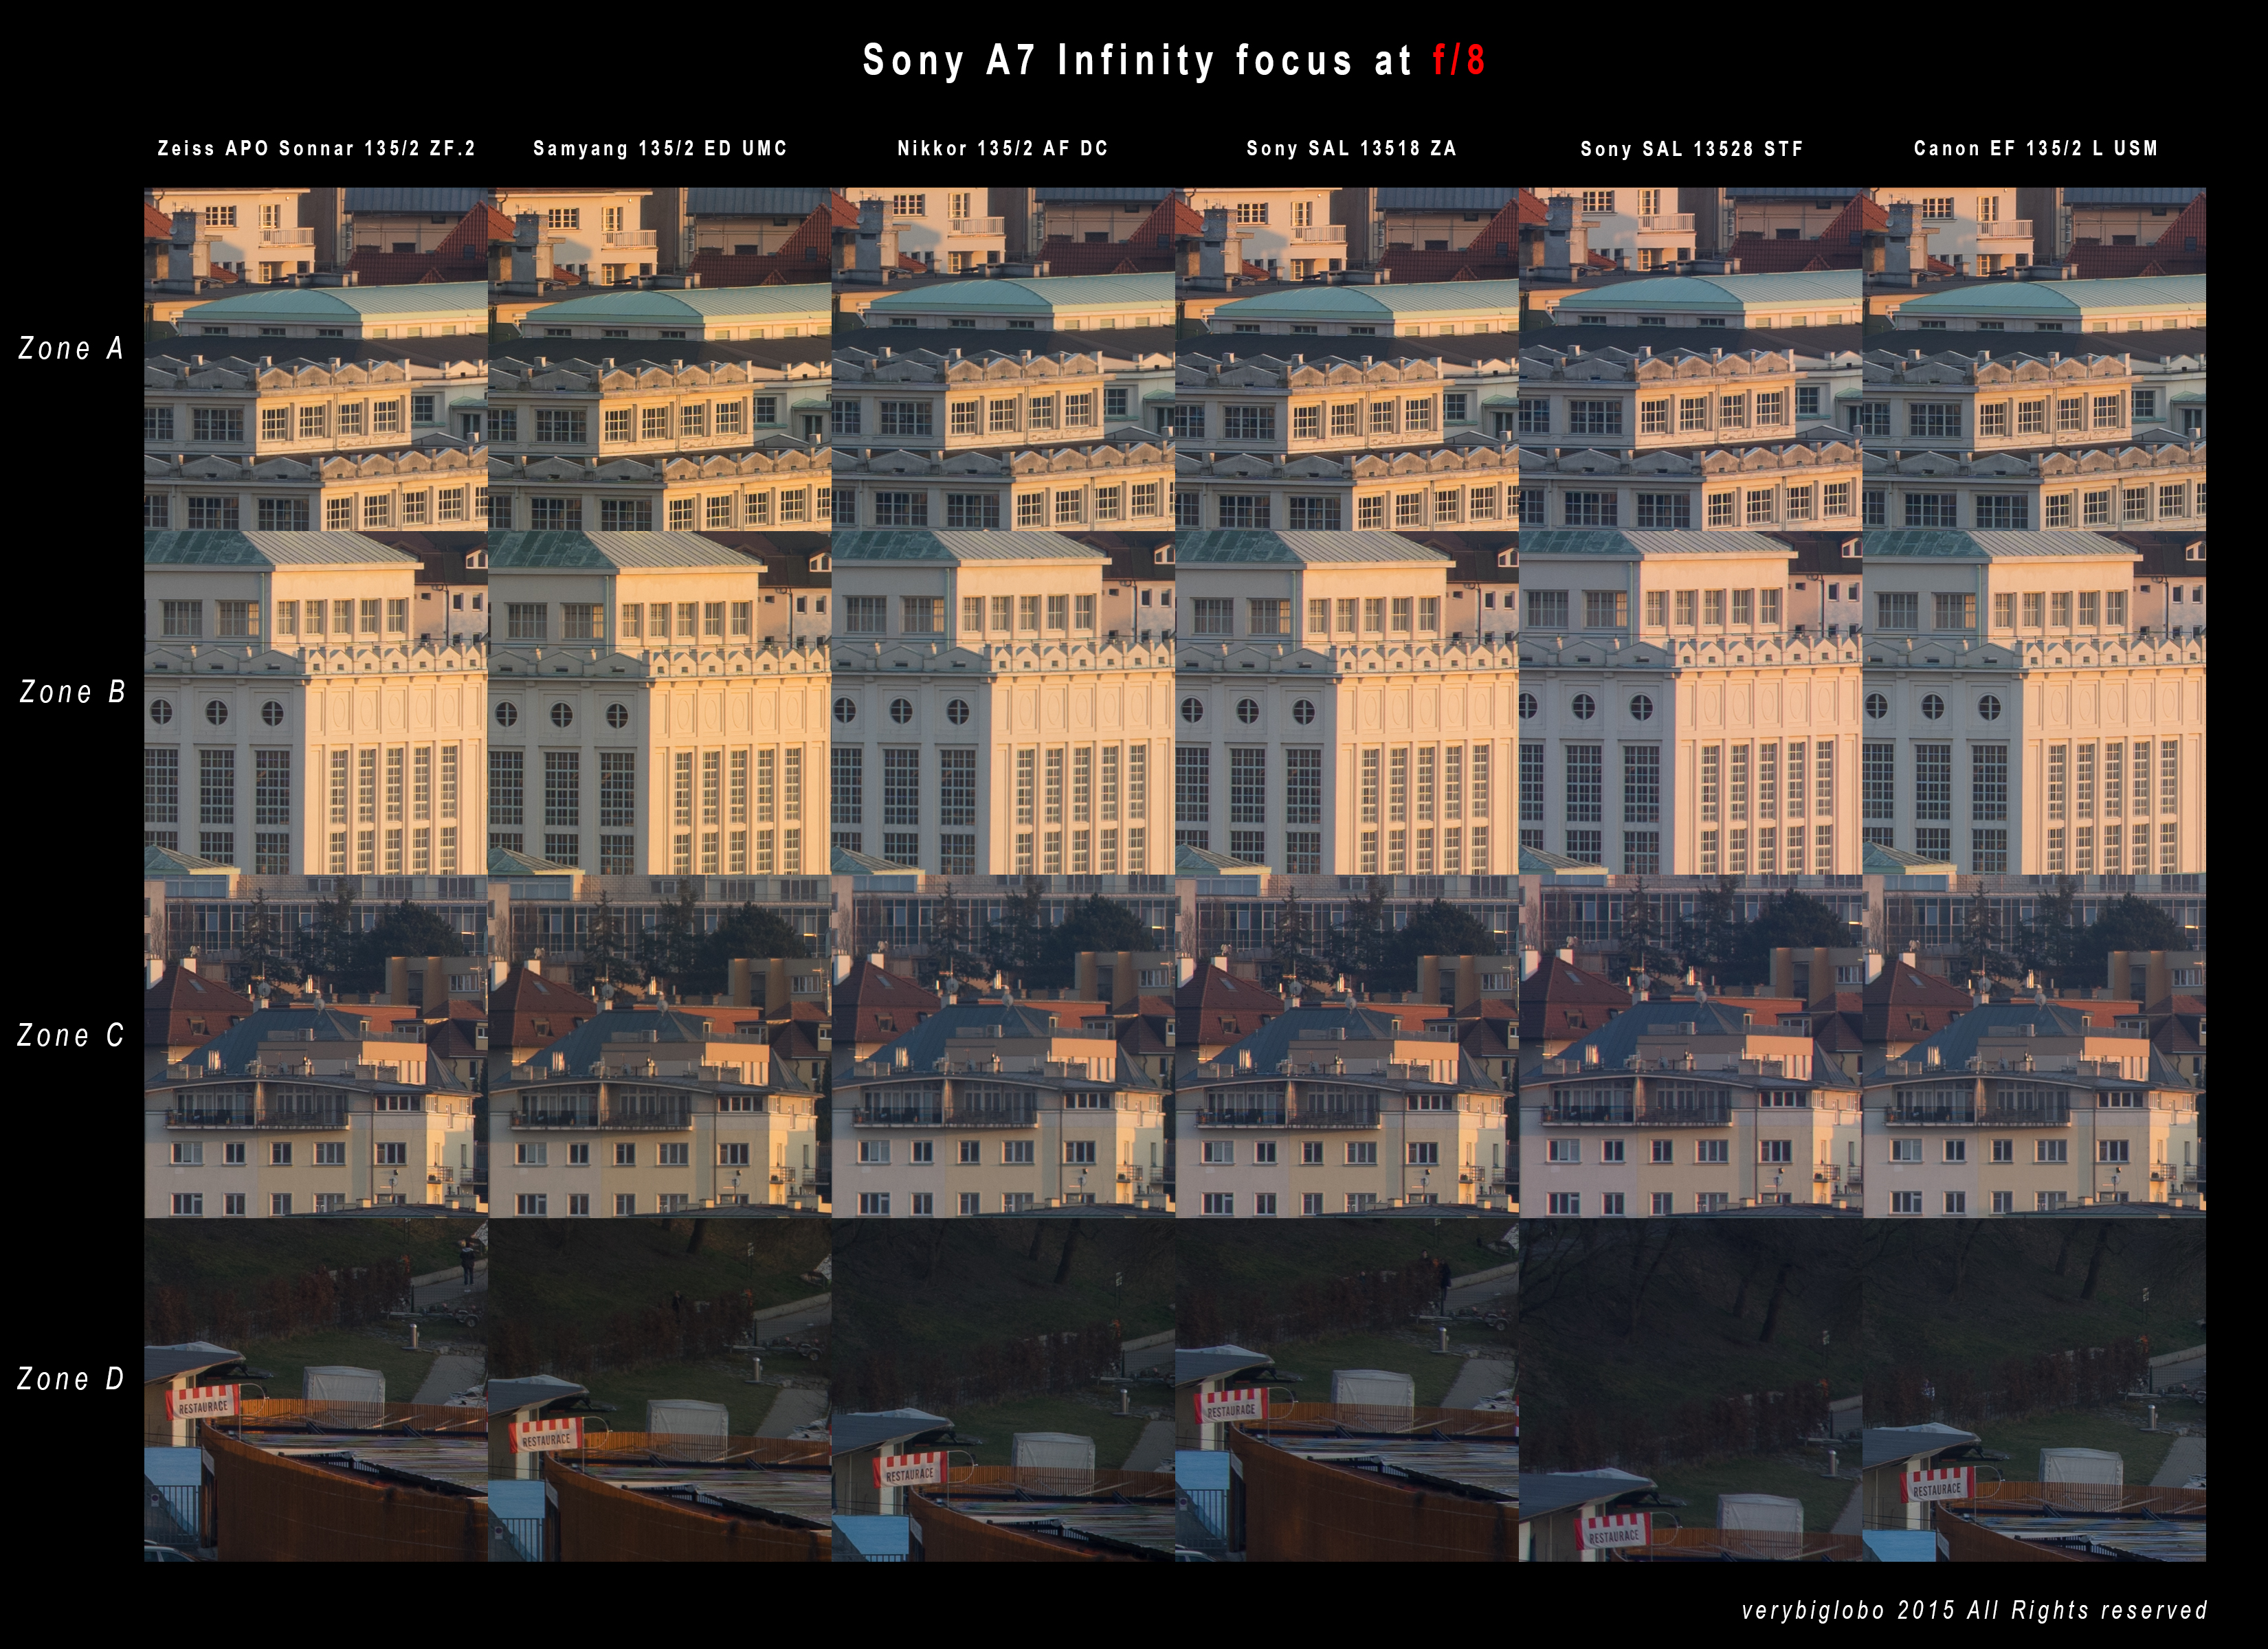
From those interesting lenses that I would suggest to think about, I picked another three for a simple f/8 landscape shot.
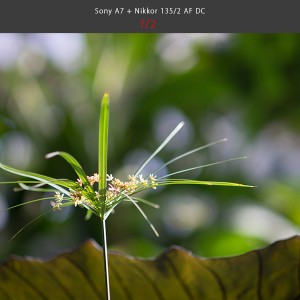
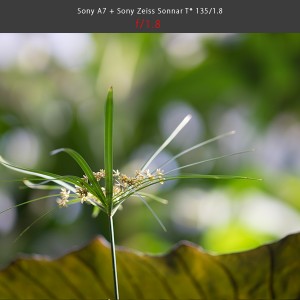
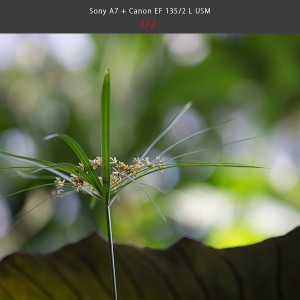
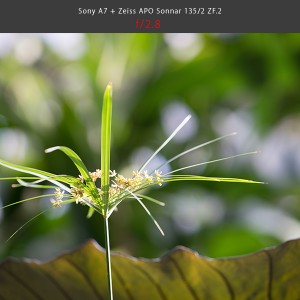
![Zeiss_Samyang_Nikkor_Sony_STF_Canon_FR_03_Zones]()
Additional lenses are Sony Zeiss Sonnar T* 135mm f/1.8, amazing lens available only in Sony A mount, even more charismatic and not often mentioned Sony (original Minolta design) 135mm f/2.8 STF (T4.5), and mighty Canon EF 135mm f/2 L USM, living legend among 135mm lenses. To make such a comparison bit more fair, I tested lenses on Sony A7 camera with appropriate adapters. Following image shows 100% crops from respective zones.
![Zeiss_Samyang_Nikkor_Sony_STF_Canon_FR_03_f8]()
In a conclusion, from all tested lenses only Nikkor 135 f/2 AF DC stay a bit behind at wide open apertures, but where Zeiss and Samyang takes a lead is in CA department. Stopped down to f/5.6 and smaller almost erase sharpness differences among tested lenses and at those apertures each one of them will deliver superb results.
Advantage of Zeiss APO Sonnar 135/2 and Samyang 135/2 ED UMC is in their optimization for wide apertures, which makes them attractive alternative for all shots were sharpness across frame is required but light level is rather low. This and brilliant control of CA, makes those two lenses standing above the others by some margin in this respect.
There is of course much more than lens sharpness. In the next chapter we will take look at flare resistance and bokeh.
Please help support this page and upcoming reviews and buy through affiliate links, with no extra cost for you:
Buy on BHPhoto: 135mm f/2 Apo Sonnar T* ZF.2 Lens for Nikon F Mount
Buy on Adorama: 135mm f/2 Apo Sonnar T* ZF.2 Lens for Nikon F Mount
Buy on Amazon: 135mm f/2 Apo Sonnar T* ZF.2 Lens for Nikon F Mount BEST OFFER!
To help this page survive, your donation will be highly appreciated.
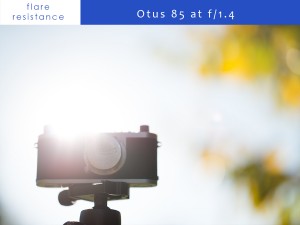
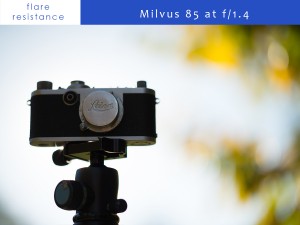
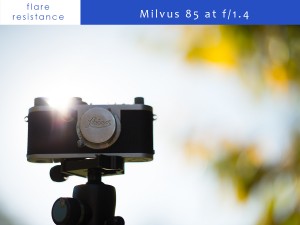
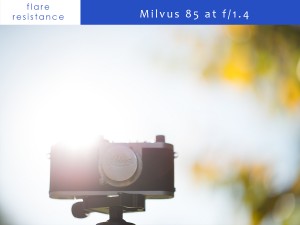
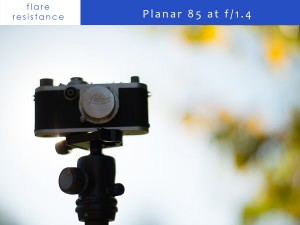
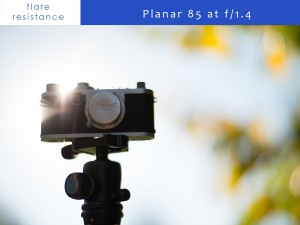
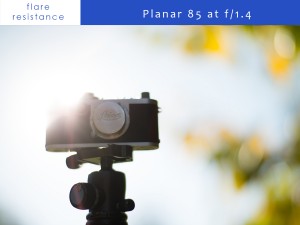
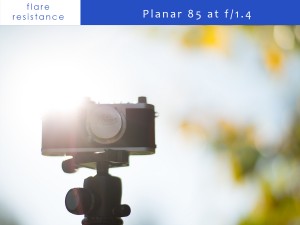
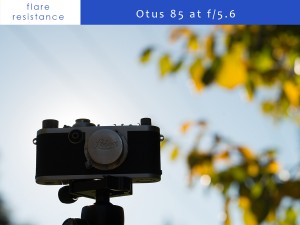
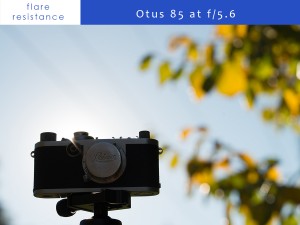
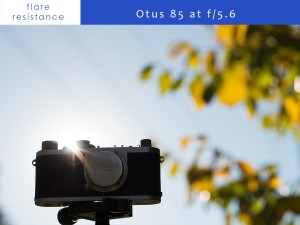
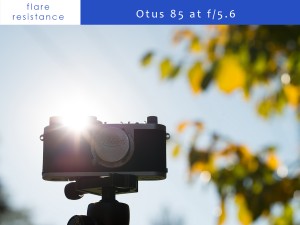
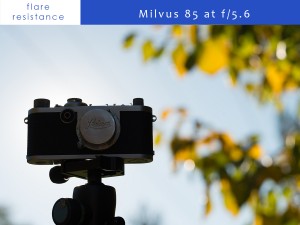
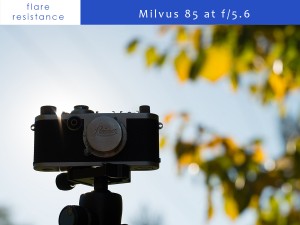
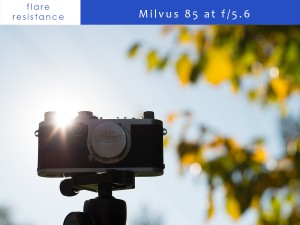
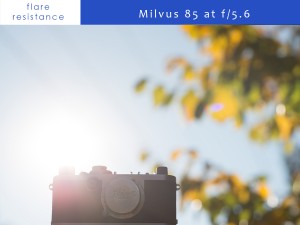
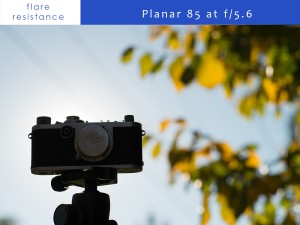
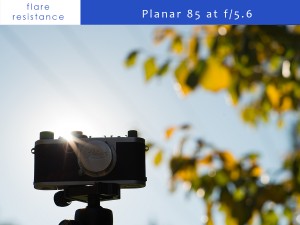
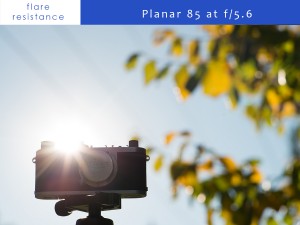
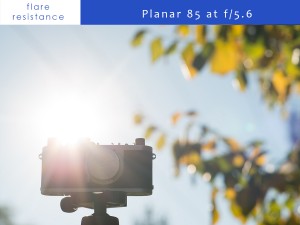
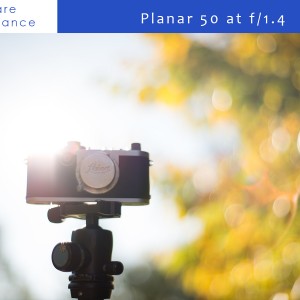
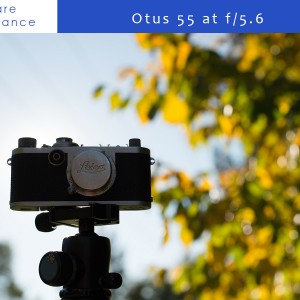
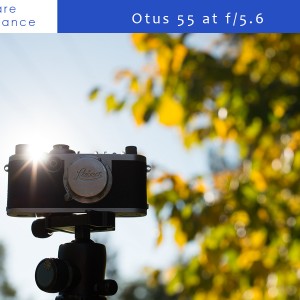
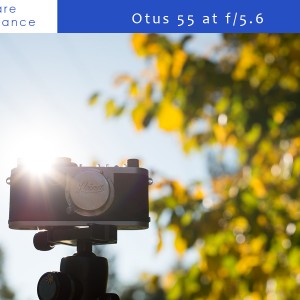
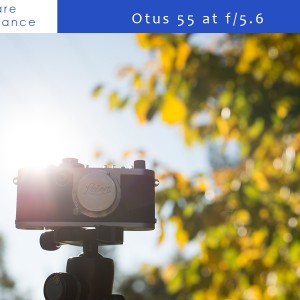
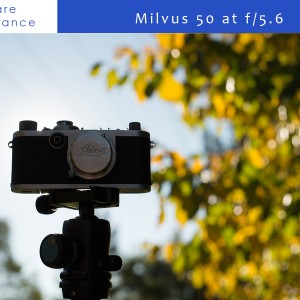
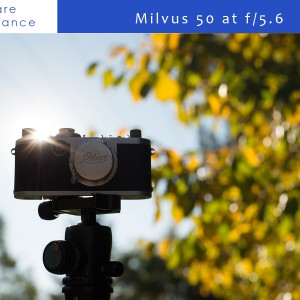
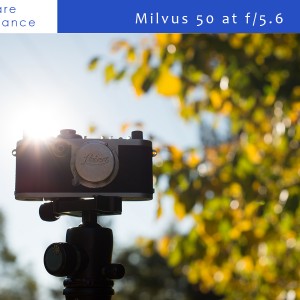
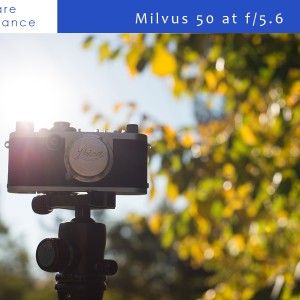
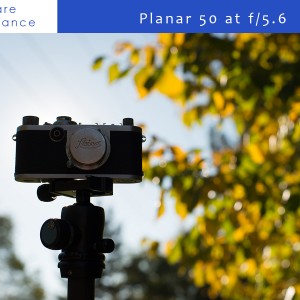
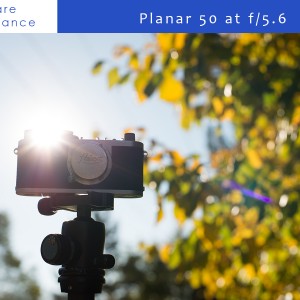
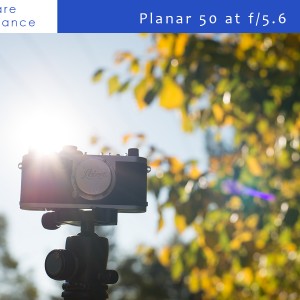
Flare:
Zeiss is well-known for many things, some of them are documented such as build quality, some are rather mythical, such as famous Zeiss look, but if there is one thing that Zeiss really deserves credit for, its obligatory T* coating.
I have been on few presentation where company experts demonstrated great flare resistance of Zeiss lenses and I experienced that myself in many occasions. With the boom of digital photography however, legacy lenses become more vulnerable because of the sensor reflections.
To fight against sensor reflection is really difficult and most of the flares that we actually see in our images, are more or less related to this phenomenon.
Nikon D800E is not as bad in that respect as e.g. Sony A7, but it is just matter of slight changes in the angle toward sun, to reveal nasty flares with almost any lens….
Following test images are thus rather informative – what can be expected under similar conditions, but because they were taken from the hand (to compensate for sun position), situations are not identical and thus lenses are not directly comparable. (We could use studio light to simulate sun position and make identical set-up for all lenses, but distance to such a light source is much smaller than toward sun, and results obtained that way, might not correspond with a real life experience).
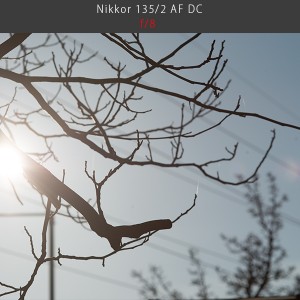
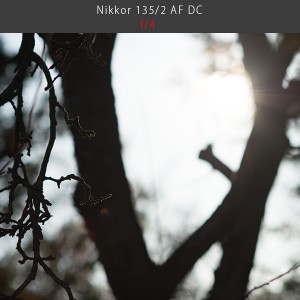
Here are few shots that you can open in gallery view and check the relative lens behavior in sunlight coming from the top right corner at f/2 and f/8, and sun coming directly at f/4 and f/8.
![Zeiss_Flare_01_f2]()
![Zeiss_Flare_01_f8]()
![Zeiss_Flare_02_f8]()
![Zeiss_Flare_03_f4]()
![Samyang_Flare_01_f2]()
![Samyang_Flare_01_f8]()
![Samyang_Flare_02_f8]()
![Samyang_Flare_03_f4]()
![Nikkor_Flare_01_f8]()
![Nikkor_Flare_01_f2]()
![Nikkor_Flare_02_f8]()
![Nikkor_Flare_03_f4]()
Zeiss have a clear edge in this test, but as I wrote above, if you change angle just a little bit, results might be slightly different. From many other shots that I took however, I feel confident to say, that Zeiss APO Sonnar 135mm f/2 lens does great job when it comes to flare resistance, especially in terms of keeping contrast high. Samyang is less predictable when it comes to flaring, but slight change of the position might bring him very close to Zeiss in terms of contrast. More pronounced rainbow like flares are visible in almost all situations where flare appears. Nikkor shows its age (in terms of coatings in this case) and the loss of contrast in back-lit situations is notable.
There is only one thing that I’d like to mention… I like flares and loss of contrast in back-lit situations for portraits ![:-)]() Nevertheless I have to admit that Zeiss engineers did splendid job with recent T* coatings and most users will love it.
Nevertheless I have to admit that Zeiss engineers did splendid job with recent T* coatings and most users will love it.
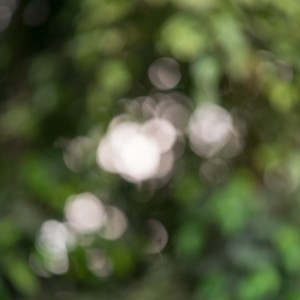
Bokeh:
Have you ever noticed how clever advertising is hidden in this magic word? (Well done KEH.com)
There are few reasons why you might consider lens with such a fast aperture (at this focal length). Either because you think that BIF means Bat In Fly so you need your lens to gather as much light as possible, or you take “sharp as a pin” literally, so that everything behind pin top should be out of focus, or you have heard that fast lens is cool to have or number 2 is your lucky number.
In this part I’d like to focus on the Pin pals… I already wrote that Zeiss APO Sonnar 135/2 is sharp as a pin, but how’s about the rest of the image? What about BoKEH?
I’d like first to show you two sets of images with Zeiss APO Sonnar 135/2 at all apertures from f/2 to f/22
Here is the first one:
![Zeiss_f2]()
![Zeiss_f28]()
![Zeiss_f4]()
![Zeiss_f56]()
![Zeiss_f8]()
![Zeiss_f11]()
![Zeiss_f16]()
![Zeiss_f22]()
Both – blur quantity and blur quality can be observed on those images. There is one thing to consider though. When shooting dominant subject such as model outside e.g., I am always trying to ask myself – how important is surrounding for resulting image. In other words – in many cases I’d like to bring my subject in relation to the background (or foreground), but on the other side I’d also like to isolate it so that viewer attention goes to the right direction. Choosing proper aperture for the desired interaction between subject and background is thus important part of creative process and it depends on many variables, such as structure, color, lighting, distance, content importance etc. In the simulated scenario above, I’d pick aperture of f/5.6 because it gives me nice relation between sharp and blurred areas.
When your subject is smaller and background closer though, wide open aperture and thin DOF often gives most pleasing results. (This is for sure very subjective).
Here is another set of all apertures showing situation described above:
![Zeiss_Bokeh_02_f2]()
![Zeiss_Bokeh_02_f28]()
![Zeiss_Bokeh_02_f4]()
![Zeiss_Bokeh_02_f56]()
![Zeiss_Bokeh_02_f8]()
![Zeiss_Bokeh_02_f11]()
![Zeiss_Bokeh_02_f16]()
![Zeiss_Bokeh_02_f22]()
In this scenario I’d pick f/2 as the preferred aperture.
I wrote about this because I am often confronted with the opinion that Bokeh is quantity of the blur. While this might be true according to Wikipedia, I like to think of it purely as a quality of the blur. What we have seen above in those two sets, has more to do with the quantity than quality.
In order to discuss quality of the blurred (and transition to the blurred) areas, it is good to see how lenses render highlights.
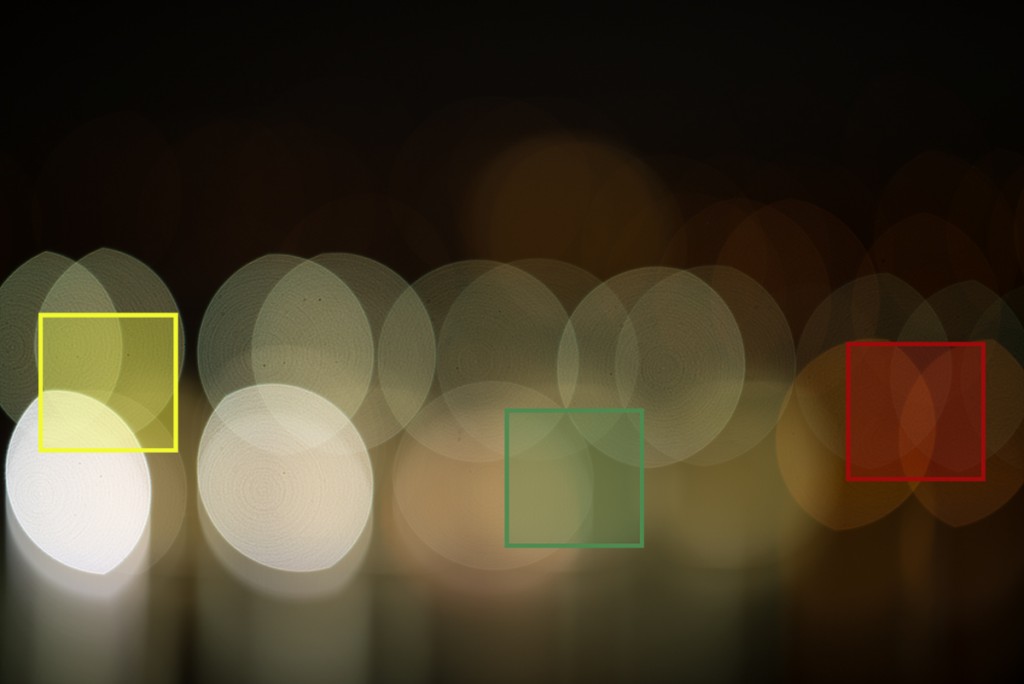
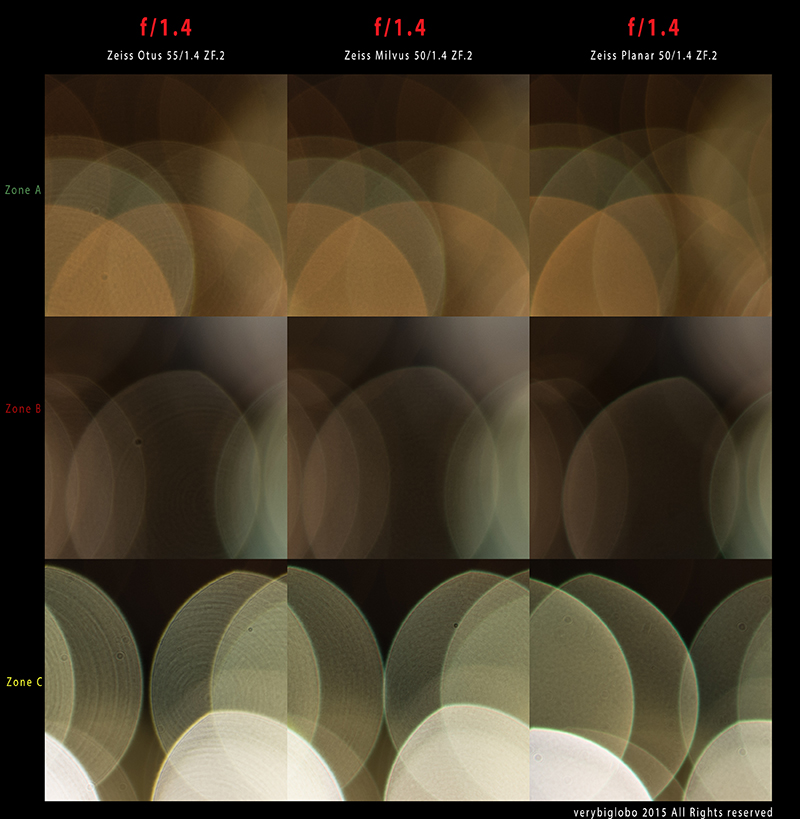
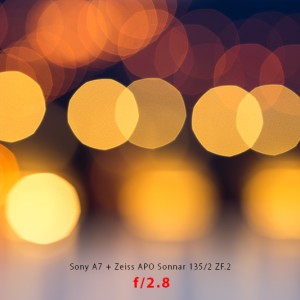
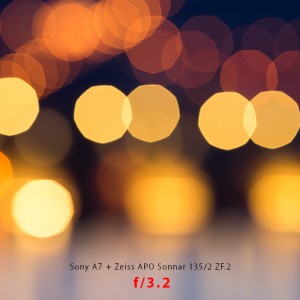
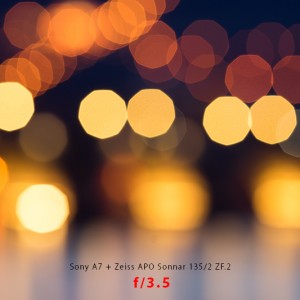
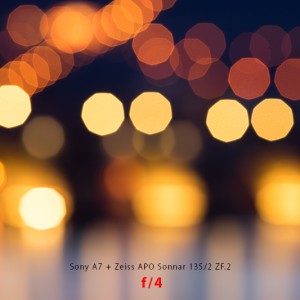
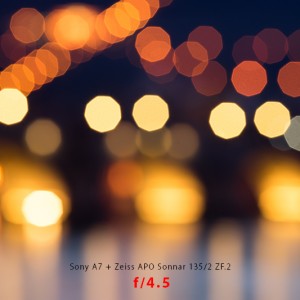
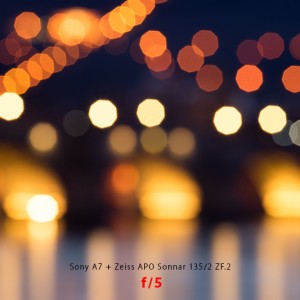
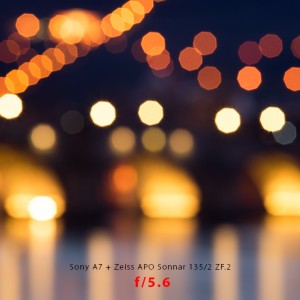
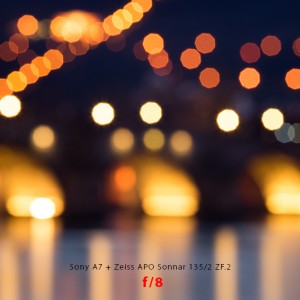
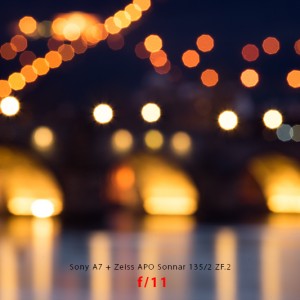
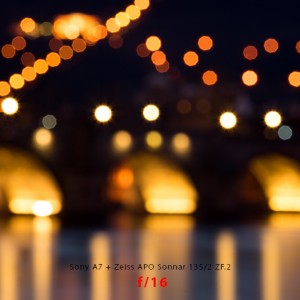
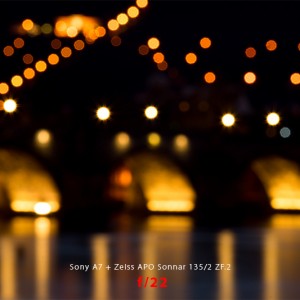
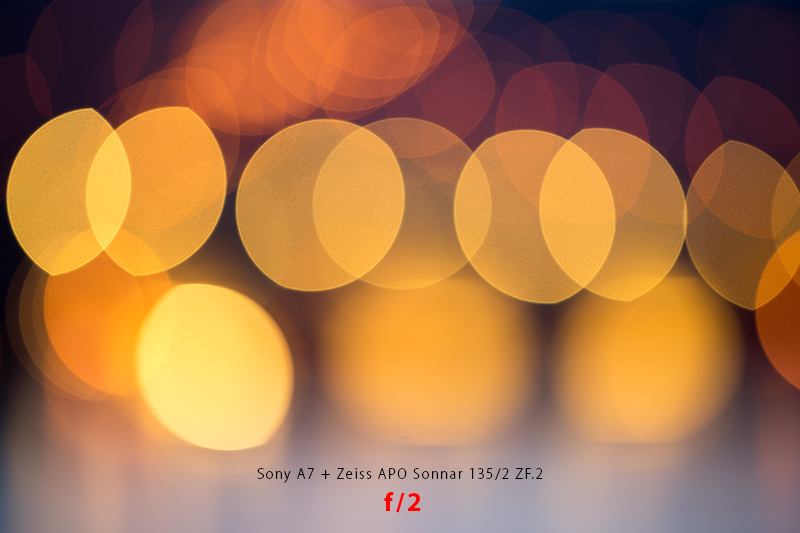
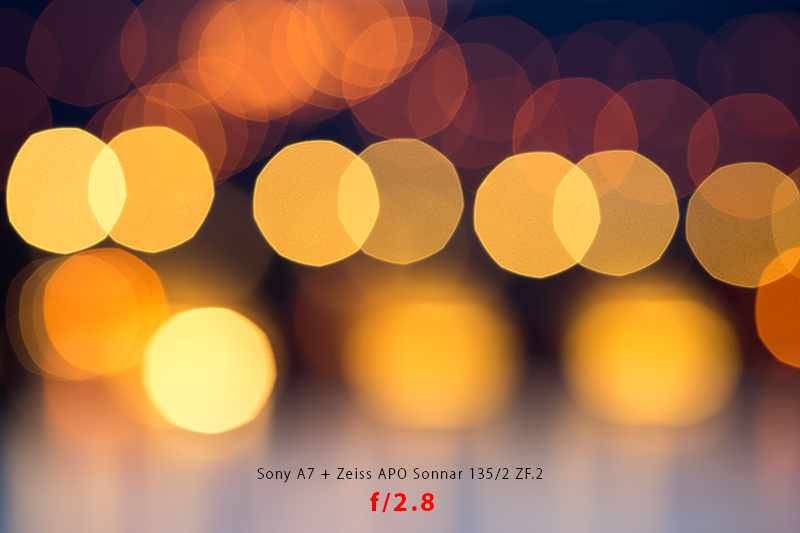
Here is set of images of Zeiss APO Sonnar, focused to MFD with a night city lights at infinity distance. This time, aperture was moved by 1/3rd of the stop up to f/5.6, from where it goes by full stops all the way to the f/22.
![Zeiss_f2]()
![Zeiss_f2-2]()
![Zeiss_f2-5]()
![Zeiss_f2-8]()
![Zeiss_f3-2]()
![Zeiss_f3-5]()
![Zeiss_f4]()
![Zeiss_f4-5]()
![Zeiss_f5]()
![Zeiss_f5-6]()
![Zeiss_f8]()
![Zeiss_f11]()
![Zeiss_f16]()
![Zeiss_f22]()
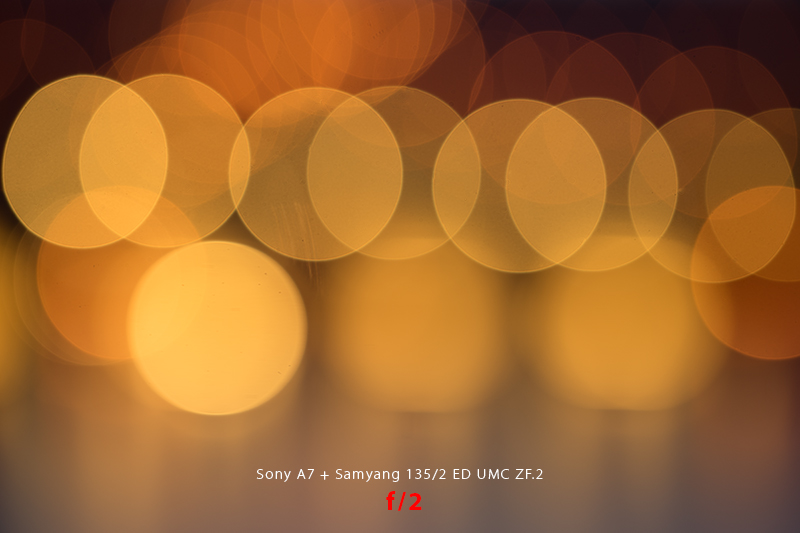
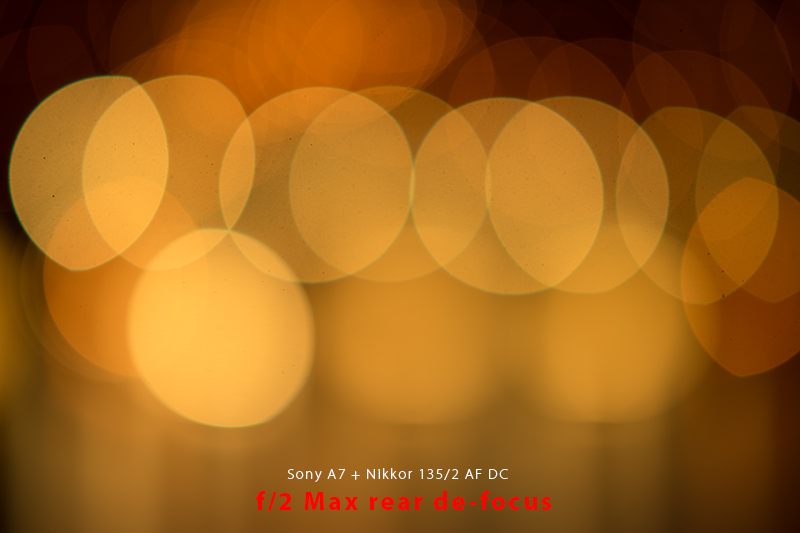
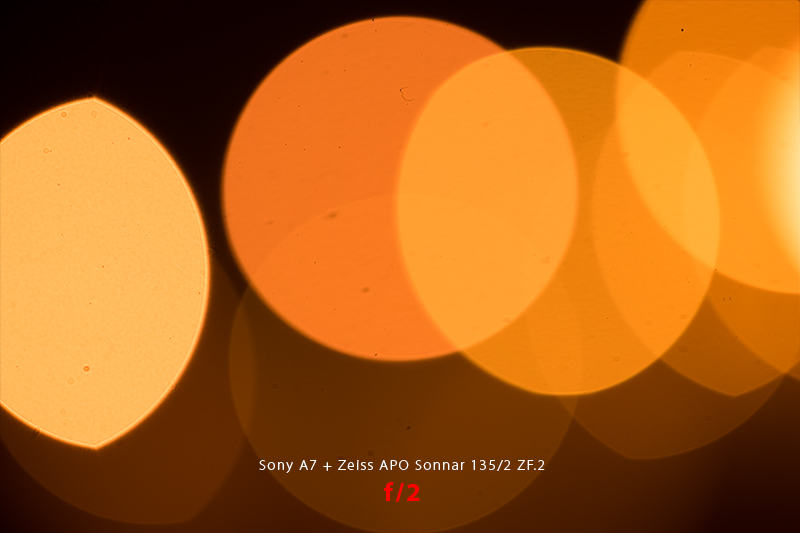
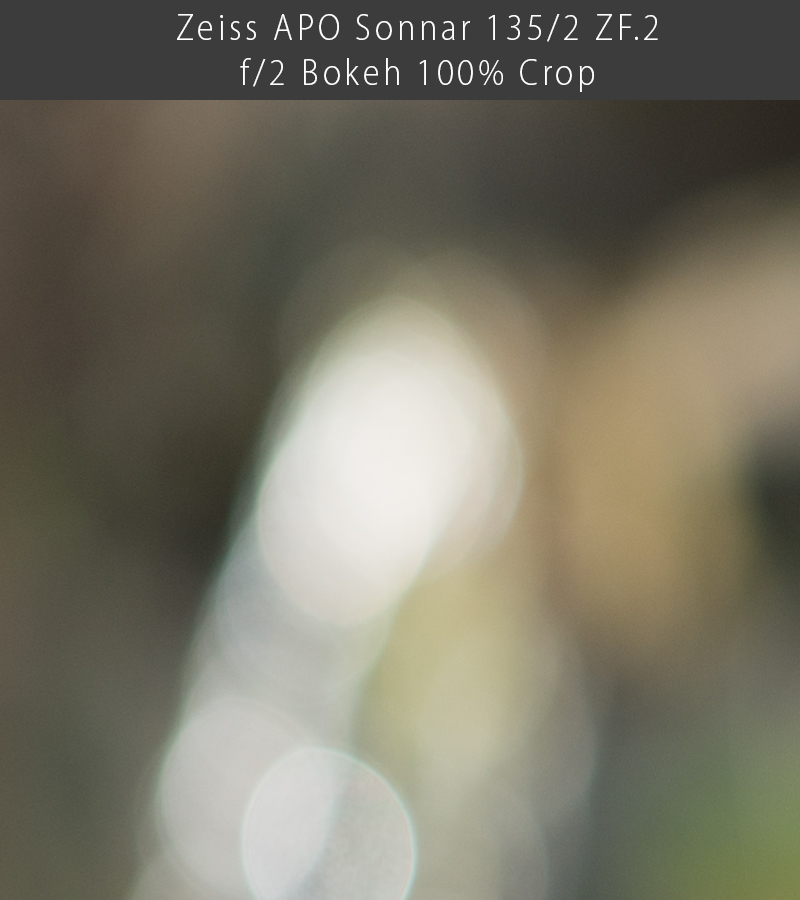
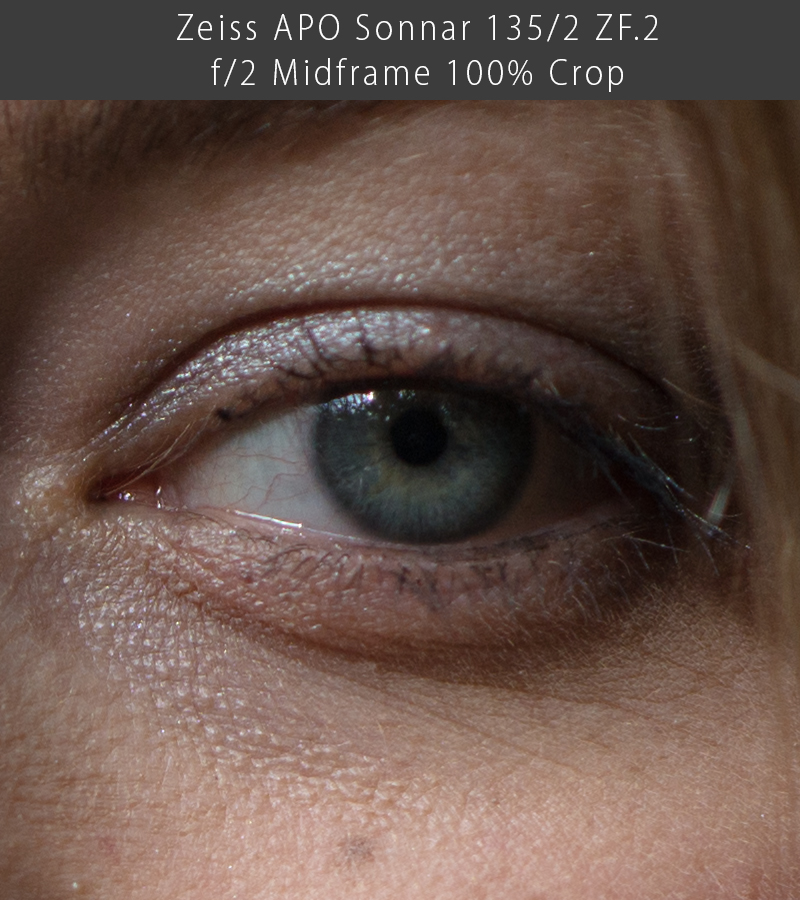
We might see that circular highlights have tendency to form elliptical shape instead of circle. This, so-called cat-eye shape, gradually increases toward edges and is caused by mechanical vignetting of the lens. To be honest, this was slightly disappointing for me but expected to certain extent when I saw light fall off at widest aperture. Stopped down just 2/3rd of the f-stop, highlight shapes improve to almost regular circles, but aperture blades starts to be visible.
While shape of bokeh is not perfectly rounded wide open, distribution of the light is very smooth and this is one of the most important attributes related to the quality (character) of the bokeh.
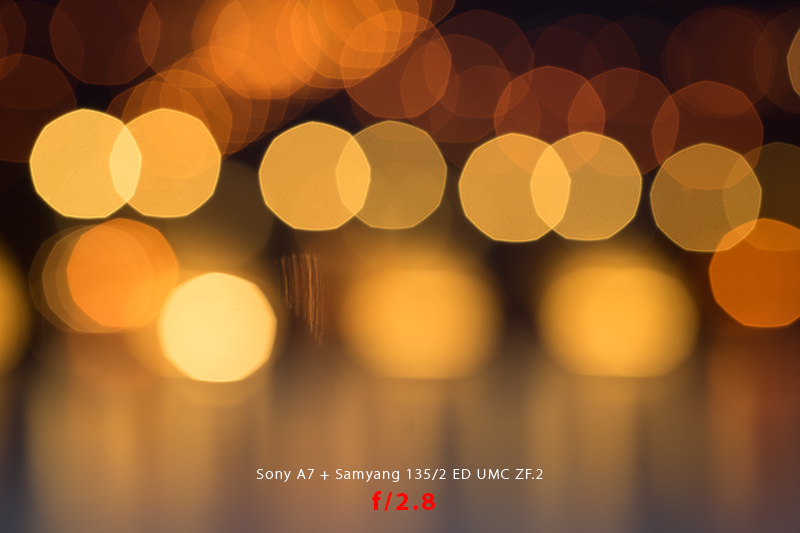
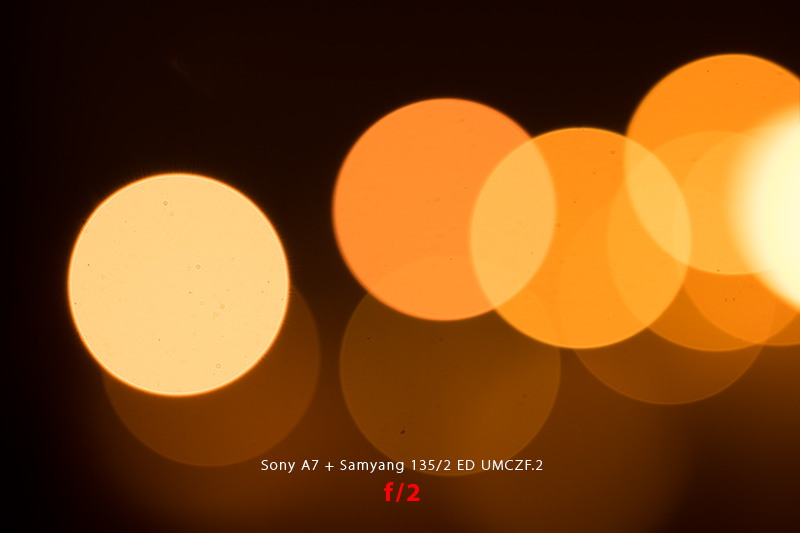
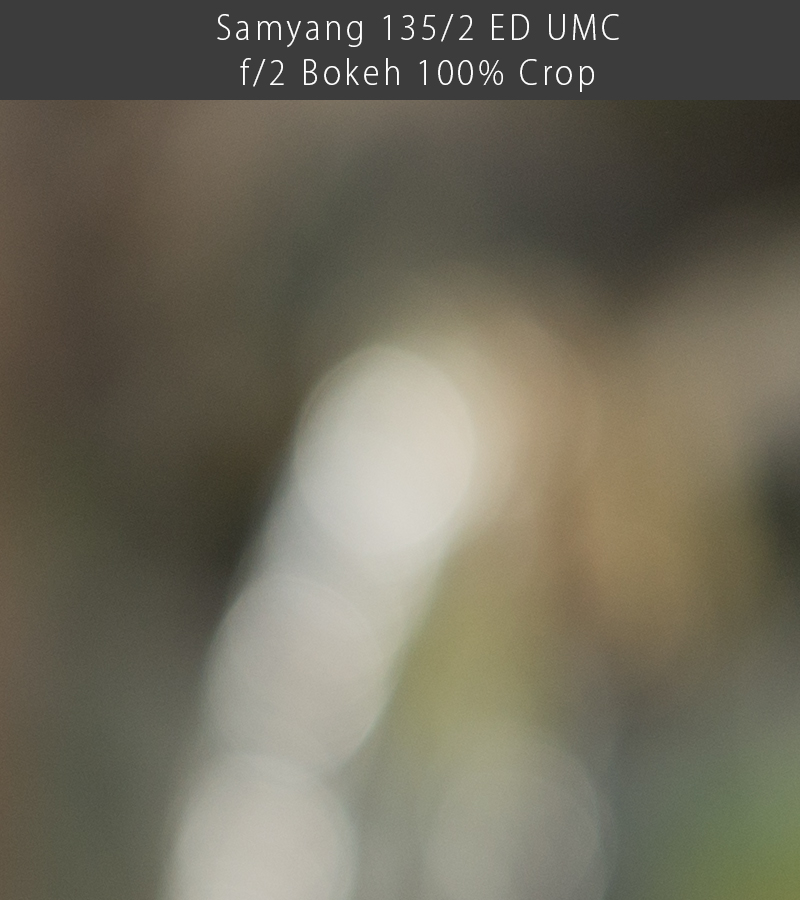
Samyang 135/2 ED UMC however excels in both categories. Let’s take a look at following direct comparisons at f/2 and f/2.8
Zeiss vs Samyang at f/2
Zeiss vs Samyang at f/2.8
As you can see, Samyang has almost perfect circular shape of the blurred highlights across the image and both lenses with their 9 aperture blades creates regular shapes wt f/2.8. Both lenses also show very smooth light distribution with almost invisible outline. At this point we might say that because of less pronounced mechanical vignetting Samyang has smoother bokeh, but that won’t be entirely true in practice.
There is another thing coming into play – defocus magnification.
As you can see from above comparisons, from the same position and at the same subject distance, with both lenses focused to MFD, Zeiss creates larger highlight circles (visible at f/2.8) and in effect we might enjoy “more blurred look of the background”.
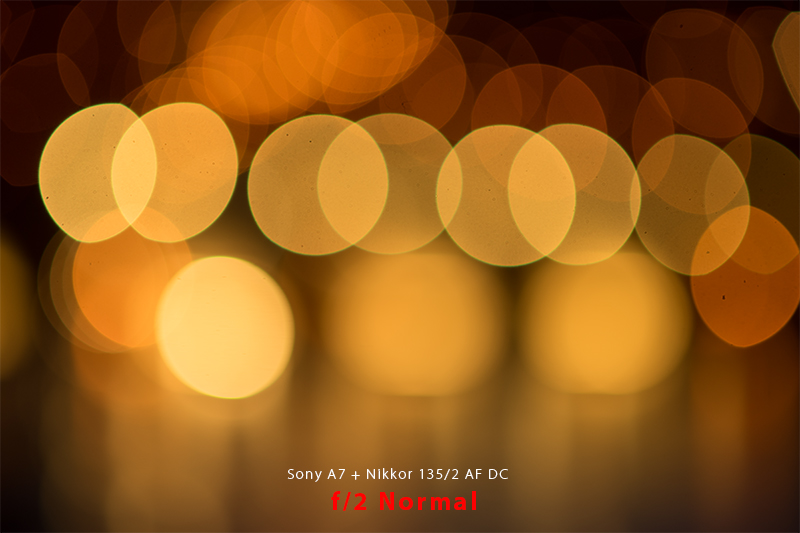
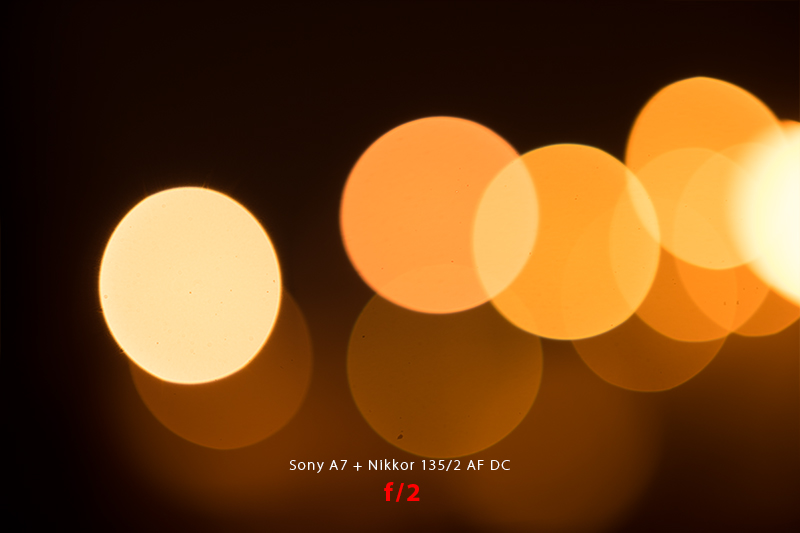
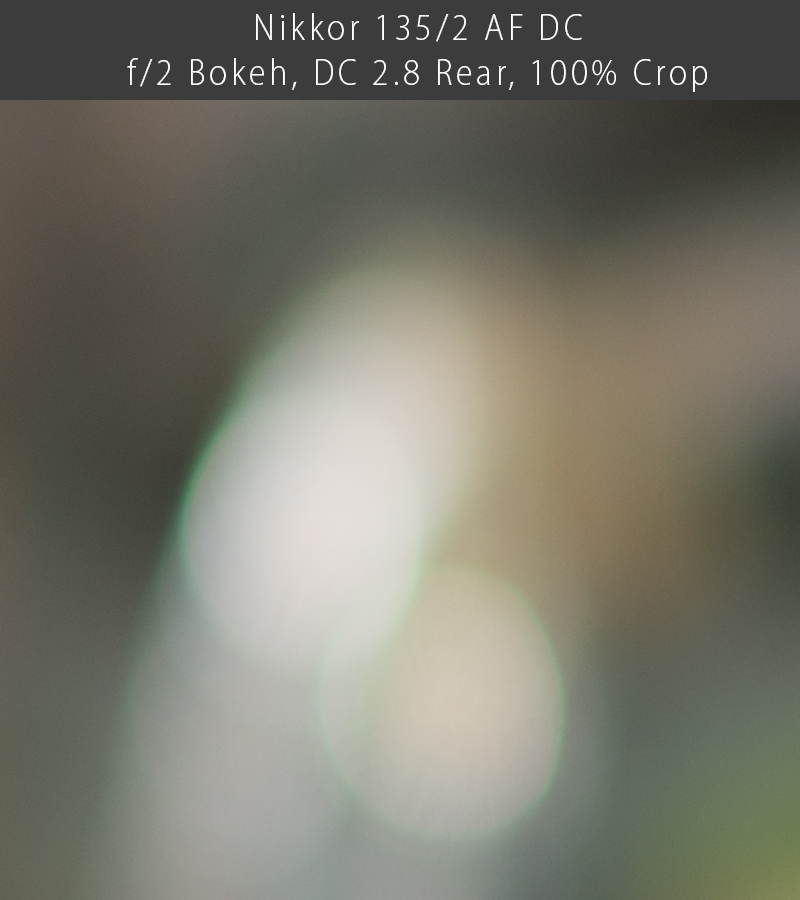
It won’t be fair to forget about Nikkor at this point. Nikkor has specially designed feature called Defocus Control (thus DC in the lens name). What it does is allowing user to increase spherical aberration either toward front focus or rear focus, in order to create smoother bokeh (improve light distribution and increase defocus magnification).
Increased spherical aberration will soften image in effect, but unfortunately also in the focus plane.
Images will explain this better than I am able to do with my poor English…
Here we have both lenses at f/2 with Nikon DC at neutral position.
Zeiss vs Nikkor at f/2 (DC Neutral)
You might notice slight CA at the highlight edges with Nikkor, slightly lower mechanical vignetting and as you can see,
slightly smaller circles.
In the following comparison we can see what happen when Nikkor is Defocused using Control ring, to its maximum value toward rear.
Zeiss vs Nikkor at f/2 (DC Rear Max)
While there are still traces of CA, light distribution is much smoother with Nikkor lens now, and circles are larger than with Zeiss.
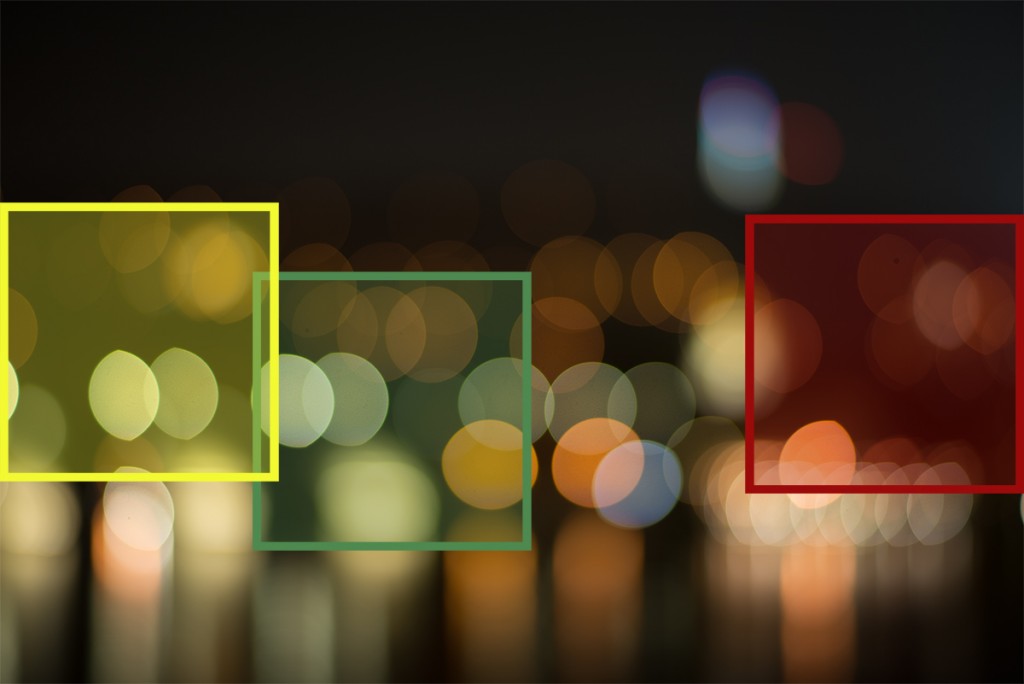
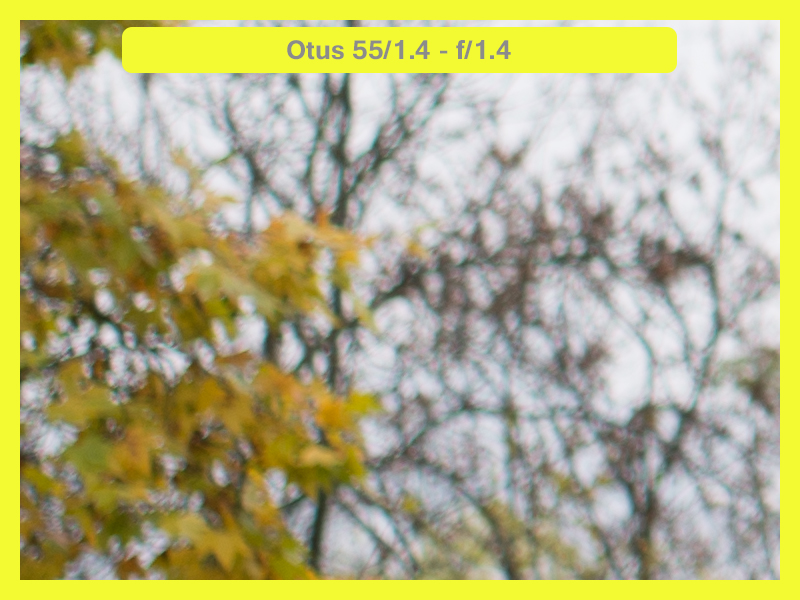
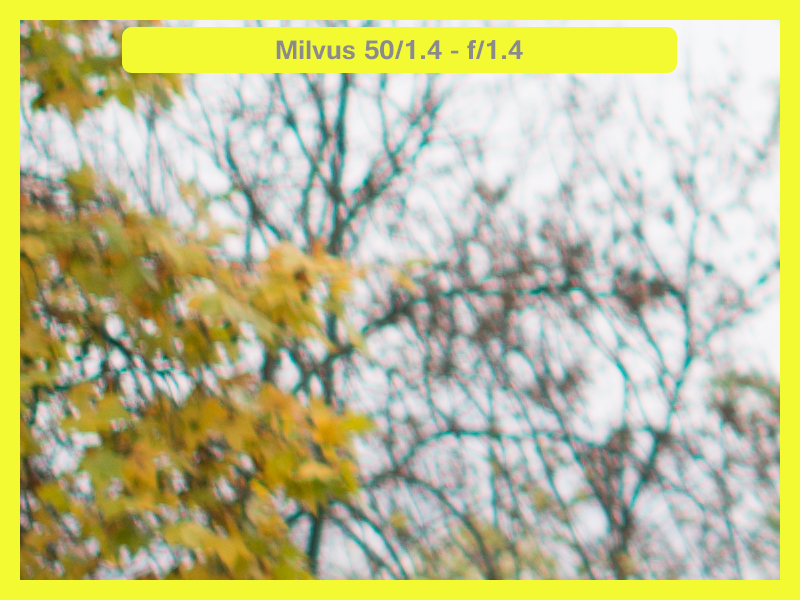
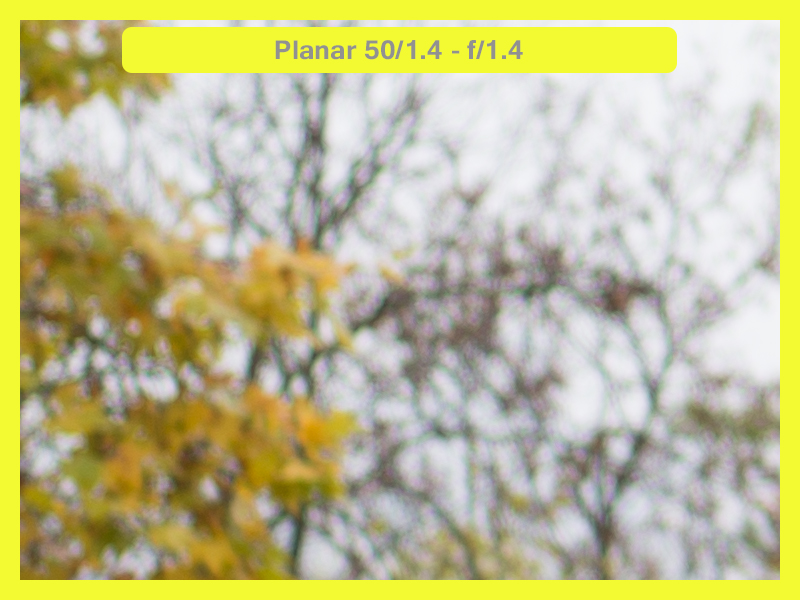
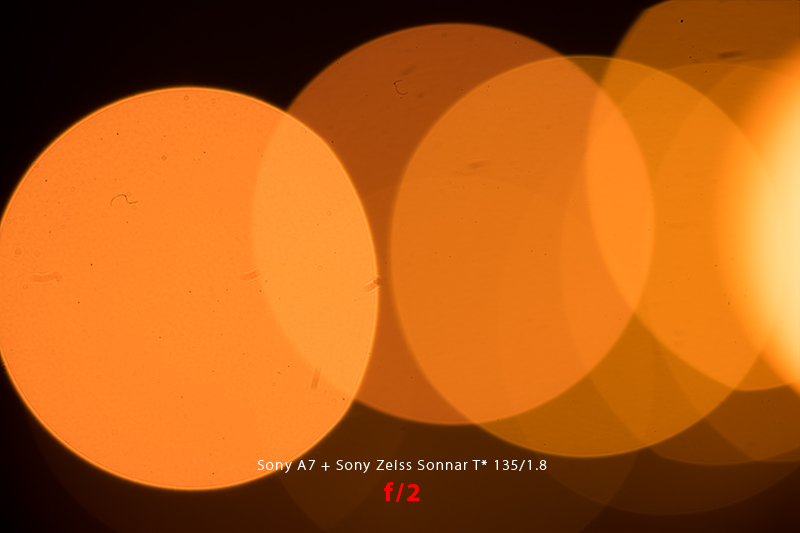
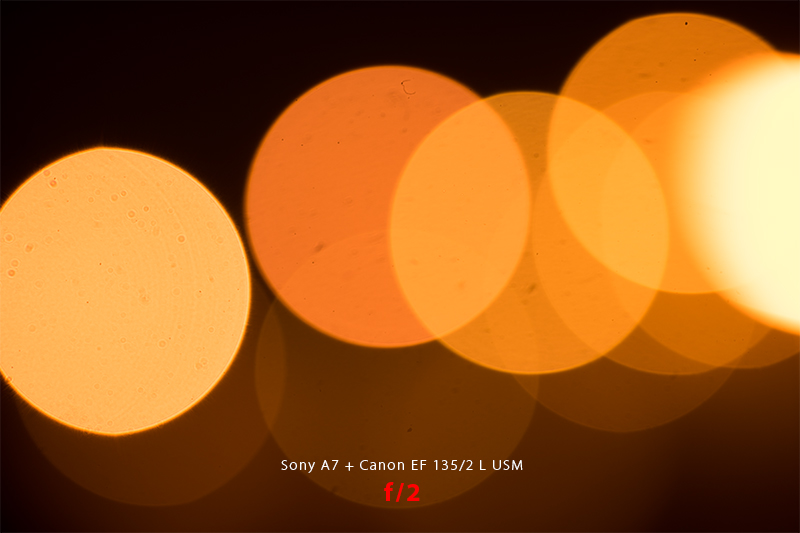
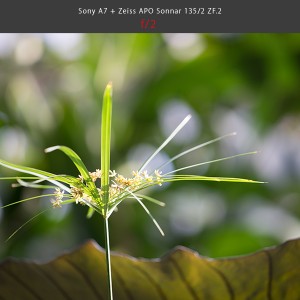
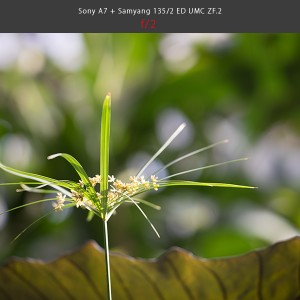
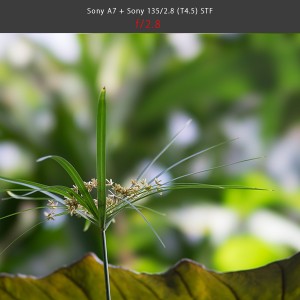
I thought that it would be interesting to compare Zeiss with few other 135mm lenses from our collection, including another very interesting Bokeh master – Sony 135mm f/2.8 (T4.5) STF.
In the following test shots, street lamps were much closer to the lens (closest is approx. 5m), so you’ll be able to better compare magnification aspect.
Zeiss vs Samyang at f/2
Zeiss vs Nikkor at f/2 (DC Neutral)
Zeiss vs Sony Zeiss Sonnar T* 135/1.8 at f/2 vs f/1.8
(There is mistake in the image description above, Sony lens is at f/1.8. Beautiful bokeh isn’t it?)
Next comparison shows Zeiss at f/2 against Sony 135/2.8 (T4.5) STF. This is very special lens which uses built in apodizing filter in order to create smooth gradient of light distribution in the highlights. Sony lens (originally Minolta design) is on f/2.8, but it let only T4.5 light in.
Zeiss vs Sony 135/2.8 (T4.5) STF at f/2 vs f/2.8
That’s what I would call, super smooth bokeh ![:-)]()
Finally we shouldn’t forget strongest player in the field. I am pretty sure that Canon’s EF 135mm f/2 L USM is among those lenses, clear champion in sale figures. It is also most popular 135mm fast lens recently IMHO.
Zeiss vs Canon EF 135/2 L USMat f/2
That is lot of images captured, just to show bokeh characteristics. After making such an effort to compare those lenses in one of the vital aspects of this focal length, we decided to make another two tests with subjects in daylight. Differences in bokeh rendering won’t be as significant as with night lamps, but they will be closer to what most will experience in real life shooting. You can use gallery mode to scroll through.
Set 1:
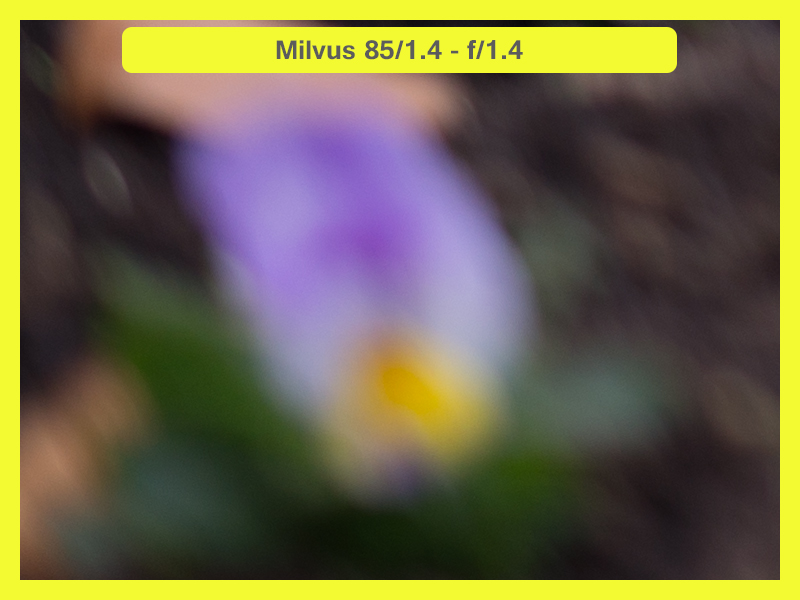
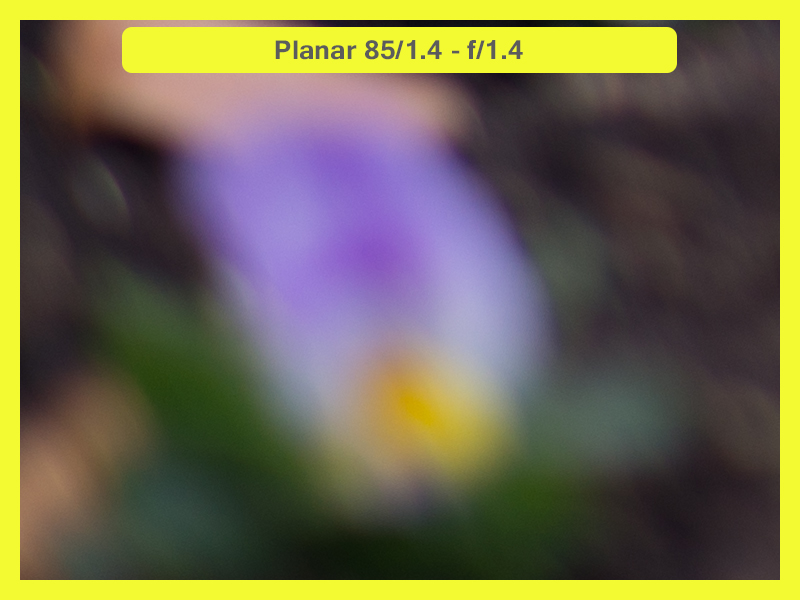
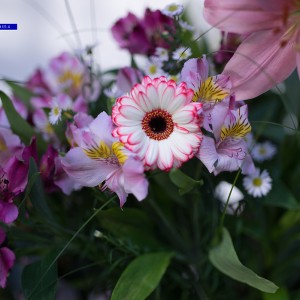
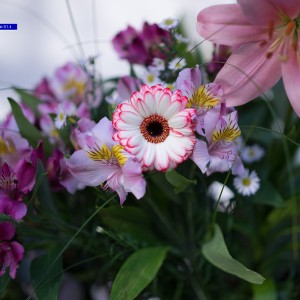
![Zeiss_Bokeh_Flower_f2]()
![Samyang_Bokeh_Flower_f2]()
![Nikkor_Bokeh_Flower_f2]()
![Zony_Bokeh_Flower_f18]()
![Canon_Bokeh_Flower_f2]()
![Zeiss_Bokeh_Flower_f28]()
![Sony_STF_Bokeh_Flower_f28]()
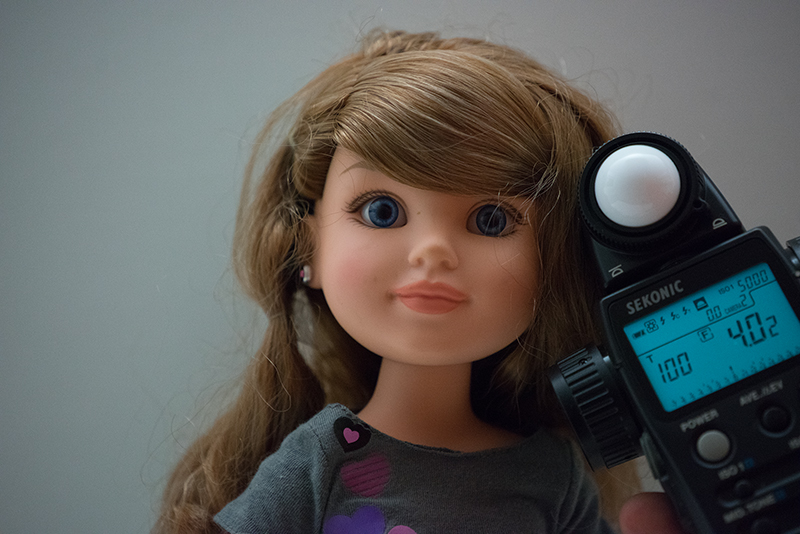
Set 2:
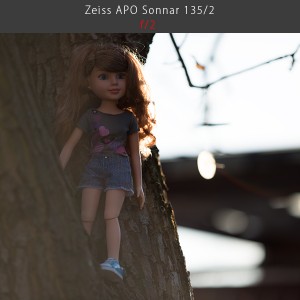
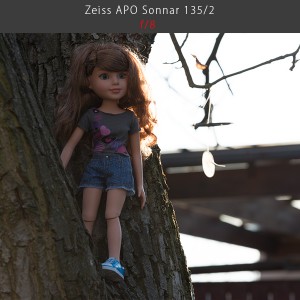
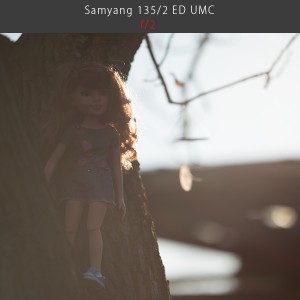
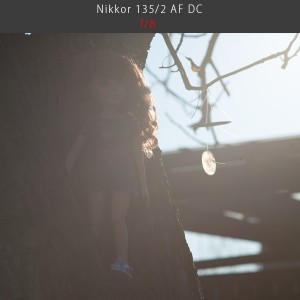
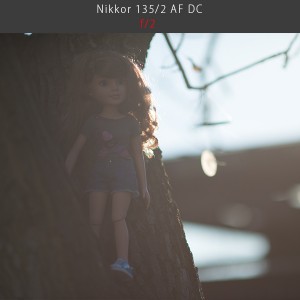
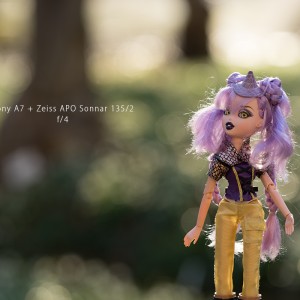
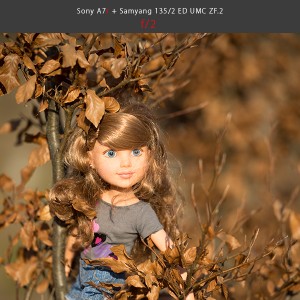
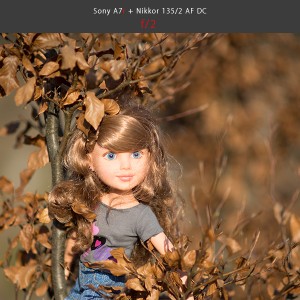
![Zeiss_Bokeh_Doll_f2]()
![Samyang_Bokeh_Doll_f2]()
![Nikkor_Bokeh_Doll_f2]()
![Zony_Bokeh_Doll_f18]()
![Canon_Bokeh_Doll_f2]()
![STF_Bokeh_Doll_f28]()
This is basically it. We tried to show you all aspects of this phenomenal Zeiss lens, comparing it to the best in its class. It’s time to move to the final part of our review, part where we will write a summary/conclusion and show you some people portraits and sample images.
Please help support this page and upcoming reviews and buy through affiliate links, with no extra cost for you:
Buy on BHPhoto: 135mm f/2 Apo Sonnar T* ZF.2 Lens for Nikon F Mount
Buy on Adorama: 135mm f/2 Apo Sonnar T* ZF.2 Lens for Nikon F Mount
Buy on Amazon: 135mm f/2 Apo Sonnar T* ZF.2 Lens for Nikon F Mount BEST OFFER!
To help this page survive, your donation will be highly appreciated.
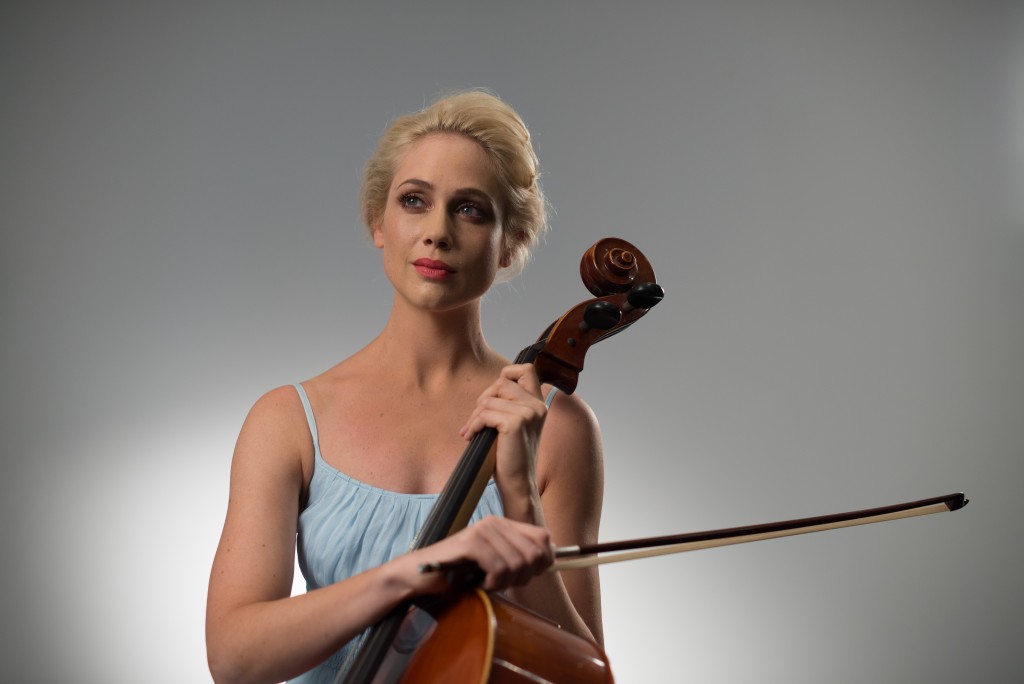
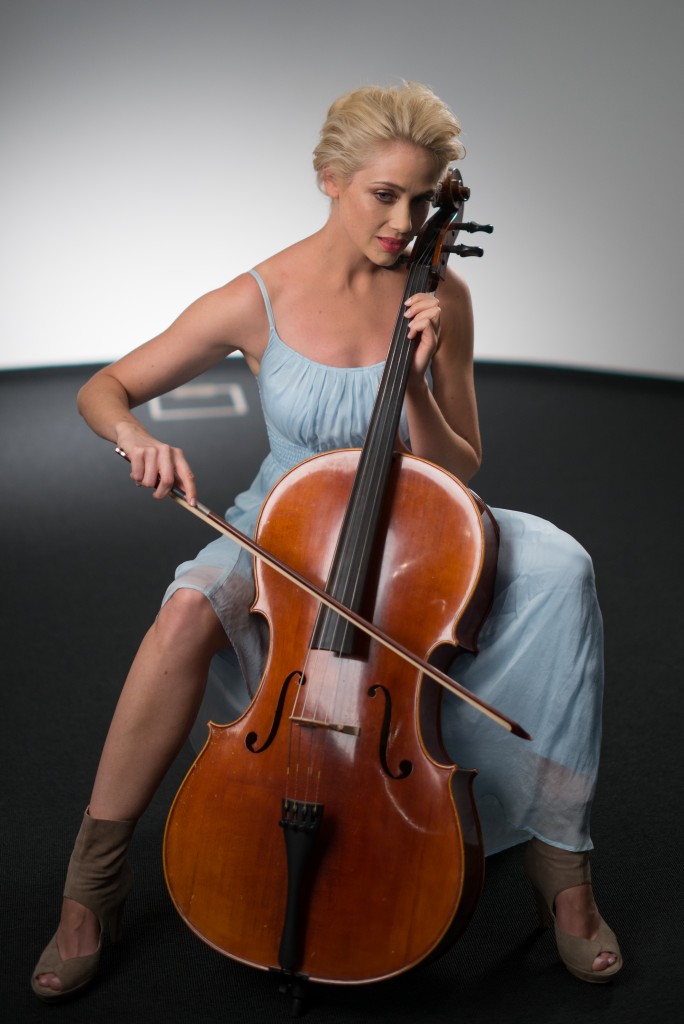
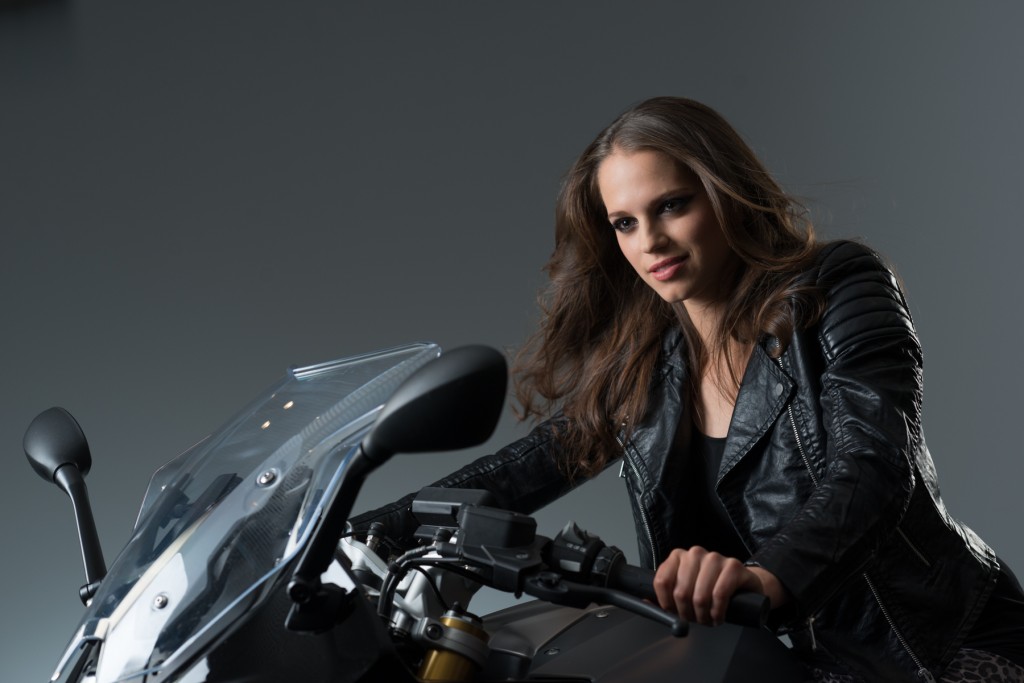
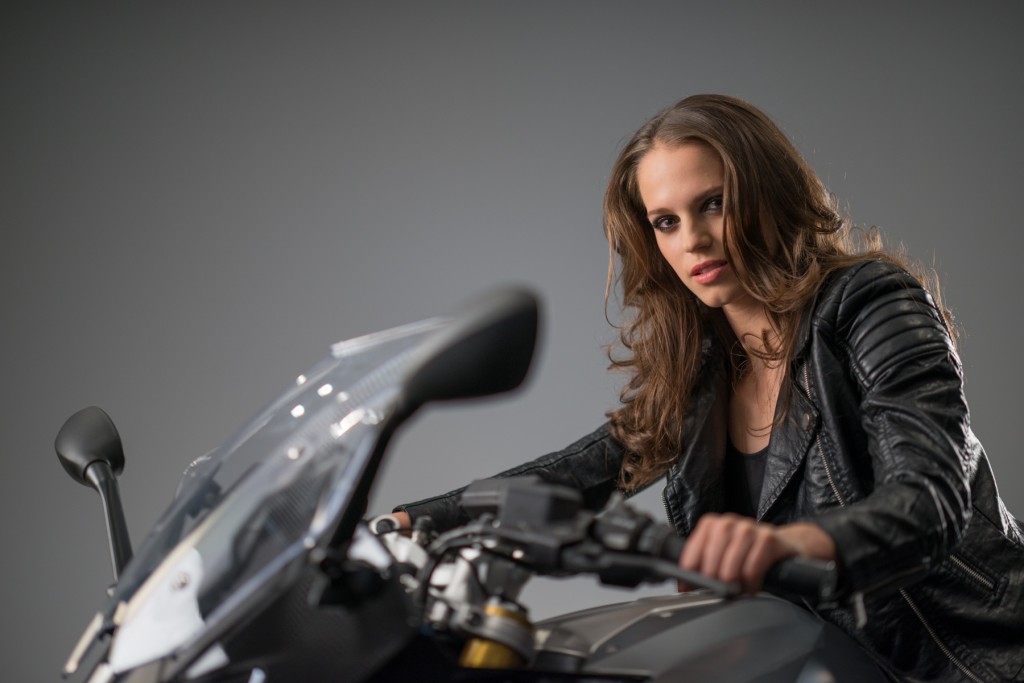
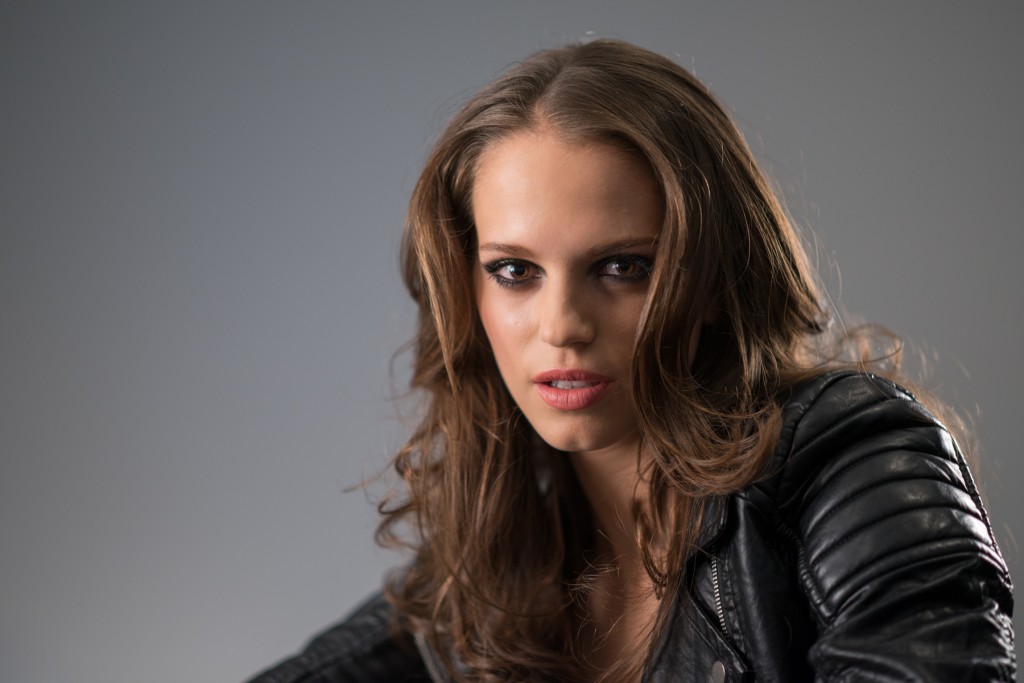
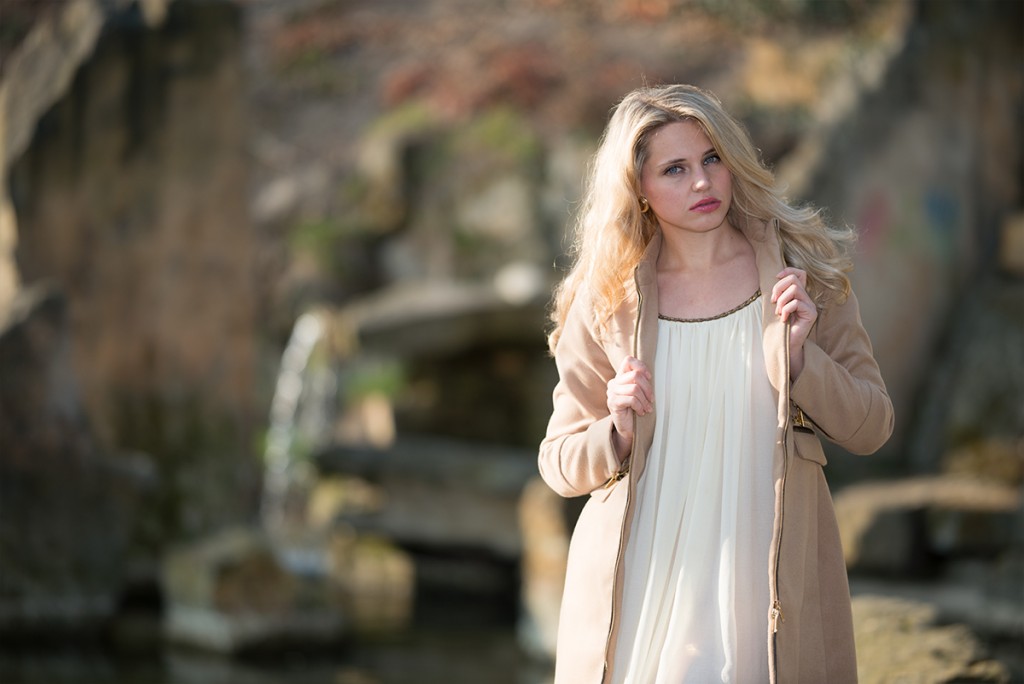
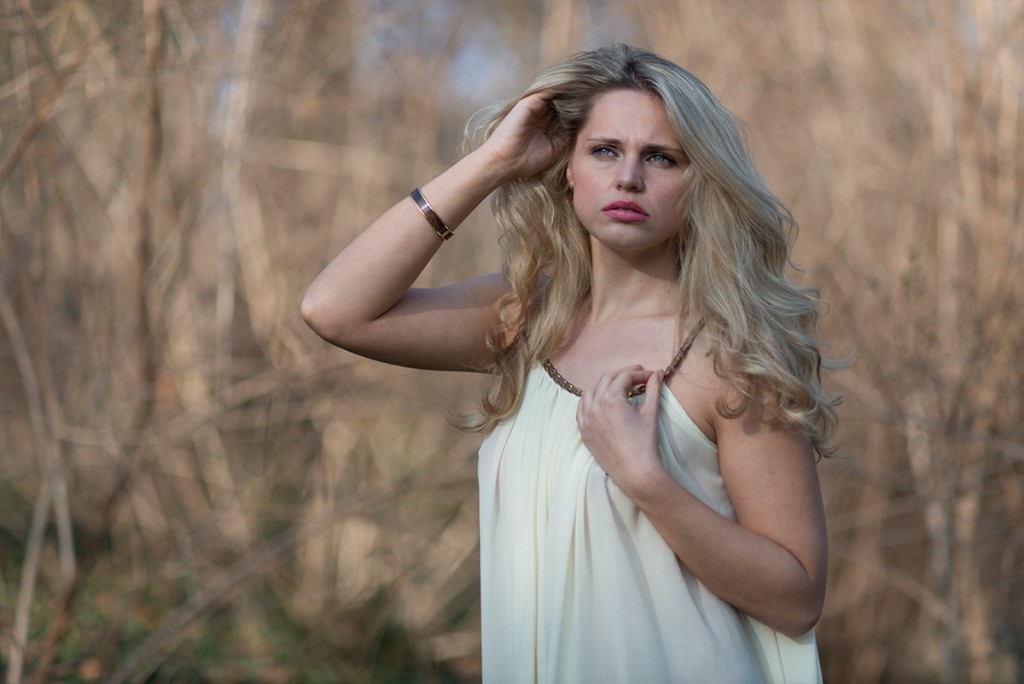
Portrait:
135mm was one of the most popular longer focal lengths for many years. It makes a good relation between reach, size, speed and magnification. Today, with different size sensors, very fast tele-zooms and large resolution allowing more aggressive cropping, it is slightly less attractive, and should I say, less versatile.
At the beginning of this review, I mentioned that it is my favorite focal length for people shots, but at the same time there are not many other situation where I would grab one of my 135’s. Zeiss APO Sonnar 135/2, due to short minimum focus distance and nice magnification, opens new possibilities.
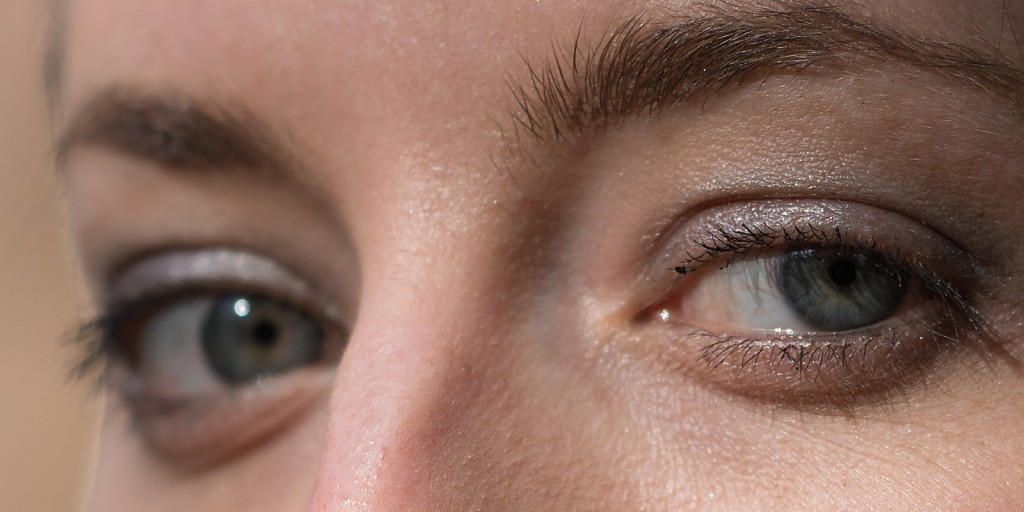
Getting back to portraits, I was impressed with Zeiss APO Sonnar 135mm f/2 during testing period, but as usual with such a fast and long lens, manual focusing is very demanding. DOF is so shallow, that it is hard to get eye in perfect focus and to have both eyes sharp, model should stand parallel to the focus plane.
Somewhat easier was to focus on Sony A7 cameras, because of the focus magnification, but acquiring focus is not the only challenge there… Even slightest movement of the subject, will cause blur problems.
Here is an example how shallow DOF is
![13520_ZOO-5704-Edit]()
![unsharp-one-eye_crop]()
You probably know all this, but following comparisons are thus rather informative than exact, because in order to give at least basic idea about how those lenses compare, I had to shot hand-held in variable lighting conditions and my dear models weren’t always stone still.
Normally, I would also post process all models photo (just like one above), because girls deserves it, being so kind to fit and make-up themselves on set and to work hard all day for just symbolic fee, in order to help verybiglobo.com and its readers.
They are professional models and they expect their images to be professionally retouched.
In this case however, I will make an exception and show you unprocessed comparative images, because both girls are very nice and have solid, smooth skin.
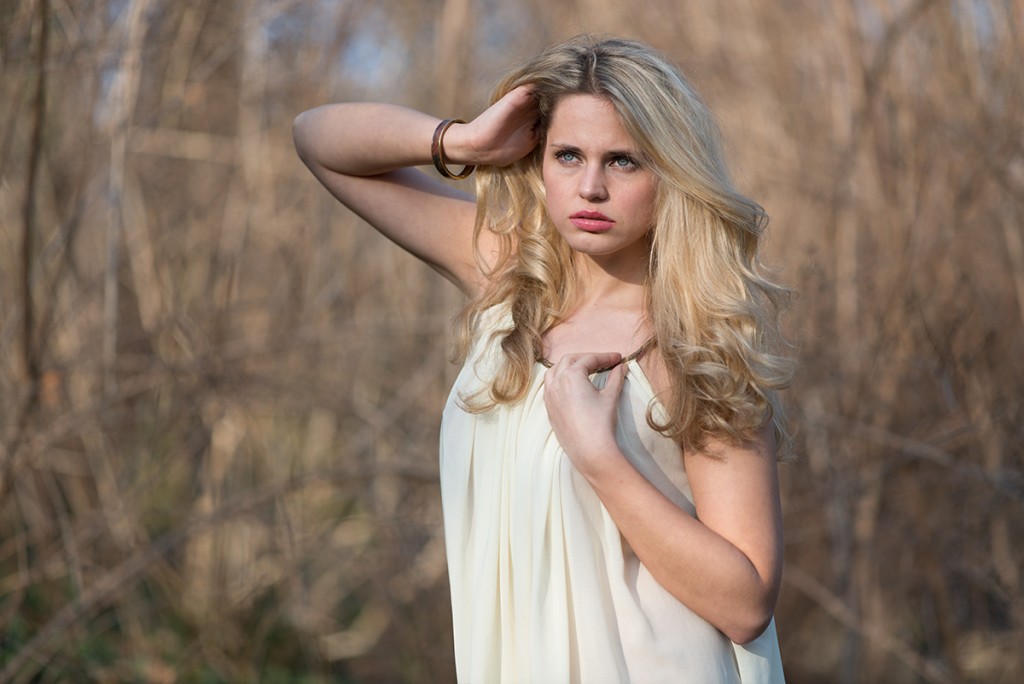
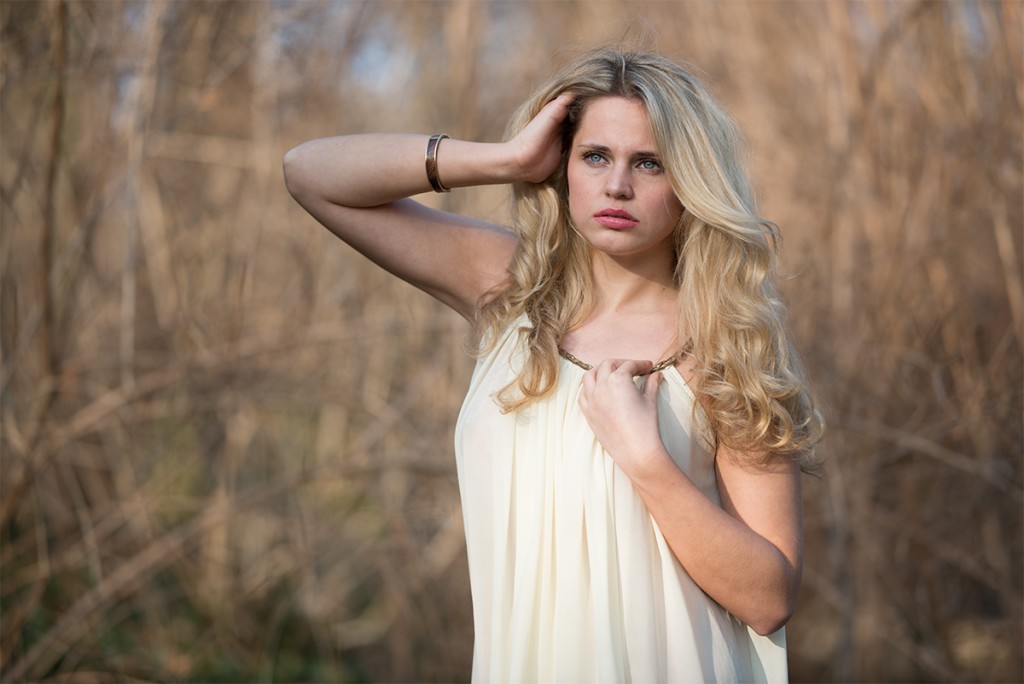
Here is first set of comparison images:
![Nikon D800E + Zeiss APO Sonnar 135mm f/2 at f/2]()
Nikon D800E + Zeiss APO Sonnar 135mm f/2 at f/2
![Nikon D800E + Samyang 135mm f/2 ED UMC at f/2]()
Nikon D800E + Samyang 135mm f/2 ED UMC at f/2
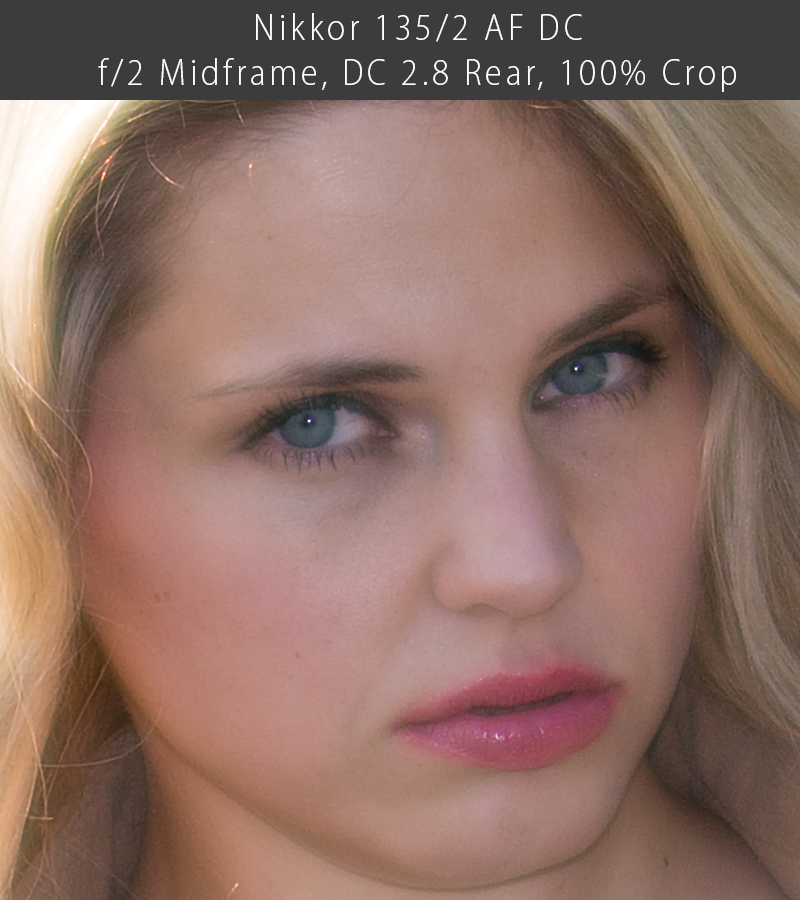
![Nikon D800E + Nikkor DC AF-D 135mm f/2 at f/2]()
Nikon D800E + Nikkor DC AF-D 135mm f/2 at f/2
At the first sight, we can notice that Zeiss and Samyang looks very similar at this image size, while Nikkor seems to be less sharp but also has smoothest bokeh. Nikkor was indeed set to defocus of f/2.8 toward rear.
Let’s take a look at the focus zone crops
Zeiss vs Samyang at f/2
Zeiss vs Nikkor at f/2 (Nikkor set to DC 2.8 Rear)
Zeiss and Samyang are very close IMHO, with Zeiss having barely notable advantage in terms of sharpness. (This could be also due to the slightly missed focus or movement of the model. In any case, difference is field irrelevant). Nikkor is significantly softer at the focus zone, but on the other hand, model has dreamy look, soft skin and pleasing tones without any post processing.
Now let’s take a look at the bokeh zone crops
Zeiss vs Samyang at f/2
Zeiss vs Nikkor at f/2 (Nikkor set to DC 2.8 Rear)
Nikkor has smoothest bokeh but also most pronounced CA, namely LoCA. Samyang has slightly smoother bokeh than Zeiss in this situation, but both lenses are very similar in that respect.
Here is another set of comparisons with Nikkor set to neutral DC.
![Nikon D800E + Zeiss APO Sonnar 135mm f/2 at f/2]()
Nikon D800E + Zeiss APO Sonnar 135mm f/2 at f/2
![Nikon D800E + Samyang 135mm f/2 ED UMC at f/2]()
Nikon D800E + Samyang 135mm f/2 ED UMC at f/2
![Nikon D800E + Nikkor DC AF-D 135mm f/2 at f/2]()
Nikon D800E + Nikkor DC AF-D 135mm f/2 at f/2
We can see again that Zeiss and Samyang are visibly sharper wide open at focus area
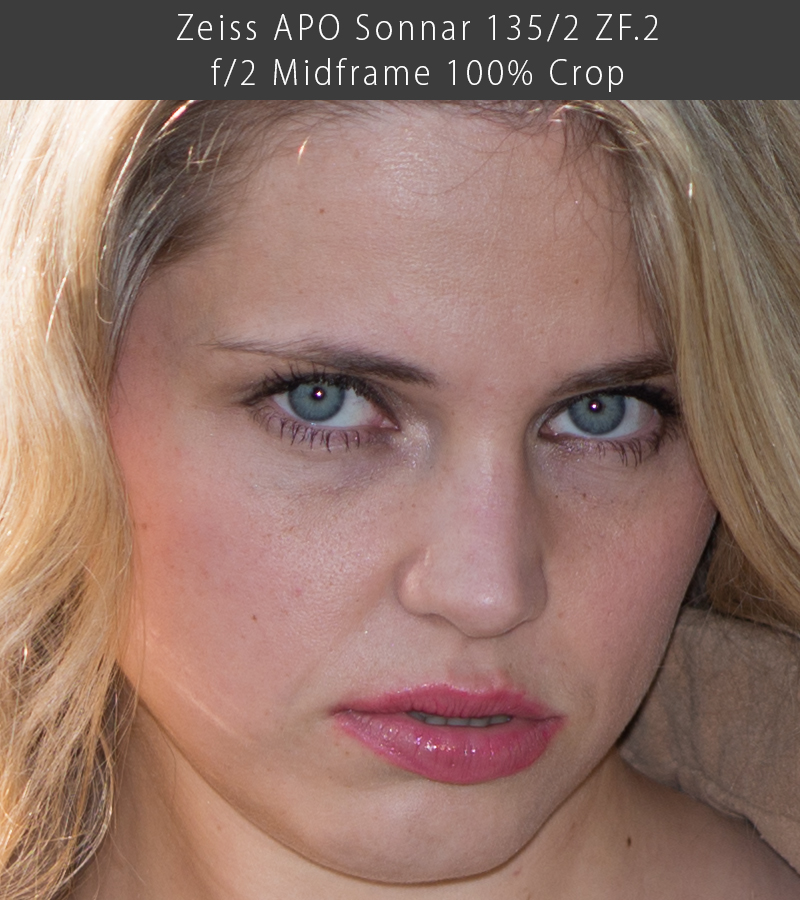
Zeiss vs Samyang at f/2
Zeiss vs Nikkor at f/2 (Nikkor set to DC 0)
While difference is clearly visible, RAW files from Nikon D800E have good latency for computed sharpening. If you have good sharpening technique, Nikkor image can be sharpened to the extent where it would be hard to distinguish between lenses.
Zeiss vs Nikkor at f/2 (Nikkor set to DC 0) Both lenses sharpened using sophisticated tools and techniques.
There is of course DOF dependent blurriness, but otherwise both images are very close after sharpening.
Last set of portrait images was made under fast changing light (running clouds), but I would post it because framing is much tighter than in above examples.
![Nikon D800E + Zeiss APO Sonnar 135mm f/2 at f/2]()
Nikon D800E + Zeiss APO Sonnar 135mm f/2 at f/2
![Nikon D800E + Samyang 135mm f/2 ED UMC at f/2]()
Nikon D800E + Samyang 135mm f/2 ED UMC at f/2
![Nikon D800E + Nikkor 135mm f/2 DC AF-D at f/2]()
Nikon D800E + Nikkor 135mm f/2 DC AF-D at f/2
At this distance, DOF is so thin, that you might often get sharp eyebrows instead of the iris e.g. Achieving critical focus is essential for the good result in this case…
Zeiss vs Samyang at f/2
Zeiss vs Nikkor at f/2 (Nikkor set to DC 0)
Conclusion:
We tried to present you lot of images, and direct comparisons in this review, in order to make your lens choice easier and mainly in order to help you to create your own opinion about those lenses.
I was impressed by Zeiss performance, but I didn’t expect nothing less. I was impressed with Samyang too and while it was a little surprise, I already get used to see great lenses from Korean producer. Both lenses are one of the sharpest optics that I had chance to test so far, and both will be great portrait lenses for many years to come.
Zeiss has slight edge in sharpness, but it also shows more CA, despite APO construction. There are however few reasons why you should favor Zeiss lens.
+
– Larger magnification at MFD.
– Better, much better built quality. Manual focusing is as usual very smooth and precise with long enough focus throw.
– Somewhat smaller size when focused to infinity. Good for transport.
– Better and more predictable flare resistance.
– More neutral color rendering.
– Better QC.
–
– Price. It is very expensive lens for standard 135mm.
– Vignetting could be smaller.
– Blurred highlights wide open have irregular shape (cat-eye), making bokeh slightly more nervous than it could be.
Zeiss APO Sonnar 135mm f/2 is very well designed and constructed lens, that will make its owner not only happy with superb images, cutting sharpness, punchy contrast and almost non-existent CA and distortion, but also with kind of emotional satisfaction of using high precision instrument.
If you are often shooting portraits, and you want one of the best lenses on the market in 135mm focal length, Zeiss is right choice IMHO.
Alternatives:
Zeiss APO Sonnar 135mm f/2 has many competitors and most of them are excelling in one or other category. Competition in this range is really tough. Samyang is almost as sharp, and has even better corrected CA, especially LoCA. Nikkor is also sharp enough in DC neutral position, especially if you are used to post process RAW images and apply smart sharpening and there is that DC option when soft, dreamy look is preferred.
Probably strongest competitor though is partially from its own stable – Sony Zeiss Sonnar T* 135mm f/1.8. This lens is also very sharp wide open, and it can open even wider than its APO brother. Build quality is comparable, and it has AF and smoother bokeh. It is made only in Sony A mount though and it is also very expensive lens.
Canon EF 135mm f/2 L USM is logical choice if you are in Canon system. No matter what was written about this lens, and fact that it is as old design as Nikkor probably, Canon is great lens IMHO. At recent price point, especially for used lenses in mint condition, it is very interesting option for sure.
Finally, my personnel choice for 135mm portrait lens was and will remain after this test – Sony 135mm f/2.8 (T4.5) STF. This Minolta lens is simply special in its own way, and as you could see in the samples above, f/2.8 (even f/4 and smaller) are usually enough for good subject separation, while preserving useful DOF to keep whole face in focus.
Zeiss should be great lens for night scene – cityscapes, night sky, evening concerts, theater etc. due to best flare resistance from tested lenses, brilliant accutance and contrast in challenging lighting conditions and sturdy built quality to survive one or two direct hits in crowd. It will serve well in studio or fashion show photography.
It might sound that I like every Zeiss lens that was tested in the last couple of months. I can assure you that we don’t have any financial interest in Zeiss, not even simple advertising on our pages, but they simply make great lenses, their only disadvantage is that I can’t have them all ![:-)]()
Thank you for reading, and if you have any questions, use comments bellow or open forum thread (I am checking it regularly).
Please help support this page and upcoming reviews and buy through affiliate links, with no extra cost for you:
Buy on BHPhoto: 135mm f/2 Apo Sonnar T* ZF.2 Lens for Nikon F Mount
Buy on Adorama: 135mm f/2 Apo Sonnar T* ZF.2 Lens for Nikon F Mount
Buy on Amazon: 135mm f/2 Apo Sonnar T* ZF.2 Lens for Nikon F Mount BEST OFFER!
I would like to thank all of you who sent us a donation so far. It really helps to finance content and design development of verybiglobo.com and to keep us independent. Thank you guys, you are part of our small team, and you are all Verybigfriends!
To help this page survive, your donation will be highly appreciated.
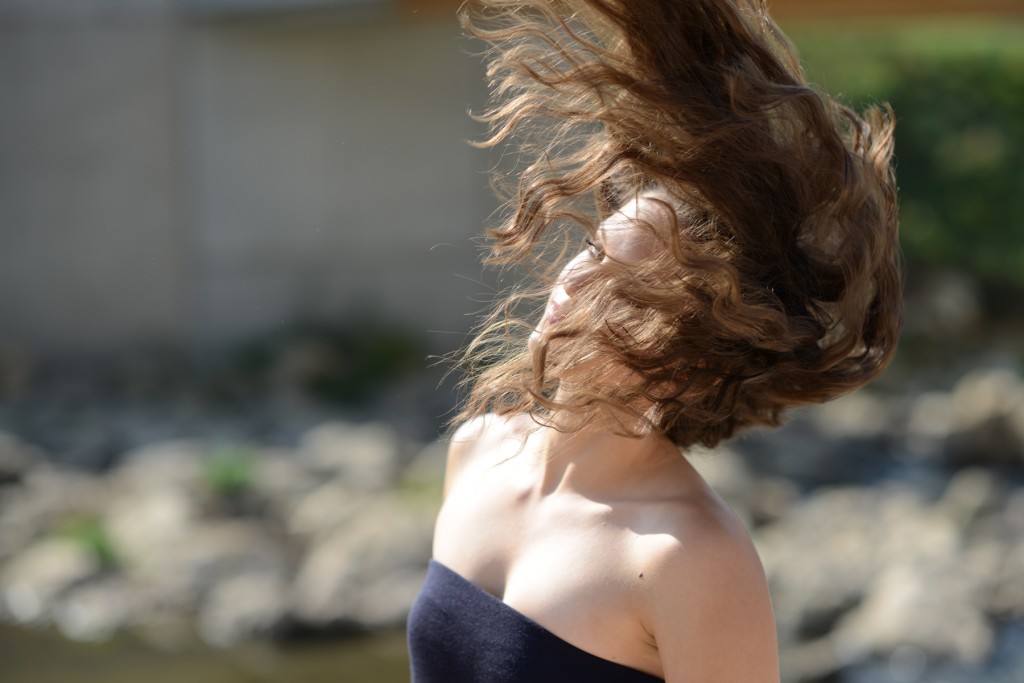
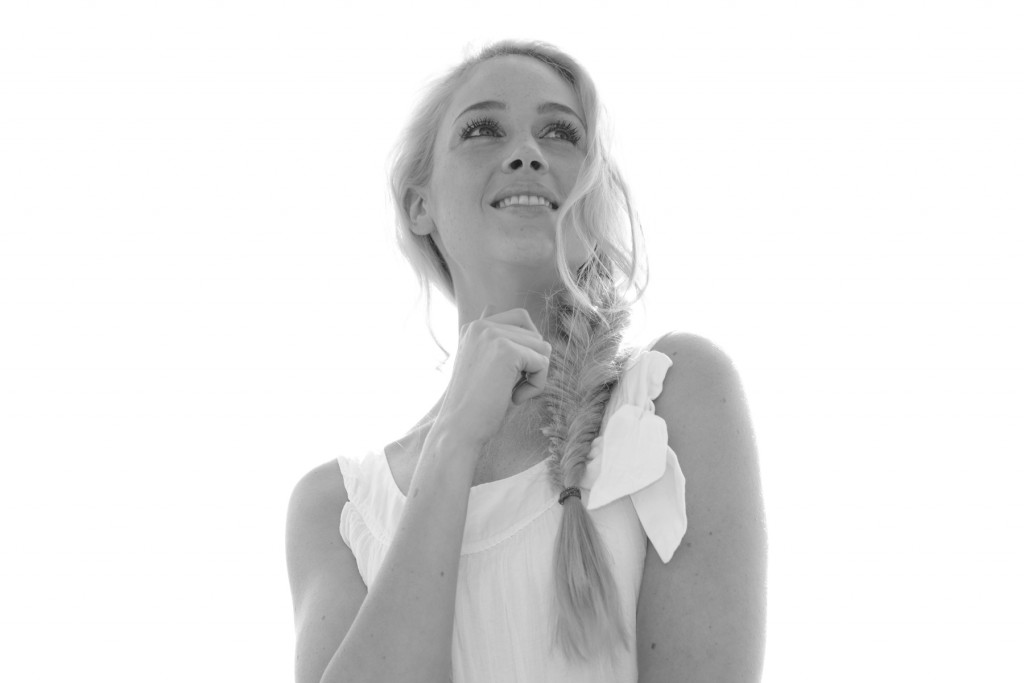
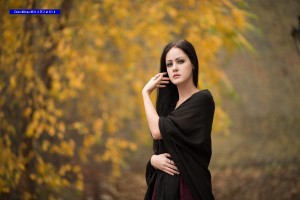
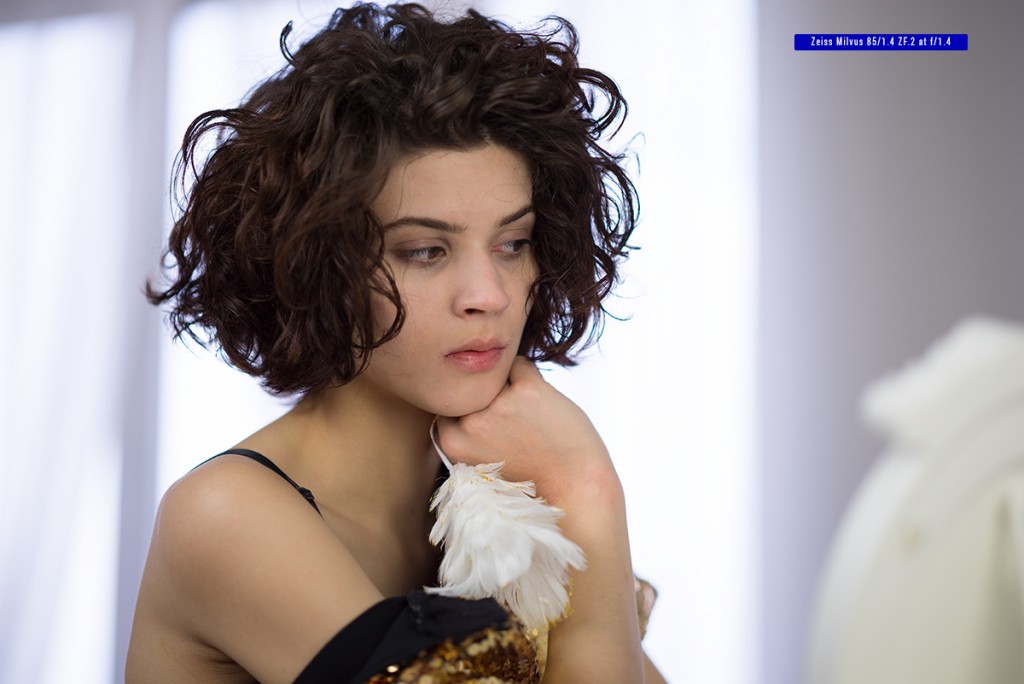
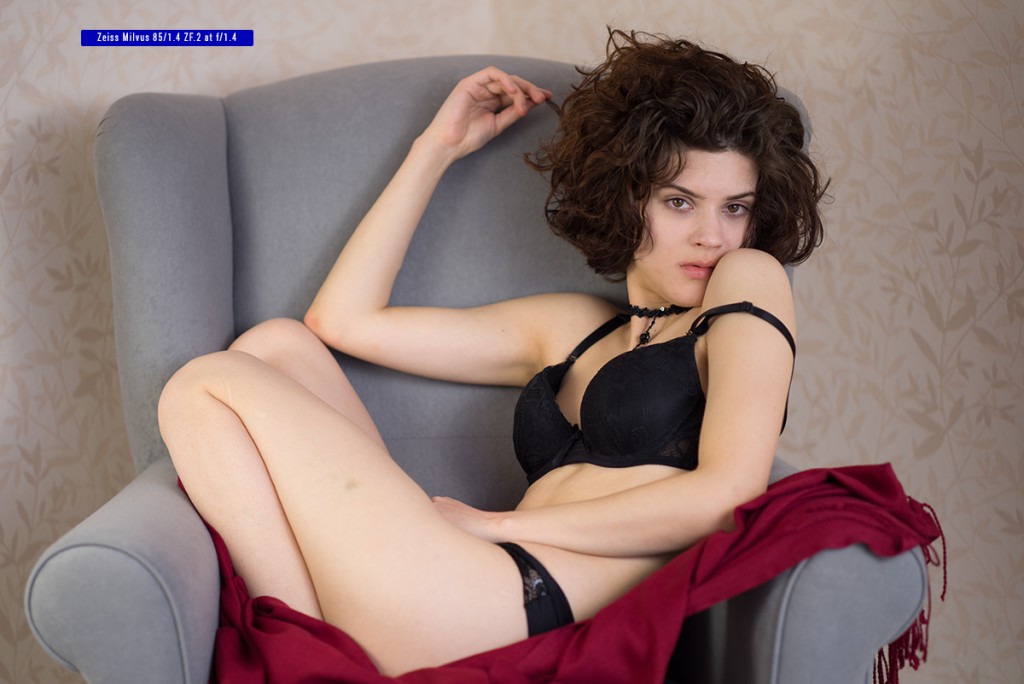
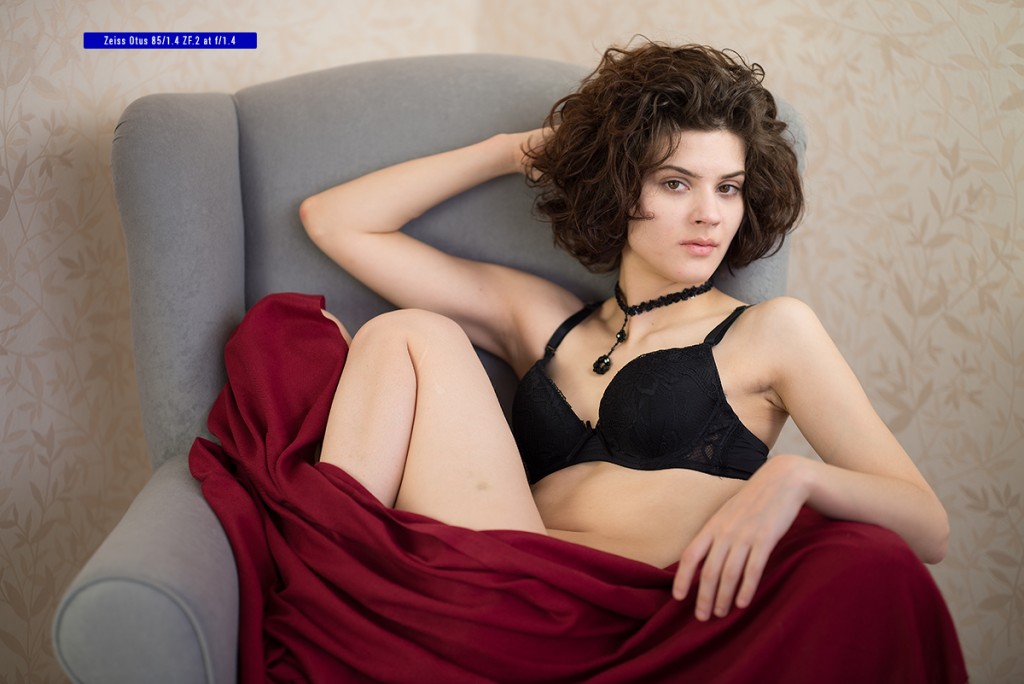
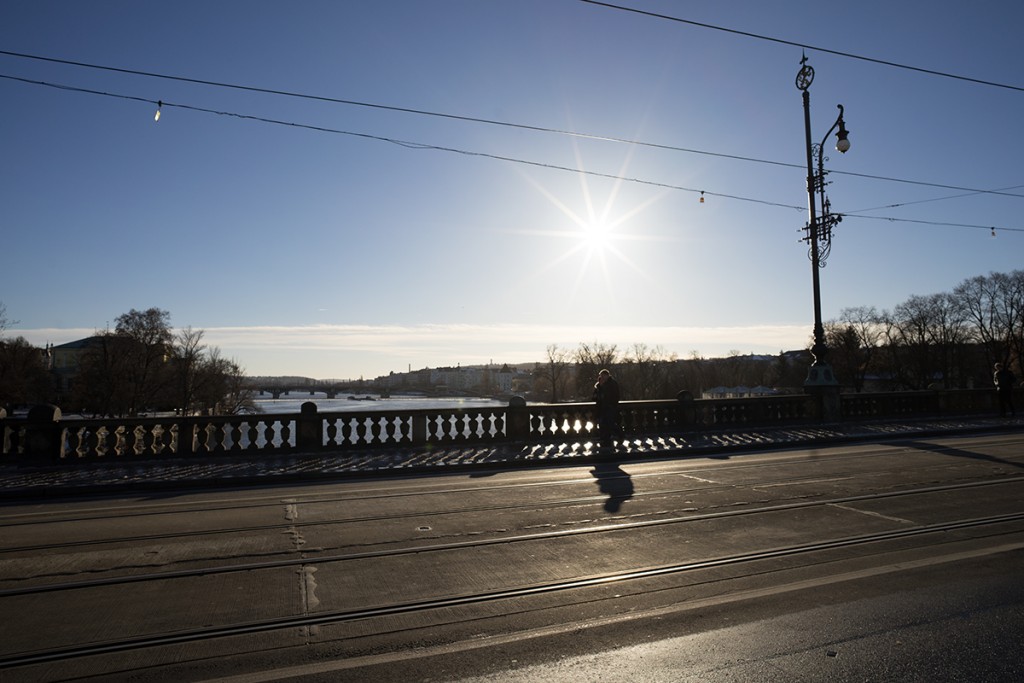
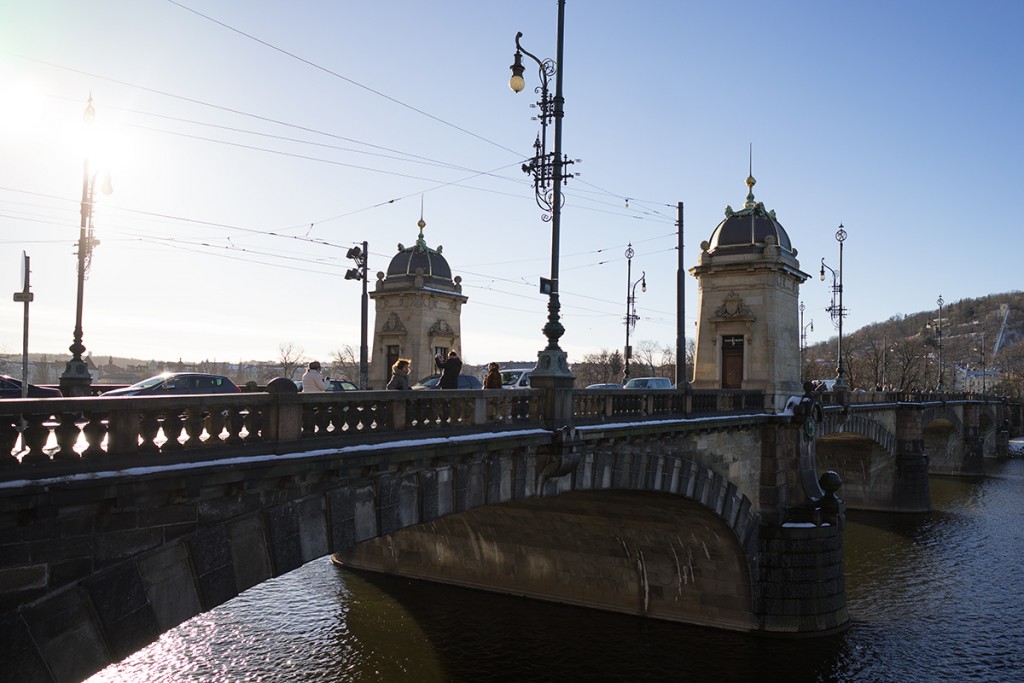
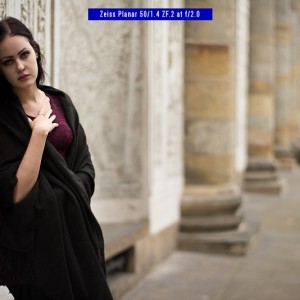
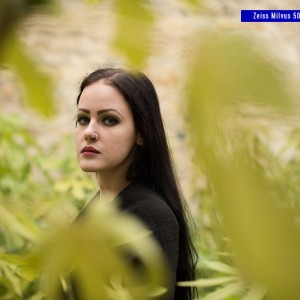
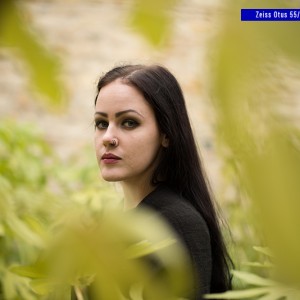
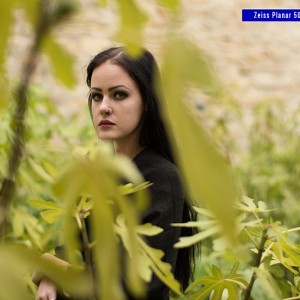
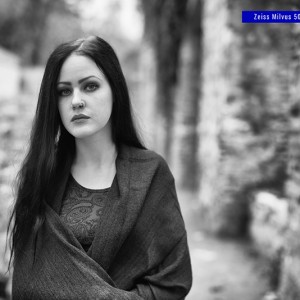
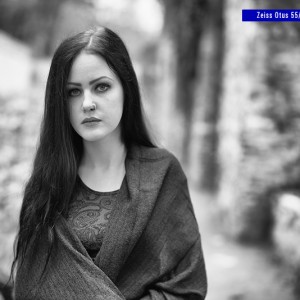
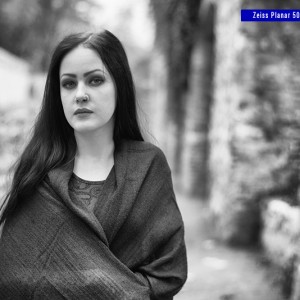
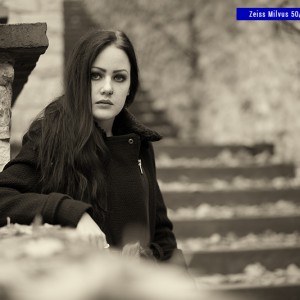
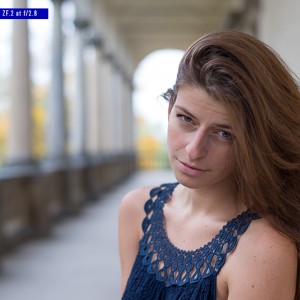
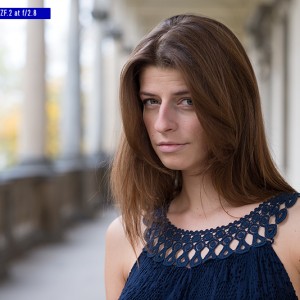
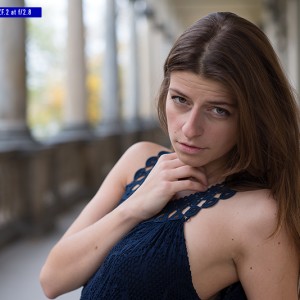
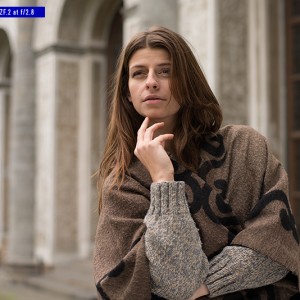
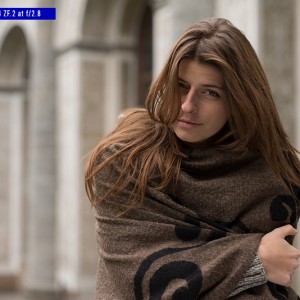
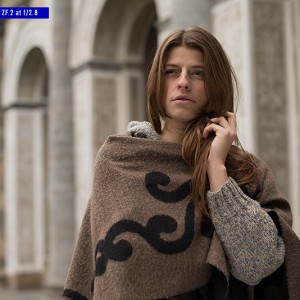
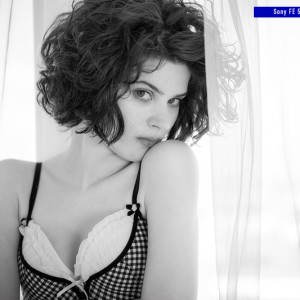
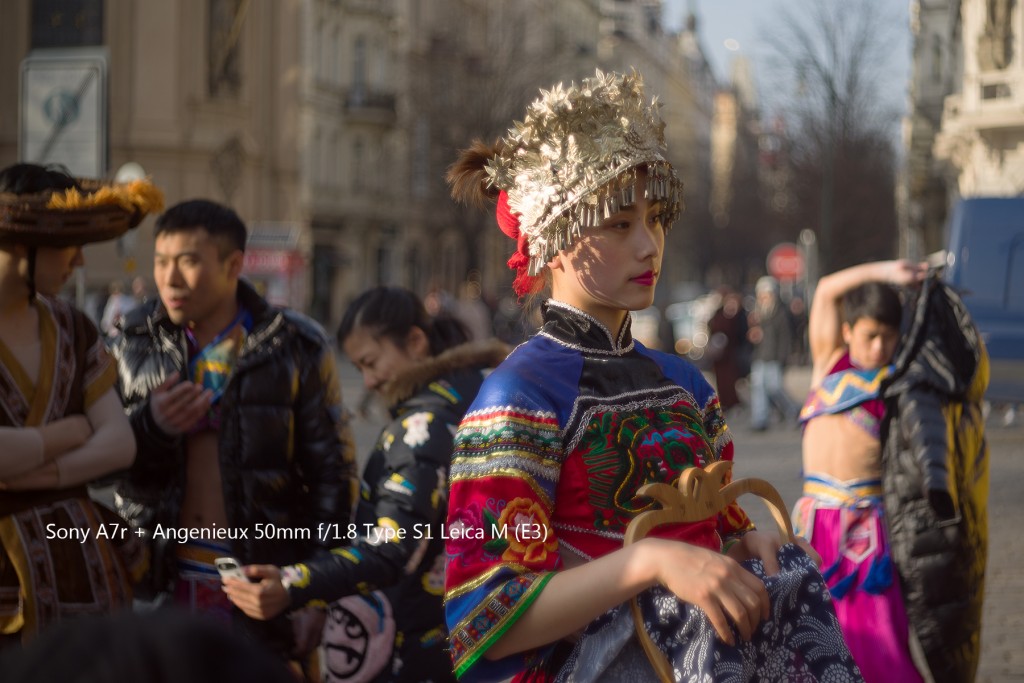
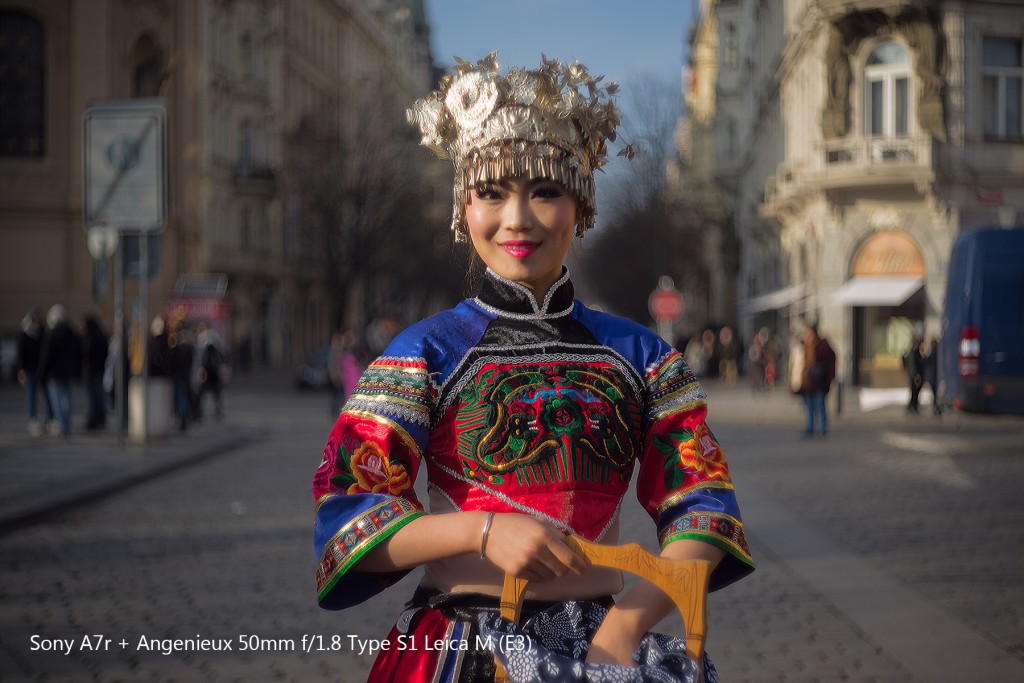
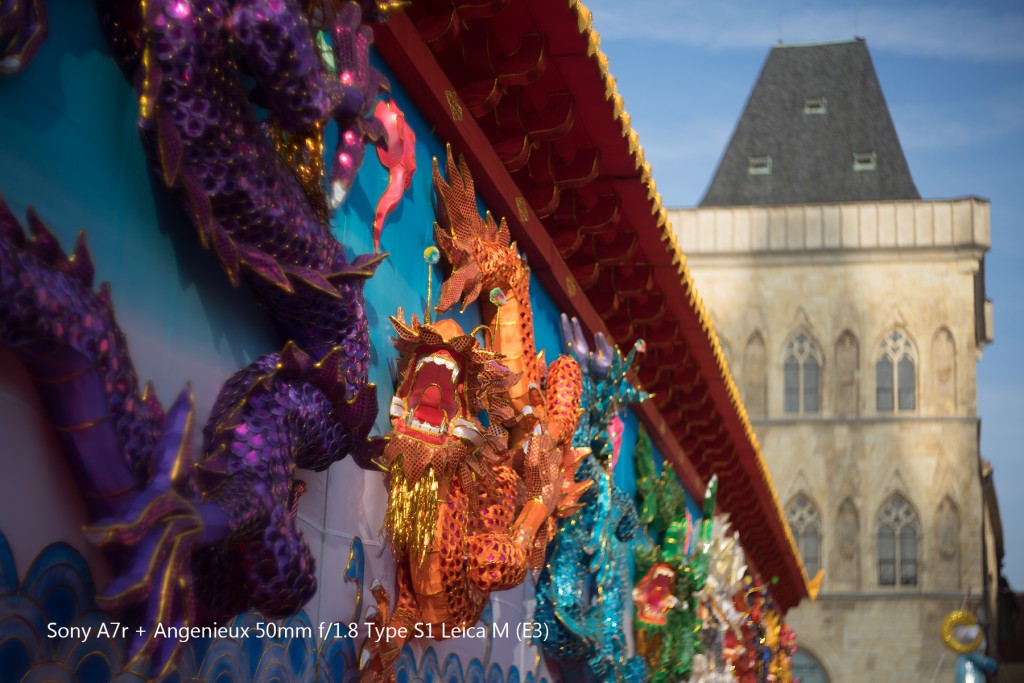
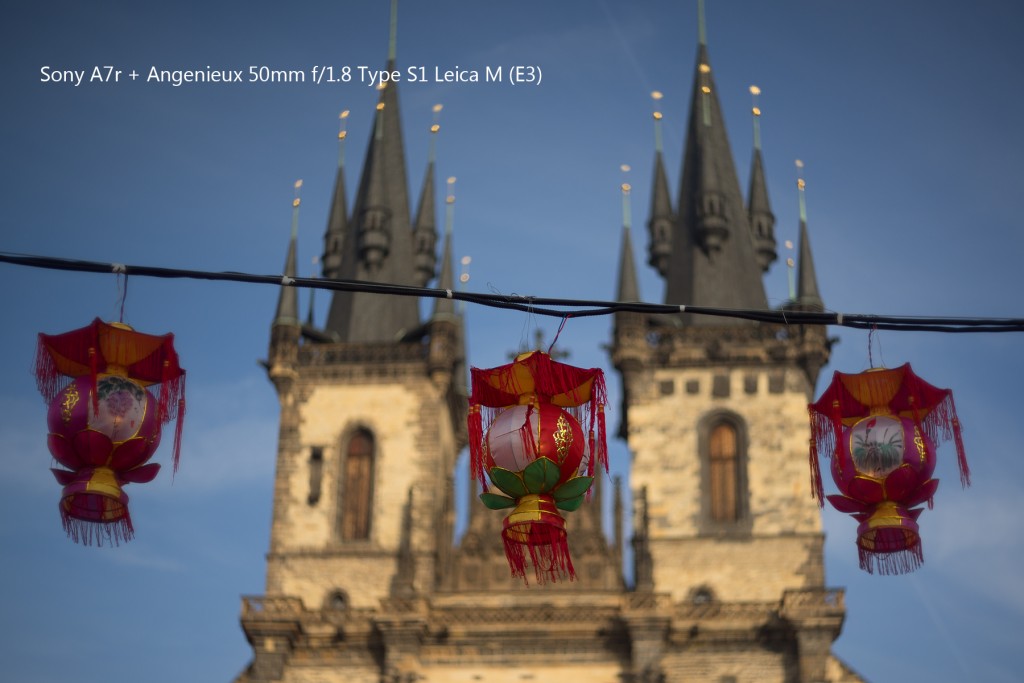
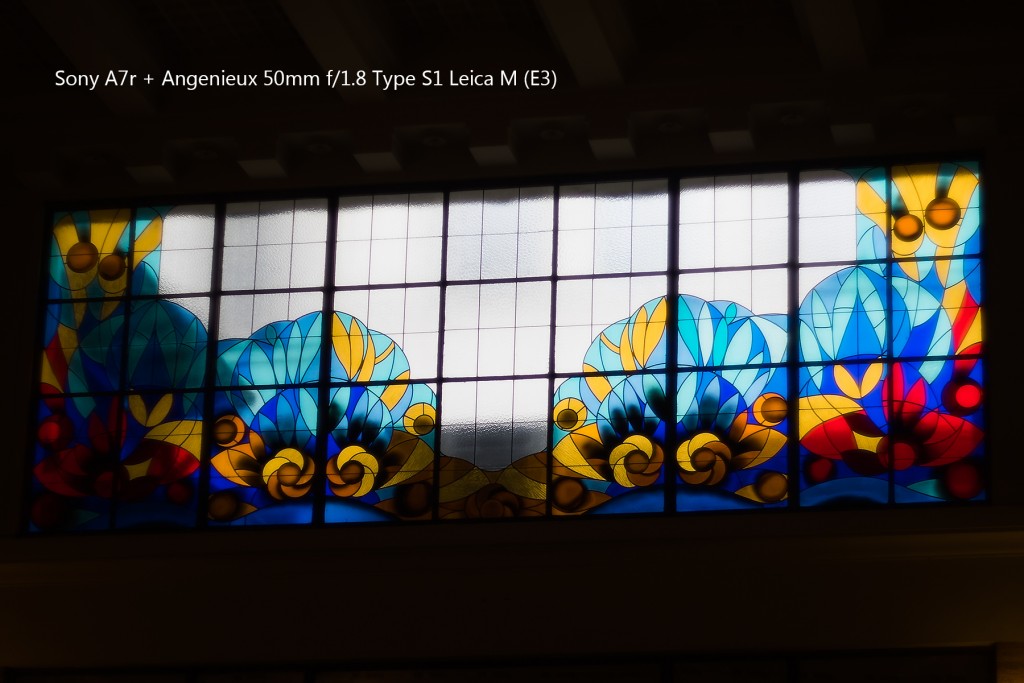
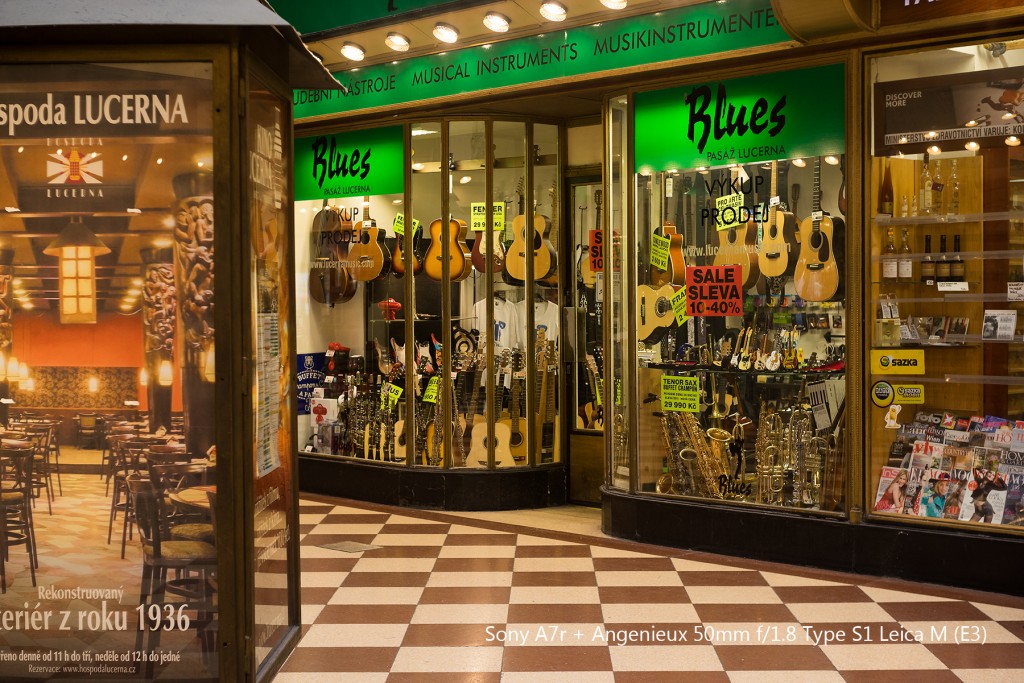
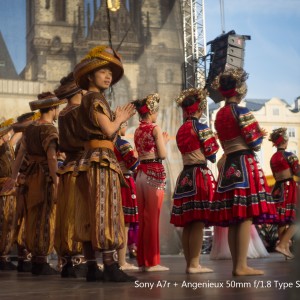
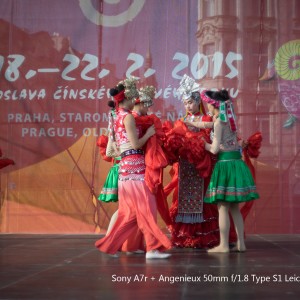
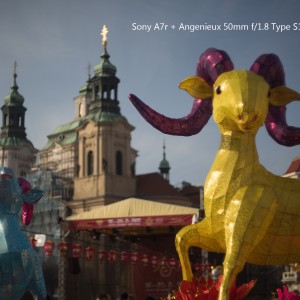
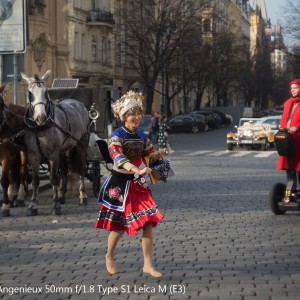
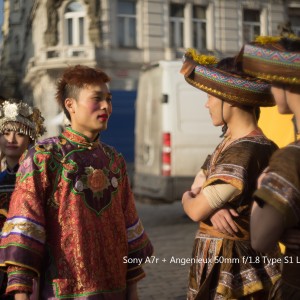
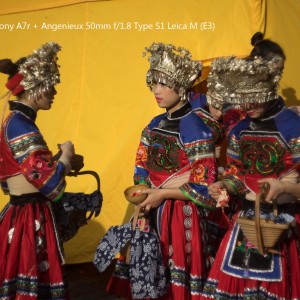
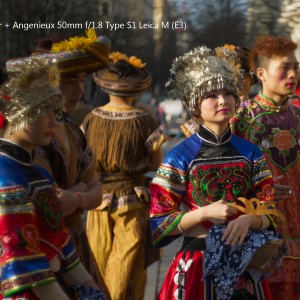
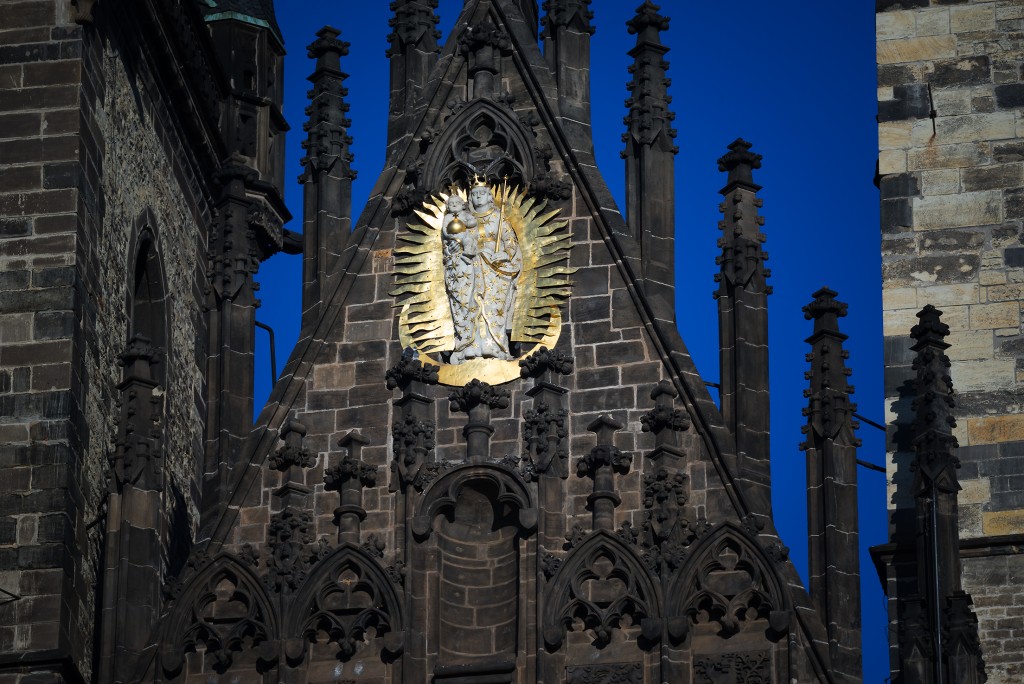
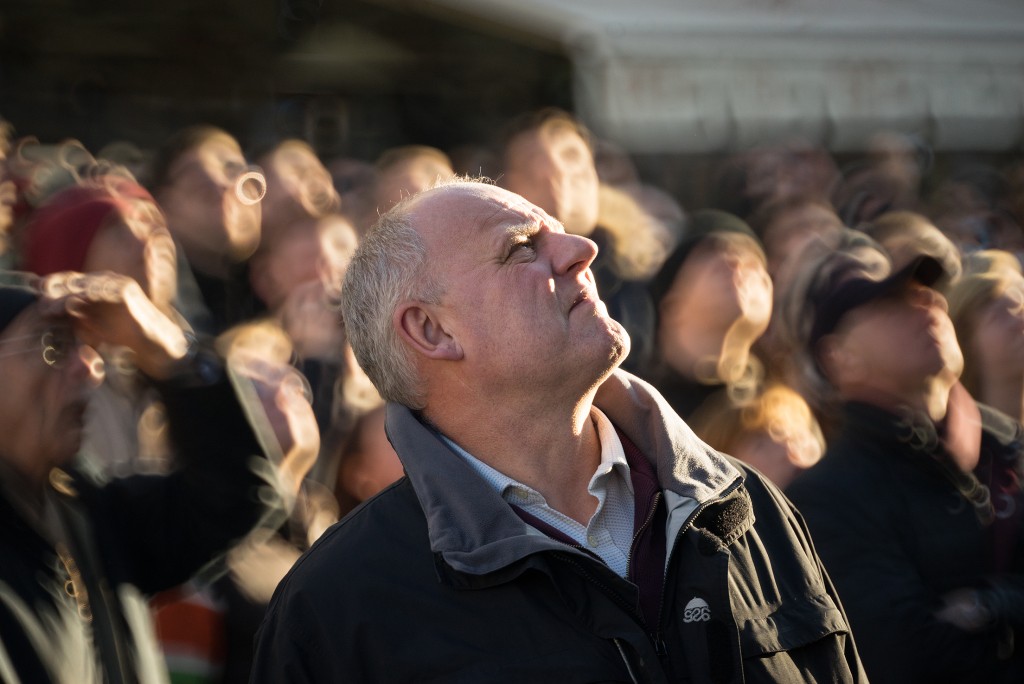
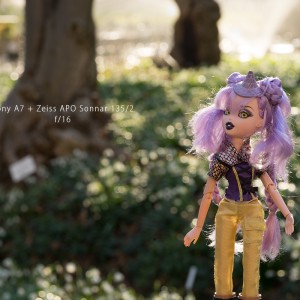
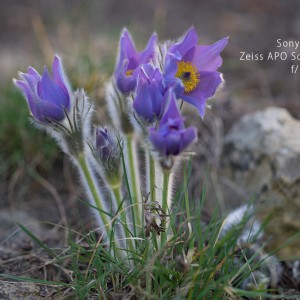
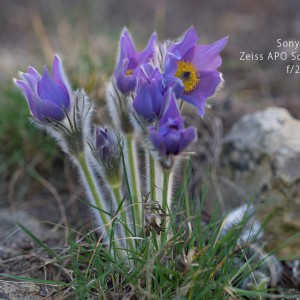
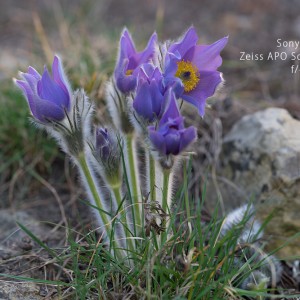
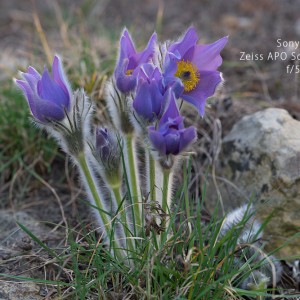
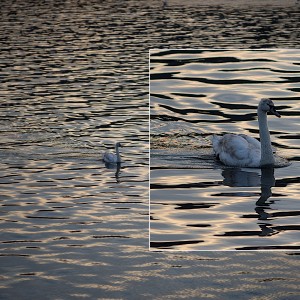
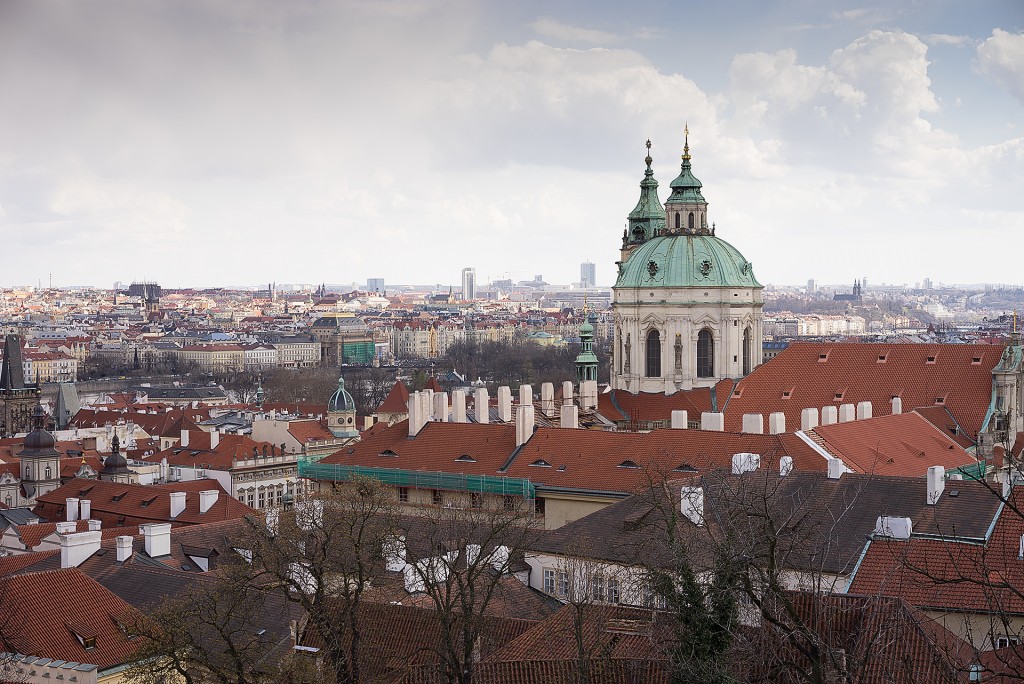
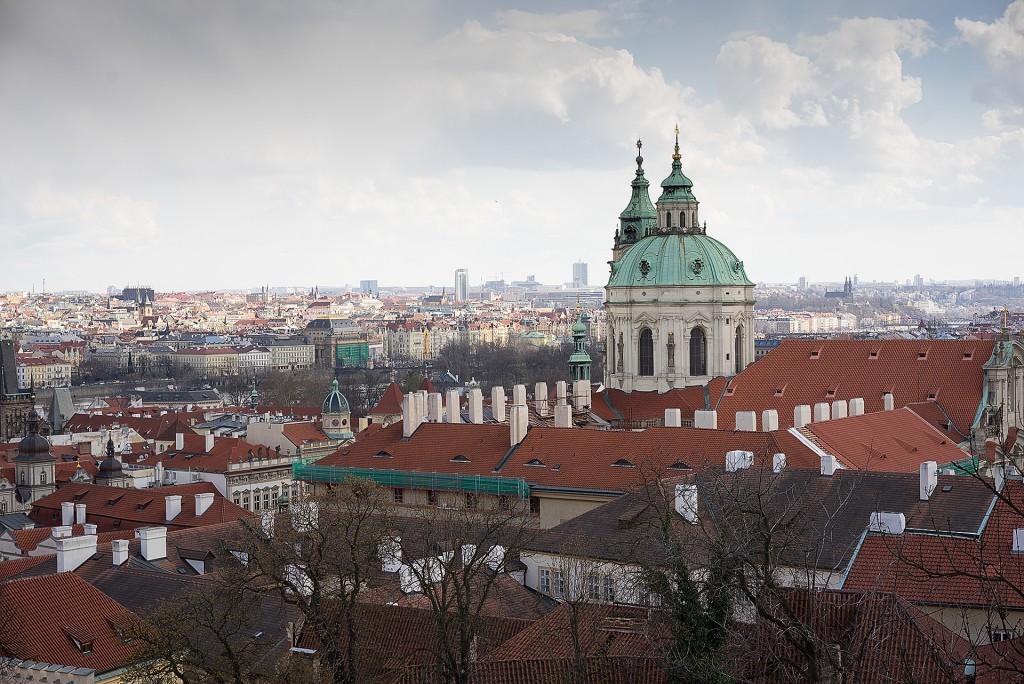
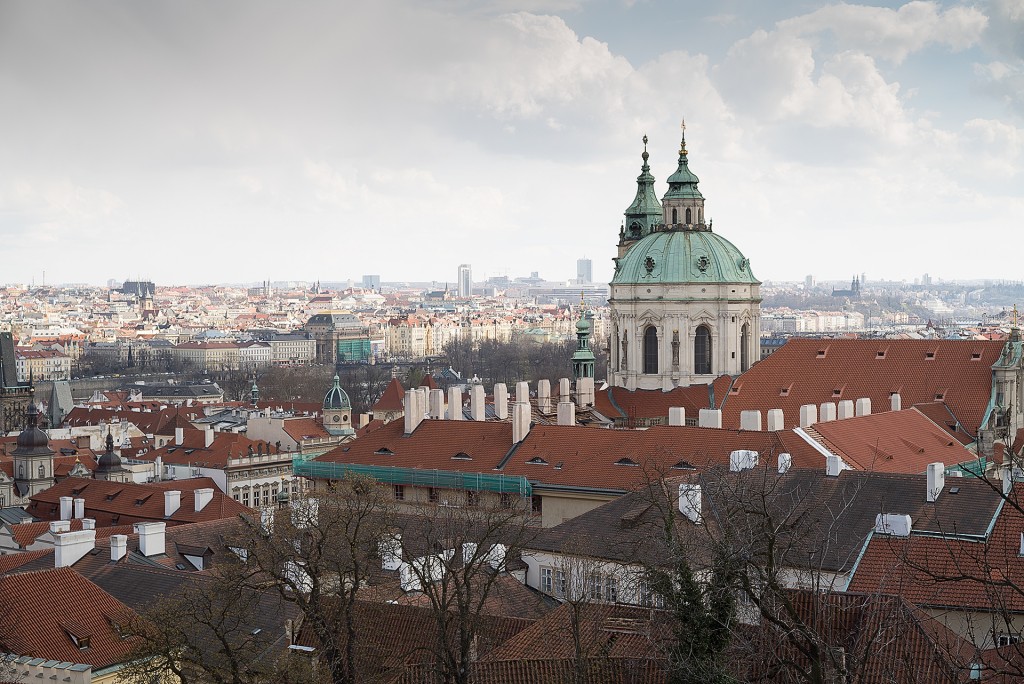
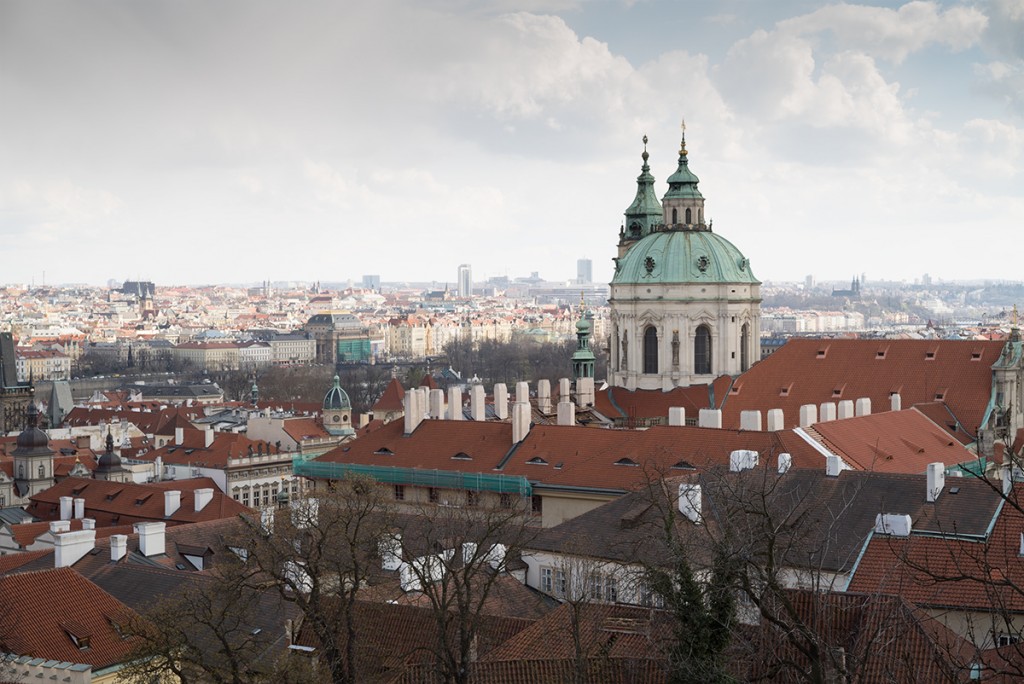
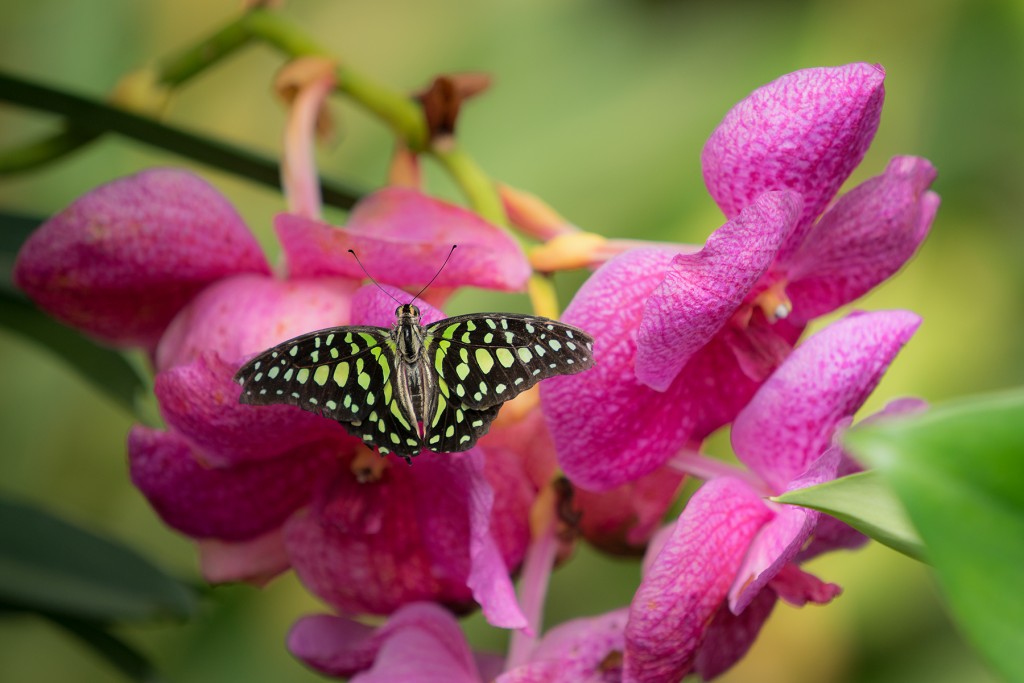
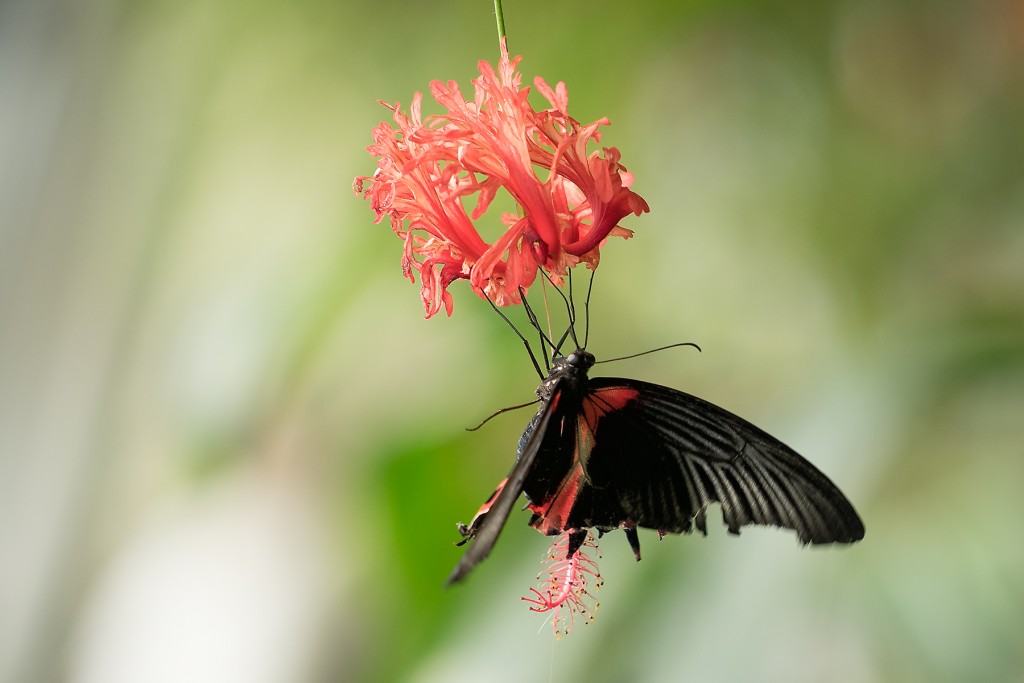
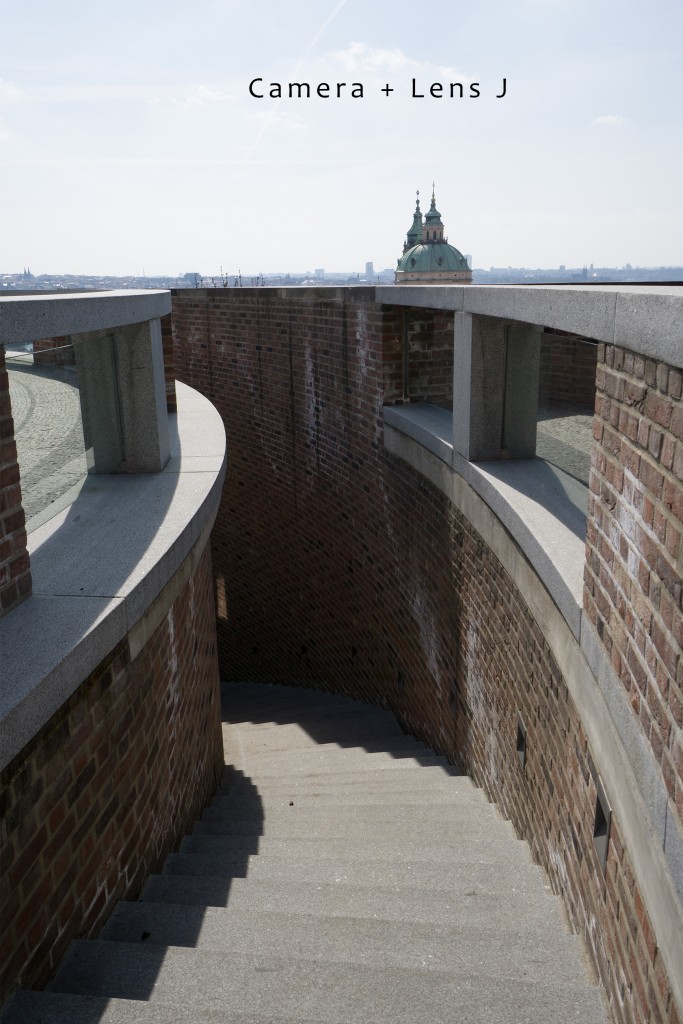
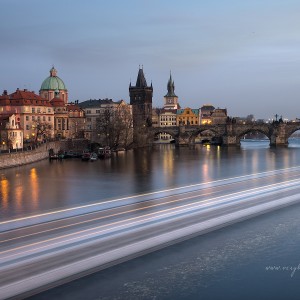
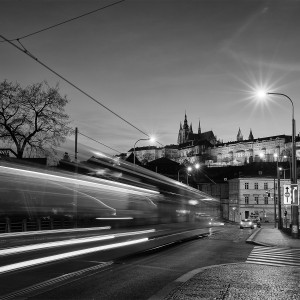
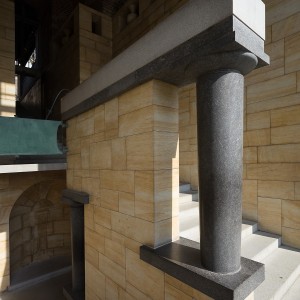
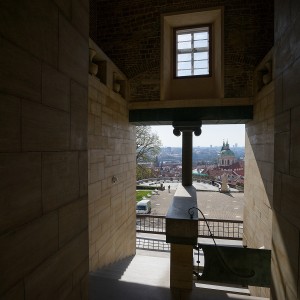
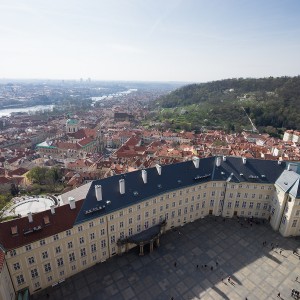
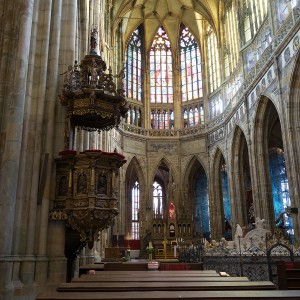
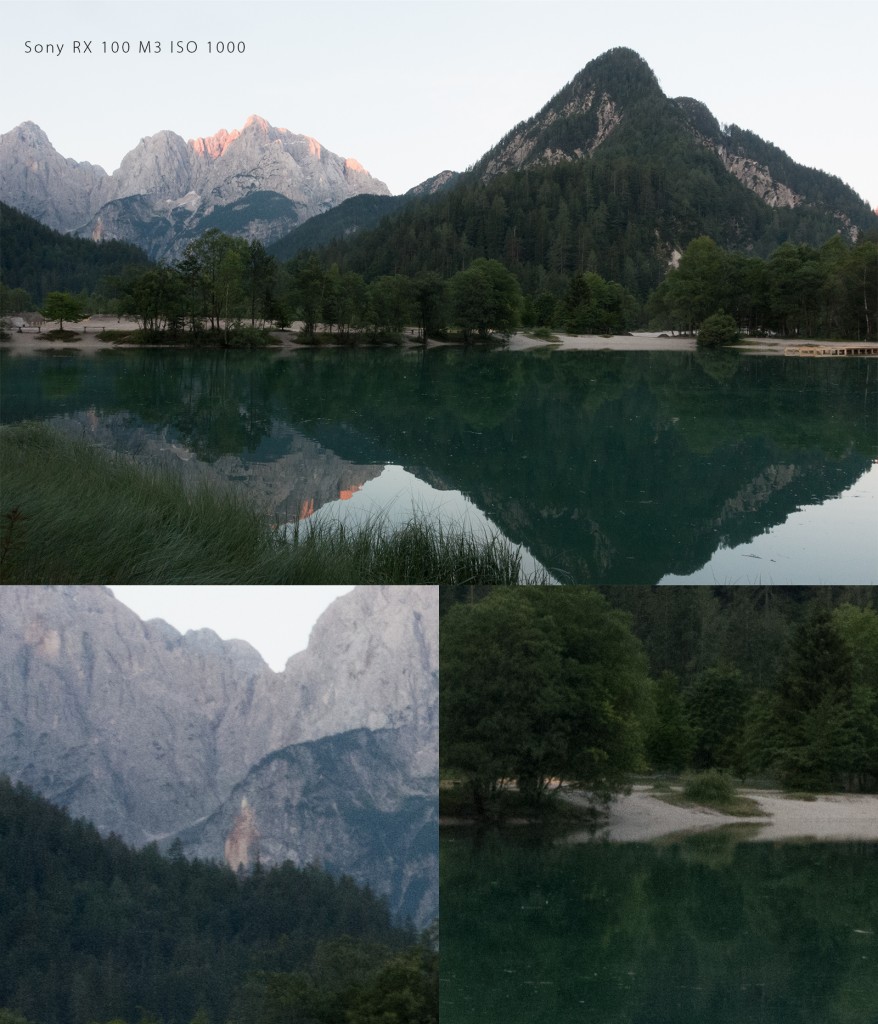
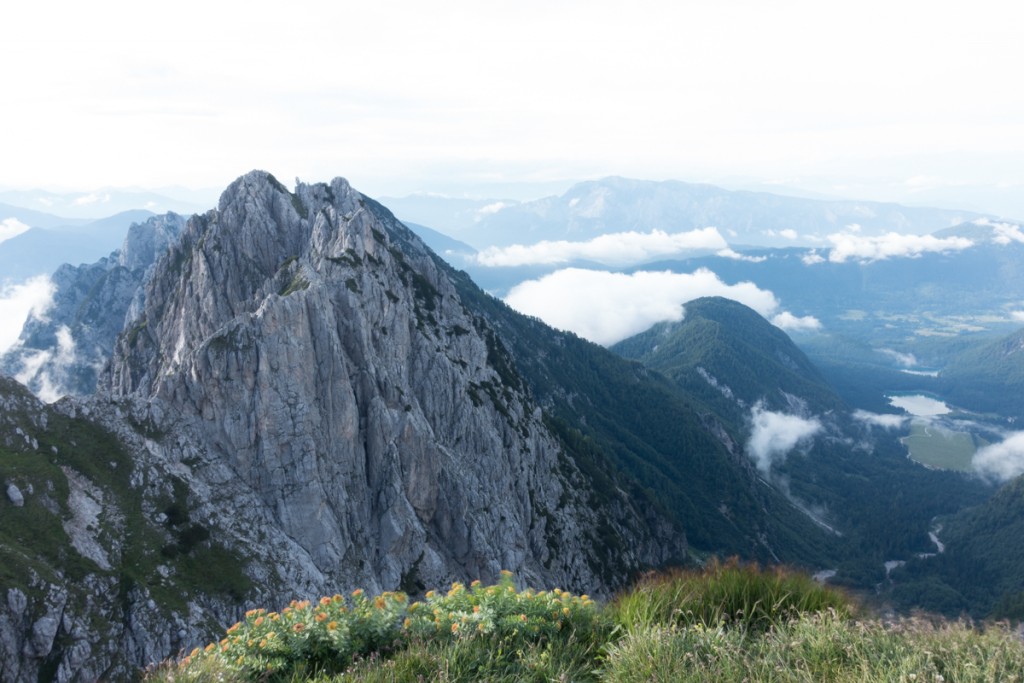
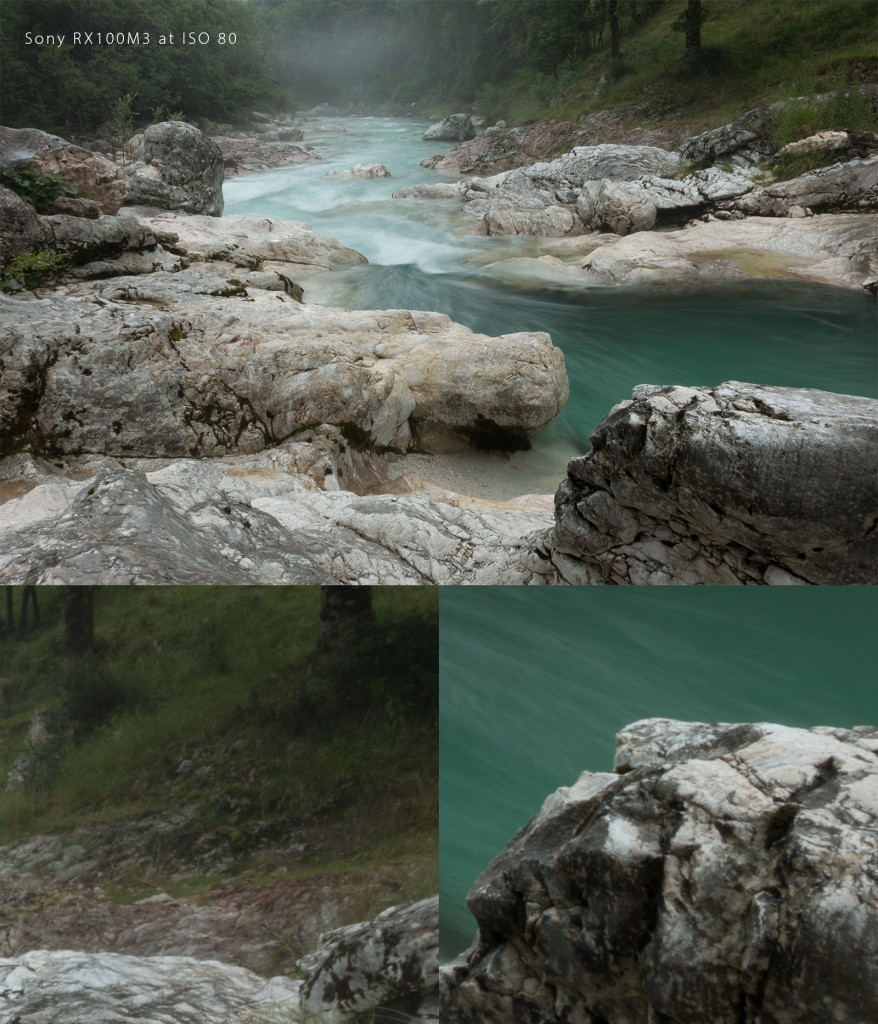
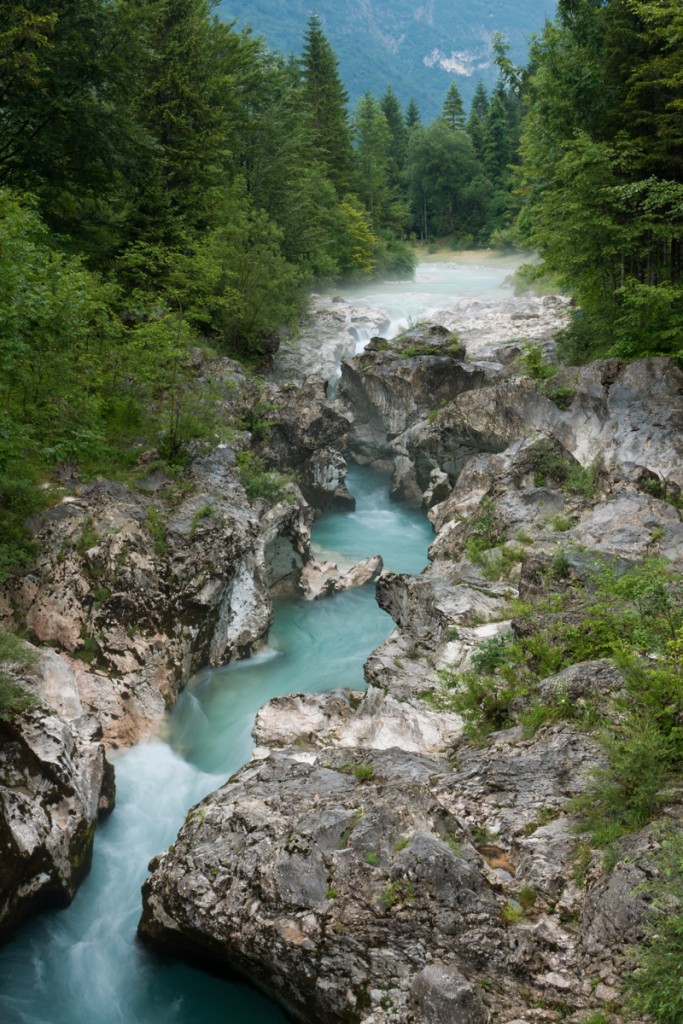
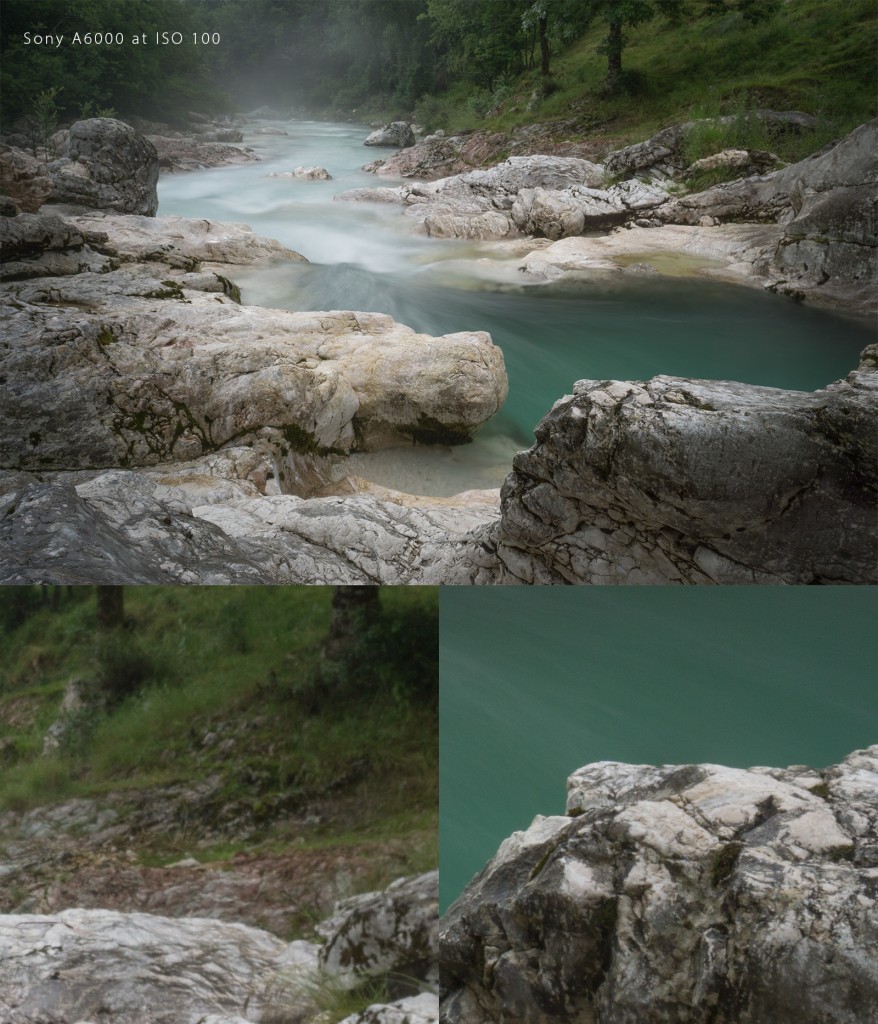
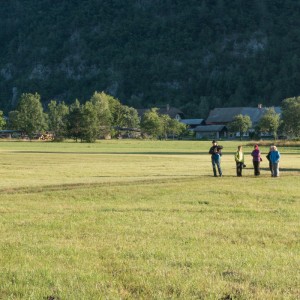
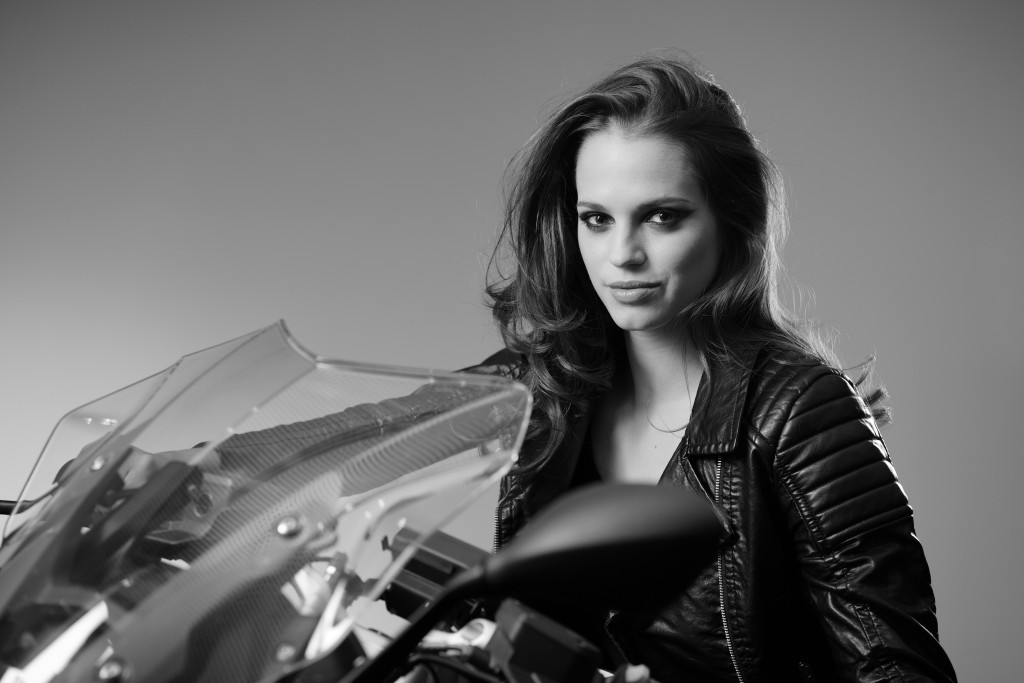
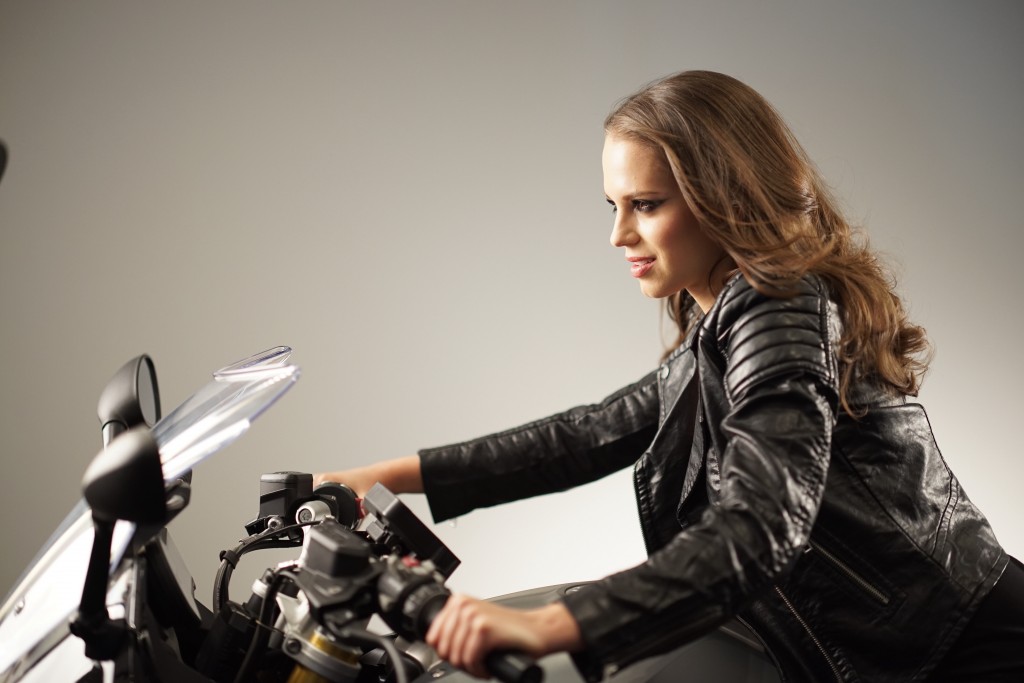
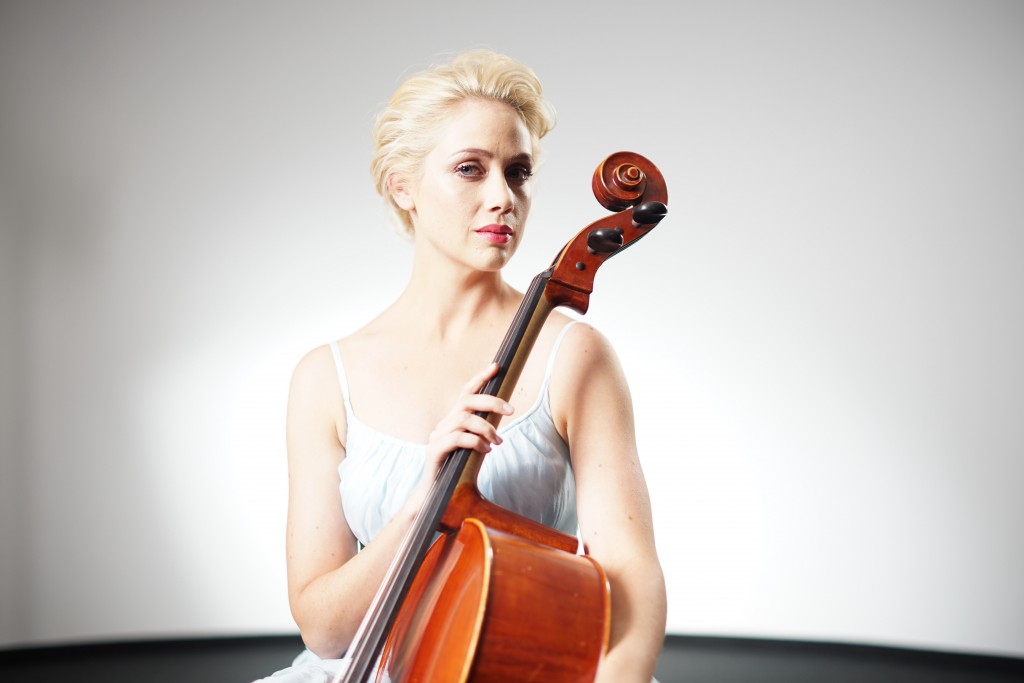
Sample Images (most shot at f/2 and Nikon D800E or Sony A7r or Sony A7):
ALL IMAGES IN THE SAMPLE GALLERY WERE POST PROCESSED!
![Zeiss_APO_Sonnar_13520-4871-Edit]()
![Portrait_04]()
![Misc_01-f2]()
![Misc_02-f2]()
![Portrait_01]()
![Portrait_02]()
![City_02_f8]()
![City_01]()
![18_f2]()
![17_f28]()
![Misc_03-f4]()
![16_f28]()
![14_f2]()
![Portrait_03]()
![12_f2]()
![09_f2]()
![08_f2]()
![Portrait_06]()
![11_f2]()
![10_f2]()
![06_f2]()
![05_f2]()
![Portrait_05]()
![04_f2]()
![03_f2]()
![01_f2]()


 Well… thank you Zeiss…)