Introduction
I got a chance to compare few 85mm lenses on my Sony A7II and A7r cameras. This comparative review took much more time to complete than I expected and meanwhile another two interesting rivals hit the market – new Sigma 85/1.4 Art and Sony FE 85/1.8. While Sigma is rather DSLR designed lens, Sony FE 85/1.8 already got some good reviews, and I will try to put my hands on it, in the near future.
When thinking of a perfect lens for portraiture, 85mm focal length will probably appear on the top of the candidates list. While there is nothing like “perfect focal length for portraits”, also because there are many sub genres of the portrait photography, 85mm lenses seems to be most commonly used for the traditional upper half body or head and shoulders type of portraits. This focal length (on 35mm format) is a good compromise of a perspective distortion control, distance field compression, good subject isolation and not too excessive minimum working distance.
Historically though, fast portrait lenses were usually more expensive than normal (50mm) fast lenses, and thus they become rather luxury gear.
It is no coincidence, that three of four compared lenses in this review are designed by Zeiss, since Zeiss and their Sonnar design are probably most famous names in the portrait photography (not only), while fourth – Sony lens, certainly has a lot in common with the Zeiss signature within ongoing cooperation between two companies.
Following comparative review has no intention to find which lens is better than others, it is trying to figure out differences that might help readers to make more informed decision.
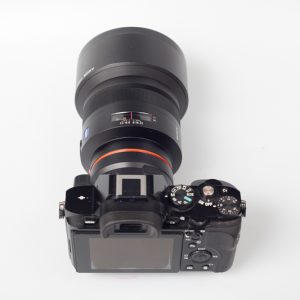
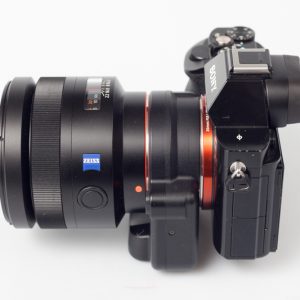
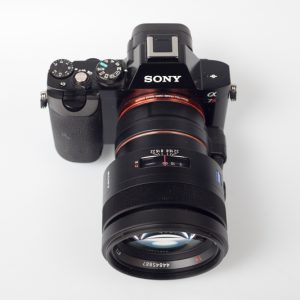
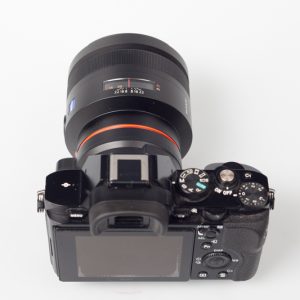
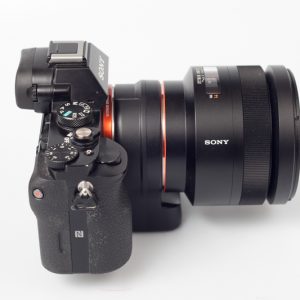
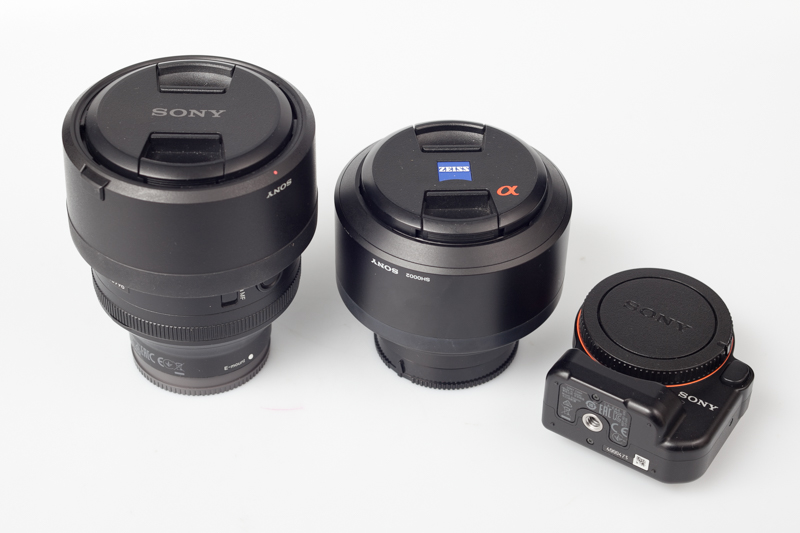
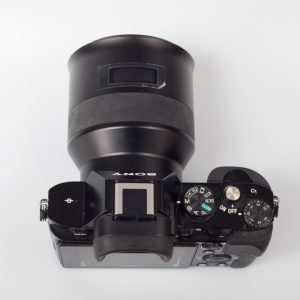
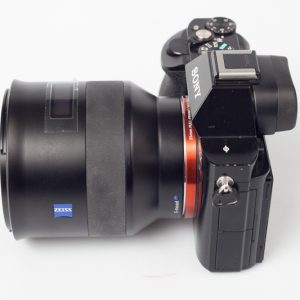
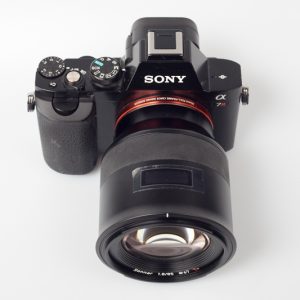
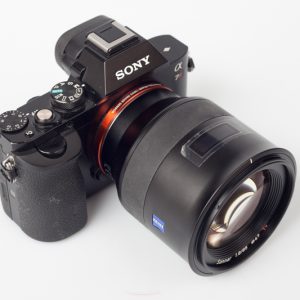
Lenses included in the review
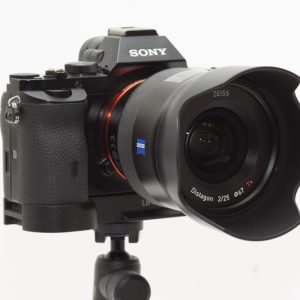
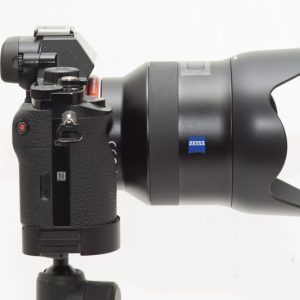
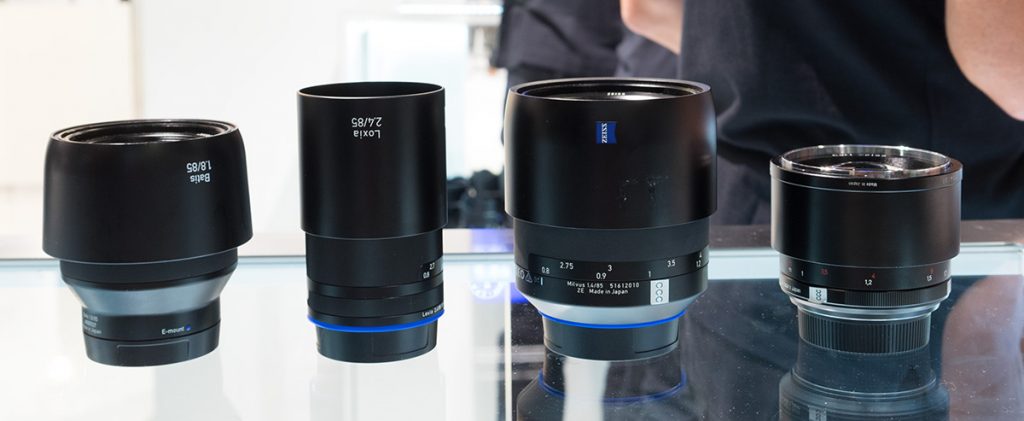
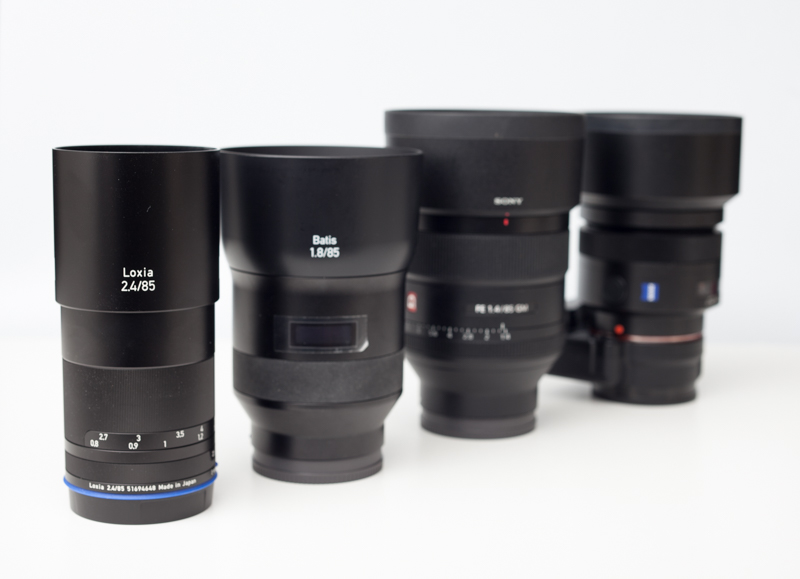
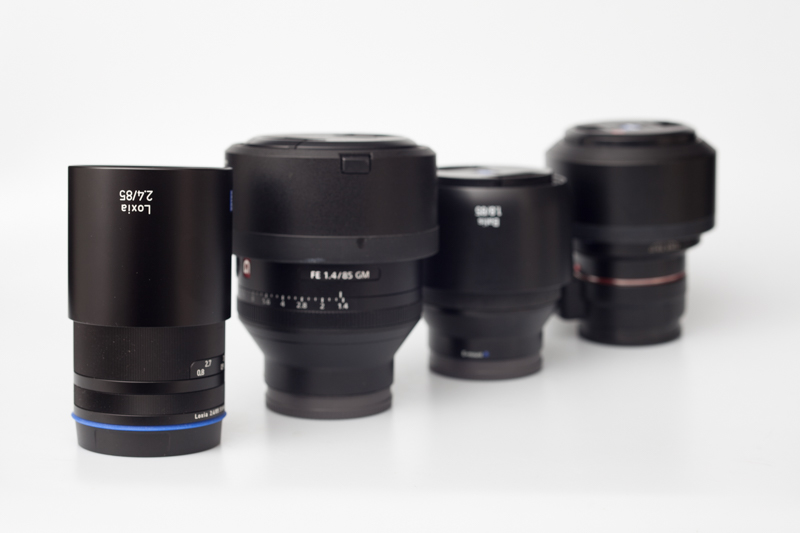
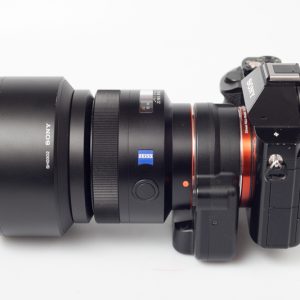
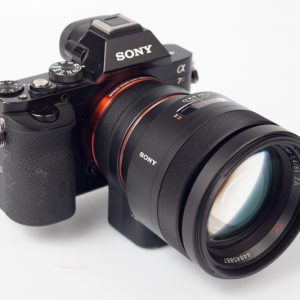
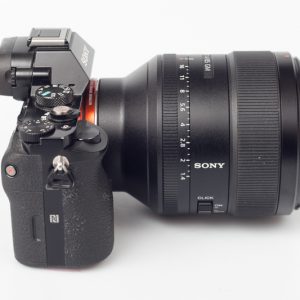
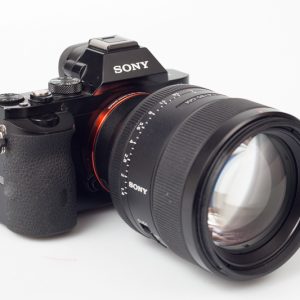
![]()
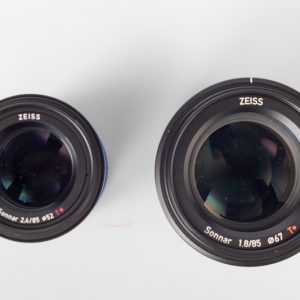
![]() (from back to front)
(from back to front)
Sony Planar 85/1.4 T* ZA, Sony FE 85/1.4 GM, Zeiss Batis 85/1.8 and Zeiss Loxia 85/2.4
Specification
Comparative chart of main specification figures:
|
Sony Carl Zeiss 85mm F/1.4 ZA Planar T*
|
Sony FE 85mm F/1.4 GM
|
Zeiss Batis 85mm F/1.8
|
Zeiss Loxia 85mm F/2.4
|
| Mount |
Sony A-mount |
Sony E-mount |
Sony E-mount |
Sony E-mount |
| Focal Length (mm) |
85 |
85 |
85 |
85 |
| Lens Groups / Elements |
7/8 |
8/11 |
8/11 |
7/7 |
| Angle of View (35 mm) |
29° |
29° |
29° |
28,63° |
| Maximum aperture (F) |
1/1.4 |
1/1.4 |
1/1.8 |
1/2.4 |
| Minimum Aperture (F) |
1/22 |
1/16 |
1/22 |
1/22 |
| Aperture Blades |
9 |
11 |
9 |
10 |
Minimum Focus Distance (mm)
|
850 |
850 |
800 |
800 |
| Maximum Magnification ratio (x) |
0,13 |
0,12 |
0,138 |
0,126 |
| Filter Diameter (mm) |
72 |
77 |
52 |
67 |
Image stabilization
|
no |
no |
yes |
no |
| Diameter x Length (mm) |
81 x 75 |
89.5 x 107.5 |
92 x 92 |
62.5 x 94.8 |
Weight (g)
|
640 |
820 |
475 |
594 |
| Focusing |
AF/MF* |
AF/EMF |
AF/EMF |
MF |
| Price new/used March 2017 (EUR) |
1205/930** |
1735/1615 |
1199/1050 |
1399/? |
* AF on Sony E-mount cameras is limited by the functionality of the adapter LA-EA4
** Using SAL85F14Z on Sony E-mount camera require special adapter – Sony LA-EA4 (250/150 EUR)
Build quality
Sony Planar 85/1.4 T* ZA
![]()
![]()
![]()
![]()
![]()
![]()
![]()
![]()
![]()
Sony Zeiss Planar 85/1.4 is a premium build quality lens – basically only metal and glass. Lens hood is metal too and one of the heaviest hoods that I ever had (except the one for its bigger brother – 135/1.8). Manual focusing is mechanically coupled (I like that), but there is significant wobbling in the focus ring which I really don’t like. Another part that I certainly don’t like is the adapter for Sony E mount. If AF is needed, than the only recently available option is LA-EA4 with translucent mirror technology. Not only that adapter seriously limits Sony A7 native focusing features, but it is ugly plastic piece of gear that simply look like plastic wheel covers on your new Ferrari. On the other hand, from tested lenses, only this combination has built-in tripod mount on the adapter, which when used on the tripod improves stability and balance. This is my own lens, one of my choices for the Sony A platform which makes it through to Sony-E. I love this lens and while it has many reserves in the optical performance (mainly CA), it still can produce incredibly sharp images with distinctive rendering of OOF areas. With its hefty weight of 650 gr (with hood over 800), it feels substantial in my hand, the way I’d like my monthly fee to impress, but it never does.
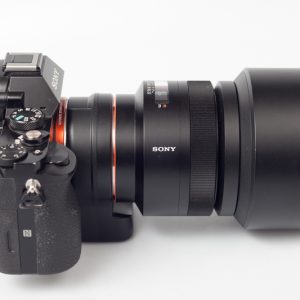
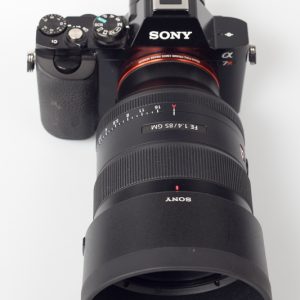
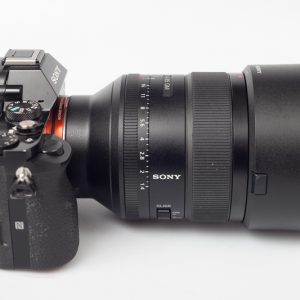
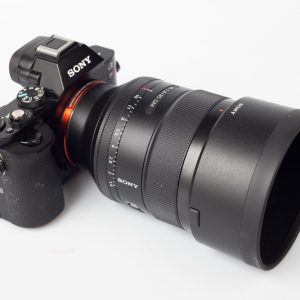
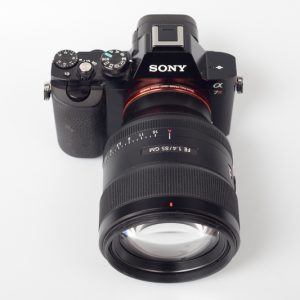
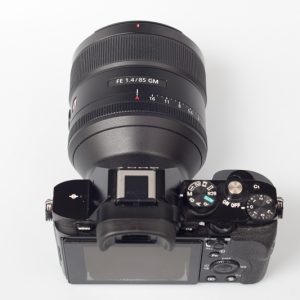
Sony FE 85/1.4 GM
![]()
![]()
![]()
![]()
![]()
![]()
![]()
![]()
![]()
Originally I wanted to write that this is the newest Sony portrait lens, but preparing this review took me so long, that Sony introduced FE 85/1.8 meanwhile. Still, this lens belongs to the new premium Sony line, GM line, whatever that means (Generally Mean, Grand Magnificent, Gorgeous Monster or Grab Money till you can). The premium line starts with the premium price, but honestly, all contenders here are more expensive that one would like to see. There is another thing related to this GM lens – Great Mass. It weight almost 1kg (OK 820g without hood and hood is plastic so it doesn’t add much). All 11 glass elements are packed in a sort of plastic composite (mount is metal). While it is not light lens, it is notably lighter than similar lenses in the Zeiss line, such as Milvus 85/1.4 or Otus 85/1.4 still having same number of glass elements and AF system on top. I don’t really like plastic, my Planar is metal, but I must admit that this is rather my old-fashioned mental anachronism, than rational consideration. AF on this lens is better than with my screw driven Planar with LA-EA4 adapter, but it is not super fast. There is a significant amount of glass that has to be moved, so you should not expect sport appropriate speed, especially in the AF-C mode. On the other hand, AF is very accurate (unlike LA-EA4) and in the good light it is more than adequate for the portraiture purpose. Everything is precisely assembled. It is made in Thailand and Mr. Cicala Roger from Lensrental.com found very little problems with the sample variations/ – https://www.lensrentals.com/blog/2016/04/sony-fe-85mm-f1-4-g-master-lens-mtf-and-variance/
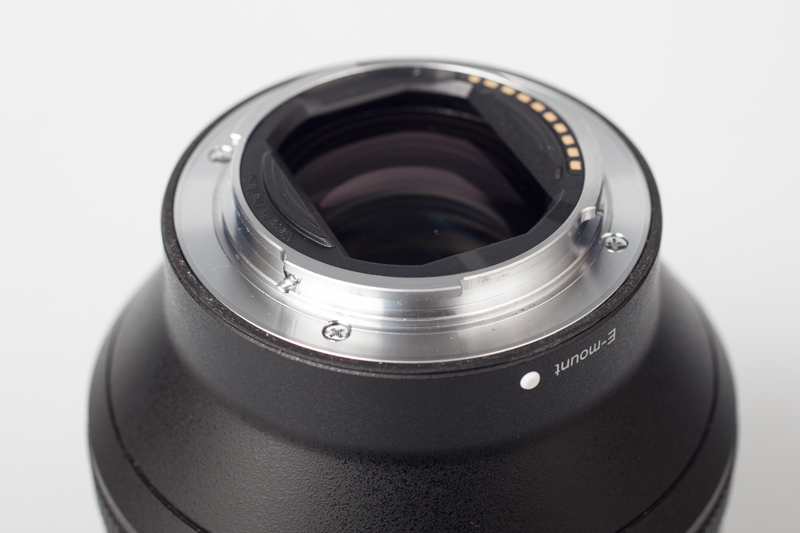
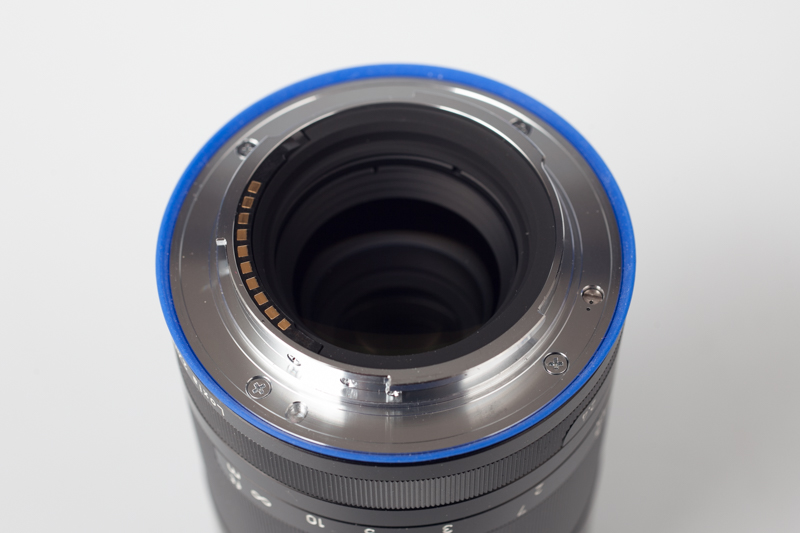
Mount is all metal with a white mount aligning spot and rear element, protected by a plastic baffle with contacts.
![]() Moving toward front of the lens, we can follow monolith body shaping toward wider body part.
Moving toward front of the lens, we can follow monolith body shaping toward wider body part.
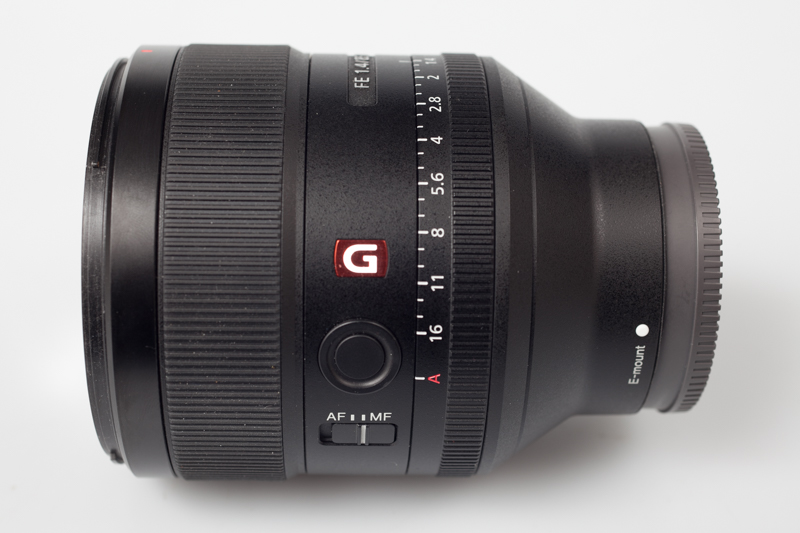
![]() The sweetest spot of the lens is its aperture control ring. Very well coupled it can be set for manual operation (aperture is manually controlled on the lens itself) or automatic operation – position “A”, with aperture control from the camera body. There is also AF/MF switch on one side, making switching from auto focus to manual focus easier and faster in some situations. Above AF/MF switch, there is functional button that can be programmed from the camera body (focus hold e.g.) The aperture ring is 19mm wide and has rib pattern for easier grip. This aperture ring is one of the most pleasing aperture control devices that I ever experienced.
The sweetest spot of the lens is its aperture control ring. Very well coupled it can be set for manual operation (aperture is manually controlled on the lens itself) or automatic operation – position “A”, with aperture control from the camera body. There is also AF/MF switch on one side, making switching from auto focus to manual focus easier and faster in some situations. Above AF/MF switch, there is functional button that can be programmed from the camera body (focus hold e.g.) The aperture ring is 19mm wide and has rib pattern for easier grip. This aperture ring is one of the most pleasing aperture control devices that I ever experienced.
![]() On the other side of the lens, there is de-clicking button – one that can change the aperture to click every 1/3 of the EV stop and make it smooth in the entire range. This is great for the video makers. Zeiss has this functionality on their Loxia lens line, but the application is much more cumbersome, needing a special tool to switch from one mode to another on the mount side of the lens (has to be removed from the camera body).
On the other side of the lens, there is de-clicking button – one that can change the aperture to click every 1/3 of the EV stop and make it smooth in the entire range. This is great for the video makers. Zeiss has this functionality on their Loxia lens line, but the application is much more cumbersome, needing a special tool to switch from one mode to another on the mount side of the lens (has to be removed from the camera body).
Above is the 26mm focus ring, with the rib pattern which is electronically coupled with the focusing mechanism. While I prefer mechanical coupling, this ring has very nice feel and accuracy is very good.
Lens is supposed to be moisture and dust protected, but Sony is not giving any warranty claims in that regard.
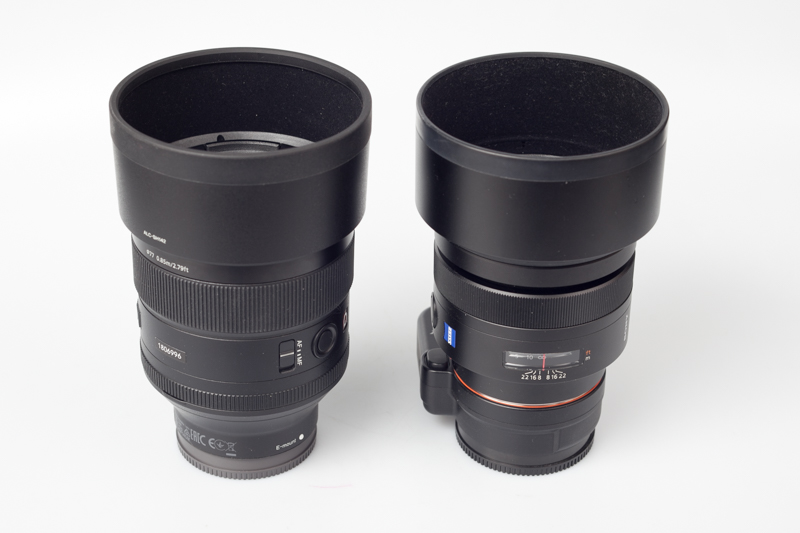
Comparing the size of those two lenses (Sony FE and Sony Zeiss), we might first got the impression that FE 85/1.4 GM is significantly bigger, but we shouldn’t forget about adapter for the use on Sony E mount cameras.
![]() We also shouldn’t forget that FE 85/1.4 GM has 11 elements in comparison to 8 of the planar. With the adapter mounted, size difference (and weight difference) becomes negligible.
We also shouldn’t forget that FE 85/1.4 GM has 11 elements in comparison to 8 of the planar. With the adapter mounted, size difference (and weight difference) becomes negligible.
![]()
Both lenses with respective hoods attached
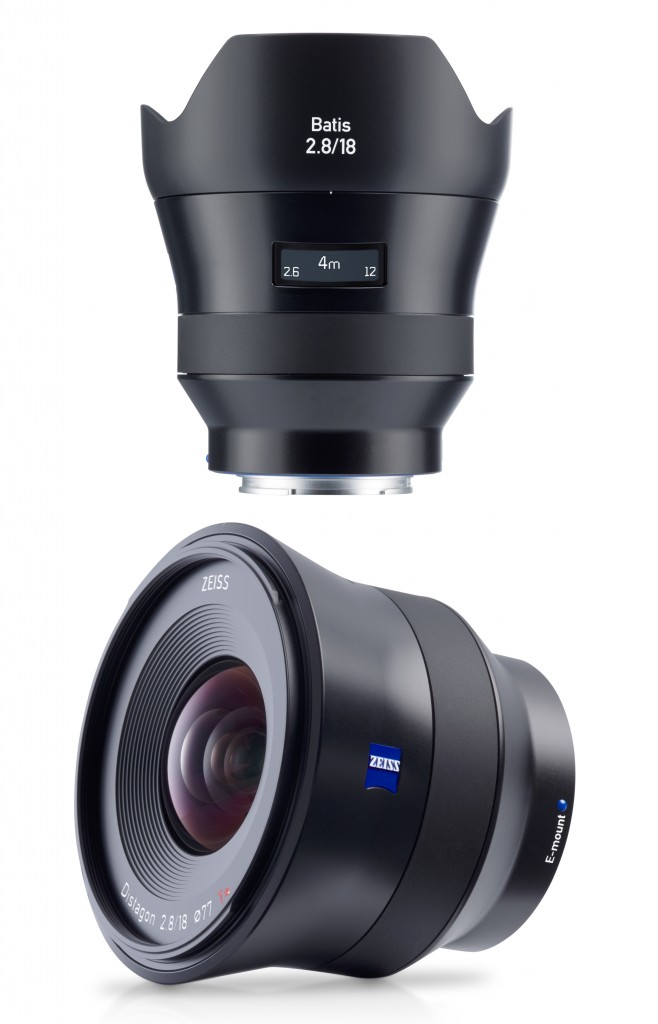
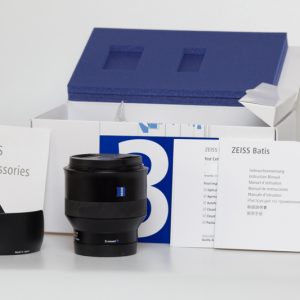
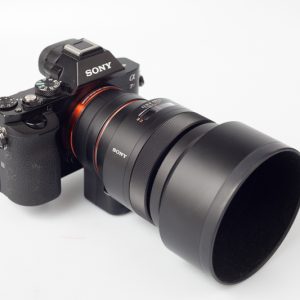
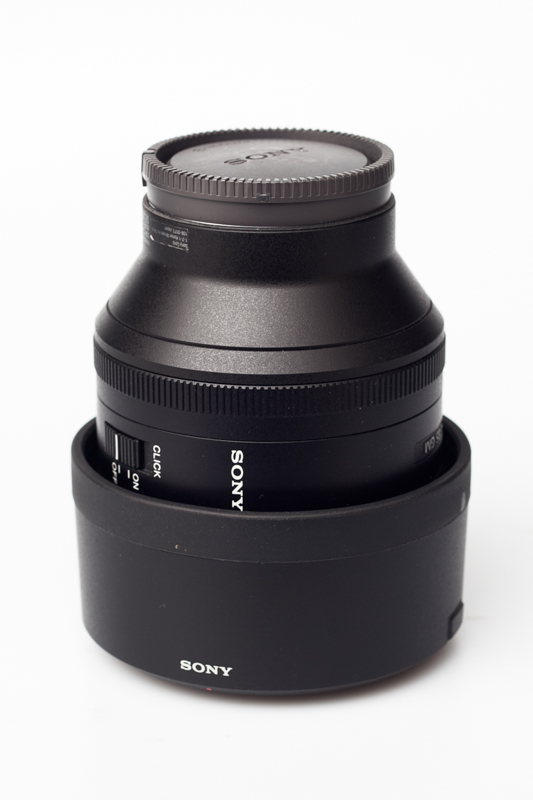
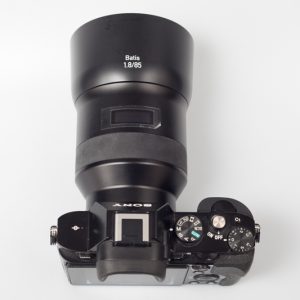
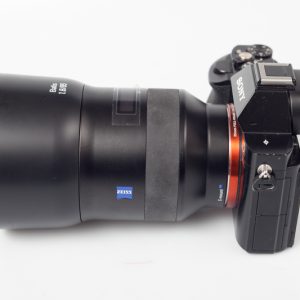
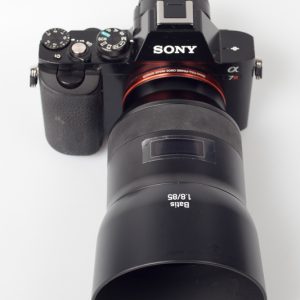
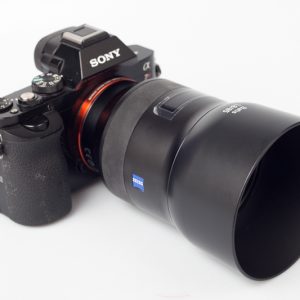
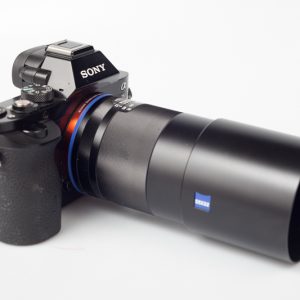
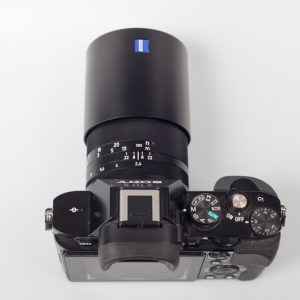
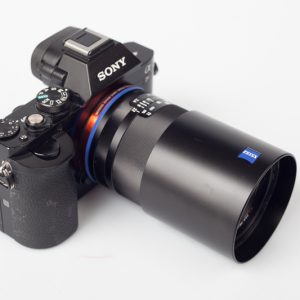
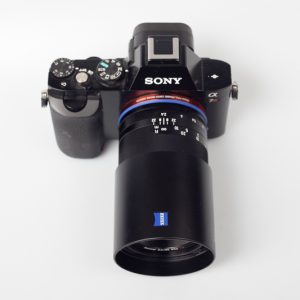
Zeiss Batis 85/1.8
![]()
![]()
![]()
![]()
![]()
![]()
![]()
![]()
![]()
All Batis lenses looks very similar so I will just copy part from my previous review here.
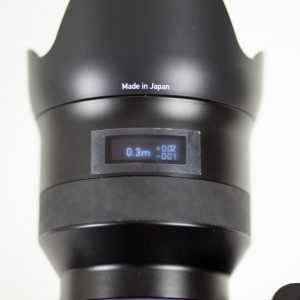
Lens itself is made of a metal composite, with built-in OLED display which substitute for distance scale engraving as well as related DOF scale. Lens has rubberized focus ring, metal mount and plastic lens hood bayonet type. Being a native Sony E mount AF lens, it supports all advanced AF functions of the camera system and has electronically coupled manual focus feature. Implementation of manual focus is also very good and OLED display has some advantages, especially because it can be under-lit for better visibility in the dark surrounding. Unfortunately, displayed values have to be taken with some reserve and their accuracy is certainly not 100%.
![]()
Hood has small dot which needs to be aligned with similar mark on the lens for proper installation. Once mounted, lens hood looks like being integral part of the lens design.
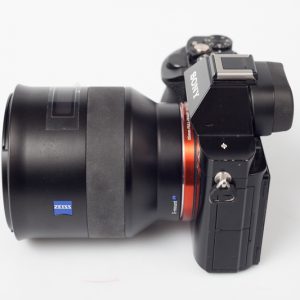
![]() Batis lenses are moisture (weather) and dust protected and 85/1.8 is no exception. Light modern construction ensures good balance on Sony FF and APS-C E mount cameras. Build quality of the Batis lenses is generally very high, but for the old dog like myself, they sometimes feels just too light or vulnerable. It is probably only feeling, not a real weakness, hard to say. The owner of the lens – Zeiss Czech Republic, didn’t let me testing it by dropping it from the 3rd floor. Next time I will propose 2nd, so they might soften a bit… Anyway, Batis lenses are perfect for the mid age generation of the enthusiast photographers, young professionals and freelance artists, non of where I belong unfortunately.
Batis lenses are moisture (weather) and dust protected and 85/1.8 is no exception. Light modern construction ensures good balance on Sony FF and APS-C E mount cameras. Build quality of the Batis lenses is generally very high, but for the old dog like myself, they sometimes feels just too light or vulnerable. It is probably only feeling, not a real weakness, hard to say. The owner of the lens – Zeiss Czech Republic, didn’t let me testing it by dropping it from the 3rd floor. Next time I will propose 2nd, so they might soften a bit… Anyway, Batis lenses are perfect for the mid age generation of the enthusiast photographers, young professionals and freelance artists, non of where I belong unfortunately.
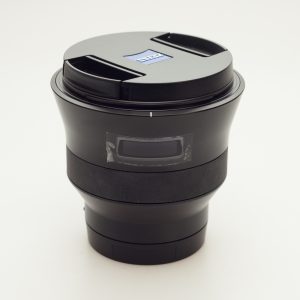
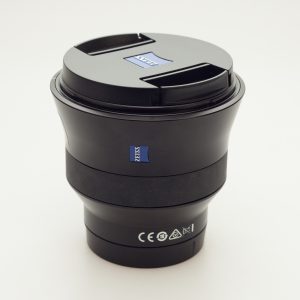
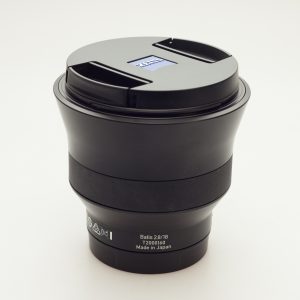
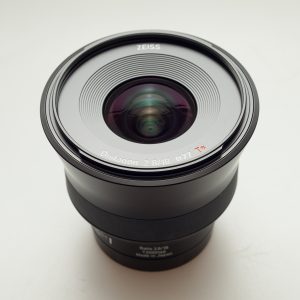
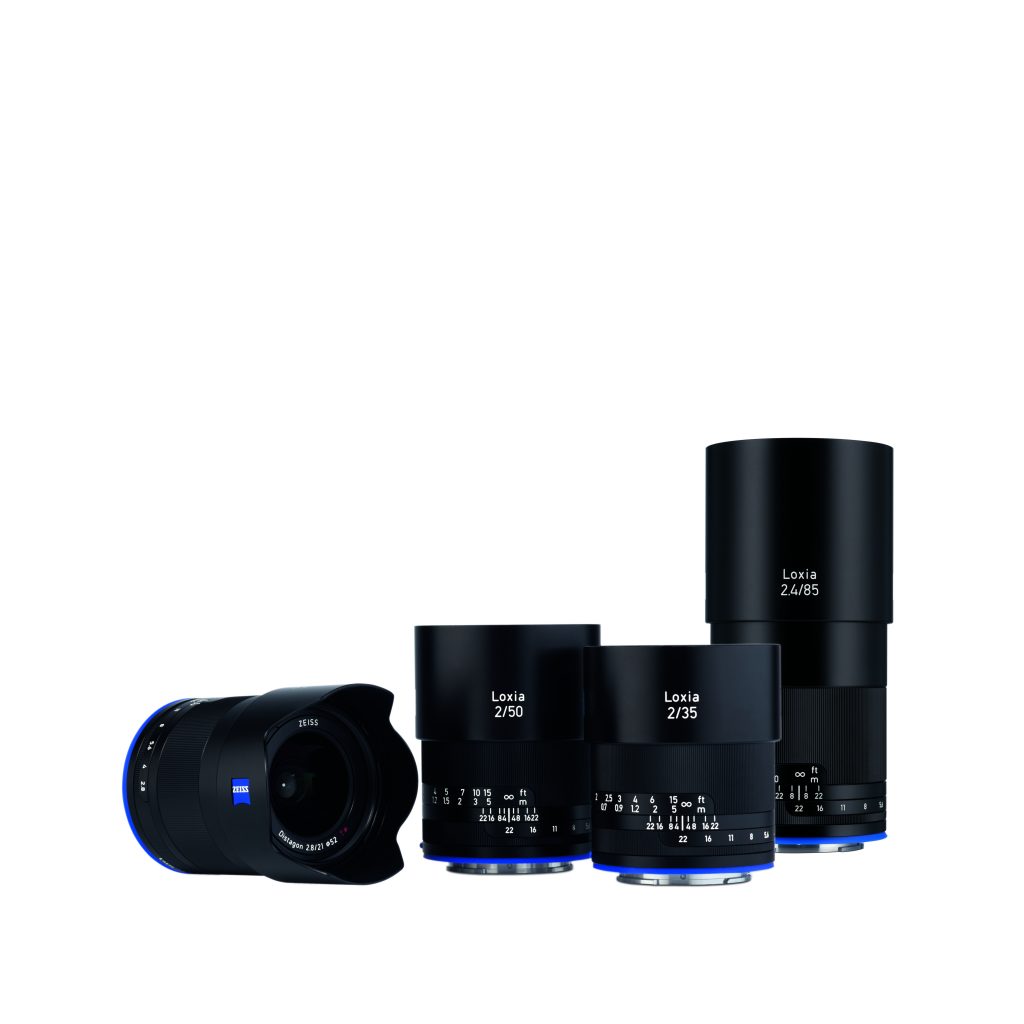
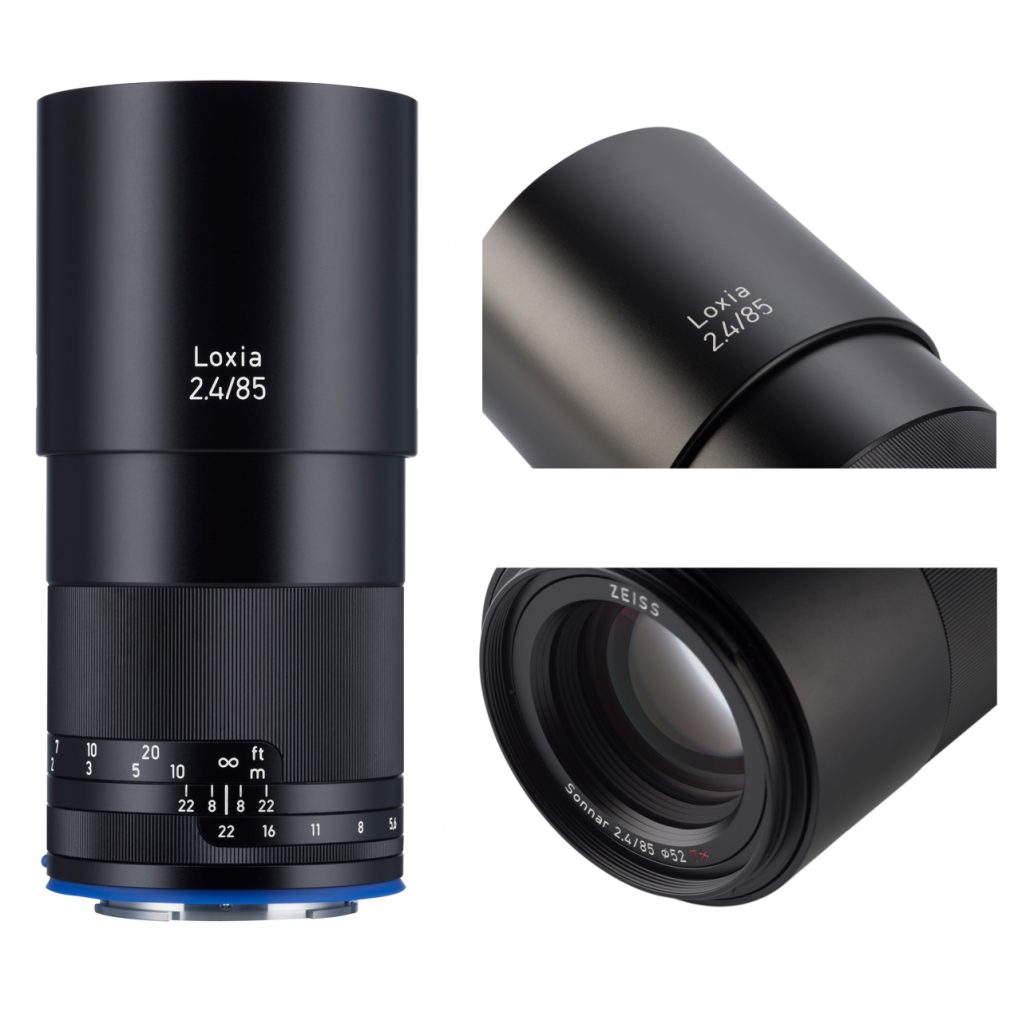
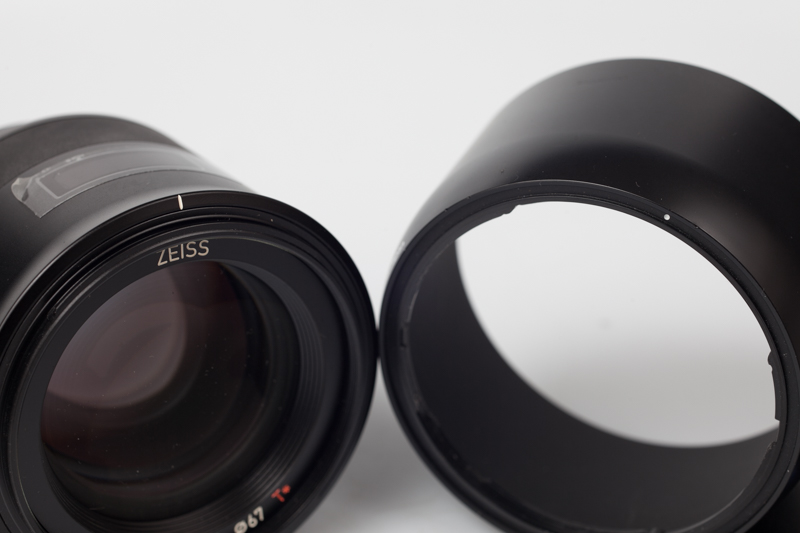
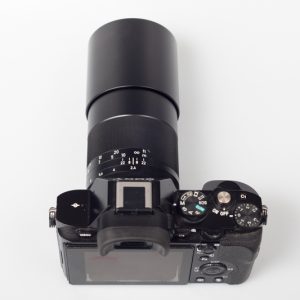
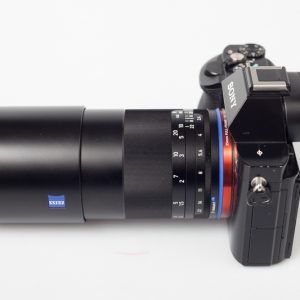
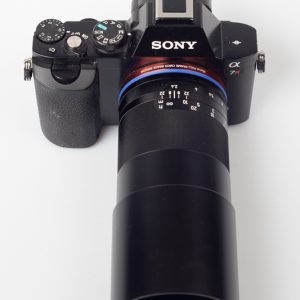
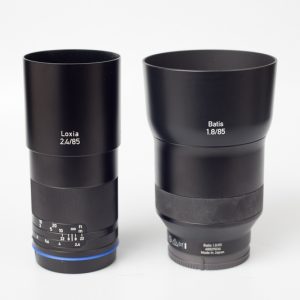
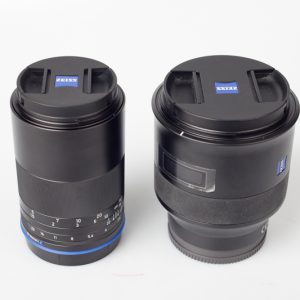
Zeiss Loxia 85/2.4
![]()
![]()
![]()
![]()
![]()
![]()
![]()
![]()
![]()
Build quality of the Loxia lens line is of the highest standards that modern production can offer. Extreme precision and high quality materials, perfect assembling and individual quality control make those lenses not only looking good, but also feel unique in the use. While I am really not a lens fetishist, I have to admit that Loxia makes me excited by simply holding it in the hand and turning focus ring here and there.
It is not everything great however, there is still one issue which I consider as a utterly useless design feature. Focus ring occupy basically whole body, therefore mounting and taking off the lens can be risky operation, especially if you wear gloves or your hands are somewhat slippery.
Since Loxia never heard of Autofocus, you can enjoy photography in the full beauty of your eye and fingers harmony. Mechanically coupled focus ring with a 220°turn is just about perfect compromise between speed and accuracy in the world of manual focusing. One of the things that I like is that reverse mounted hood, (which is otherwise very deep, probably as long if not longer than the lens itself) protrudes around 1 cm from the front element, still providing shading against incident light for most occasion, except for the direct front light. This means, that you can keep Loxia 85/2.4 within rather compact size (with reverse mounted hood) for most of your shooting. I have no idea if that was the intention, but it certainly worked for me.
Loxia has classic aperture ring which ignores camera and respect only your fingers. You can turn the aperture wheel on your Sony A7 all they long, but Loxia will remain utterly oblivious to your pathetic effort. Touch the aperture ring on the lens with your fingers and it will twist and sing moving at 1/3rd EV step clicks. Would you like seamless aperture change for video, you’ll have to take off the lens and use famous de-clicking tool (Remember that pin for your iPhone sim card slot? Yes, the one that you was so excited about when you opened the box and you never saw it again? Well Zeiss de-clicking tool is exactly the same – beautiful pin, which you will never have with you when needed.) See that little screw with a dot on the right side of the image bellow?
![]() While I think that Sony implementation of de-clicking feature is far more adult and reasonable, there is something masochistic in the Zeiss approach but at the same time purist by refusing any sort of plastics or electronic.
While I think that Sony implementation of de-clicking feature is far more adult and reasonable, there is something masochistic in the Zeiss approach but at the same time purist by refusing any sort of plastics or electronic.
Comparing all those four lenses in terms of design and build quality, I can hardly say that one is made better than the other. Oldest – Zeiss Planar 85/1.4 ZA is a bit shaky, but at the same time it feels very sturdy and competent for the professional use. Sony FE 85/1.4FE while mostly plastic on the surface, has certainly sturdy inner construction and used plastic is of the highest quality, making the lens very durable, scratch resistant and more pleasing for use (warmer in the winter e.g.) Batis is reflection of the modern CNC sort of design, contemporary artifact with artistic flavor. We will see how this monolith design will be perceived in a few years, but it might preserve its attractiveness, being very minimalist and clean. Finally, there is Loxia a small wunderkind of the functional design and modern production. With Loxia, size difference between those four lenses become very significant, mainly because of the smallest diameter, but it has substantial feel in the hand with its 600 gr. If you like mechanical toys, ultimate craftsmen and small size, your choice of the portrait lens for Sony E platform, shouldn’t take long.
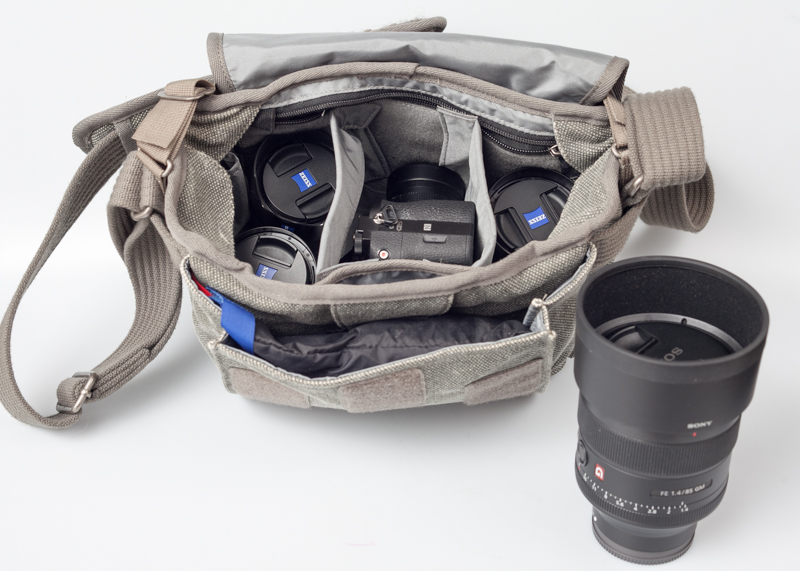
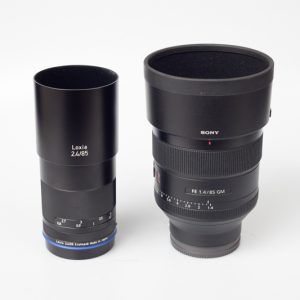
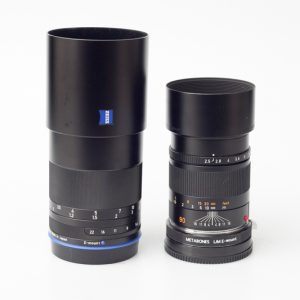
Speaking about the size, Loxia 85/2.4 is not a short lens, but it is rather thin lens. Why this might be important is when you need to pack couple of primes for the trip, but you need to stay compact.
![]()
In the bag above, there are all four Loxias together with my Sony A7 MII, small umbrella, batteries, release cable, small tripod etc. For the reference, there is Sony FE 85/1.4 standing next. Try to put it, together with 50/1.4, 21/2.8 and 35/2 of the similar design, and your bag will have to grow proportionally. When you need to switch your lenses often on the set or on the go, thinner profile of the Loxia lenses is much more friendly for the purpose (except that design thing: my barrel-my focus ring).
As usual, the price for compactness (apart of the famous Zeiss-price itself) is in the moderate speed. But let’s be honest here, if you still believe that beautiful portrait (and those are portrait lenses at most), can be only shot with DOF of 0,5cm and less, you should probably skip Loxia, than skip any other lens and finally skip portrait photography in general. I mean, there are situations when you can creatively use thin DOF, but it is not that ultra thin DOF will make an artistic portrait of your mother in law. It’s not always great to guess which of those blurred spots is actually other eye of your subject, and if that is Quasimodo in the front, or just blurred nose of your poor model.
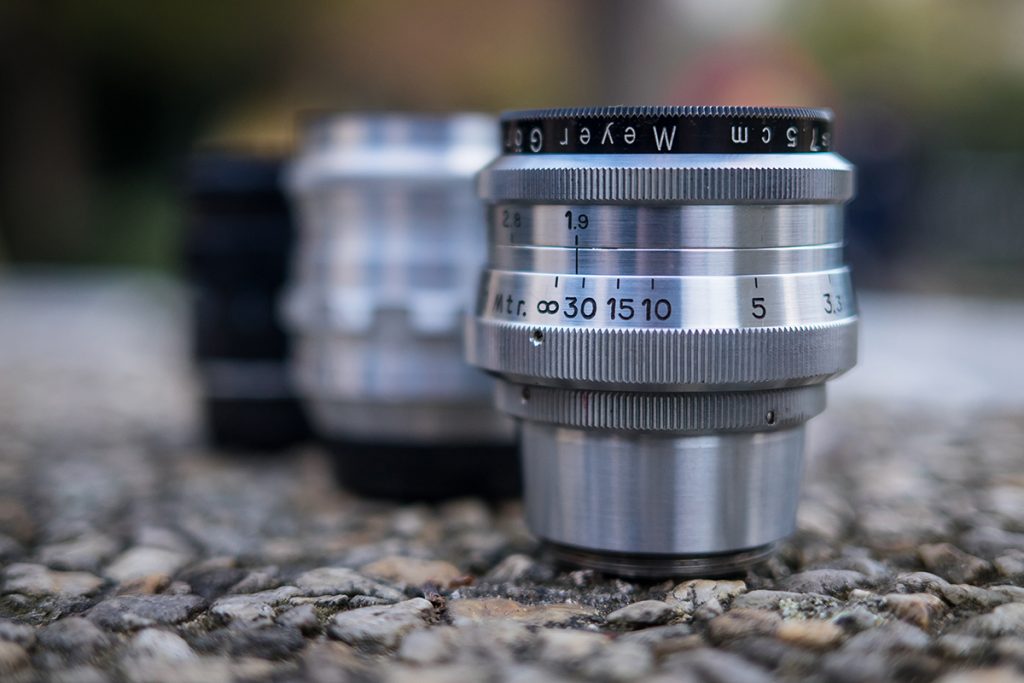
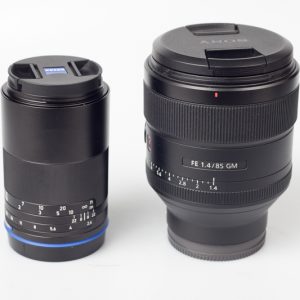
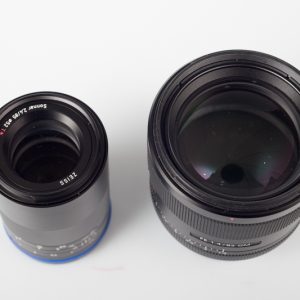
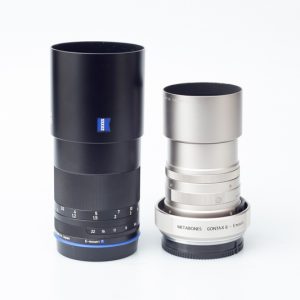
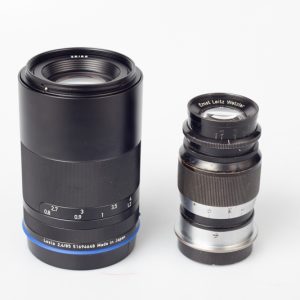
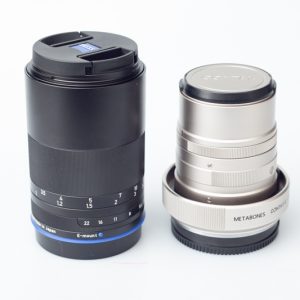
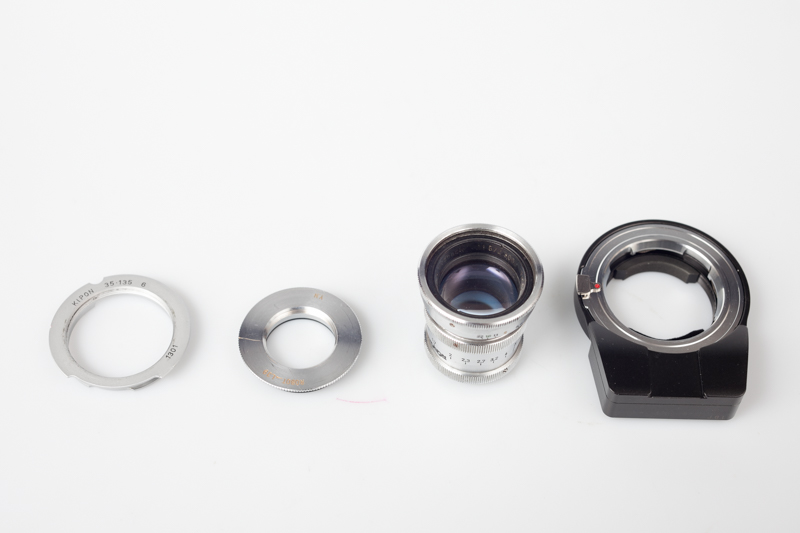
Loxia is small by today standards but bellow you can see few even smaller portrait lenses from ancient age.
![]()
![]()
![]()
![]()
![]()
![]()
![]()
![]()
![]()
![]()
![]()
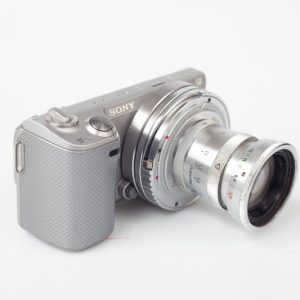
Looking at those images, I asked myself, what would be most compact portrait set-up (based on Sony E platform) that I can come up with from my collection. The choice laid on the Sony NEX 5N with the Xenar 7,5cm f/3.8 from the Robot camera.
![]()
![]()
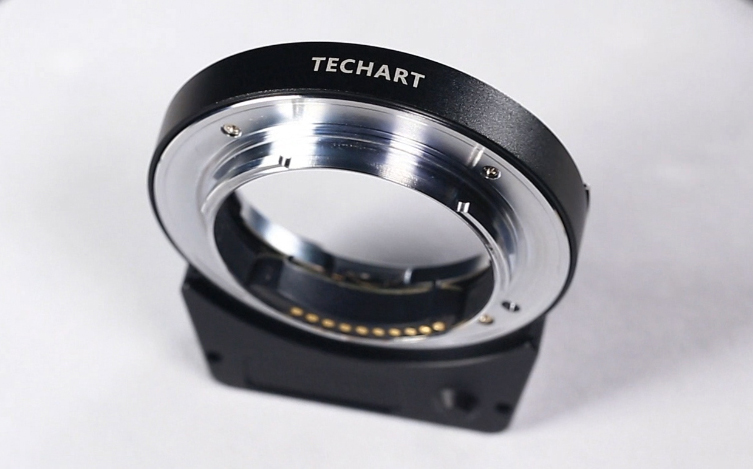
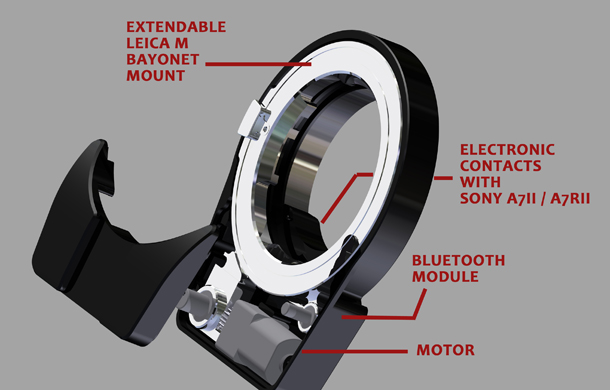
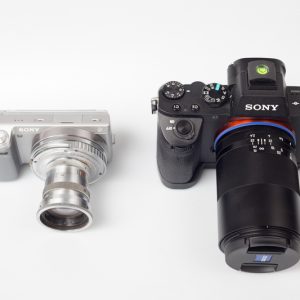
The funniest thing is, that old Robot lens can be mounted on Techart Pro and, not only it is super small, it can be super small with AF. Crazy times huh…
![]()
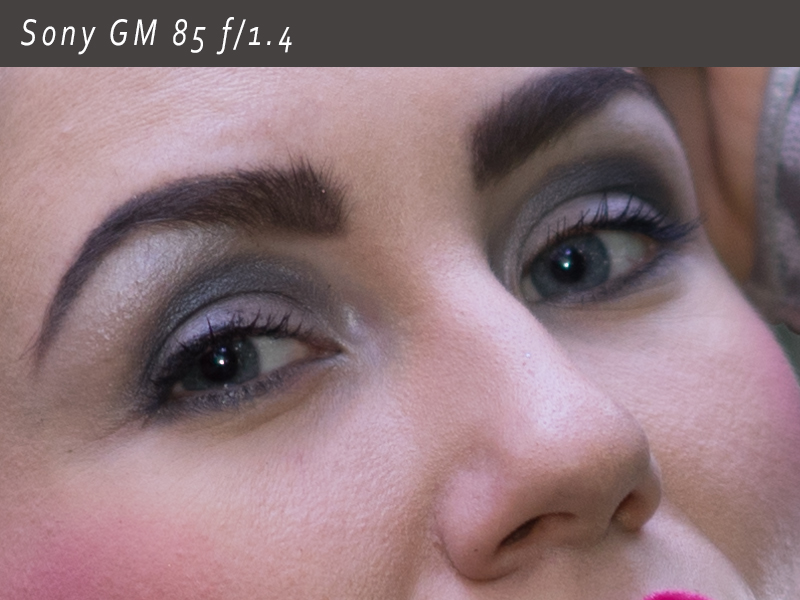
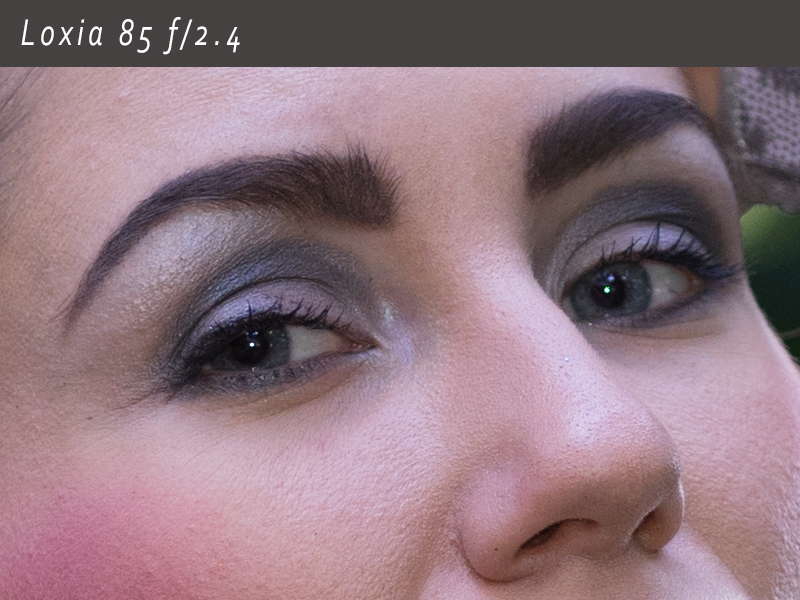
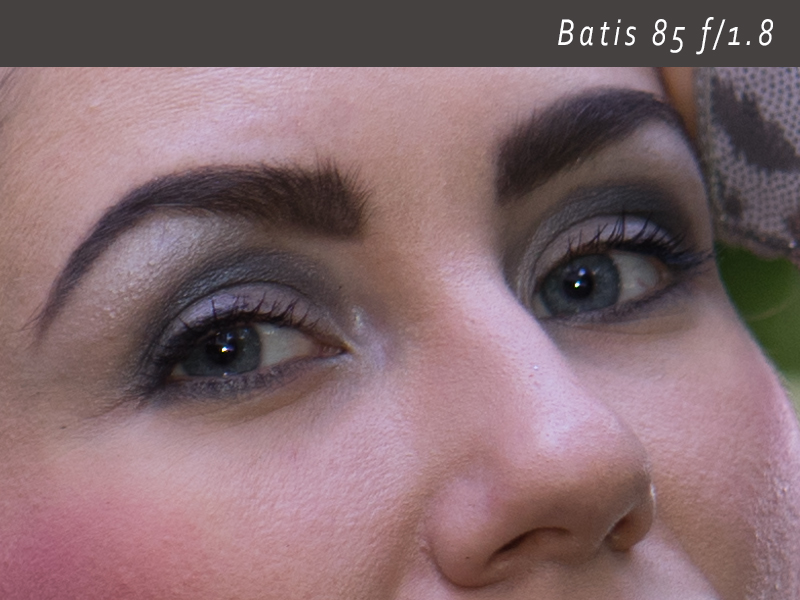
Image Quality – sharpness
The verdict is simple here – all four tested lenses can render technically much better images that I can artistically follow. In other words, all four are among best portrait lenses that you can buy today.
There are some differences sure, I will try to comment on a few, but this will be rather for the purpose of the review itself, than for any practical purpose. At the end, if considering one of those lenses, you should be more focused on other aspects than image quality itself. All that in my humble opinion of course…
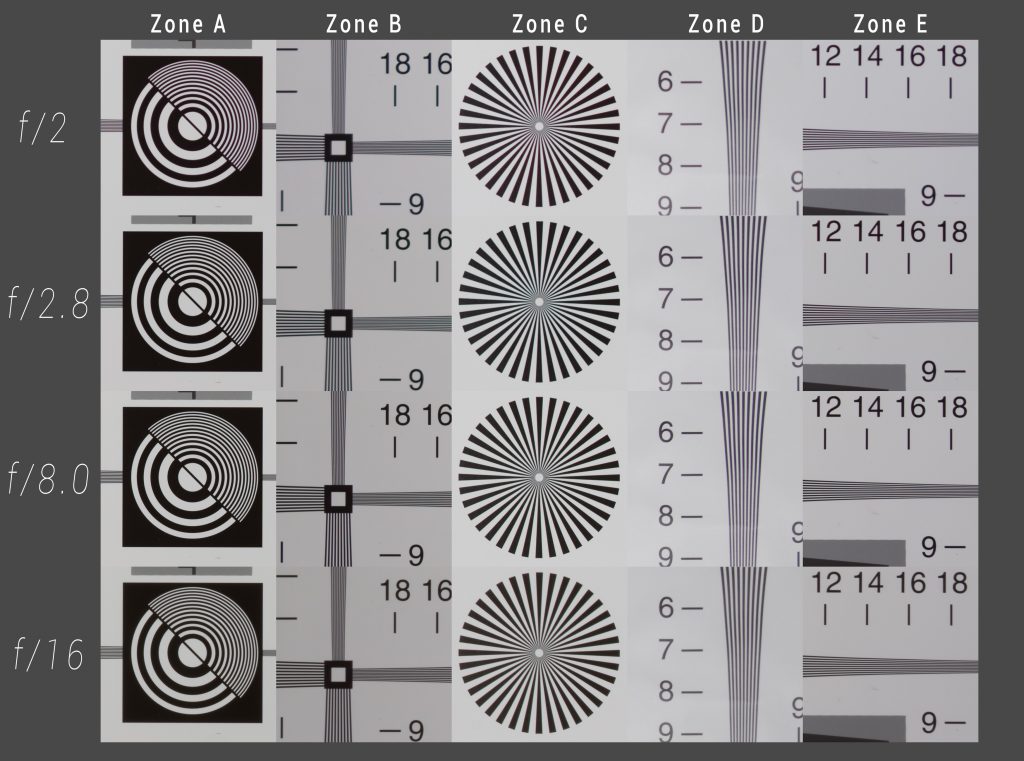
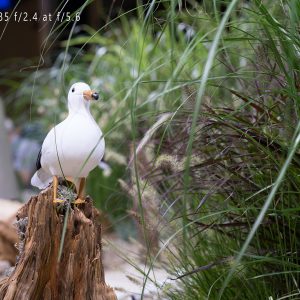
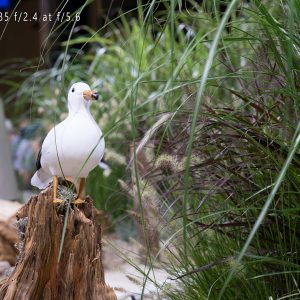
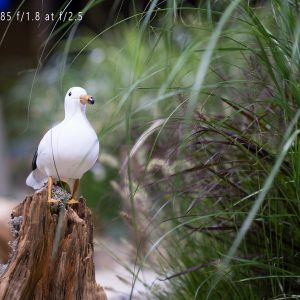
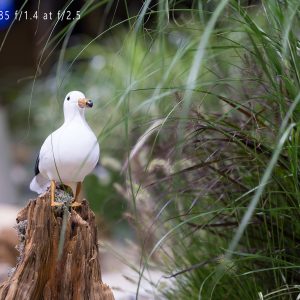
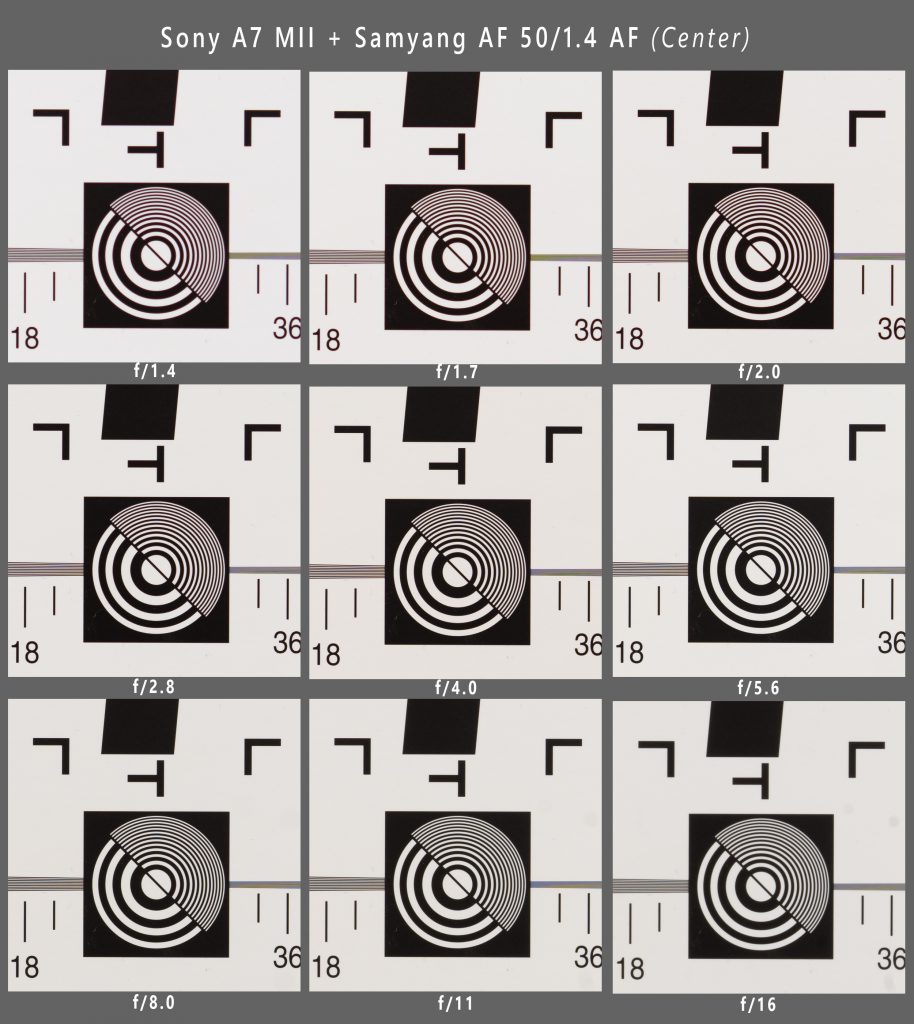
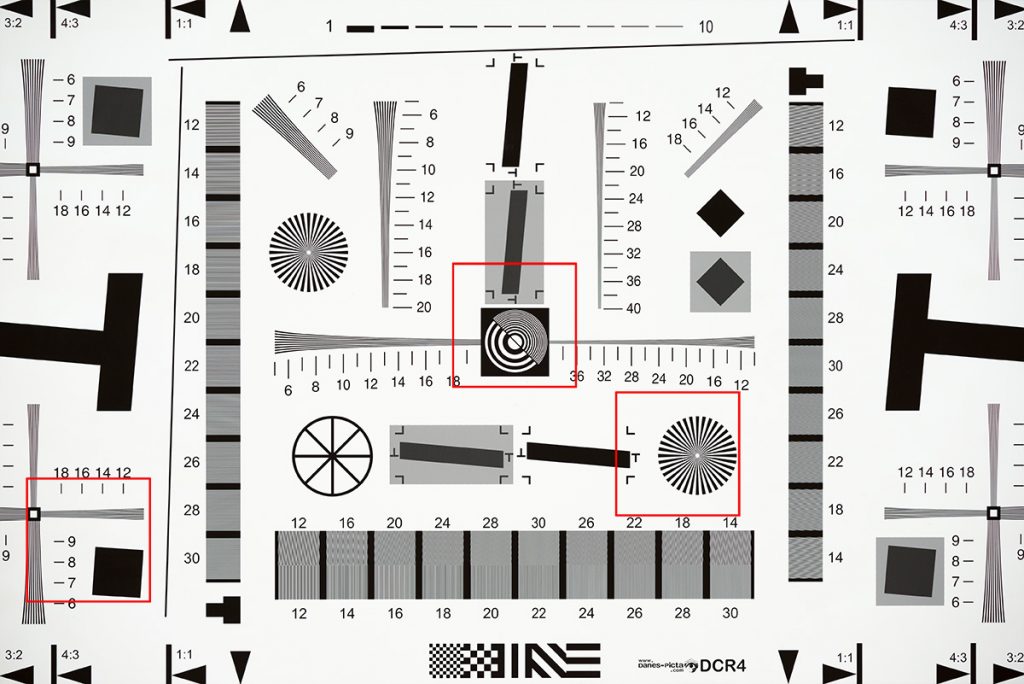
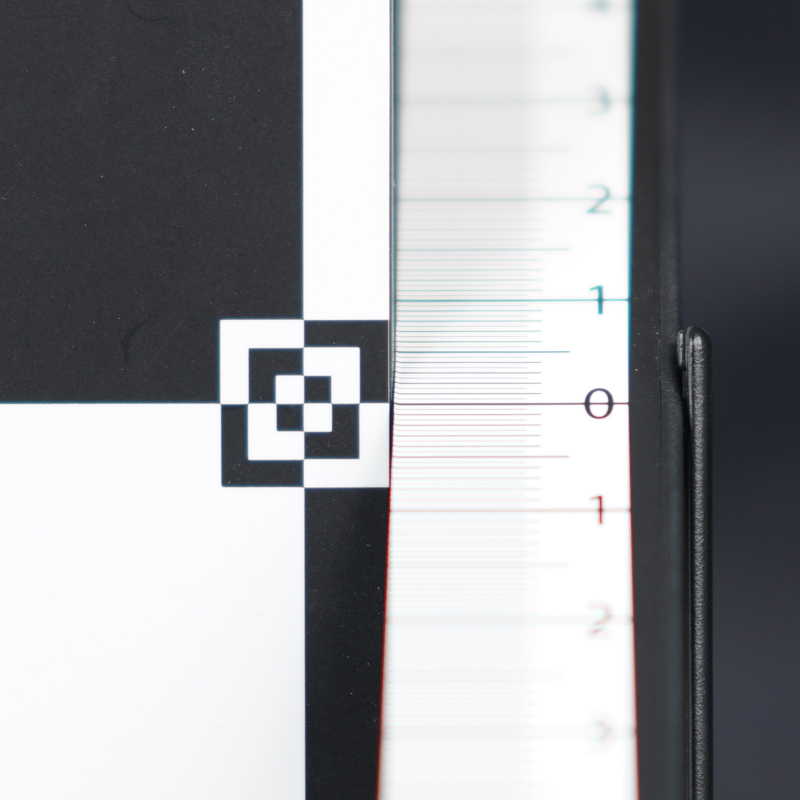
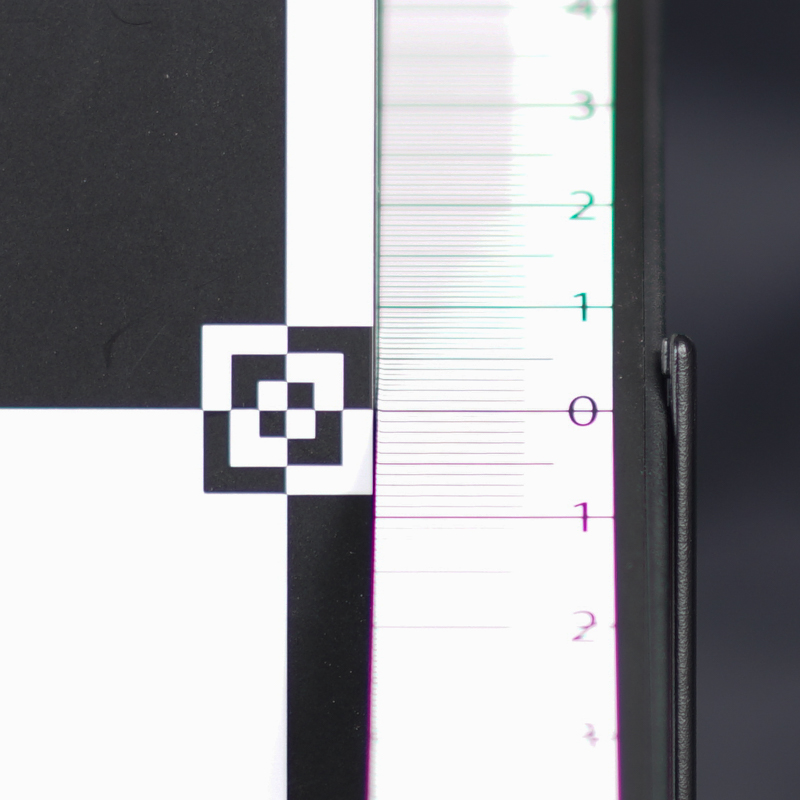
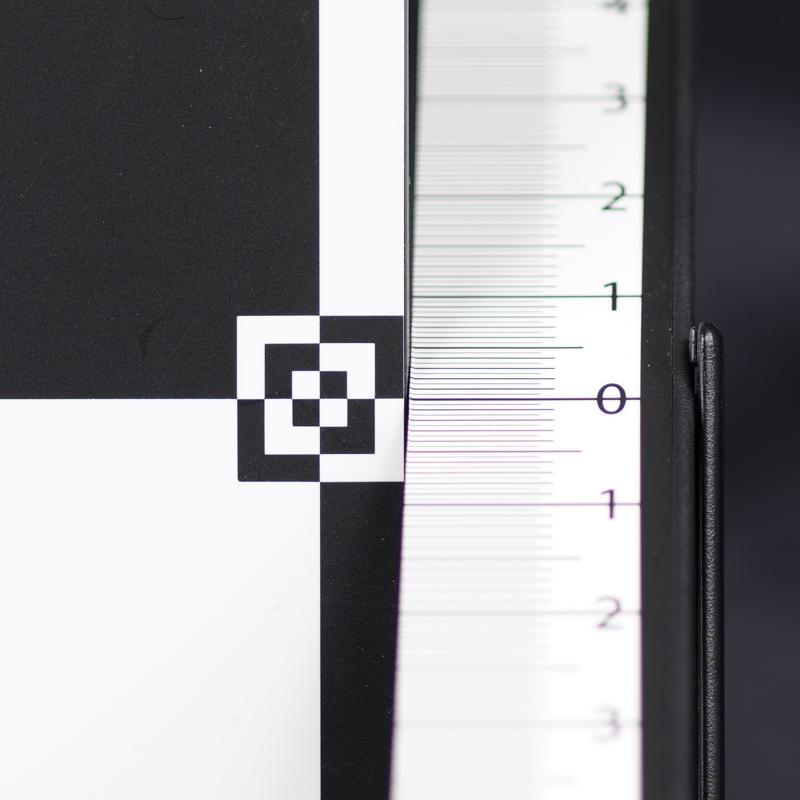
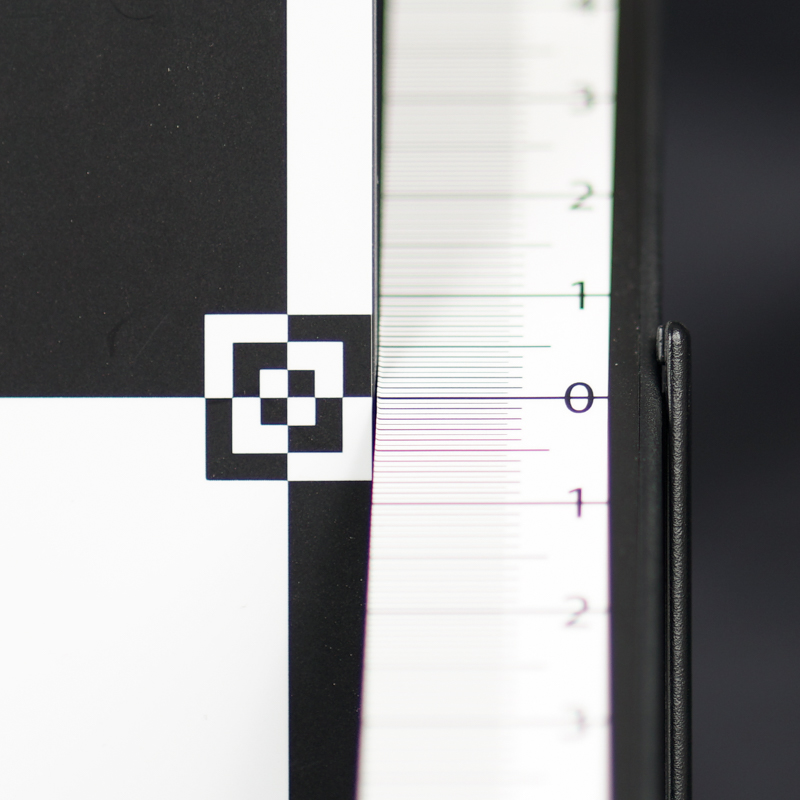
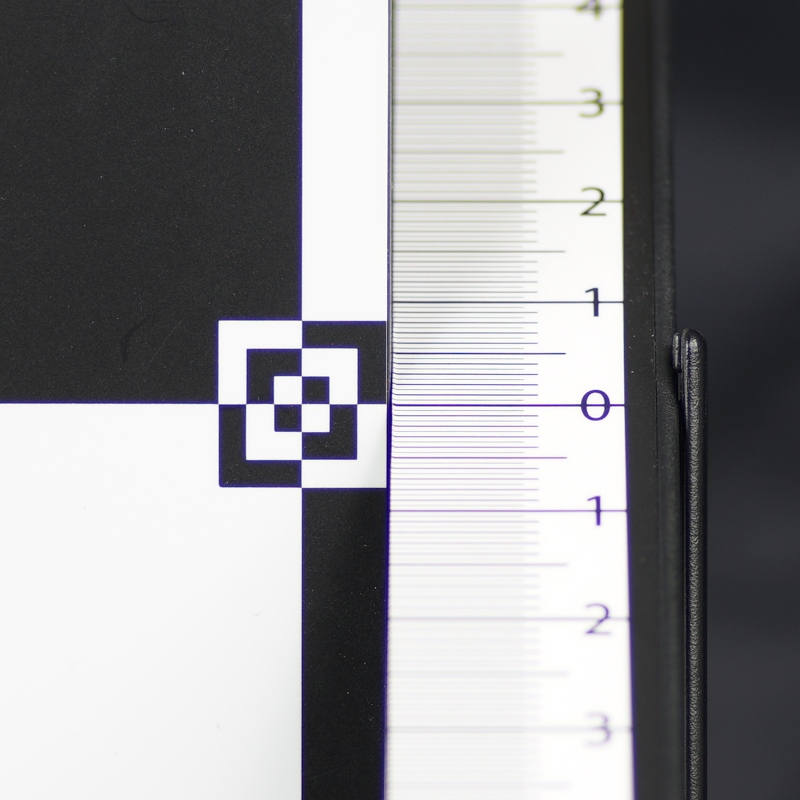
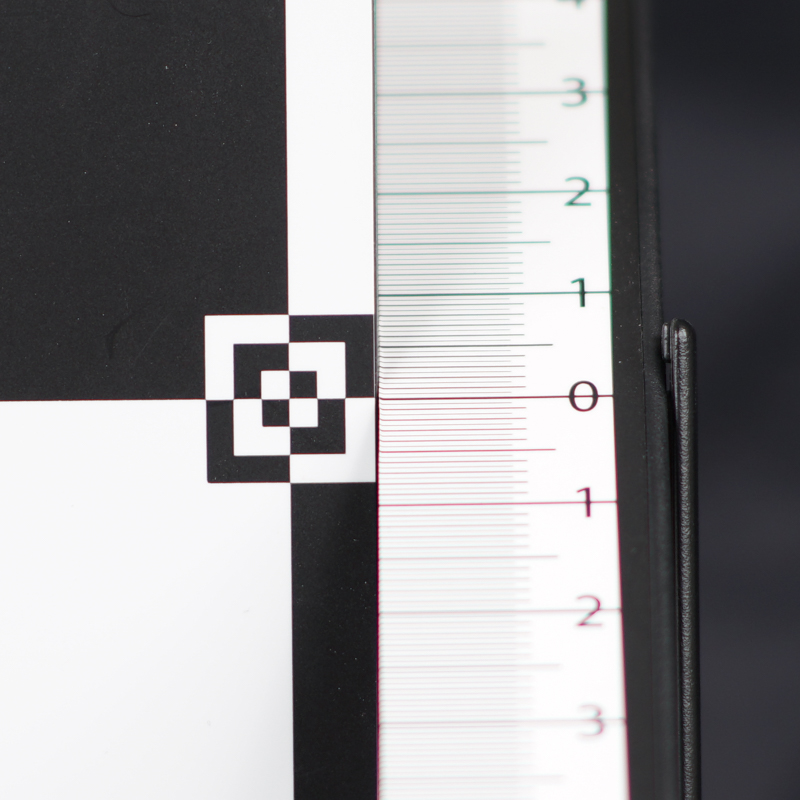
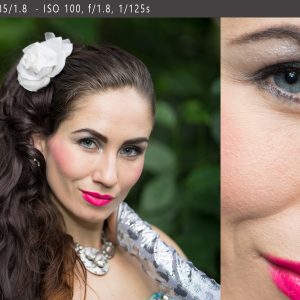
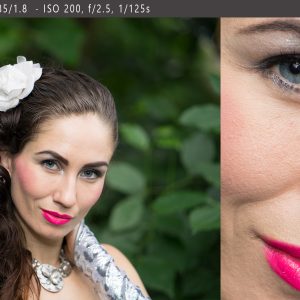
ISO 12333
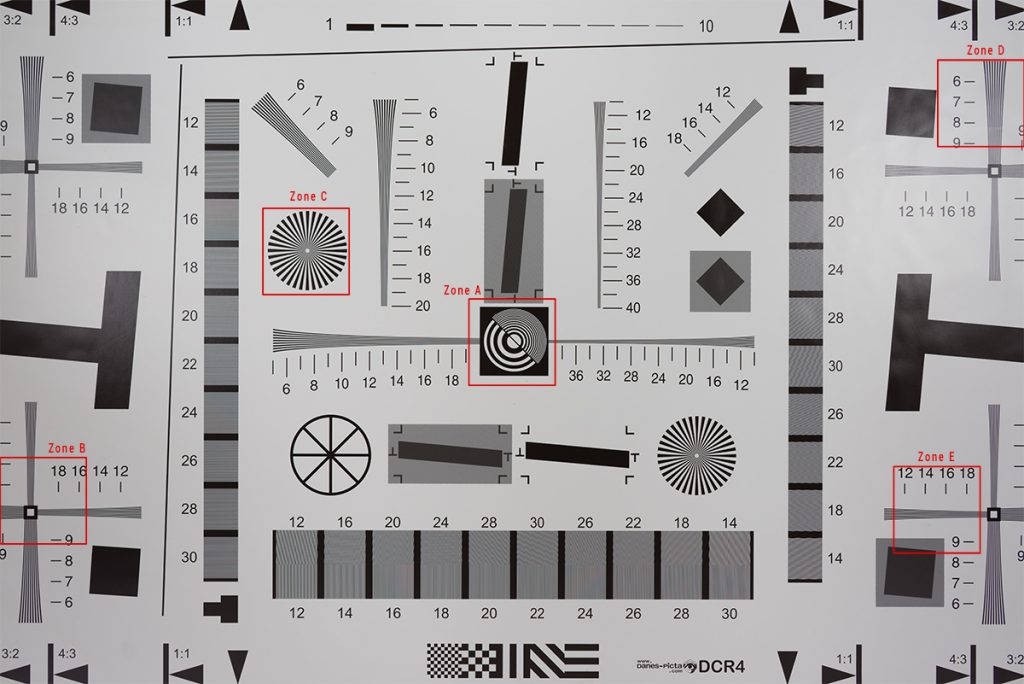
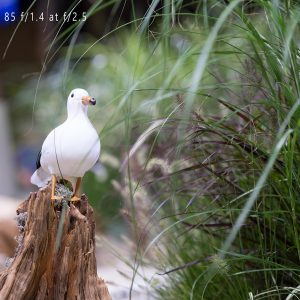
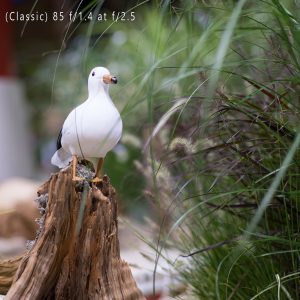
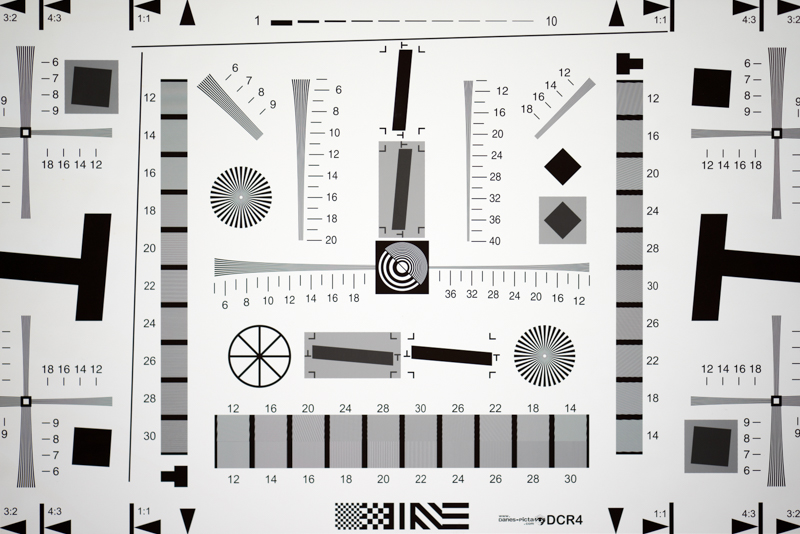
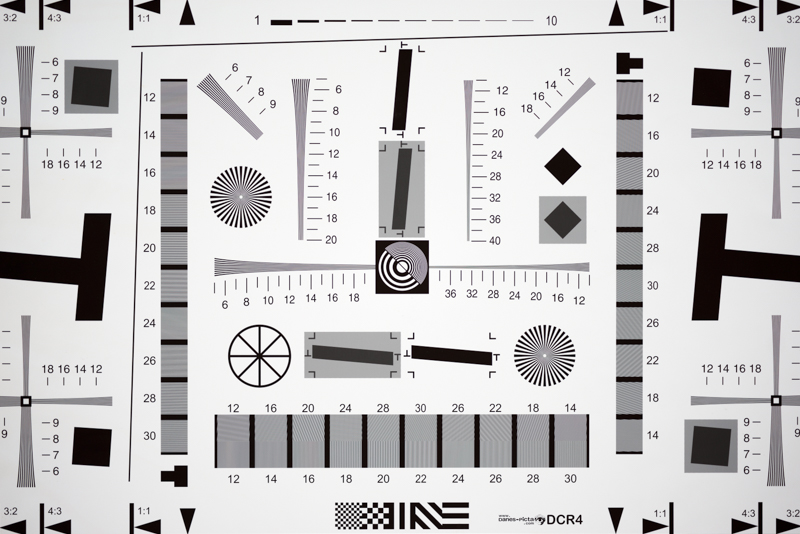
Formal studio test can show some of the lens rendering tendencies. I made a 100% crops for easier comparison, but you can choose to see images in the original file size on my service Flickr album
![]()
![]()
![]()
![]()
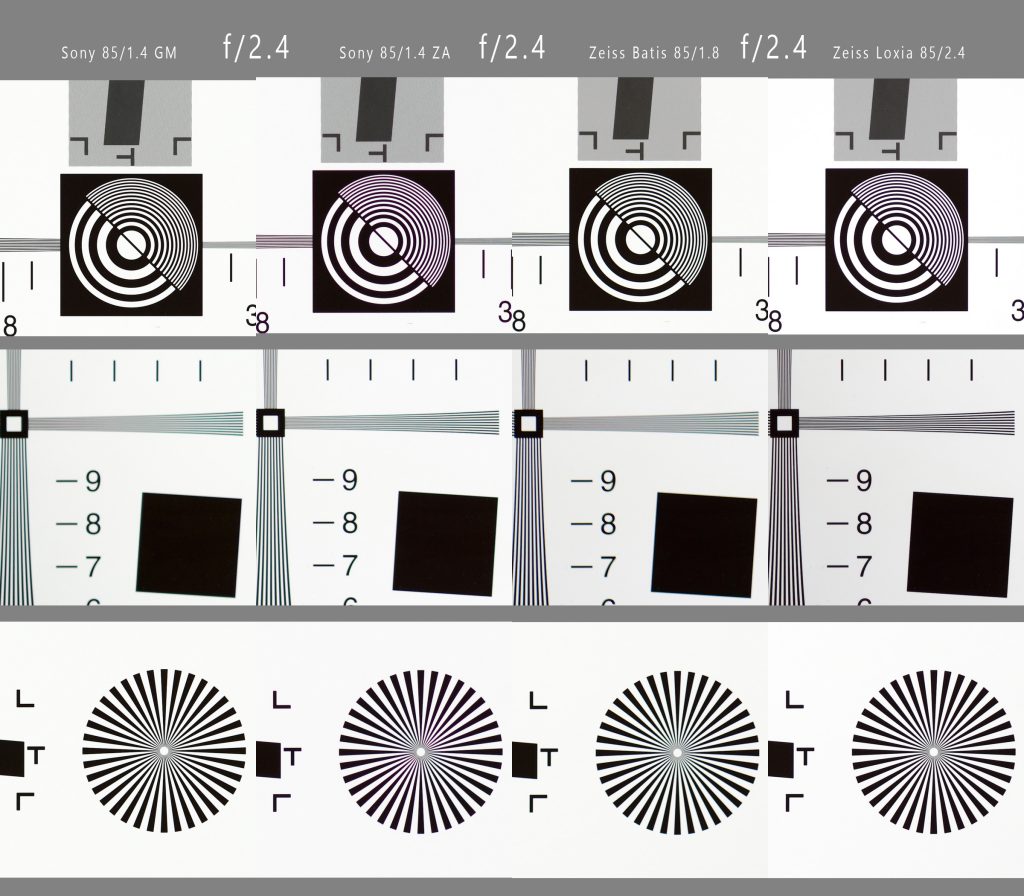
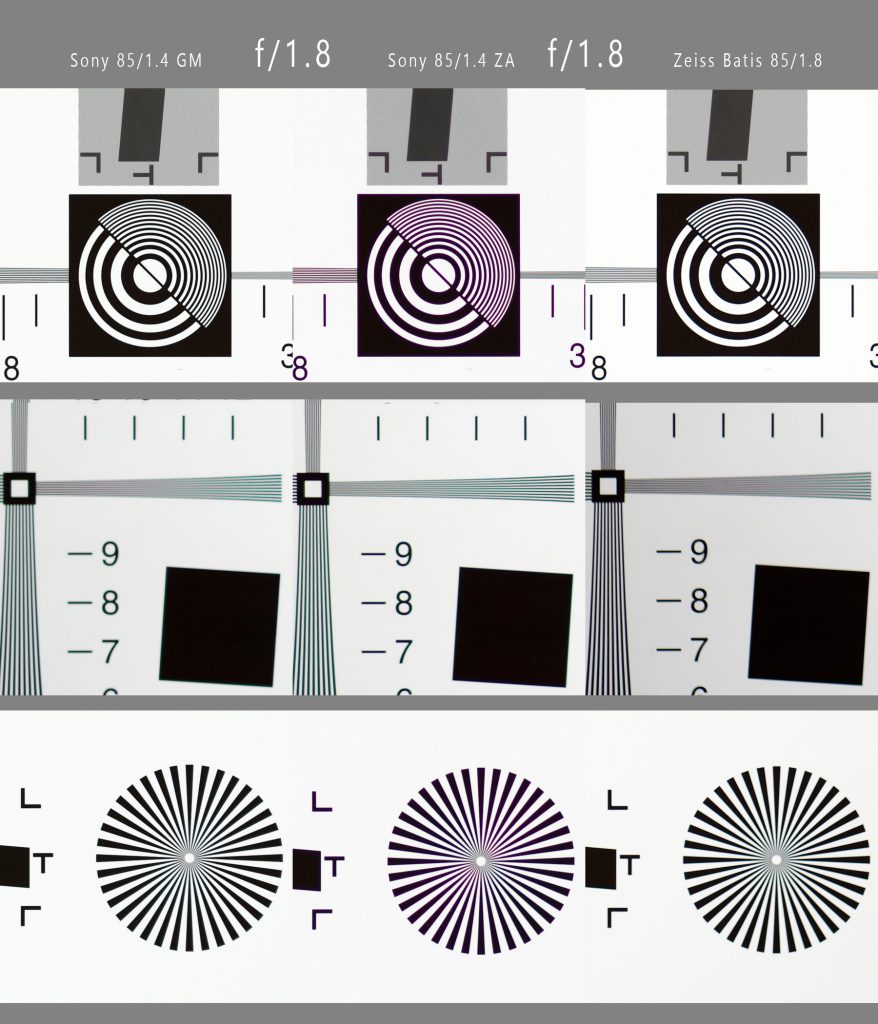
![]() One thing is immediately noticeable – Sony SAL Planar 85/1.4 ZA has significantly more pronounced chromatic aberration, especially wide open. At f/2.4 where Loxia starts though, this aberration correction dramatically improves and in most of the portrait applications in the field, it shouldn’t be a problem.
One thing is immediately noticeable – Sony SAL Planar 85/1.4 ZA has significantly more pronounced chromatic aberration, especially wide open. At f/2.4 where Loxia starts though, this aberration correction dramatically improves and in most of the portrait applications in the field, it shouldn’t be a problem.
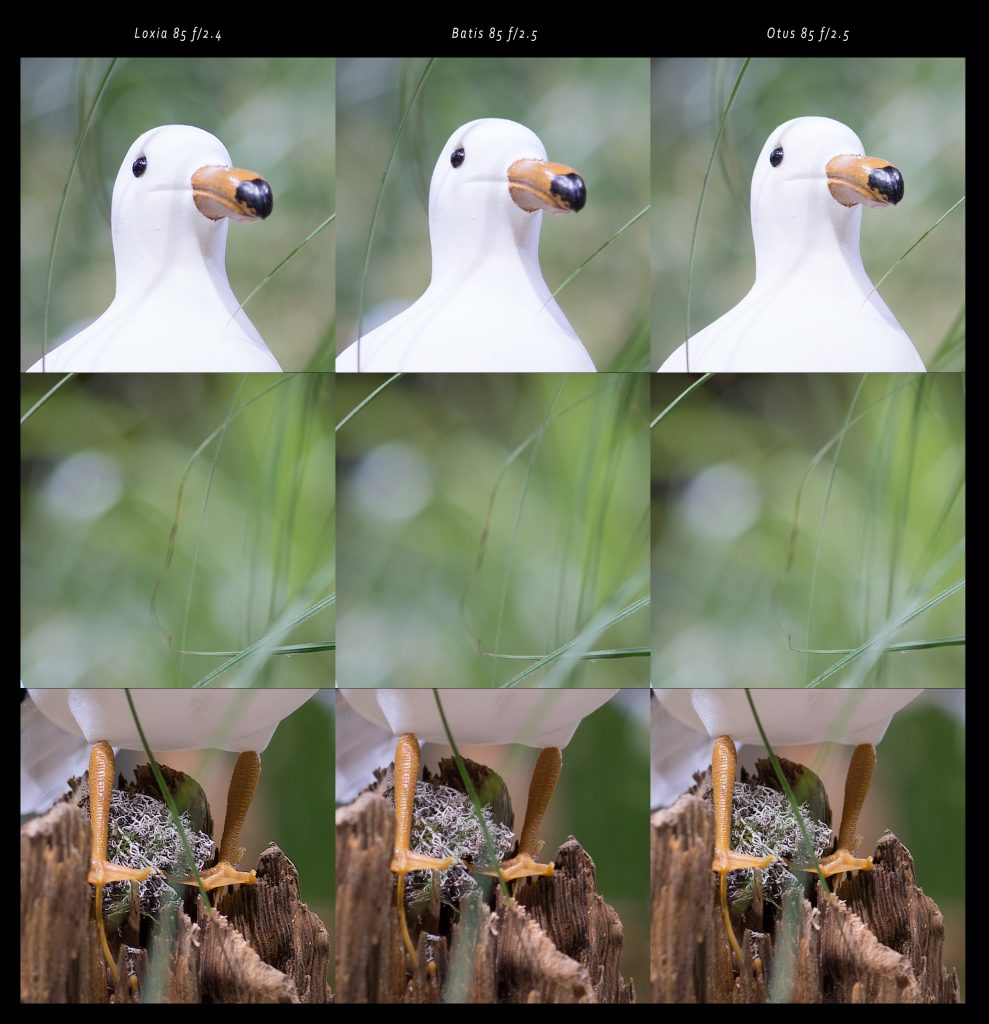
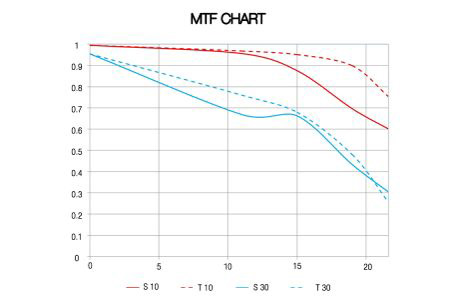
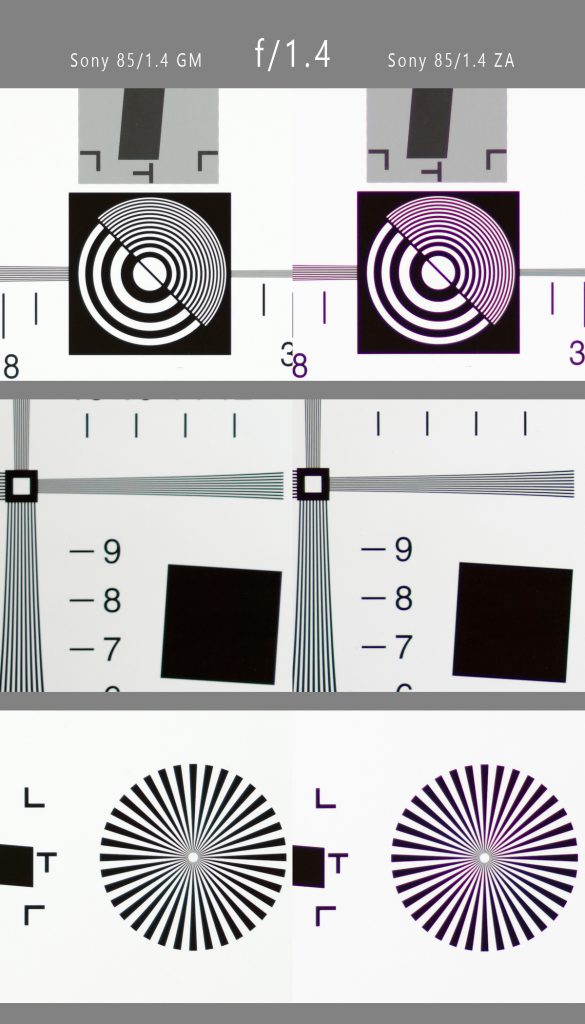
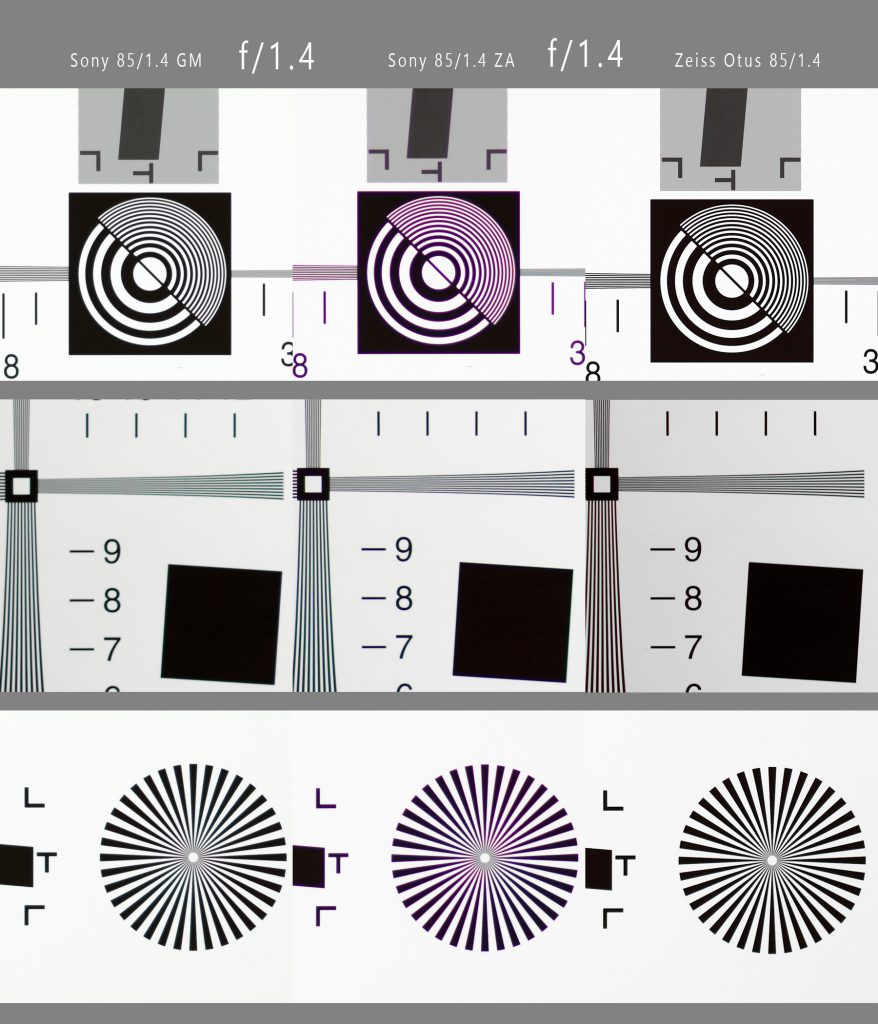
Apart of CA, Planar is actually very sharp from f/1.4, I would dare to say that it is slightly sharper than Sony FE 85/1.4 GM in the center of the frame. At f/2.4 in contrary, Loxia seems to be overall sharpest, closely followed by Batis. The differences are however so small than in practice it will matter much more on the particular technique, lighting condition, distance of the subject and its steadiness than on the absolute MTF numbers from the formal testing.
I included few more lenses for the reference, where Zeiss Otus 85/1.4 remain sharpest (but new Sigma Art 85/1.4 seems to beat it in that regard according to DxO).
![]()
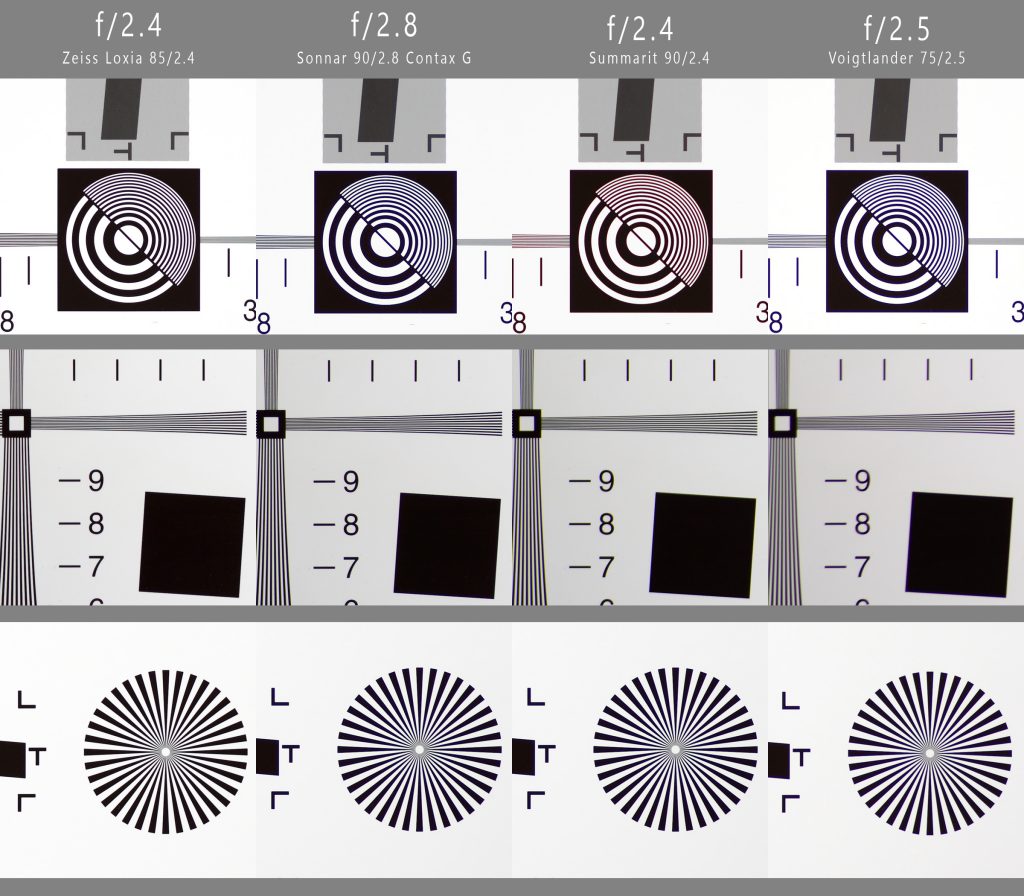
On the other side, you should see how Loxia, pulls away from older lenses in the similar focal length.
![]()
For the specific purpose of the portrait lens, sharpness doesn’t necessarily have to be of the huge importance. However the combination of sharpness, high micro contrast and character of the bokeh, certainly creates specific look. In that regard, I am still amazed by the look of Otus 85/1.4 images wide open, even if the bokeh shows onion rings in the highlights, but I rarely use this lens for my work, where more commonly used apertures vary between f/2.8 and f/5.6. At those apertures, all tested lenses are super sharp, and I need to spend quite some time in retouching skin imperfections of my dear clients.
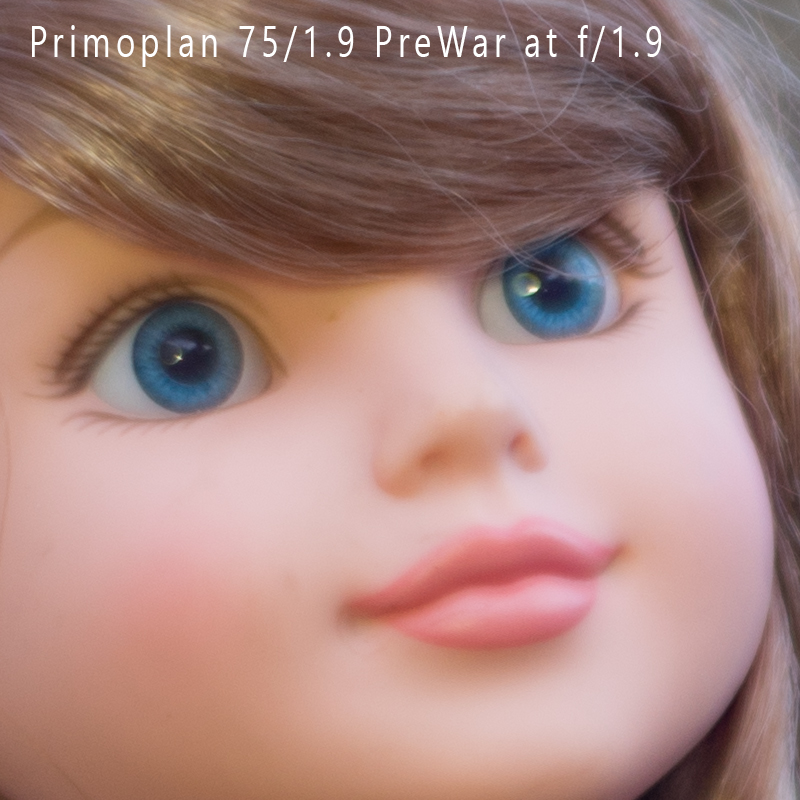
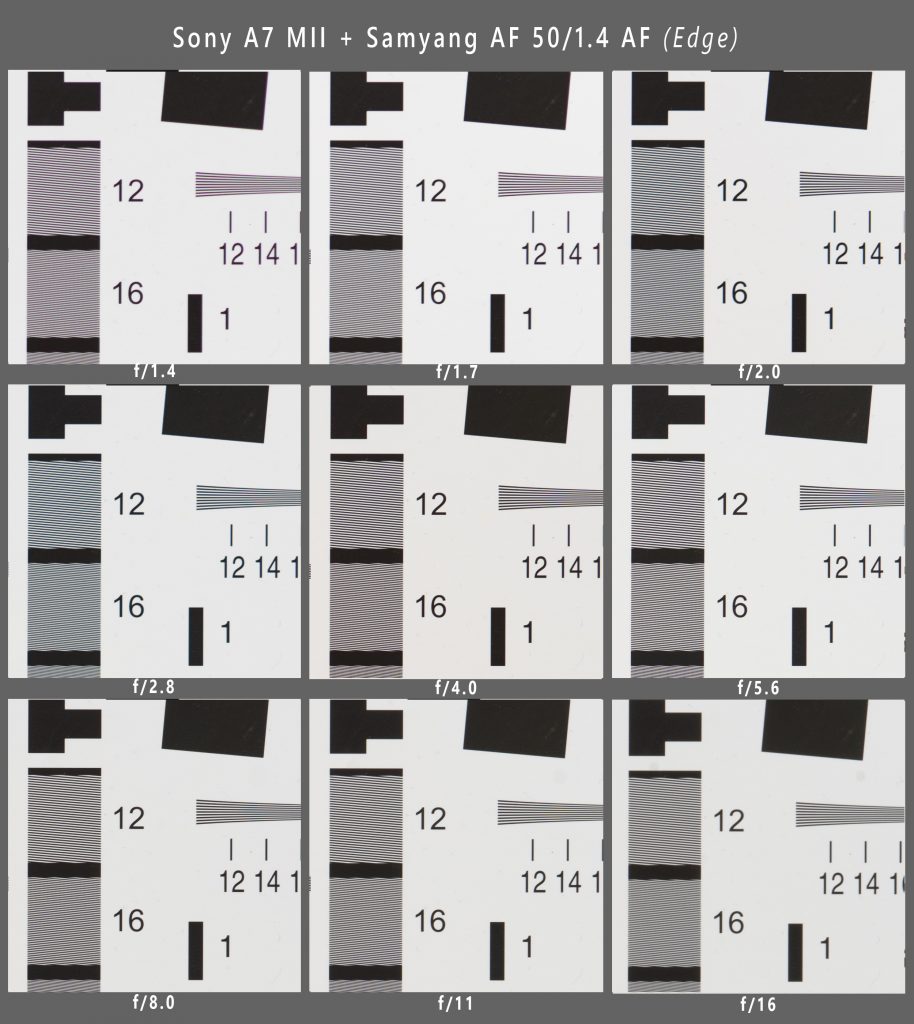
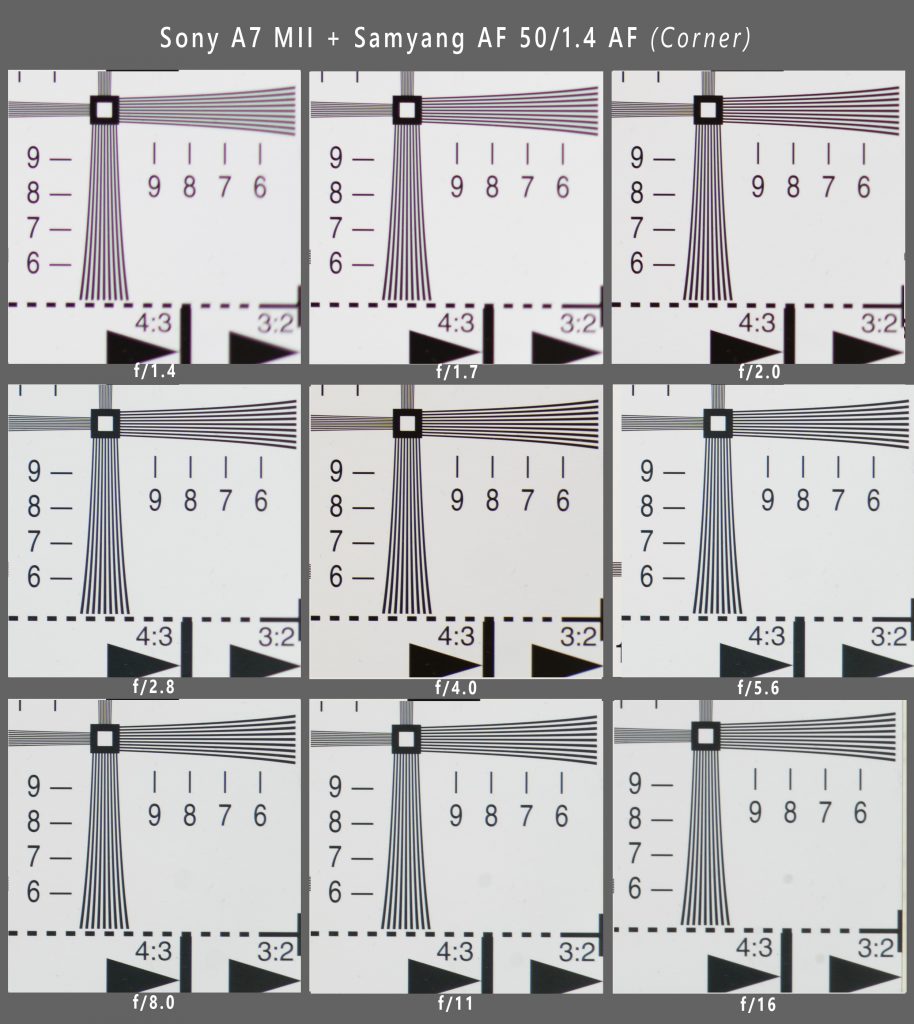
Another story is sharpness toward image borders. Because I usually want my models to separate from the background so that the viewer attention naturally fall on them (usually on model eyes), instead of expecting sharpness across the frame, I prefer more pronounced spherical aberration, that usually helps in creating bokeh with certain specific, painterly look. My most often used portrait lens is the old Zeiss Jena Biotar 75/1.5 which has exactly those characteristics.
![]()
Carl Zeiss Jena Biotar 75/1.5 wide open
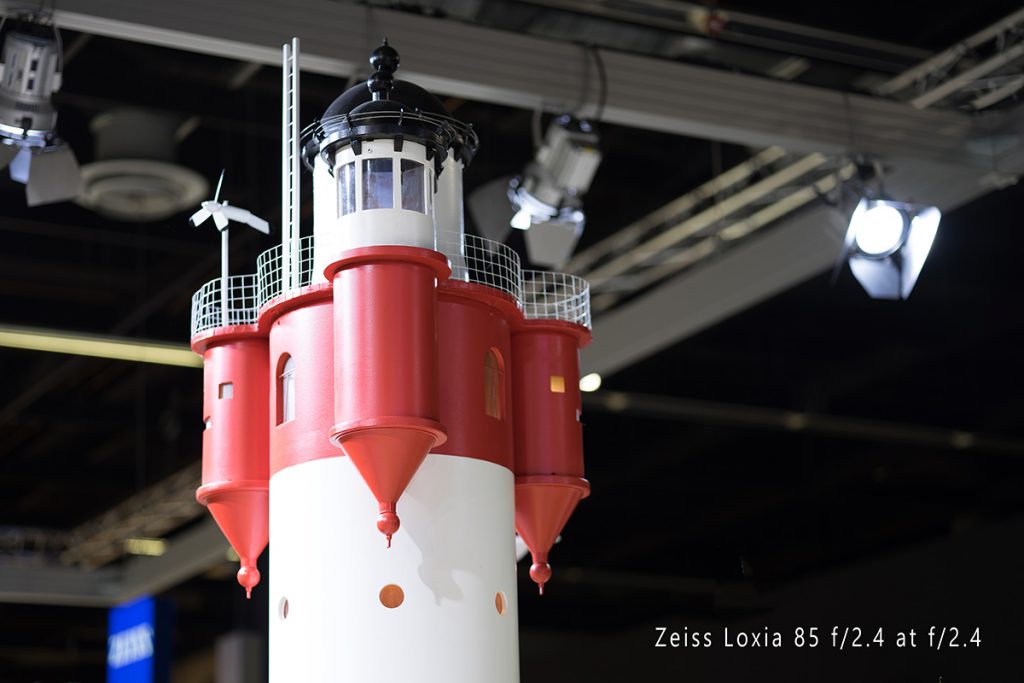
This is main reason why I don’t really care about sharpness in the image corners at wide open aperture, for this type of lenses. Nevertheless all tested lenses show well corrected spherical aberration and surprisingly good performance even at the extreme corners of the image at wide open apertures. Loxia is probably winner in the corners (by very small edge) at comparable apertures.
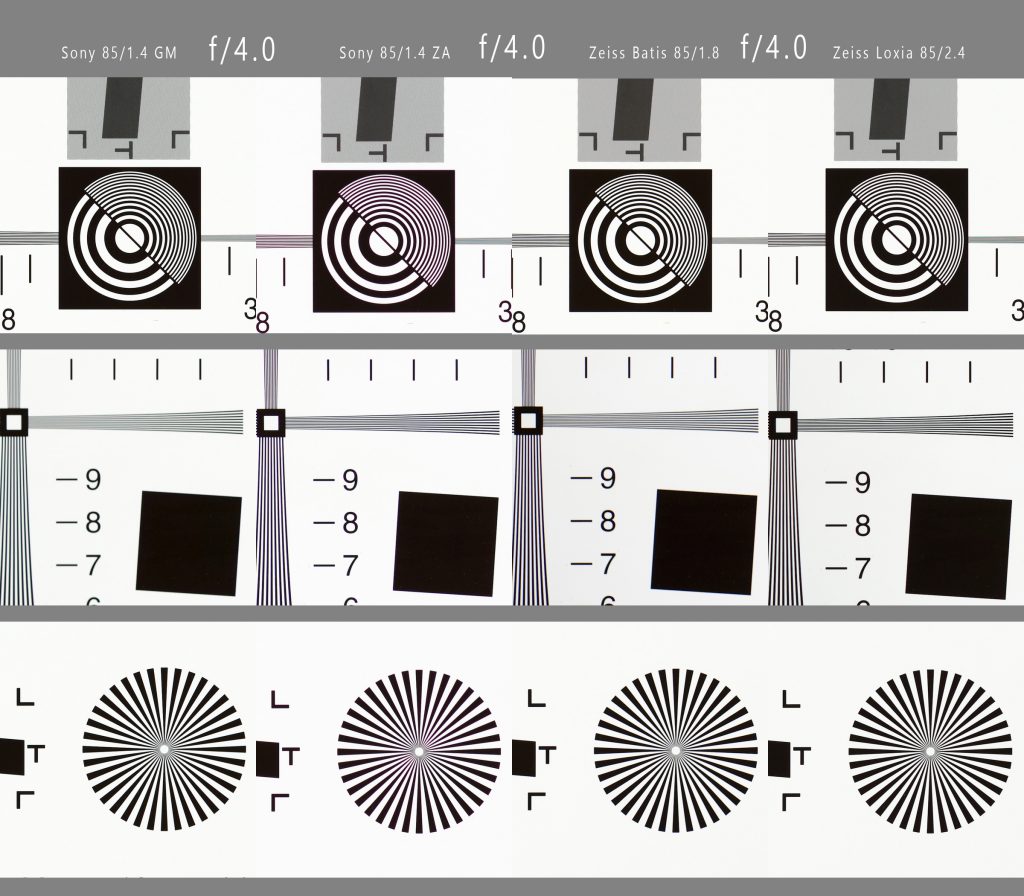
At f/4 it is hard to tell the lenses apart from each other.
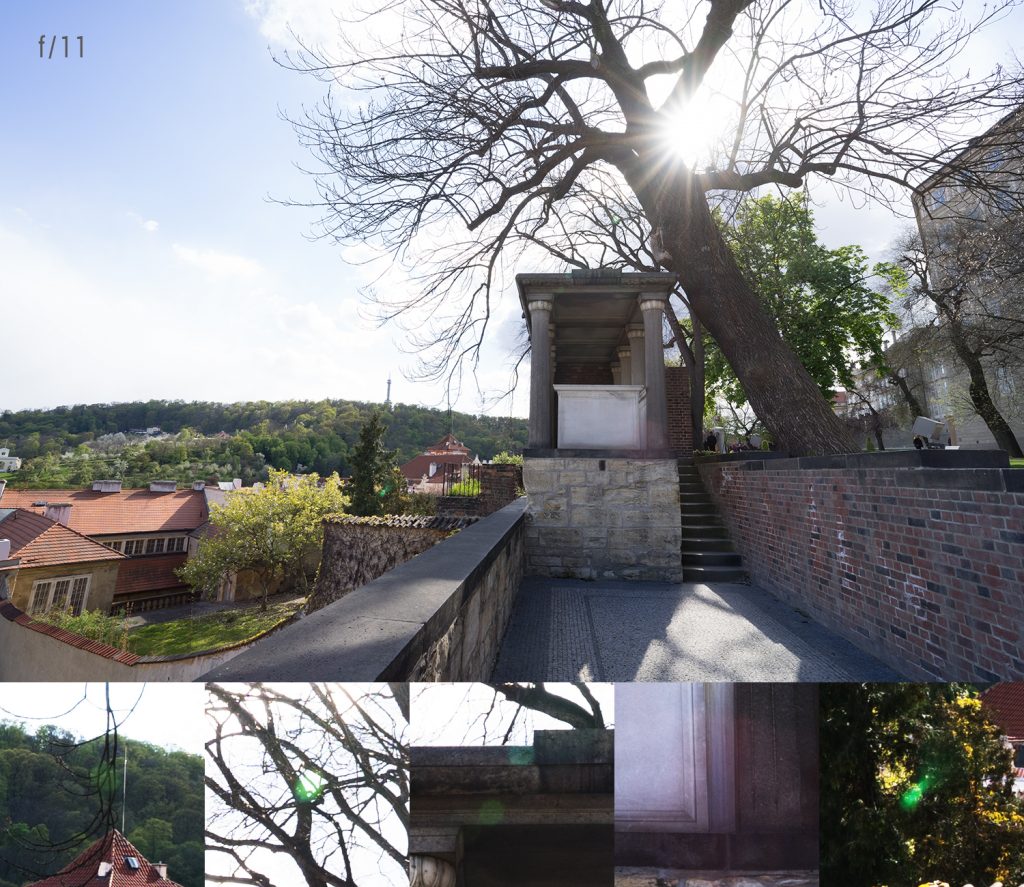
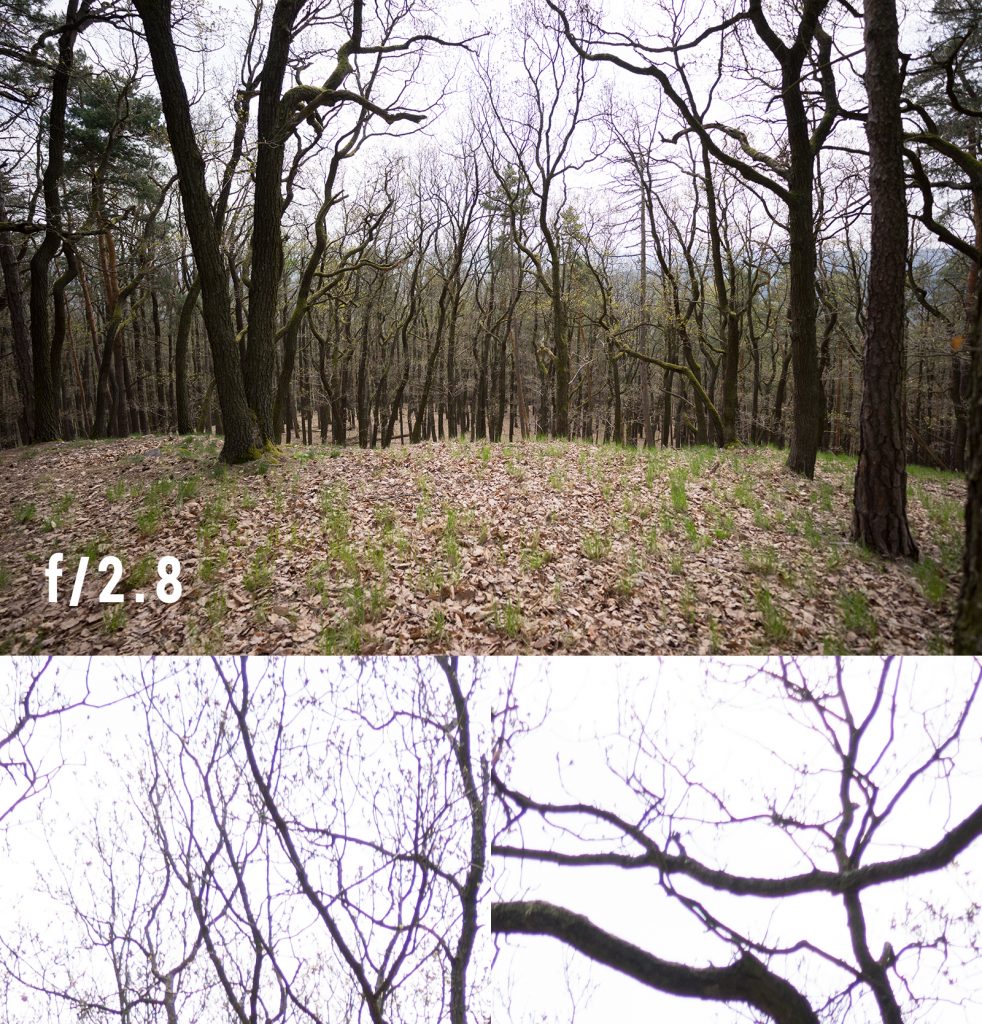
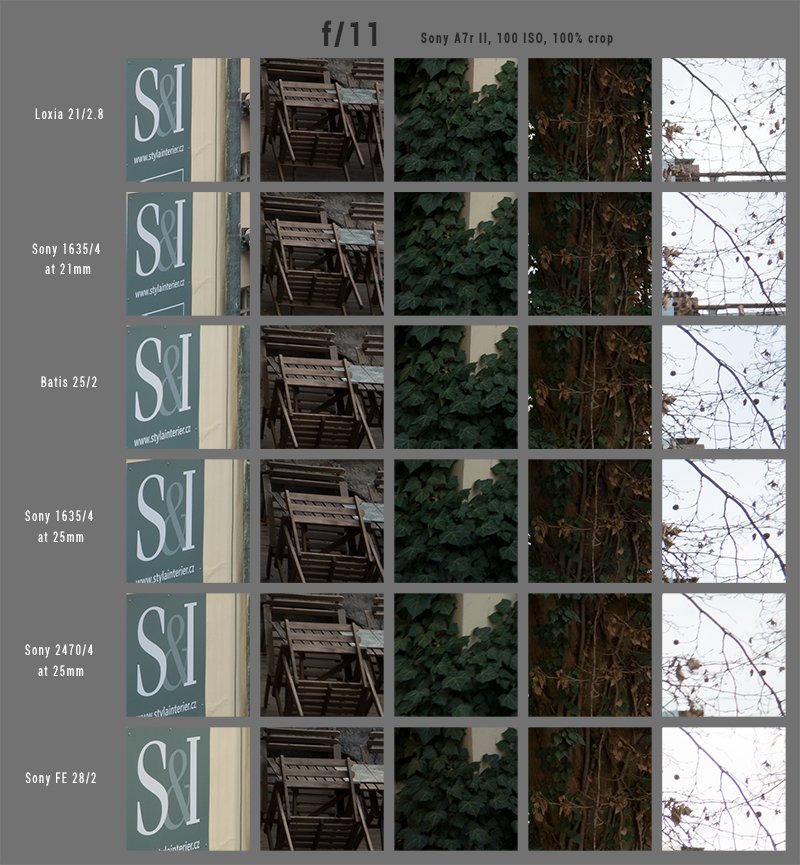
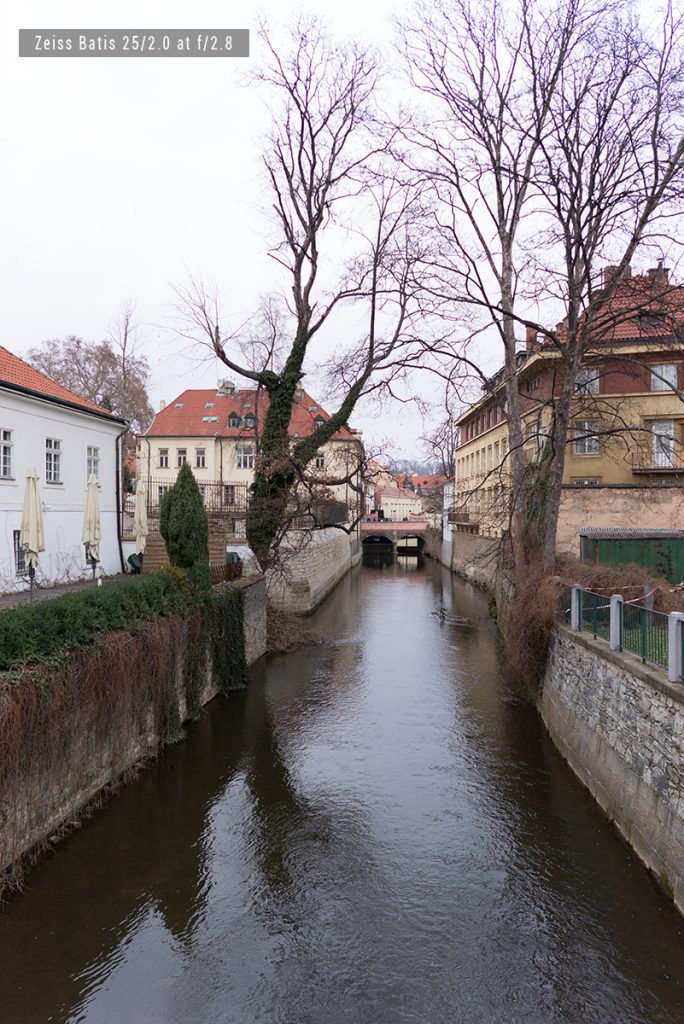
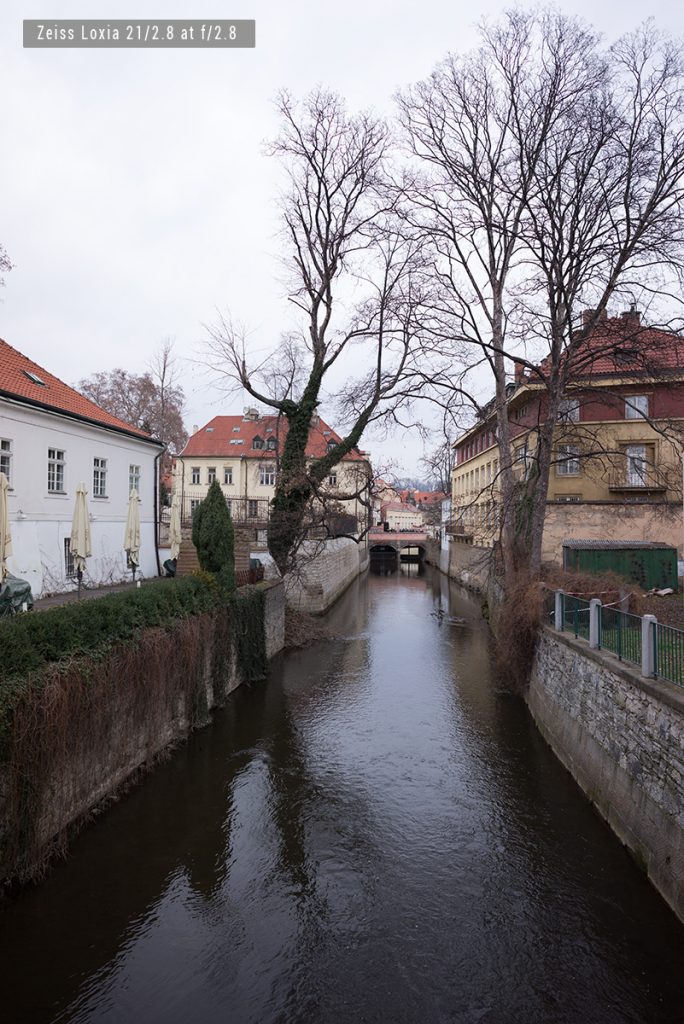
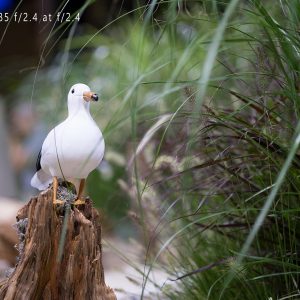
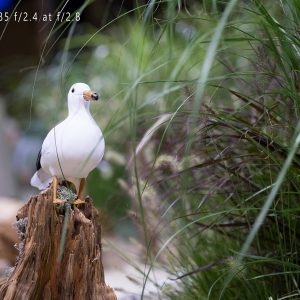
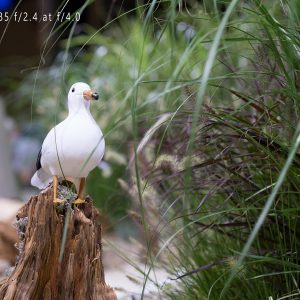
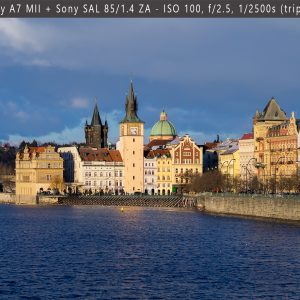
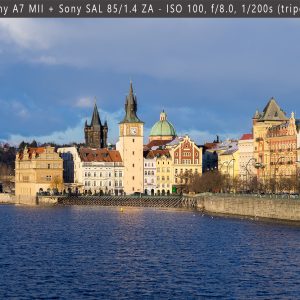
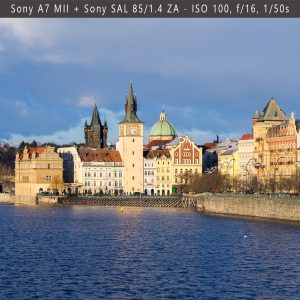
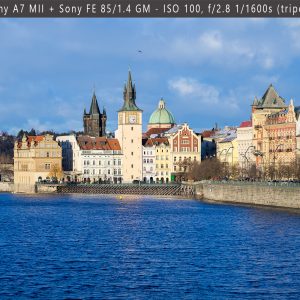
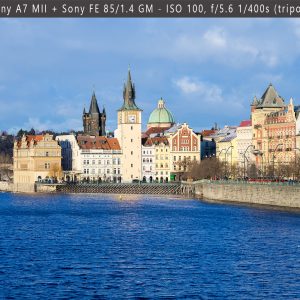
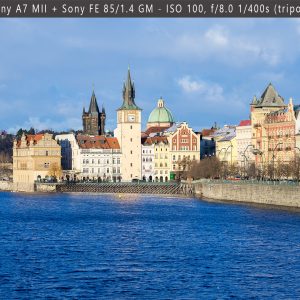
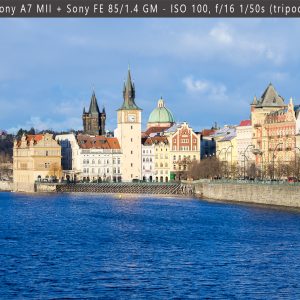
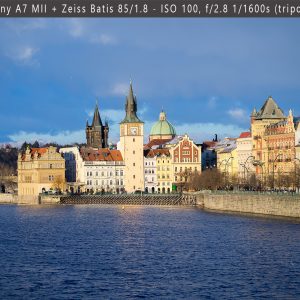
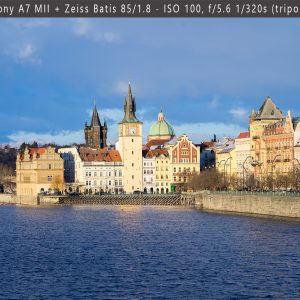
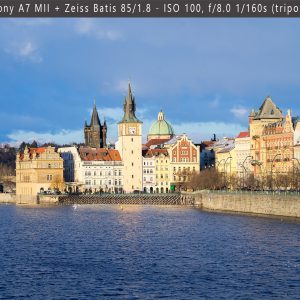
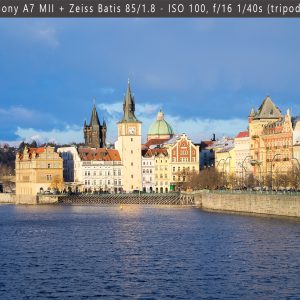
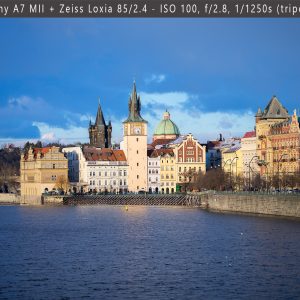
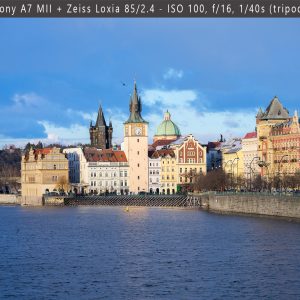
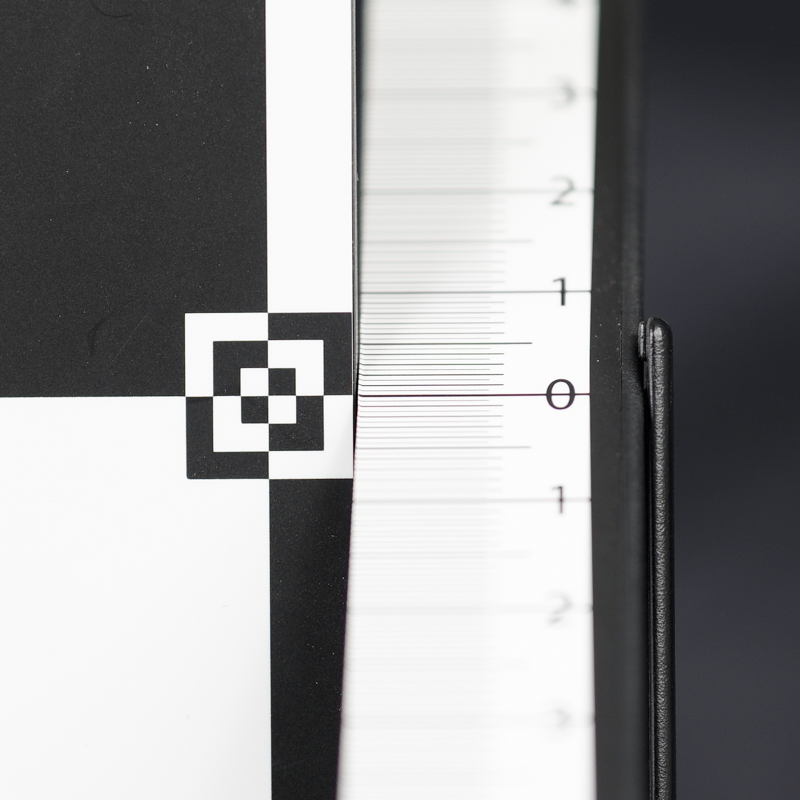
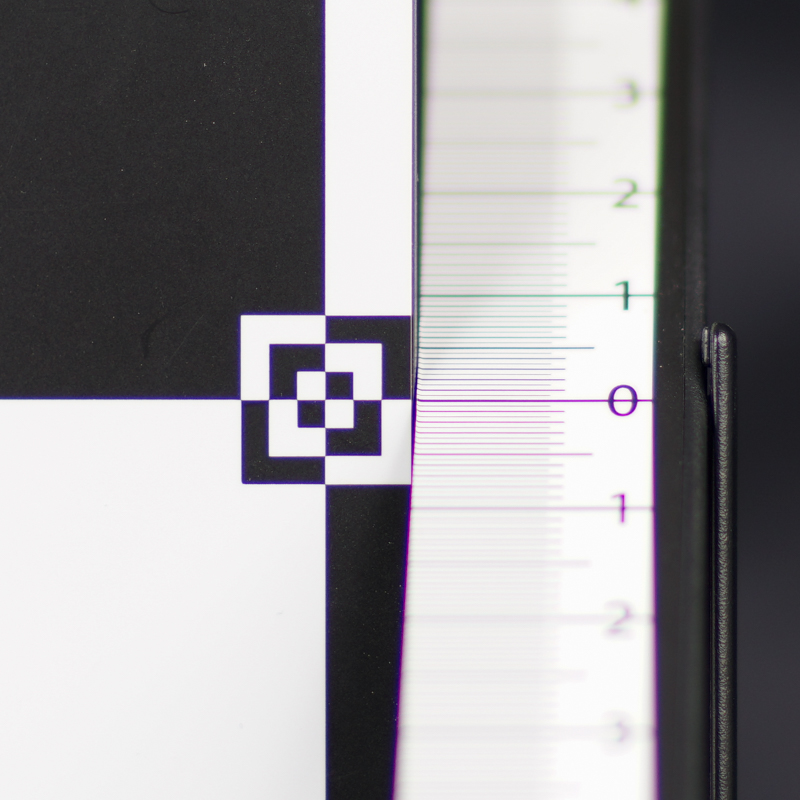
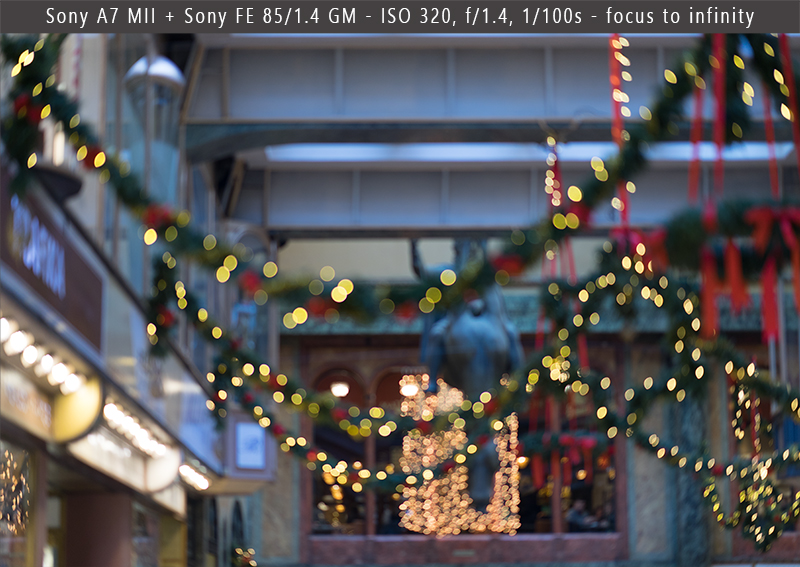
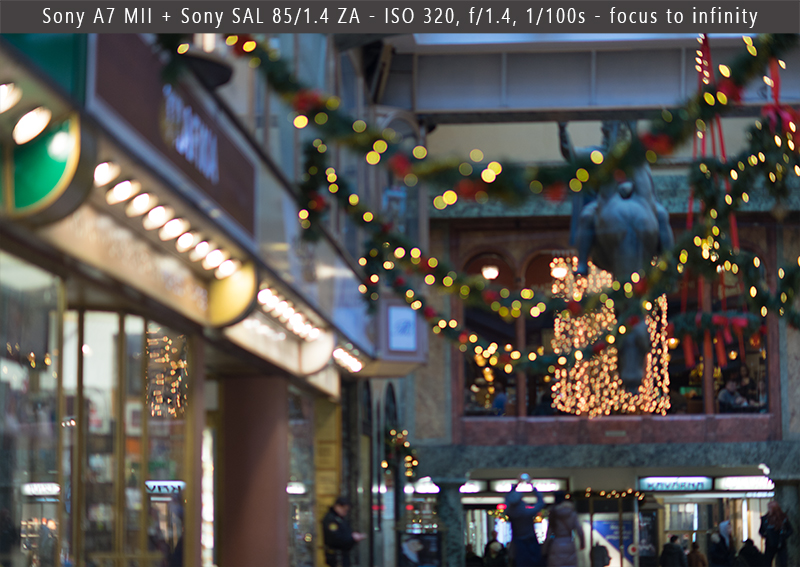
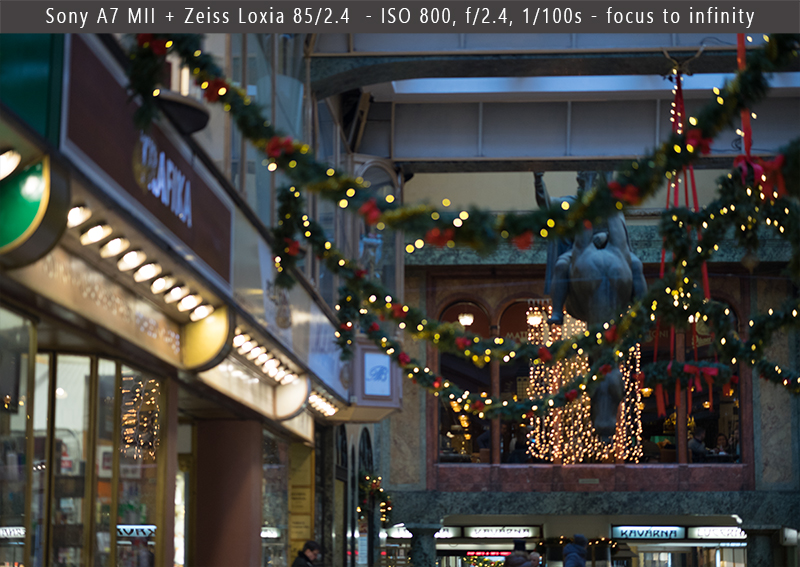
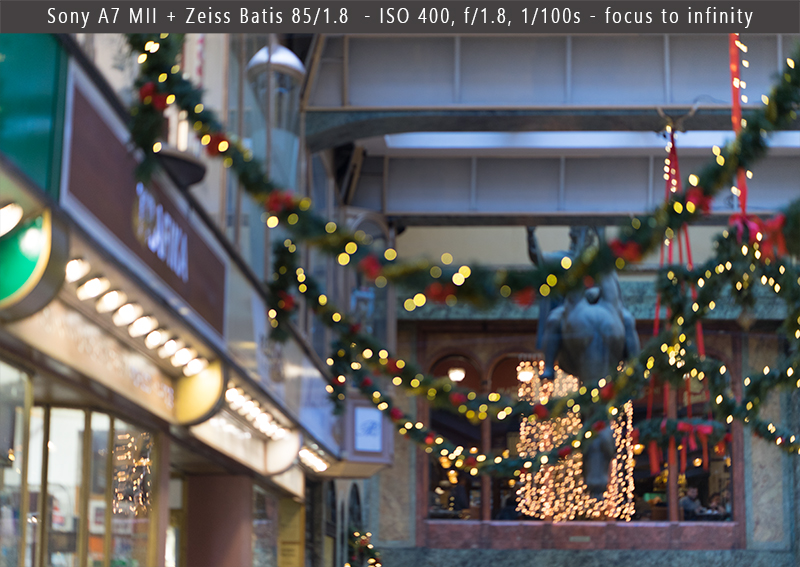
In the album bellow there is a scene with focus set at infinity. Aperture starts at f/2.8 and ends at f/16, where diffraction affect sharpness. For the images in the original size, please visit Flickr album
![]()
![]()
![]()
![]()
![]()
![]()
![]()
![]()
![]()
![]()
![]()
![]()
![]()
![]()
![]()
![]()
As I wrote at the beginning of this section, all four lenses are very sharp. Loxia is really great wide open for all purposes, but so are others when stopped to f/2.5 (2.8)
Distortion, vignetting and color reproduction
![]()
Sony FE 85/1.4 GM
![]()
Sony Planar T* 85/1.4 ZA
![]()
Zeiss Batis 85/1.8
![]()
Zeiss Loxia 85/2.4
Zeiss Batis 85/1.8 shows some of the pincushion distortion, the other three lenses are almost distortion free. When it comes to the light fall off, Batis has most significant vignetting dropping to around 40% of luminescence in the corners compared to 100% in the center. Loxia is somewhat better with drop to around 50%, followed with Sony at above 50% while Sony Planar 85/1.4 is just a little better. Bigger light fall then expected seems to be trade mark of the recent Zeiss lenses. For the portrait lens, vignetting however doesn’t have to be bad thing, but if you want to shot at even luminescence across the frame, Batis will improve at f/5.6 but it won’t get fully rid of vignetting even at f/16.
Color reproduction
There is one thing that Zeiss should be rightfully proud of. Color accuracy across the product range. Zeiss Batis and Zeiss Loxia, both have almost identical color interpretation (at equal settings) and this is the case also with Otus and even my older Distagon ZE lenses. If you switch the lenses on the set, for the wedding e.g., you can easily use any of the Zeiss lenses at the same white balance settings, and unless your light temperature change, you can easily correct all of your shots (if needed) in a batch process. This is even more important for video creators, since dynamic corrections are much more complicated.
From the tested lenses, Batis and Loxia has typical Zeiss colors, slightly shifted to the colder range with a ted of green hue. The difference in the temperature that I measured between those two lenses was in average less than 50K. Sony FE 85/1.4 GM has similar color interpretation varying between 100-200K with a slight shift toward red. Sony Planar 85/1.4 ZA, despite having Zeiss label, shifts heavily toward warmer tones, with a temperature difference of more than 500K in comparison to Batis and Loxia. Part of the reason may lie in the adapter LA-EA4 with translucent mirror. Heavily shifted toward red/yellow hue, this lens was most difficult to correct for the skin tones that I like.
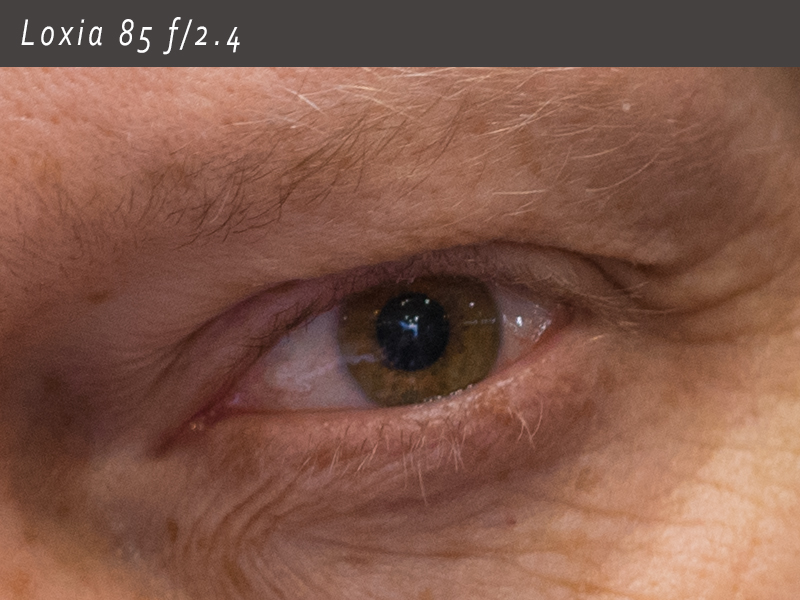
Chromatic aberration
As written in the previous chapter, while none of the tested lenses is fully apochromatic, Sony, Batis and Loxia are very well corrected for lateral CA and in fact for the axial too. Planar 85/1.4 with its simpler formula, can’t really compare in that regard, but in the real life it is usually not as noticeable as in the formal studio tests. Perfect (nearly) correction of the chromatic aberration is very costly in both material and size/weight. Just look at Otus vs Loxia e.g. Do you need authentic apochromatic lens with all those great software correction tools? The answer is yes and no IMHO. If you are only bothered by the purple/green fringing, you can get rid of most with a few mouse clicks. Because chromatic aberration is however caused by different focus planes for different color waves (either in planar or axial direction), by removing color we actually leave the monochromatic (luminescence) component. Therefore edges with color aberration will never be visually as sharp as edges optically corrected, even if we remove visible color deviation. This little extra edge contrast, might influence resulting image appearance in some situation.
It is one of the main reason why I still see Otus images being superior in subject isolation, despite Otus bokeh having lot of space for improvement.
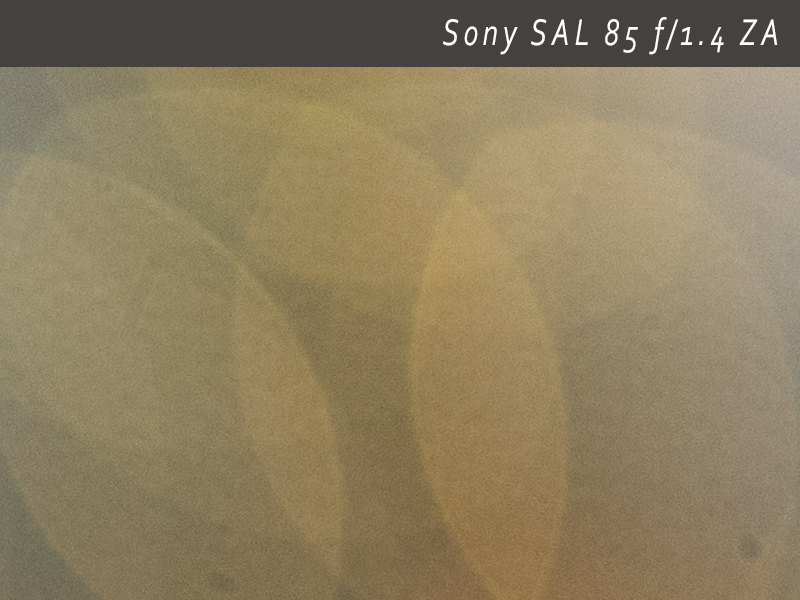
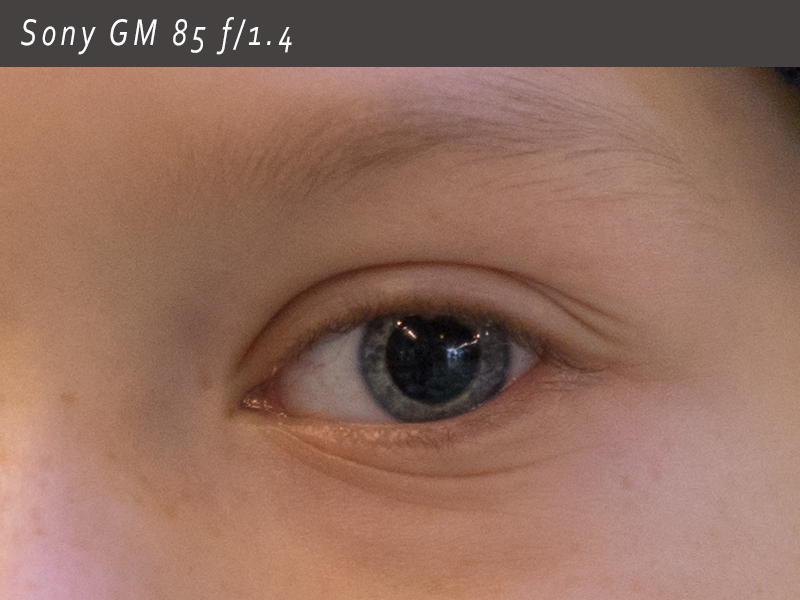
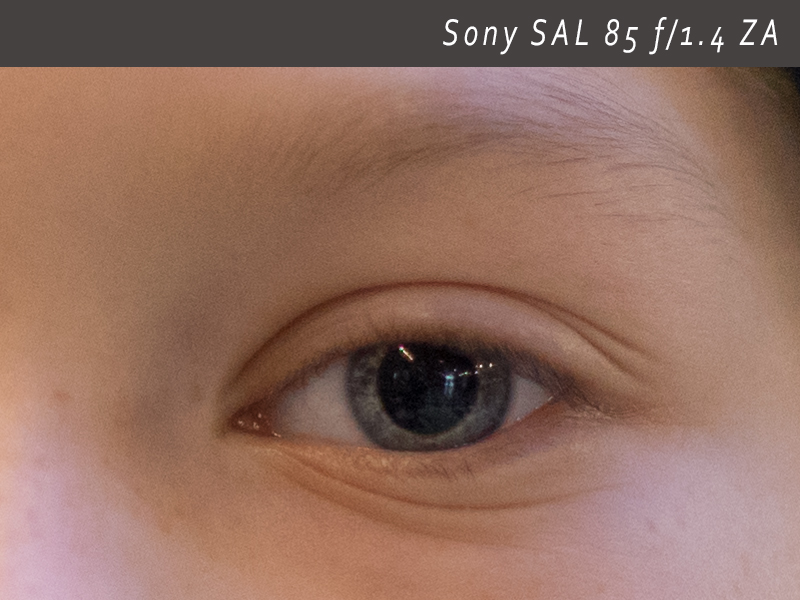
Set bellow shows axial chromatic aberration (LoCA) at wide open apertures of few portrait lenses
![]()
Zeiss Otus 85/1.4 at f/1.4 – reference performance
![]()
Sony Planar T* 85/1.4 ZA at f/1.4
![]()
Sony FE 85/1.4 GM at f/1.4
![]()
Samyang 85/1.4 AS IF UMC (Canon EF mount) at f/1.4
![]()
Zeiss Loxia 85/2.4 at f/2.4
![]()
Zeiss Batis 85/1.8 at f/1.8
![]()
Carl Zeiss Sonnar 90/2.8 T* Contax G at f/2.8
![]()
Leica Summarit 90/2.5 at f/2.5
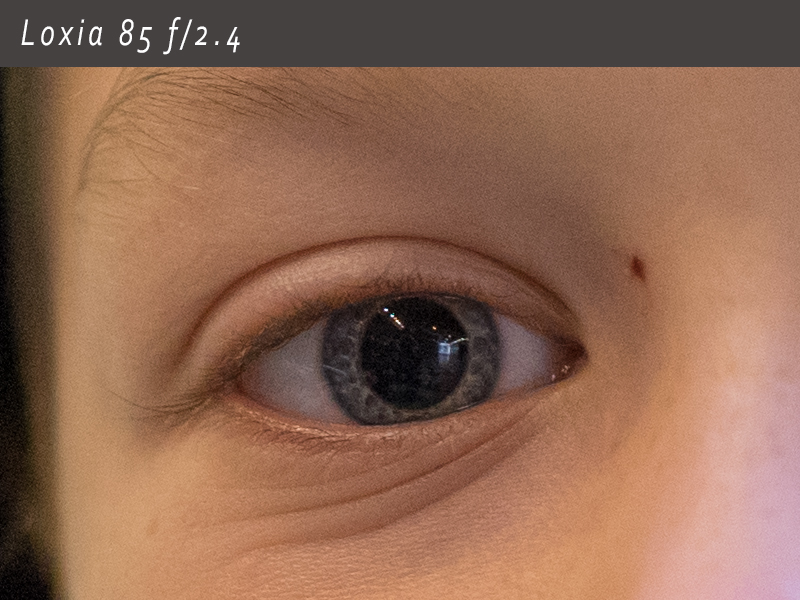
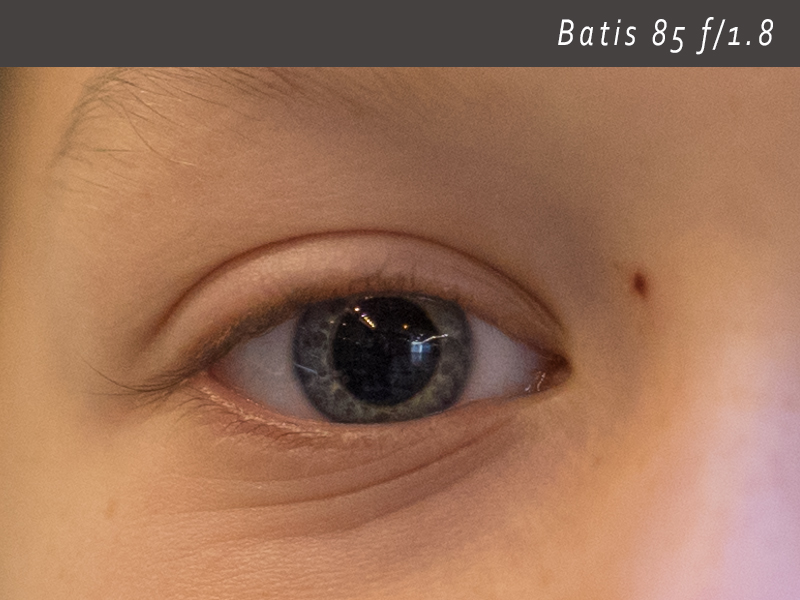
Sony FE, Batis and Loxia are very well LoCA corrected, and in practice the residual aberration shouldn’t make big difference. Especially Loxia IMHO is impressive (considering it’s size) but it is also slowest at the tested aperture.
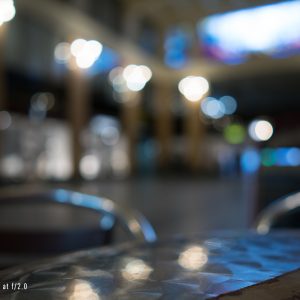
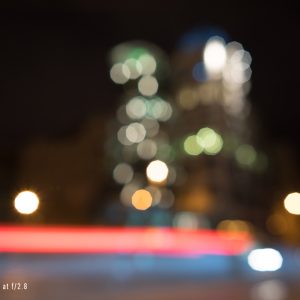
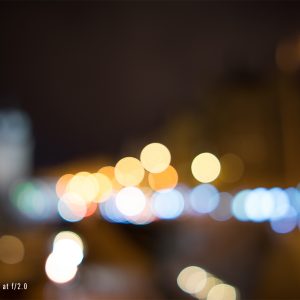
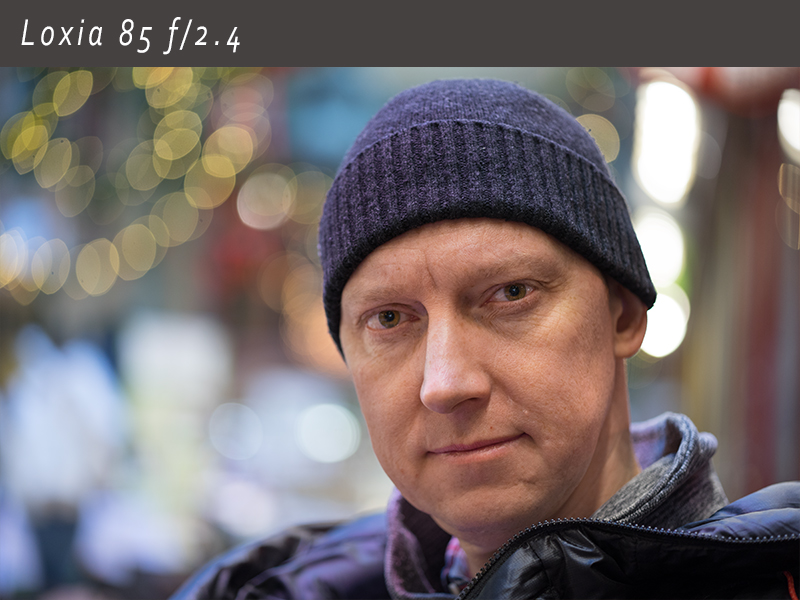
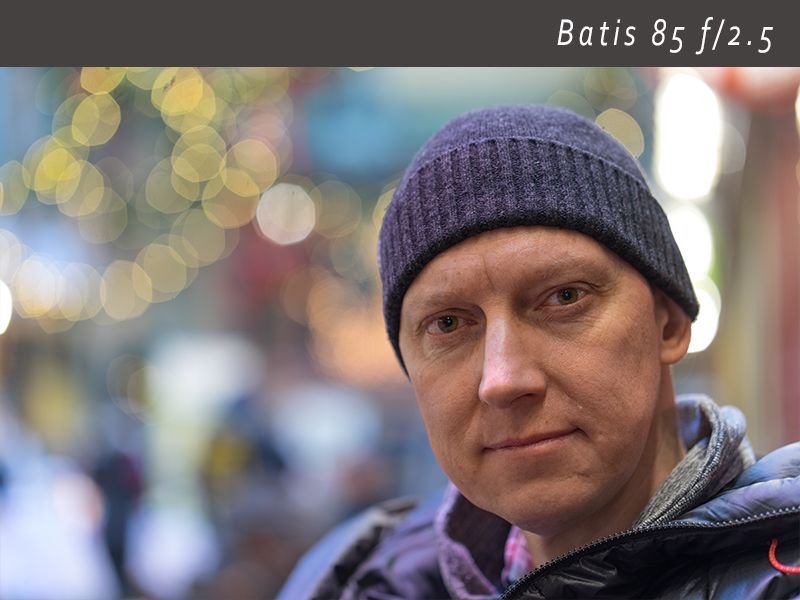
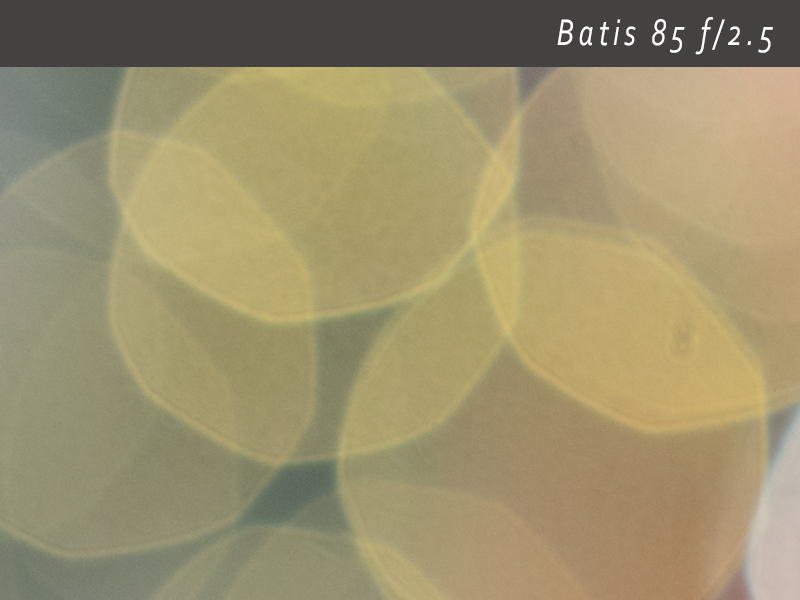
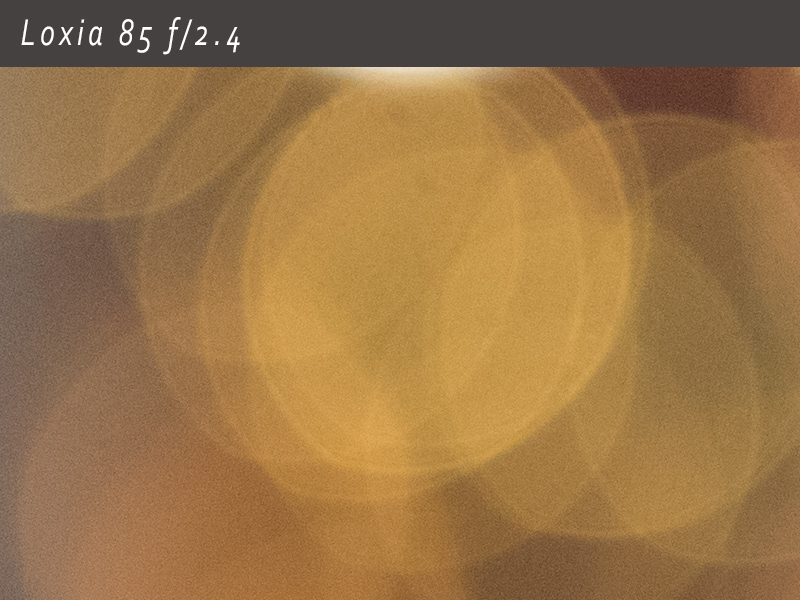
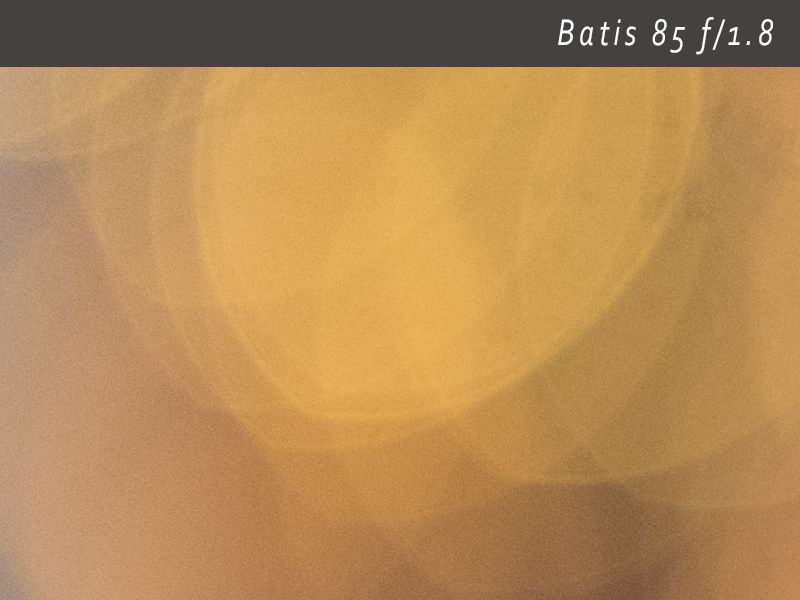
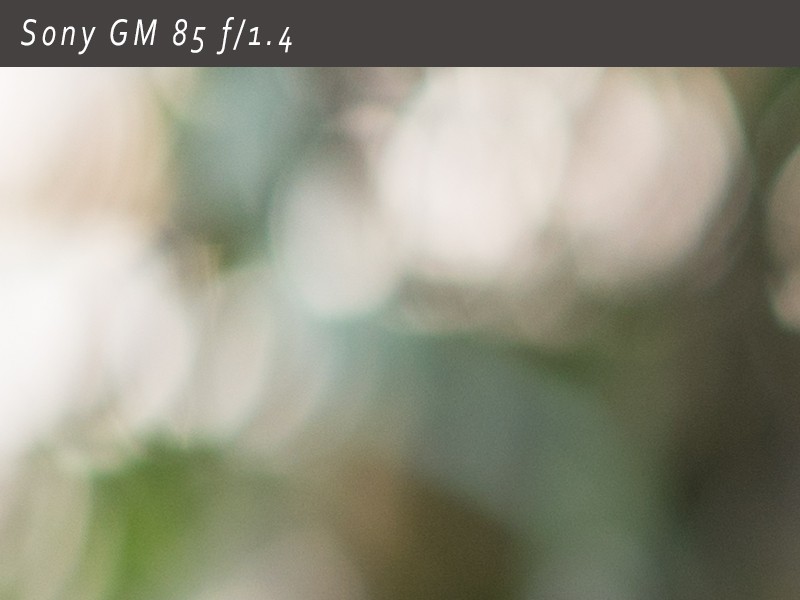
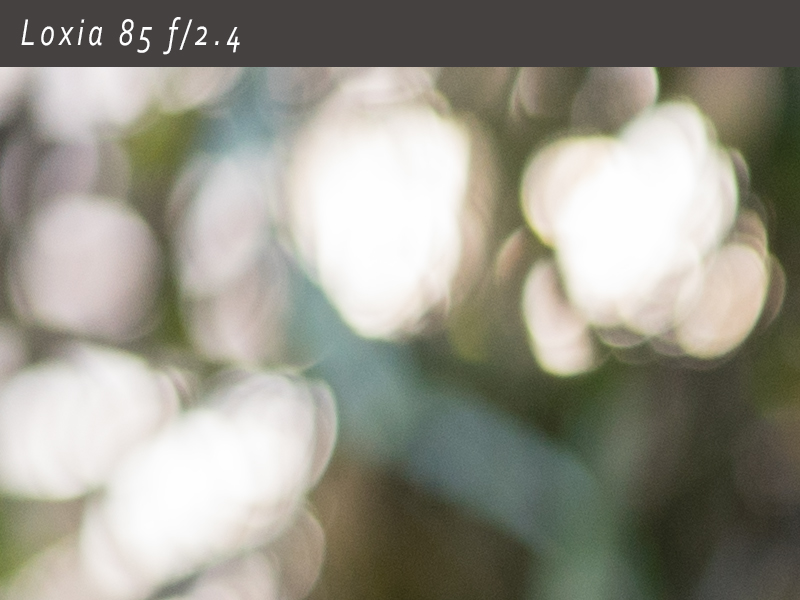
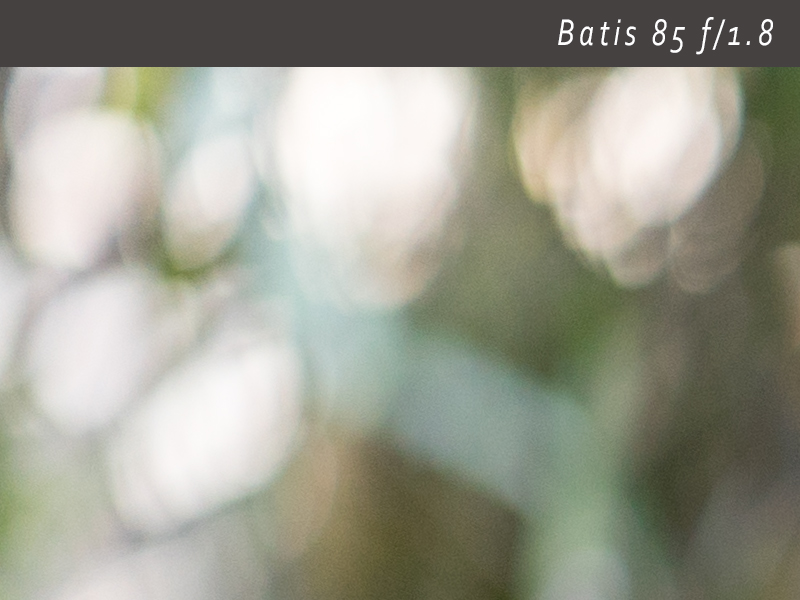
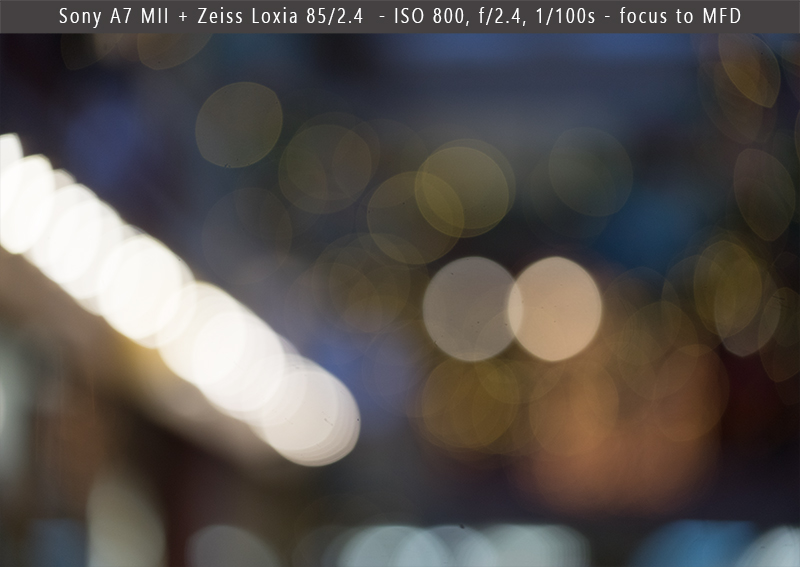
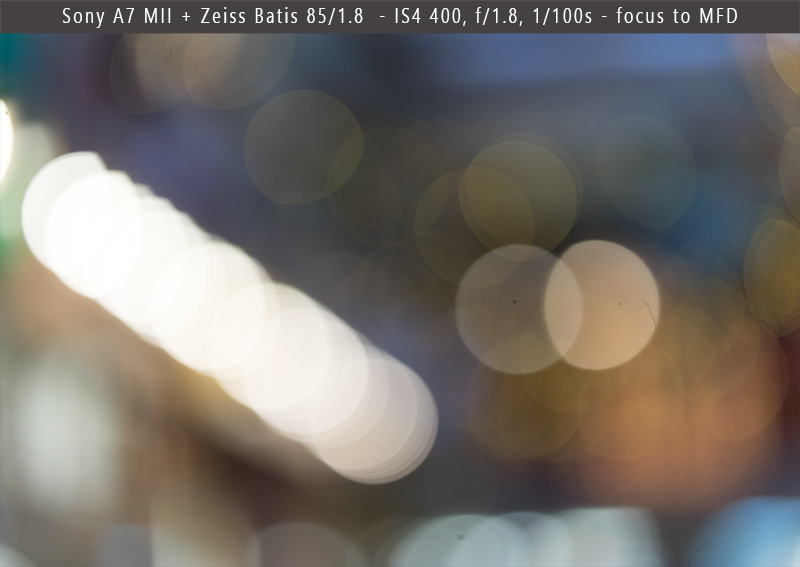
Bokeh
Important criteria for the portrait lens selection is the way out of focus areas are rendered. For 85mm lenses there are few things to be taken into consideration when we look at the “bokeh”.
We should first differ between quantity and quality of the bokeh. When we speak about quantity, there are some differences related to the minimum focus distance, maximum aperture and related DOF and of course distances between camera and subject and subject and background.
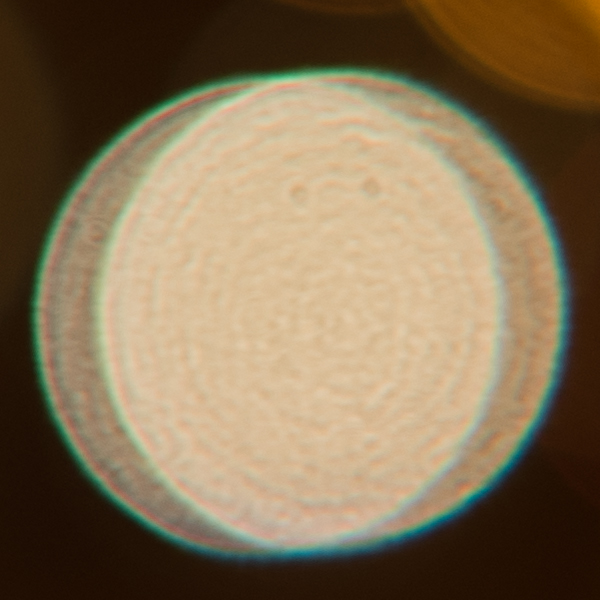
Speaking about quality, we can look at the way how circular highlights are rendered, but also how smooth transition is between sharp and blurred image areas. Circular highlights can show darker or brighter outline inside or outside of the circle, suggesting under-corrected or over corrected spherical aberration. Color fringing at the edge of the bright spot suggests sphero-chromatic aberration, while deformation of the circles toward image borders is caused by mechanical vignetting. There is also ghosting, flaring and other potential attributes that are all participating in the final look of the OOF areas.
Since we will rarely shot blurred background as the only motive of the image, the importance of the bokeh is directly related to the lens ability to isolate subject from the background.
We can often read about swirly bokeh, soap bubbles bokeh, silky smooth bokeh, harsh bokeh, etc. That is fine until someone starts to speak about better bokeh. Better bokeh doesn’t exist, only different bokeh. In technical terms, the way bokeh is created is dependent on the lens optical correction, but its aesthetic is also related to physical values explained above, so it is not possible to qualify it.
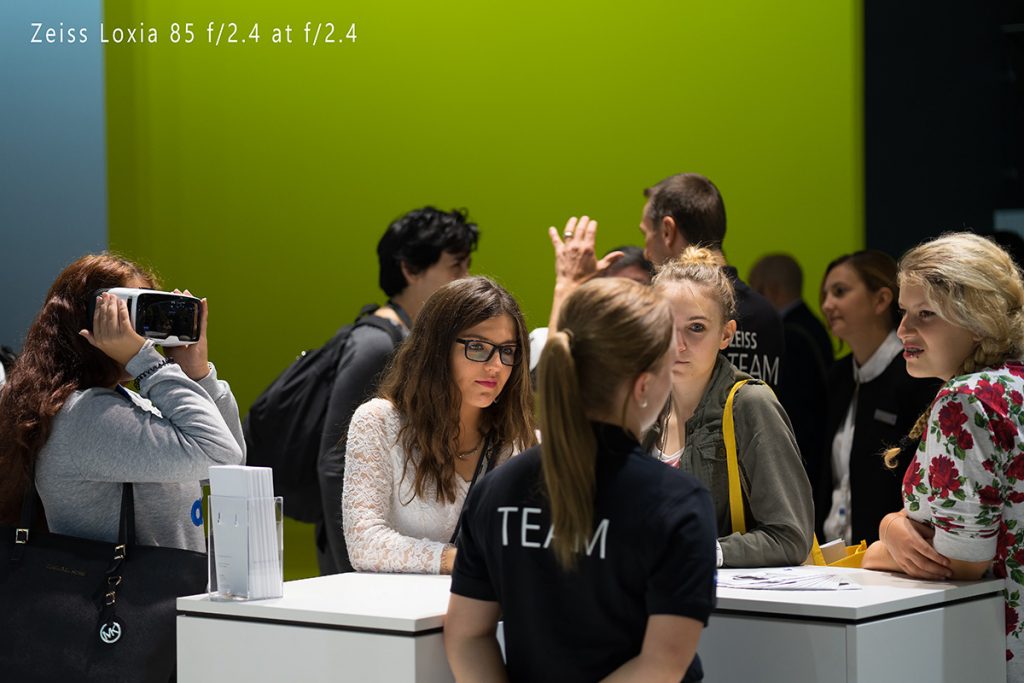
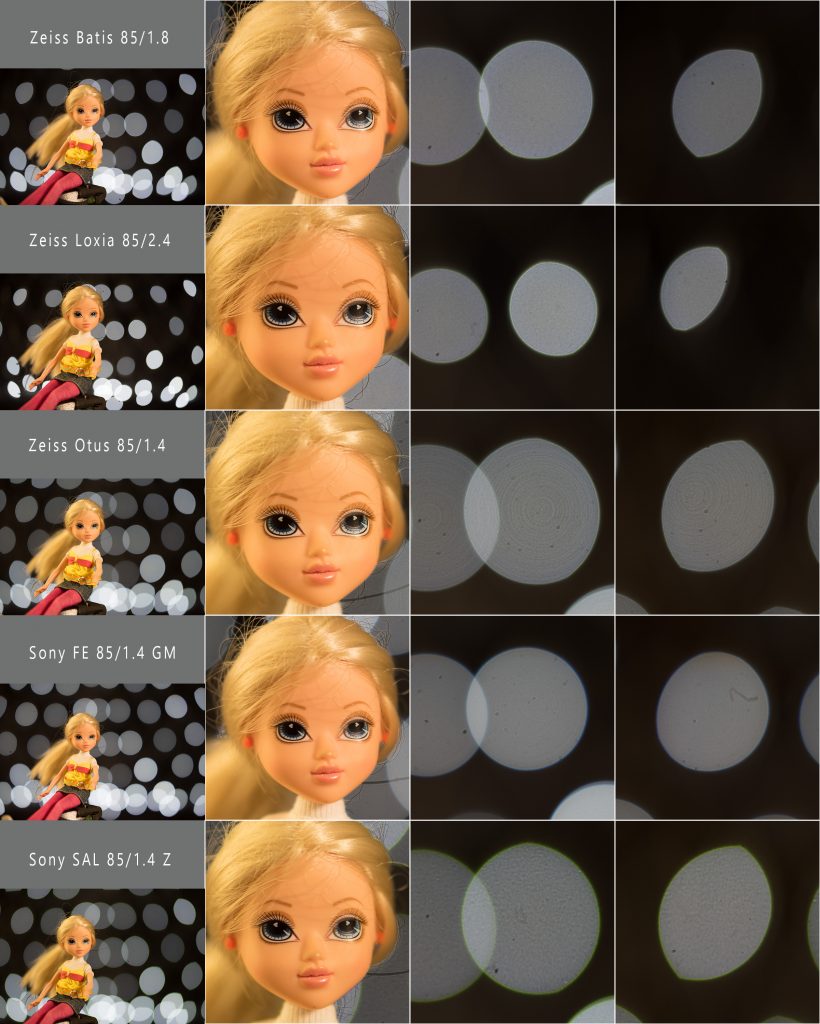
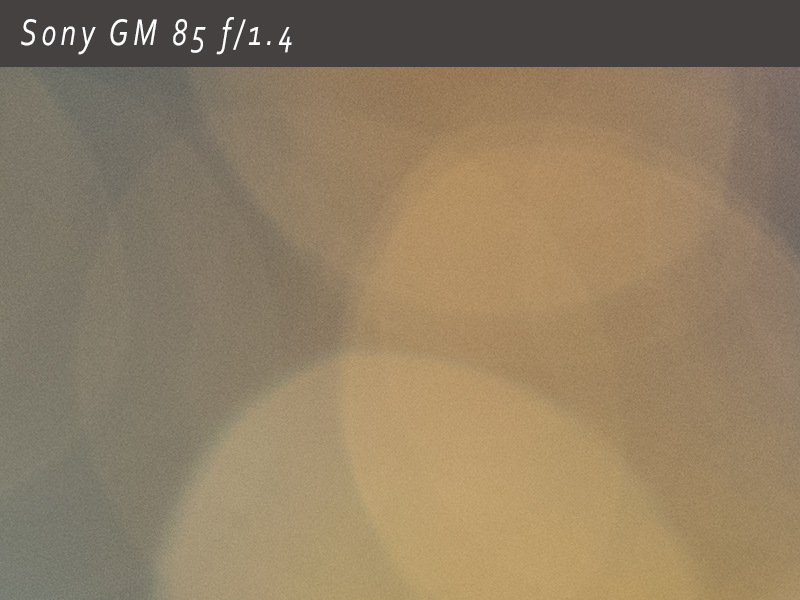
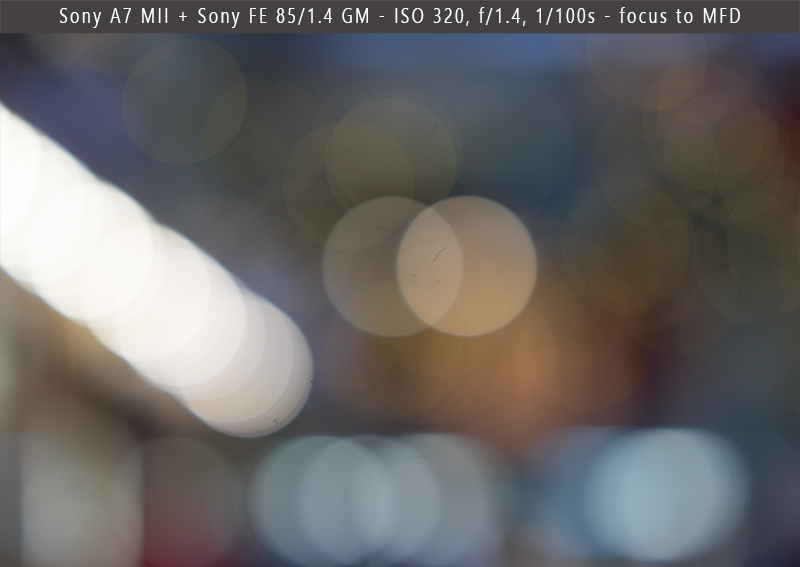
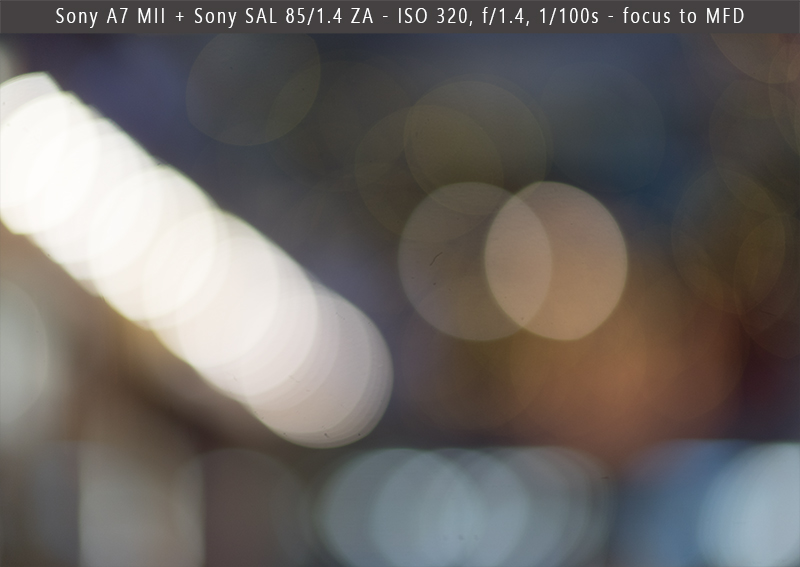
Bellows are image crops showing rendering character of the blurred area and subject isolation capability of few tested lenses.
![]()
We can see here few things. Sony Planar 85/1.4 T* ZA shows most pronounced sphero-chromatic aberration but at the same time it creates larger highlight circles from the same distance, compared to Sony FE 85/1.4 GM and of course Loxia. In comparison to the Sony, it is because of relatively lower focus breathing, in comparison to Loxia, mainly because of the difference in-depth of field. Effect of “onion rings” is mostly apparent in the Otus image, while Sony FE shows least mechanical vignetting resulting in the “cat eye” shape of circular highlights toward image borders. Otus highlights are “outline” free, which refers to the well corrected spherical aberration, but other 3 lenses (except Planar 85/1.4) are not far away.
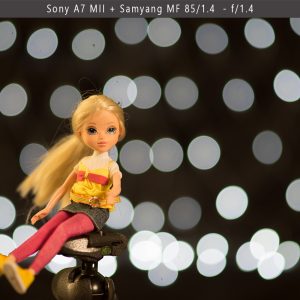
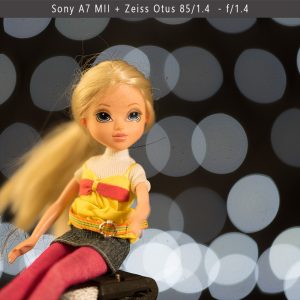
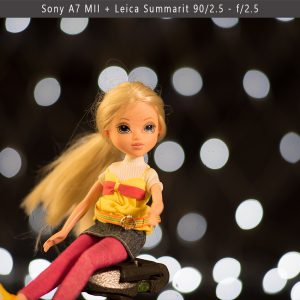
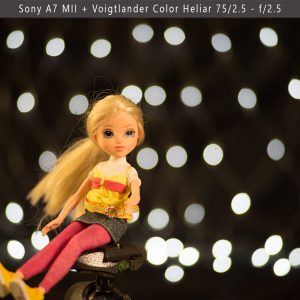
In the gallery bellow, there are additional sample shots of few other lenses for the reference. Larger files are on Flickr Album
![]()
![]()
![]()
![]()
![]()
![]()
![]()
![]()
![]()
You might notice some terrible ghosting and flaring in the Voigtlander Heliar and Leica Summarit images. I believe that large part of it is caused by inner reflection of the adapter. Adapters in general can cause much more harm than I like to admit (since I have as many adapters as lenses I believe)
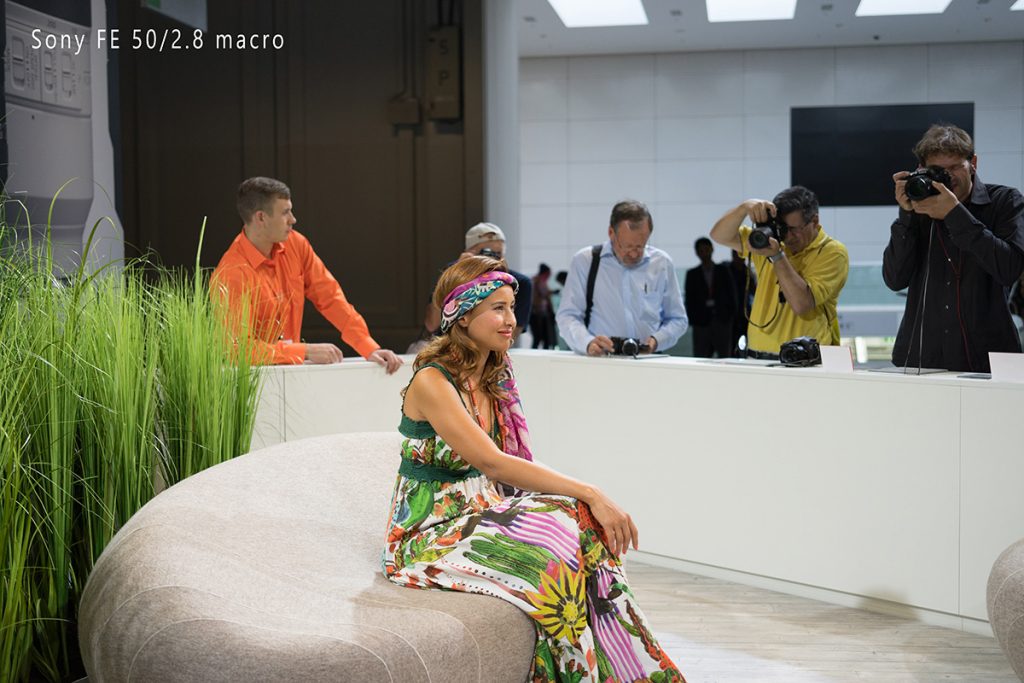
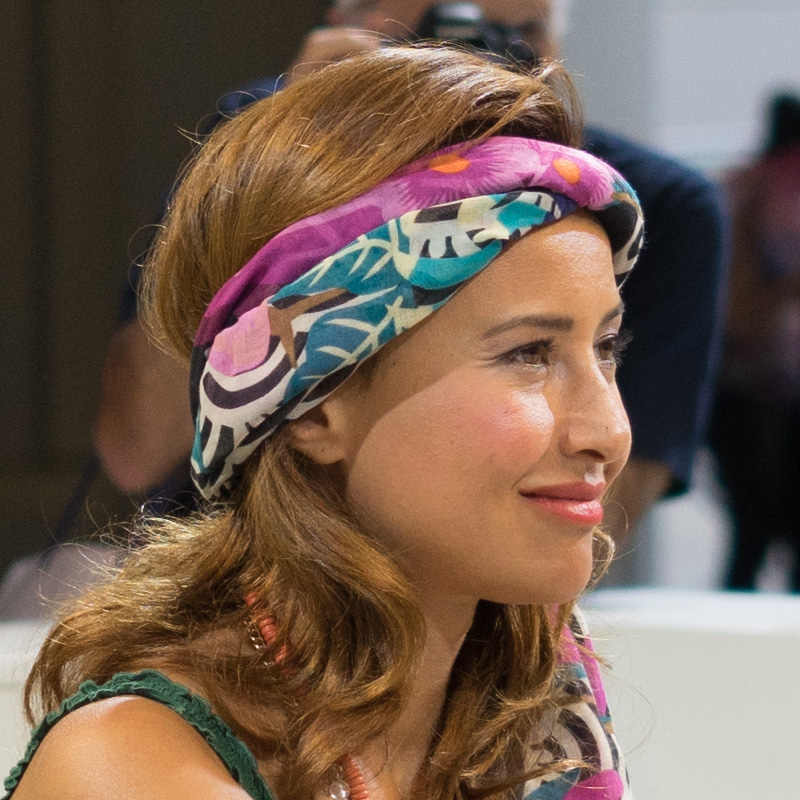
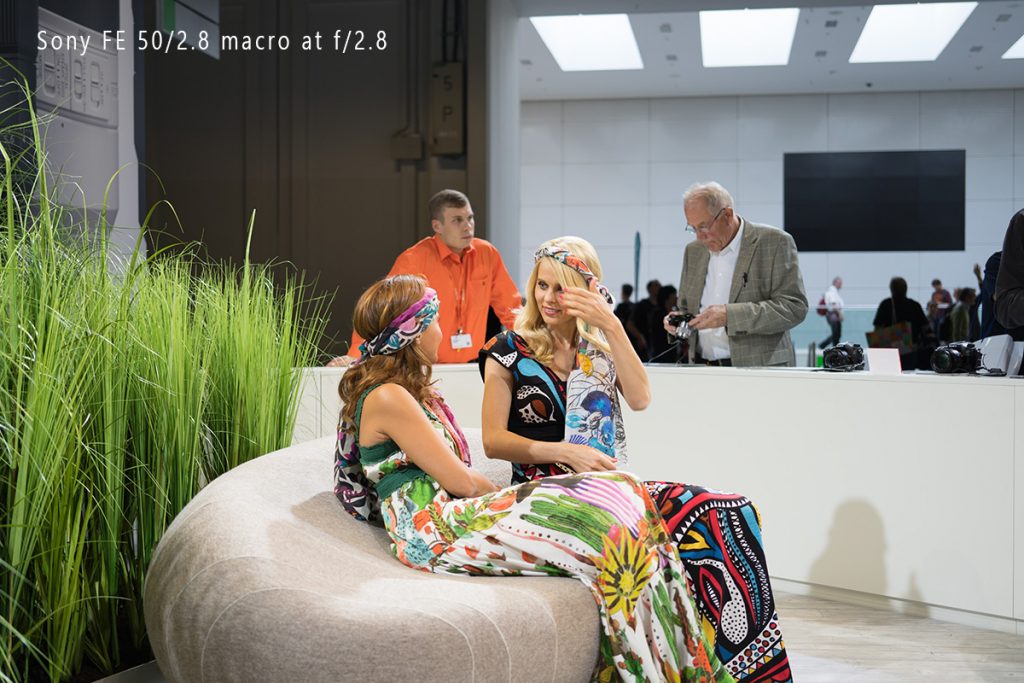
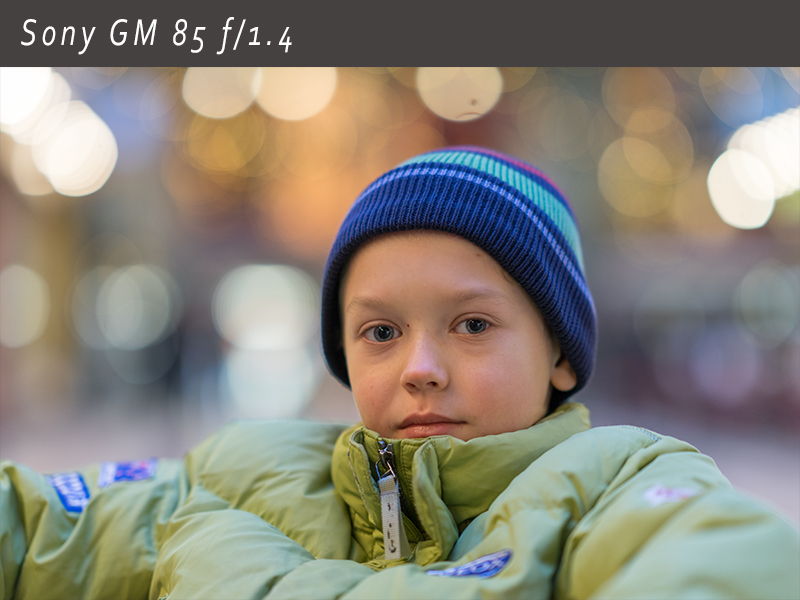
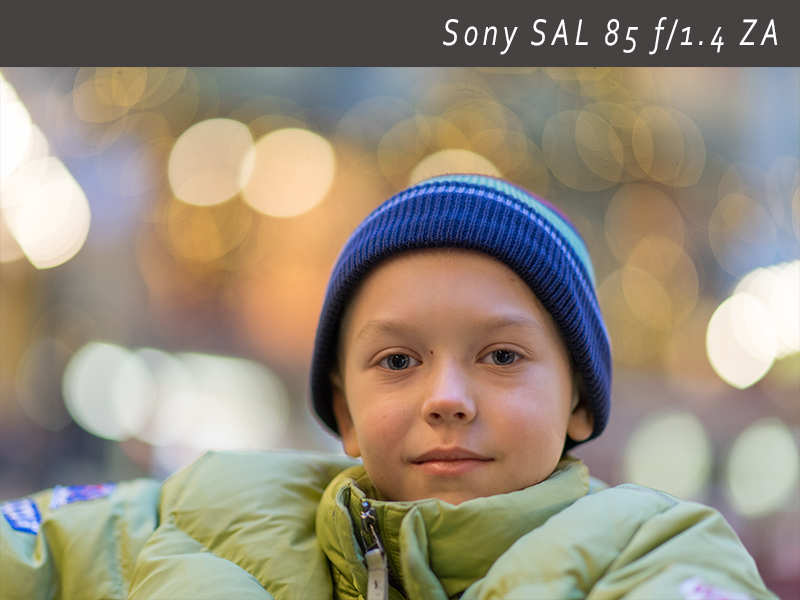
All of those studio tests should serve a purpose of a “fair” comparison when most of the condition can be controlled. In a real life photography, we can’t really compare absolute sharpness, because our subjects will usually move and unless we use tripod, we will move too. On top of that there are many different sources of light and unexpected reflections. In the following set of images, you can use slider in the middle to switch between images. With a small arrow bellow you can move to the next set. That should help you to experience bokeh appearance in the direct comparison.
Scene 1
Scene 2
-
Sony FE 85/1.4 GMSony GM vs Sony PlanarSony Planar 85/1.4 ZA
-
Sony FE 85/1.4 GMSony GM vs Sony PlanarSony Planar 85/1.4 ZA
-
Sony FE 85/1.4 GMSony GM vs Sony PlanarSony Planar 85/1.4 ZA
-
-
-
Scene 3
-
Sony FE 85/1.4 GMSony GM vs Sony PlanarSony Planar 85/1.4 ZA
-
Sony FE 85/1.4 GMSony GM vs Sony PlanarSony Planar 85/1.4 ZA
-
Sony FE 85/1.4 GMSony GM vs Sony PlanarSony Planar 85/1.4 ZA
-
-
-
Scene 4 (shows the difference in the amount of blur at minimum (MFD) and infinity (IFD) focus positions)
-
Sony FE 85/1.4 GM MFDSony GM vs Sony PlanarSony Planar 85/1.4 ZA MFD
-
Sony FE 85/1.4 GM IFDSony GM vs Sony PlanarSony Planar 85/1.4 ZA IFD
-
Loxia MFDLoxia vs BatisBatis MFD
-
Loxia IFDLoxia vs BatisBatis IFD
Flare resistance
I tested lenses in the winter, so it was very hard to catch some sun light to check for flaring. I tested all four lenses though on the artificial light sources. All four lenses have great coatings so there is nothing much better that you can buy today in order to shot against light. You should expect some flares in the extreme angles with all lenses, but contrast will always remain very high. This is something that most people wants, but I love sometimes to lose a little contrast and get some flaring as part of creative interpretation of the captured moment. If you are like me, you should have at least one of those legacy single coated lenses in your bag, next to one of those modern high contrast instruments.
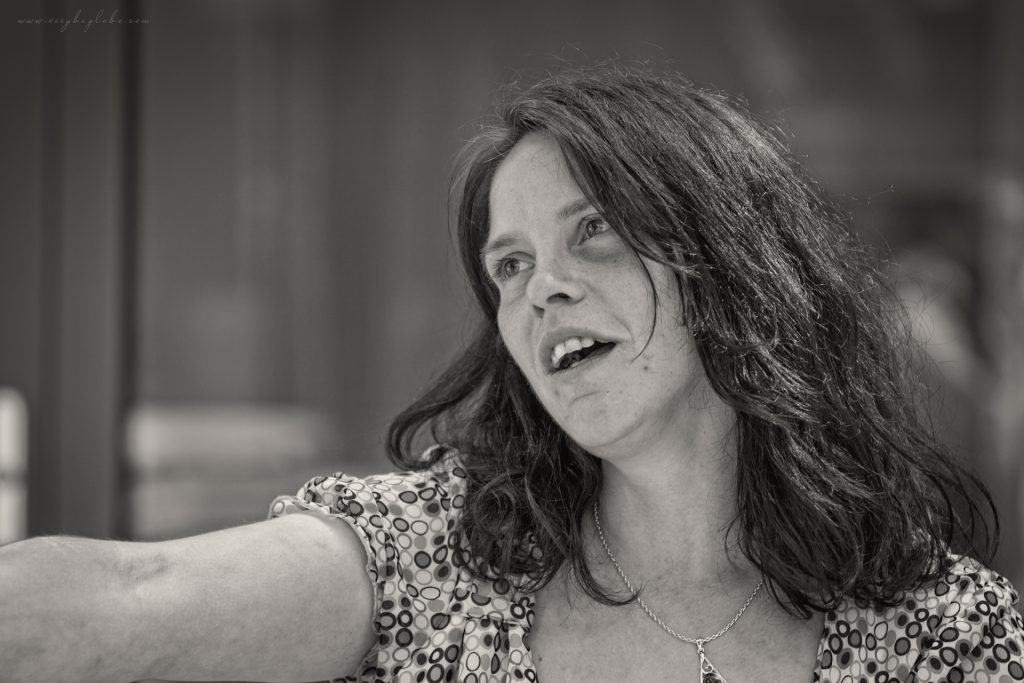
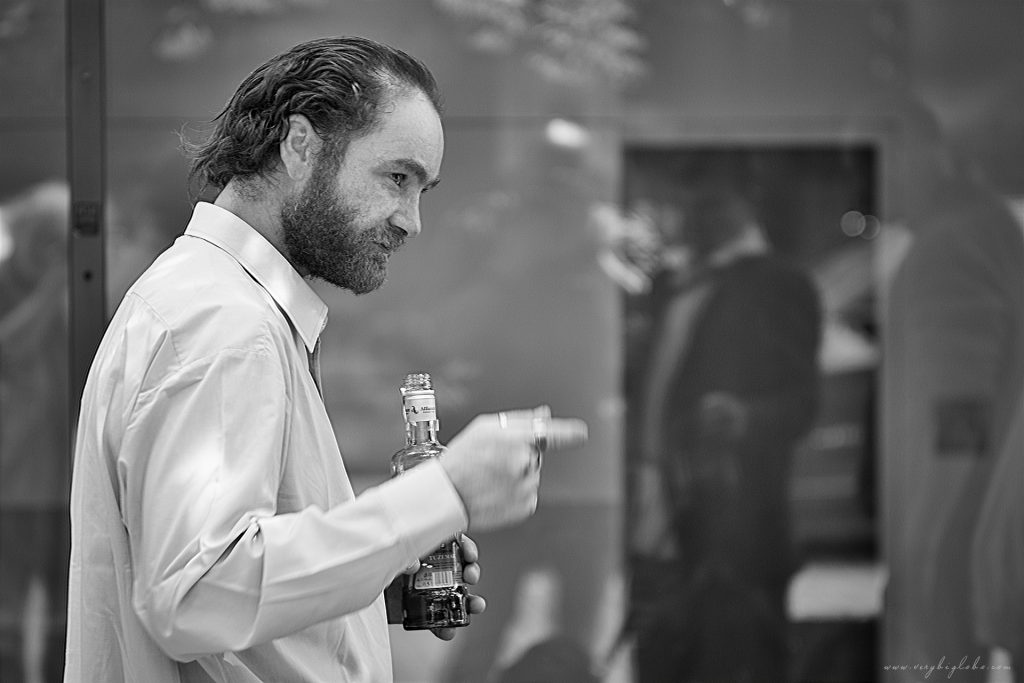
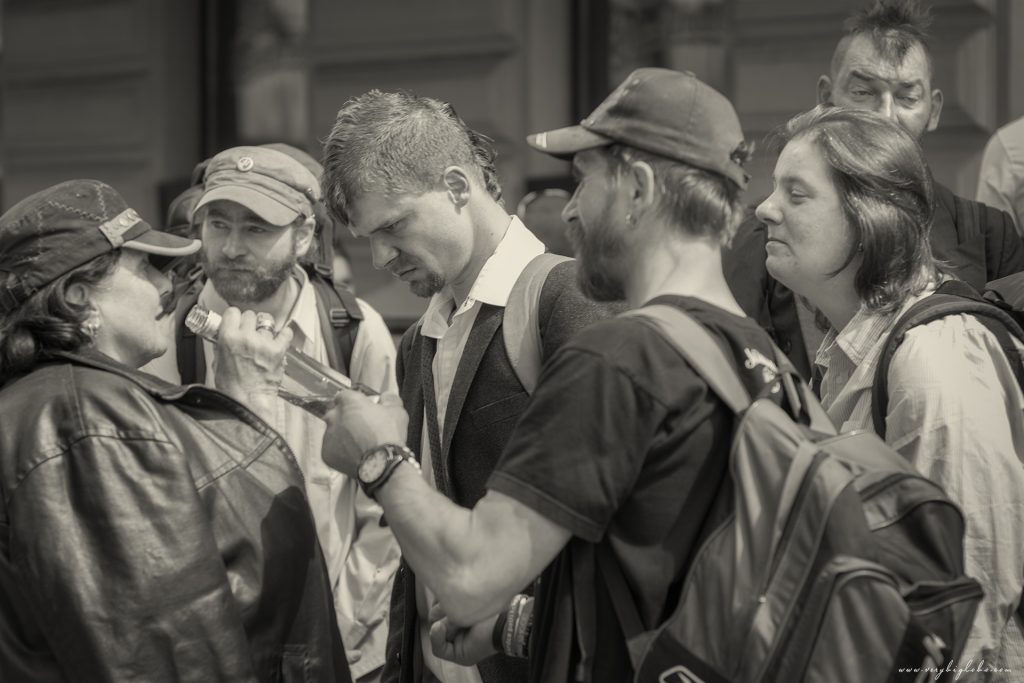
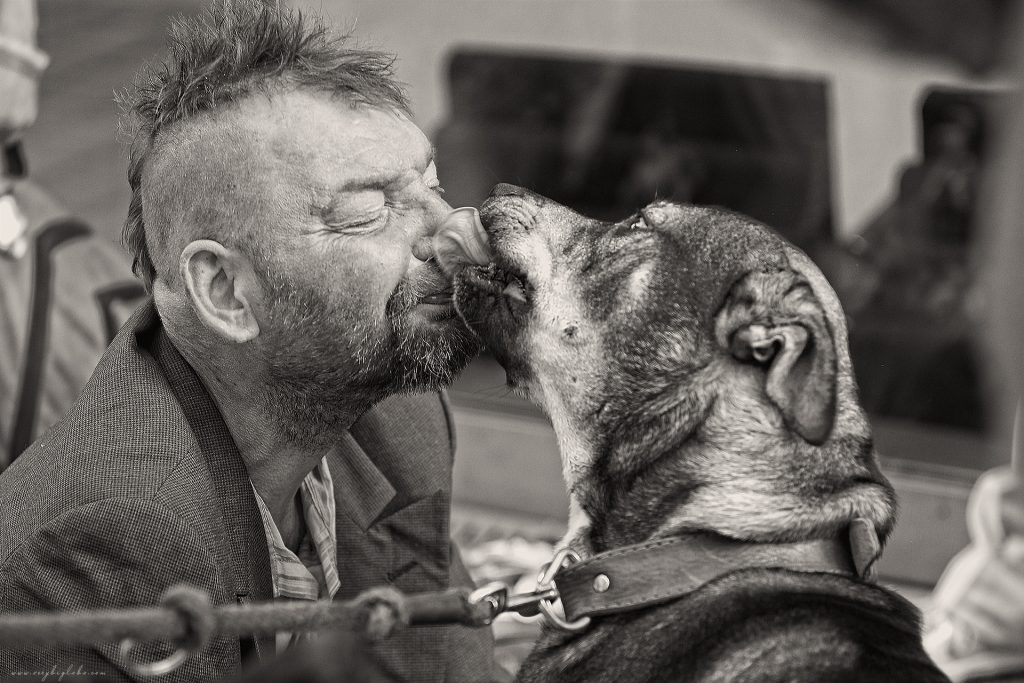
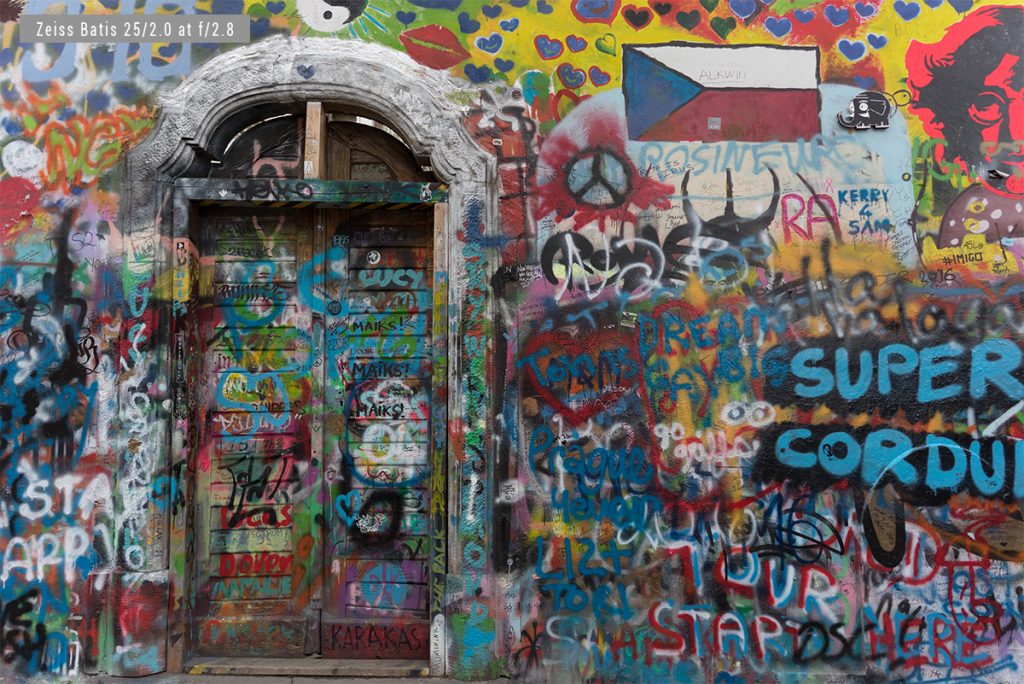
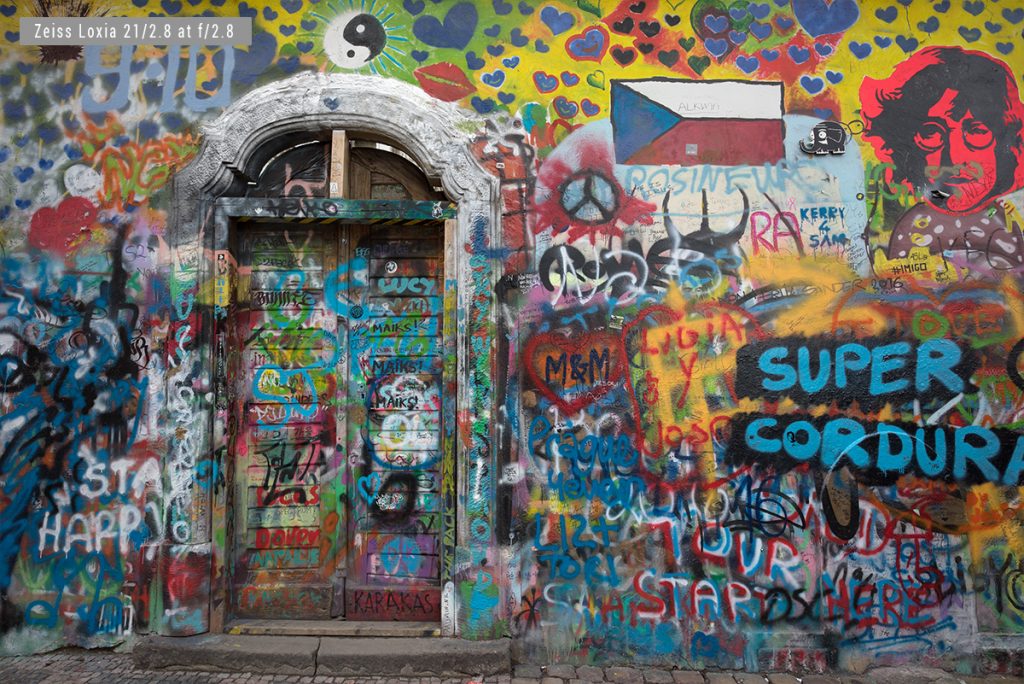
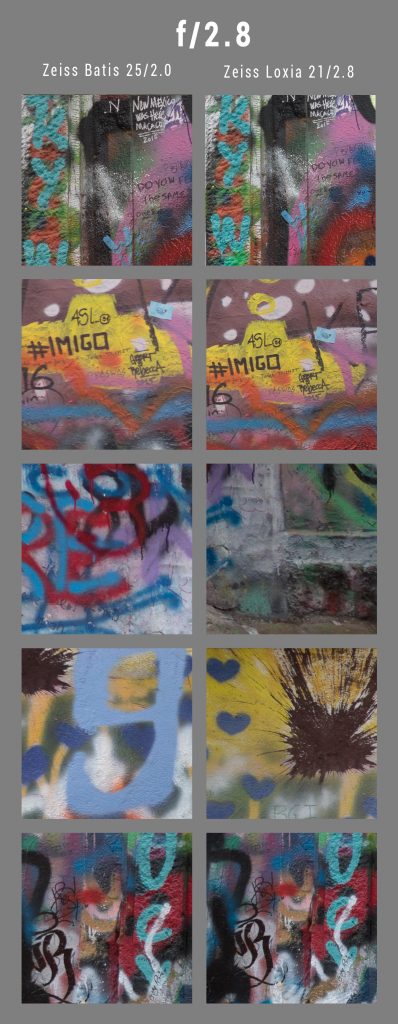
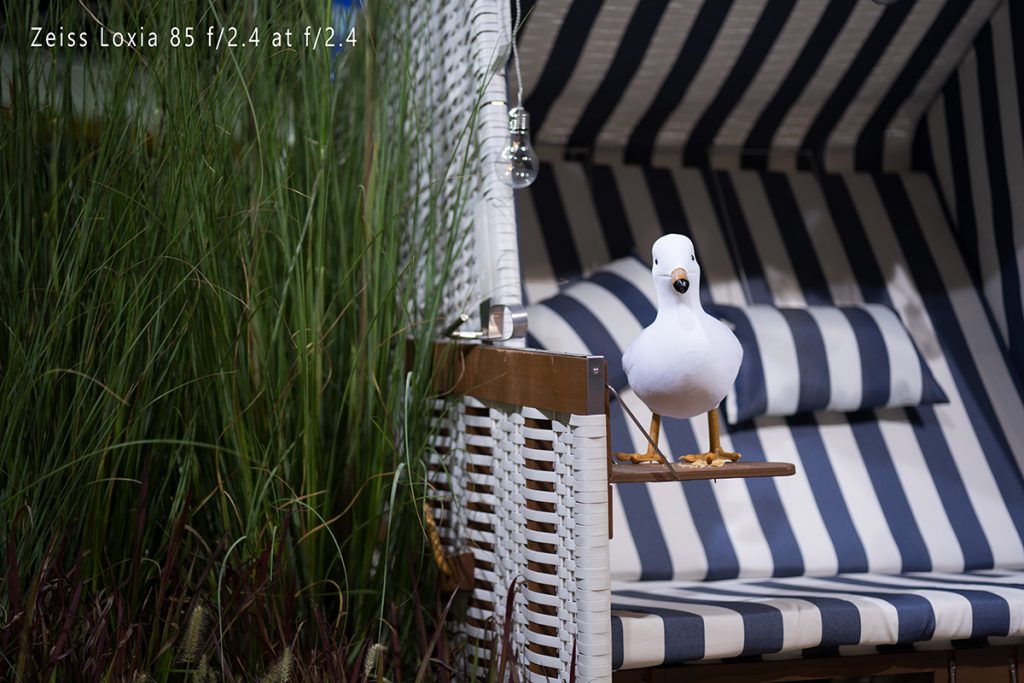
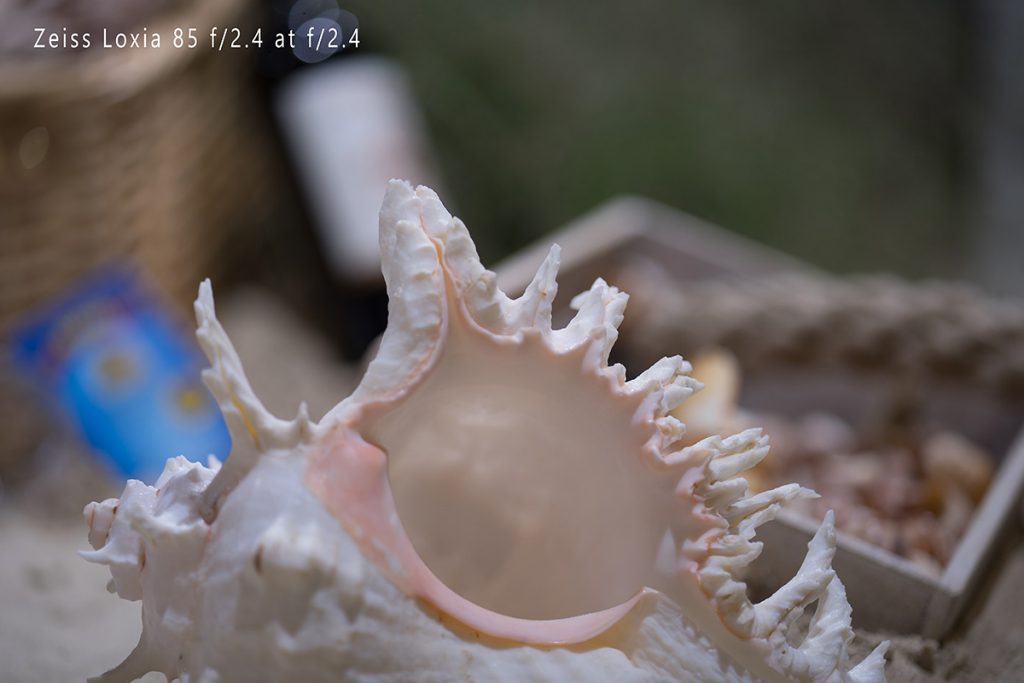
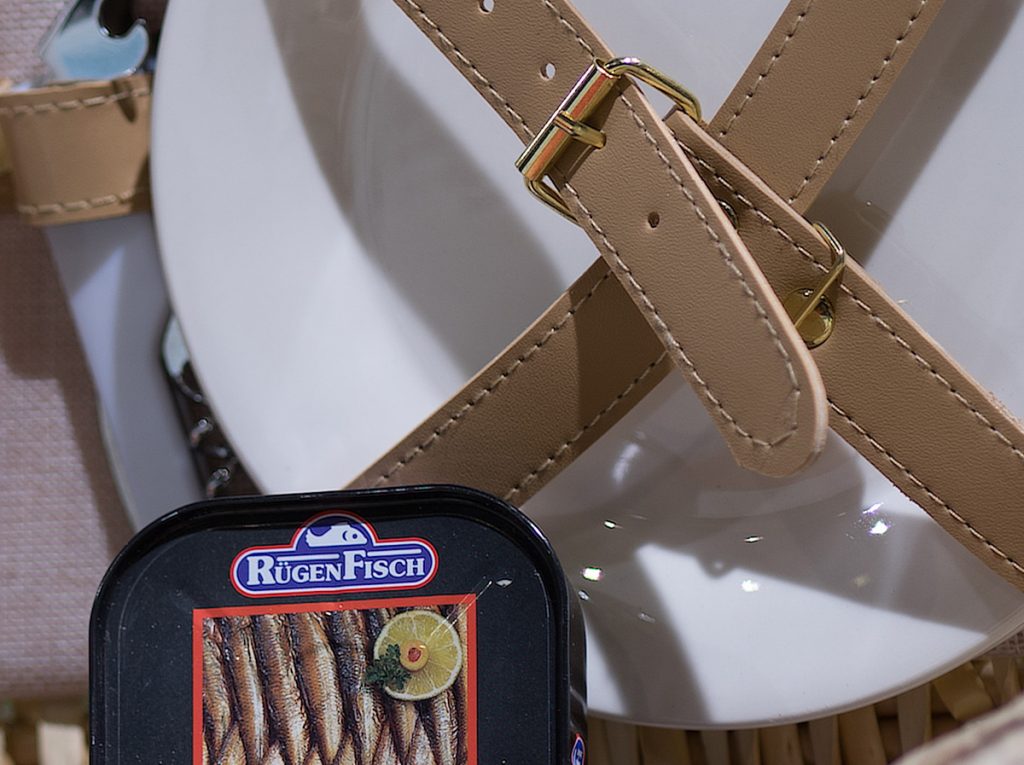
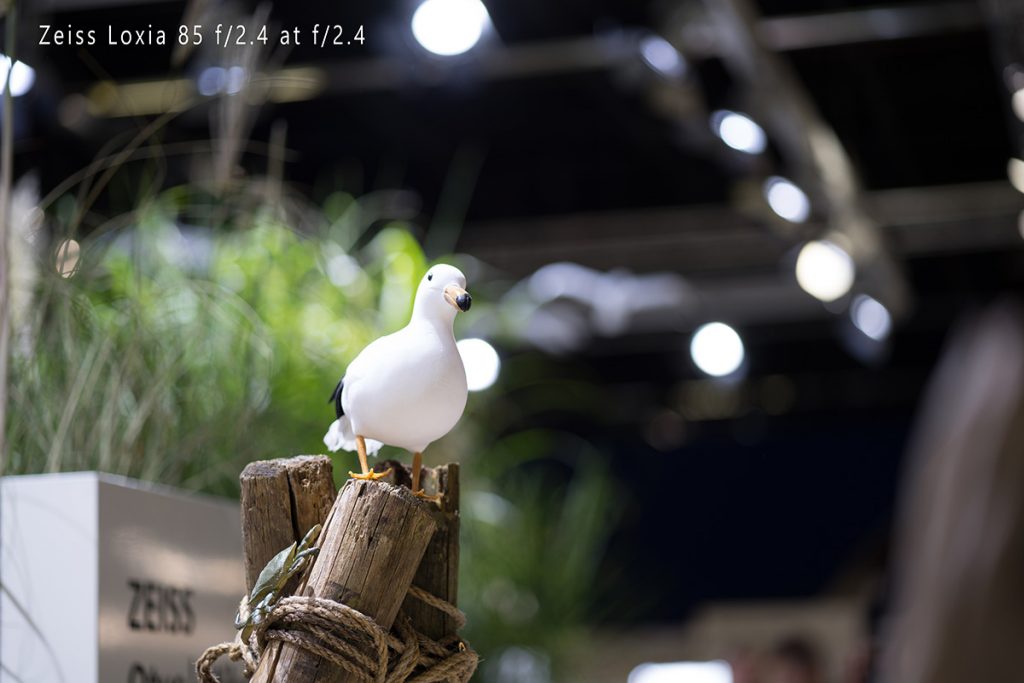
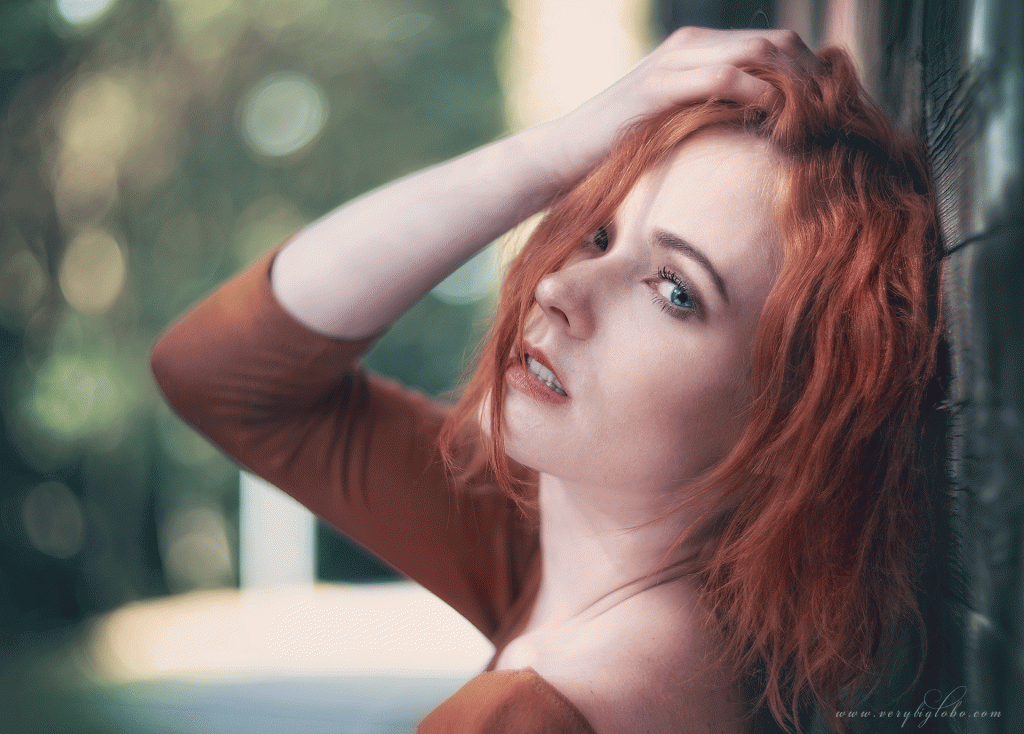
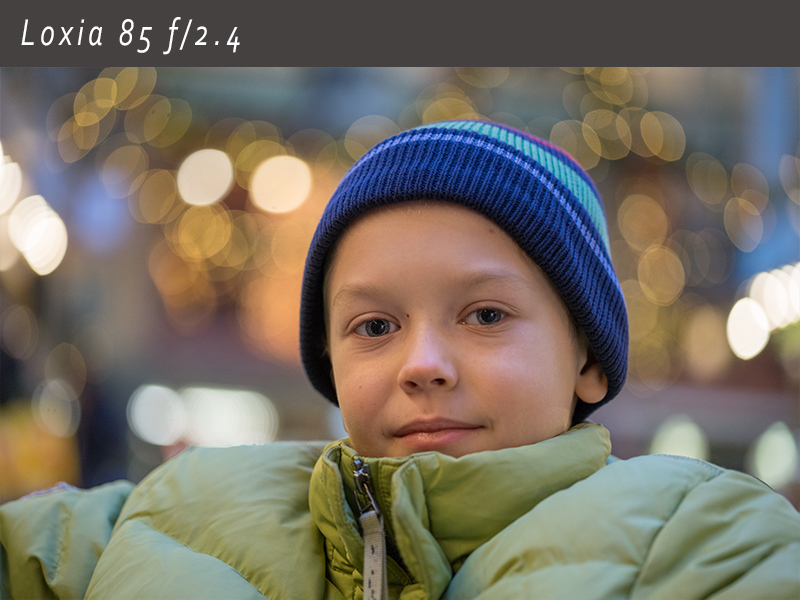
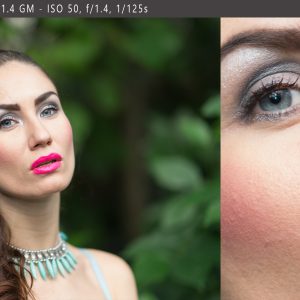
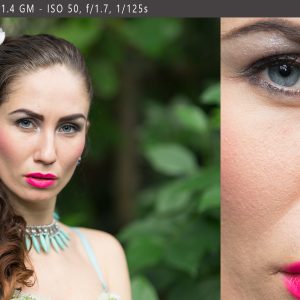
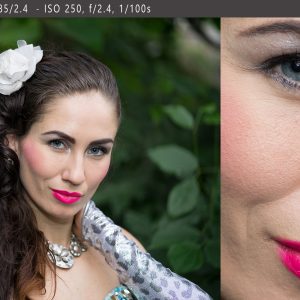
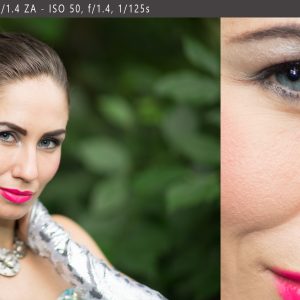
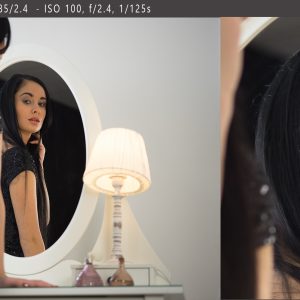
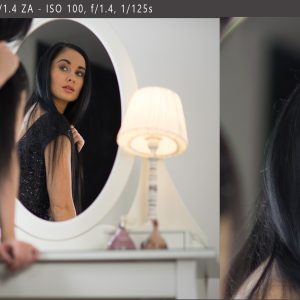
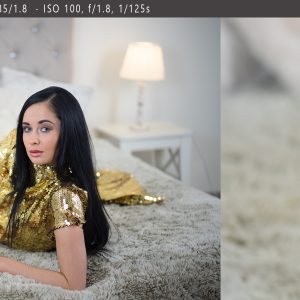
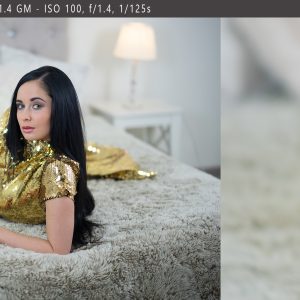
Sample Gallery and Conclusion
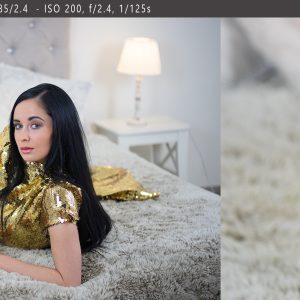
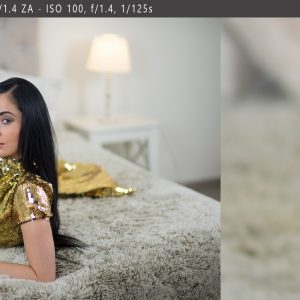
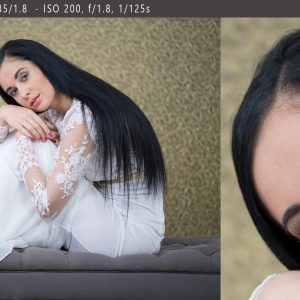
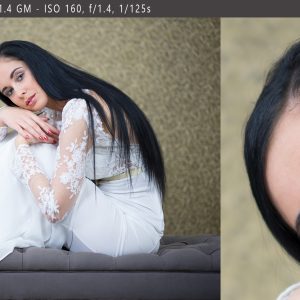
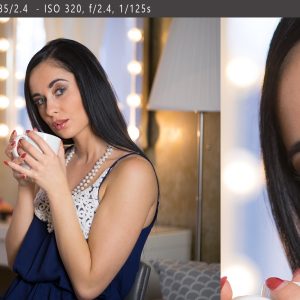
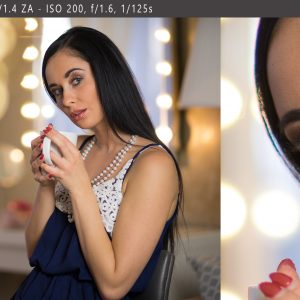
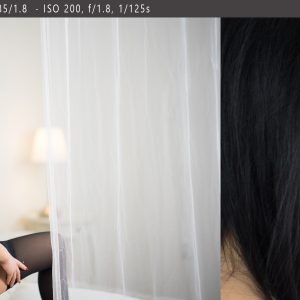
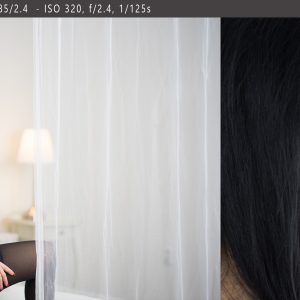
Sample Gallery
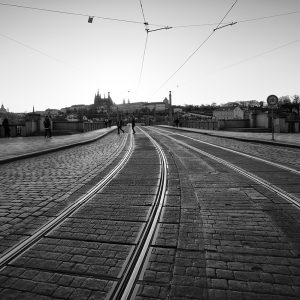
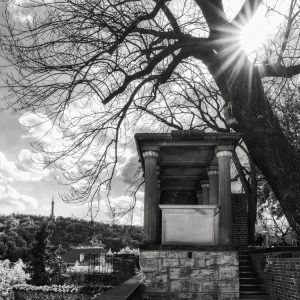
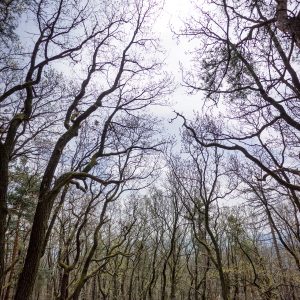
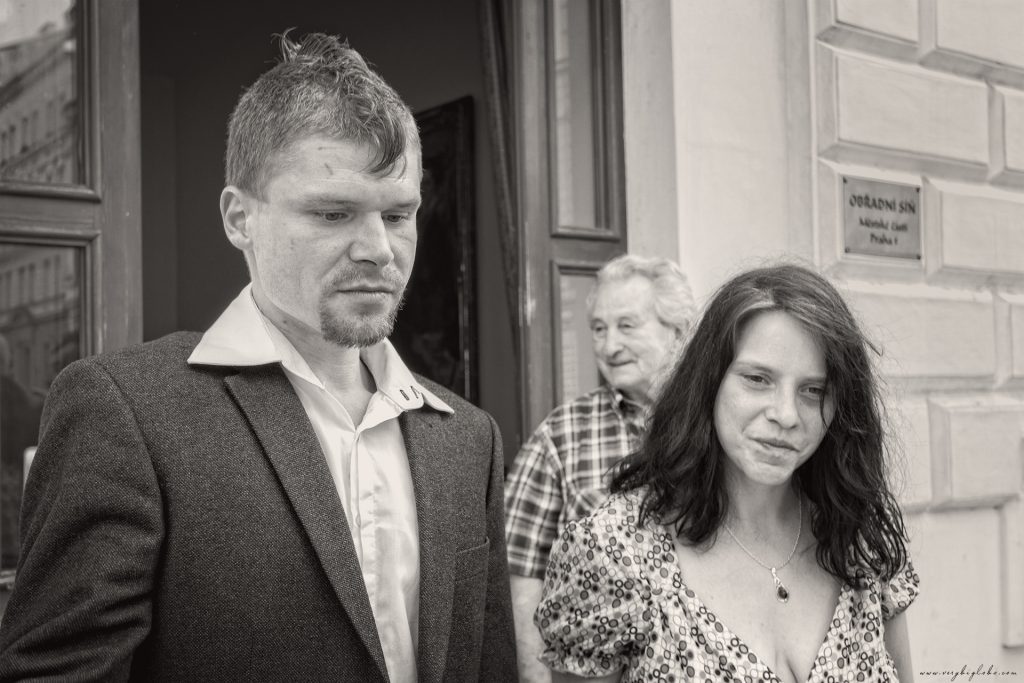
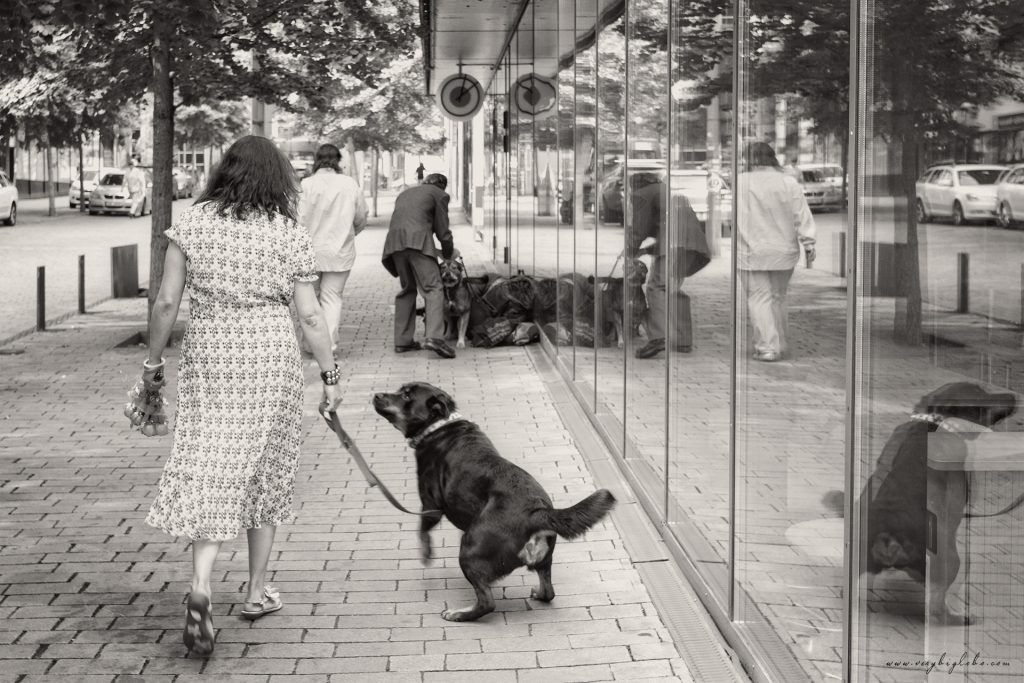
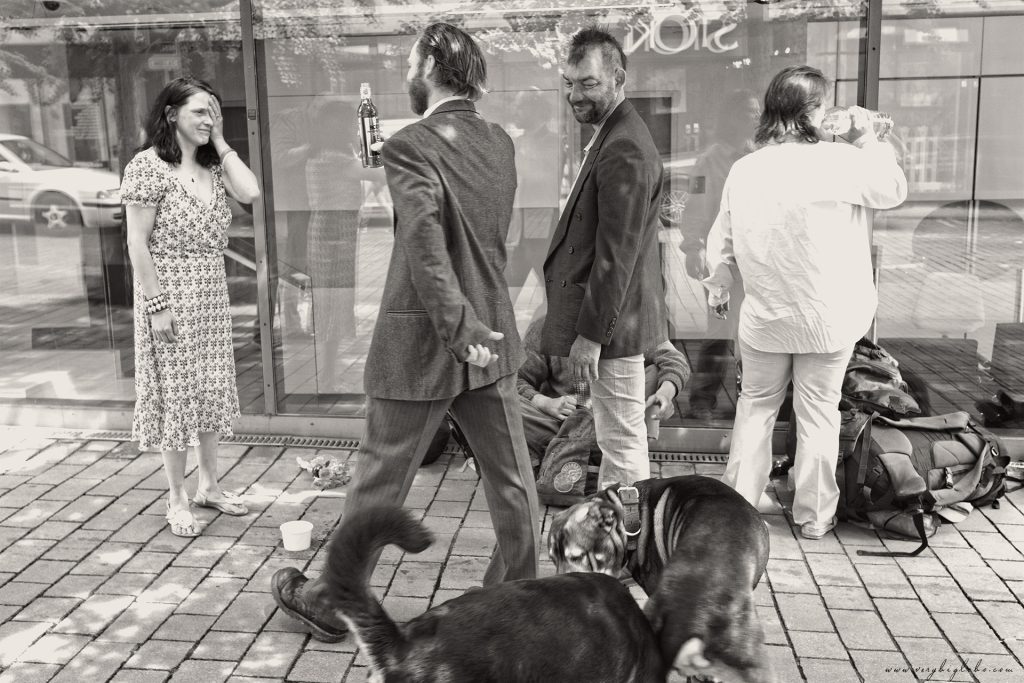
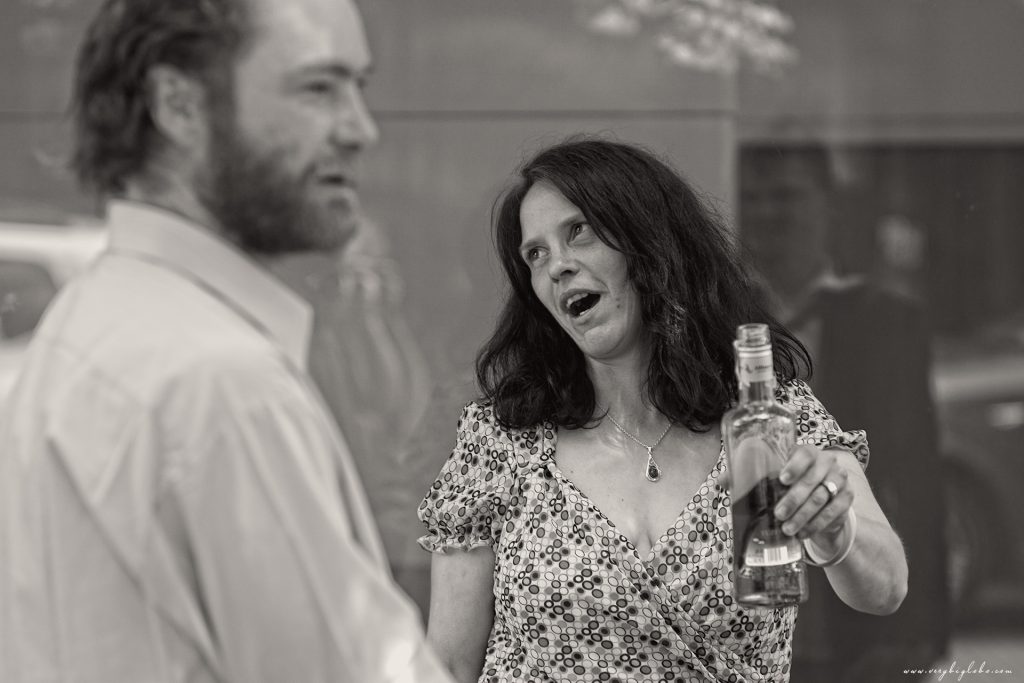
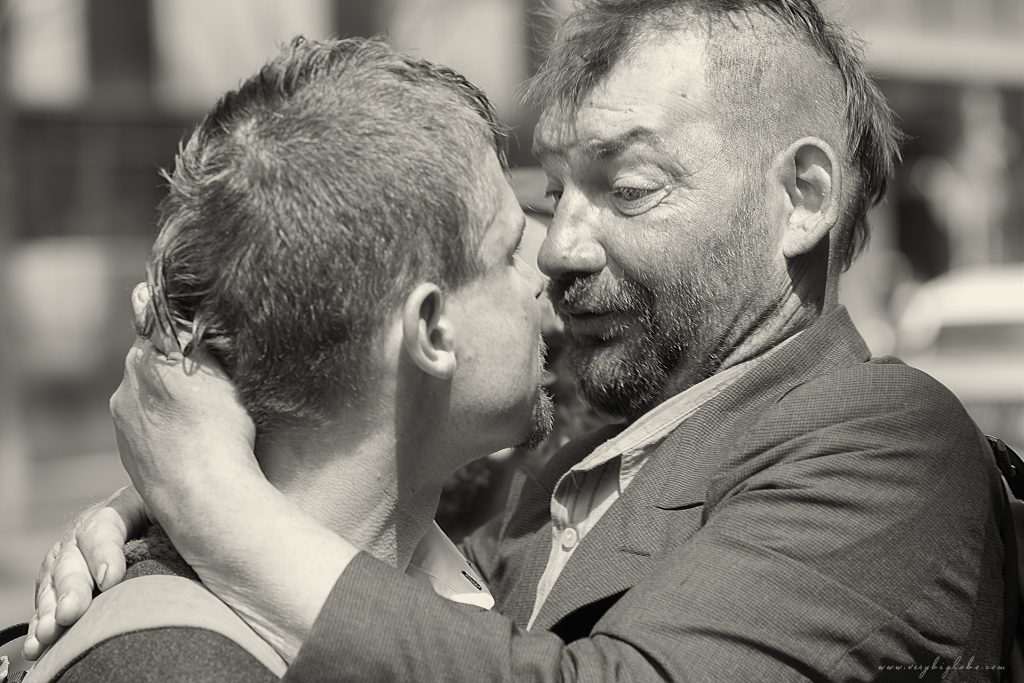
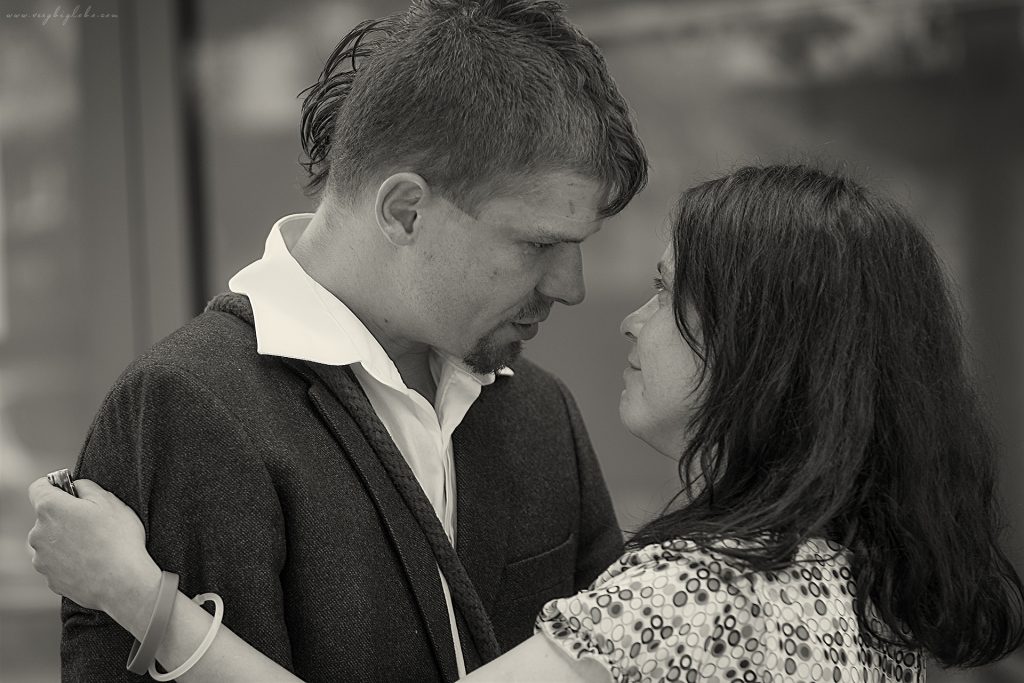
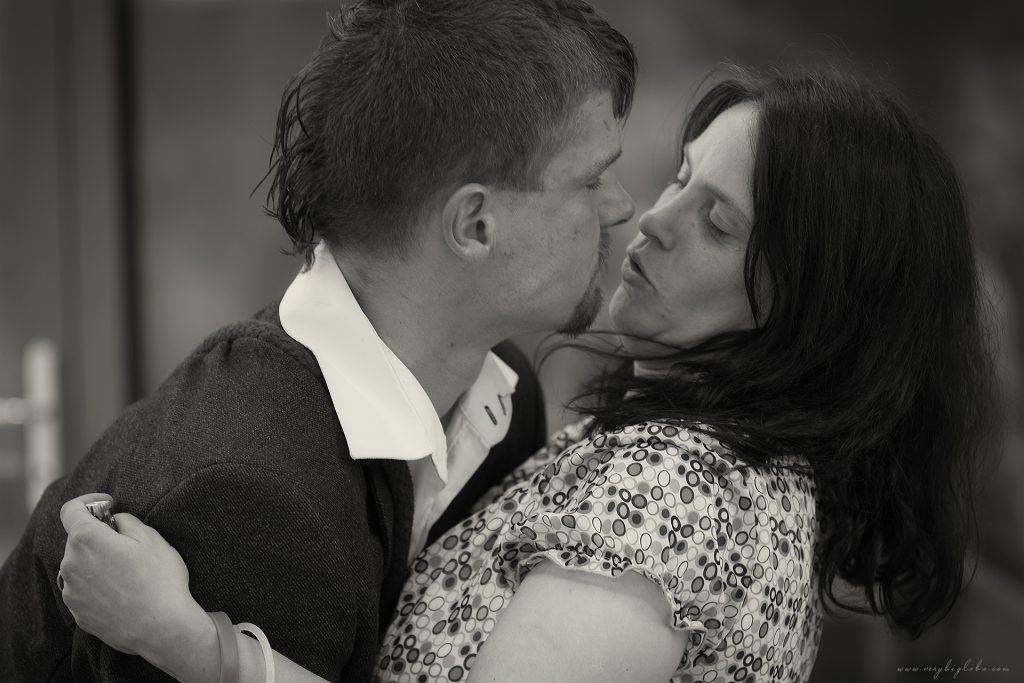
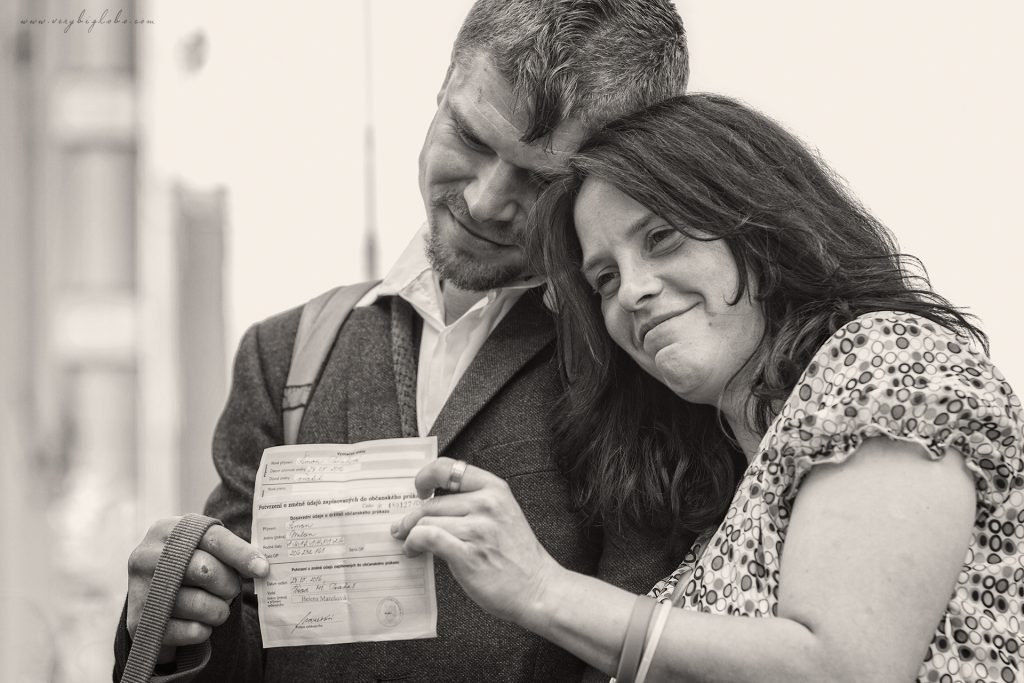
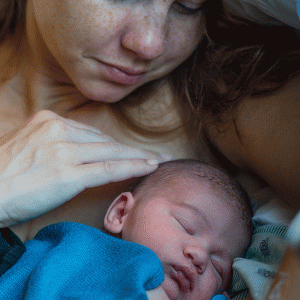
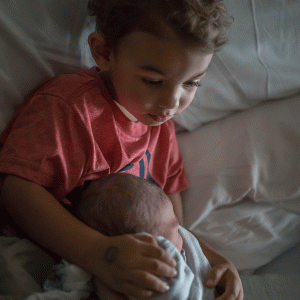
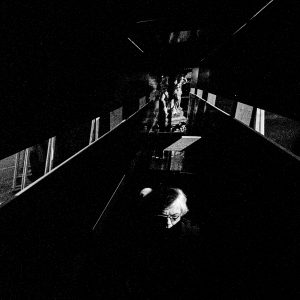
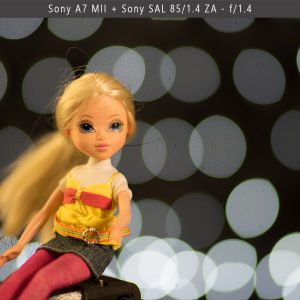
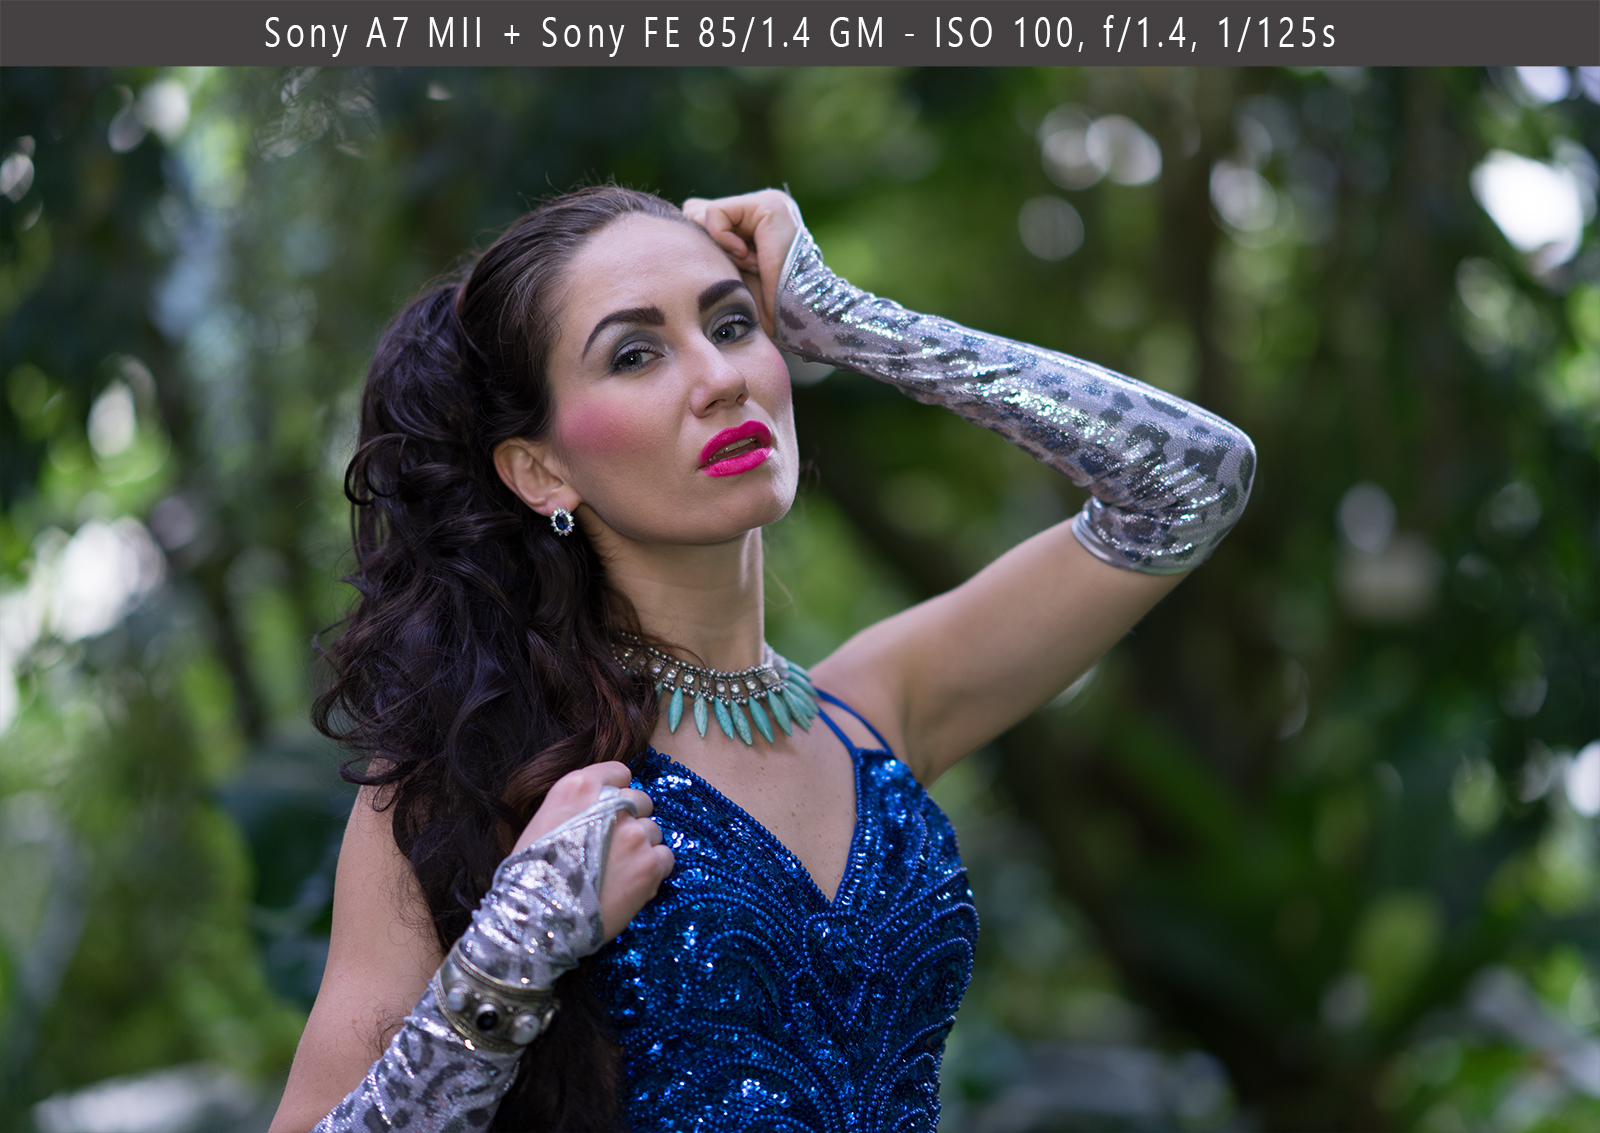
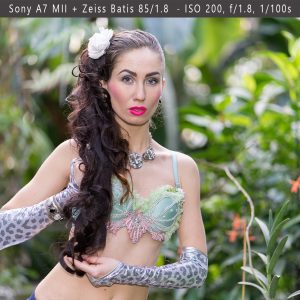
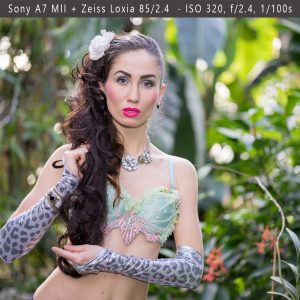
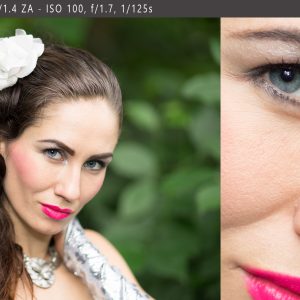
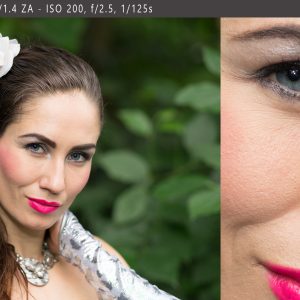
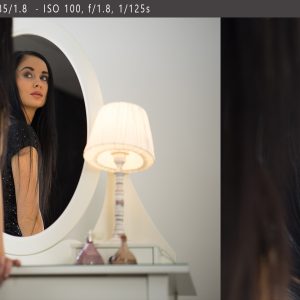
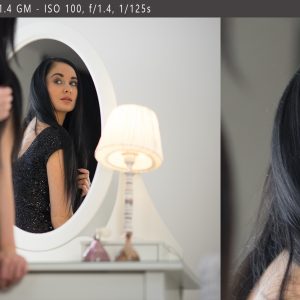
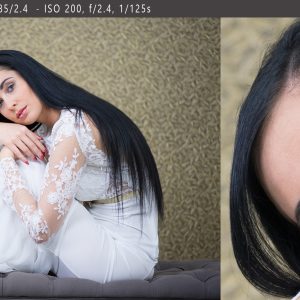
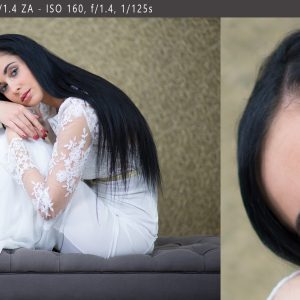
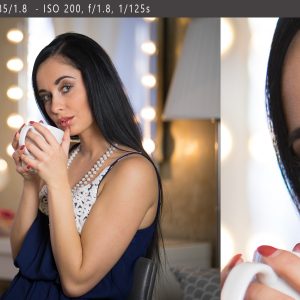
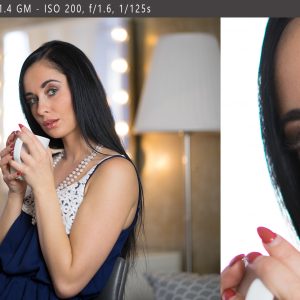
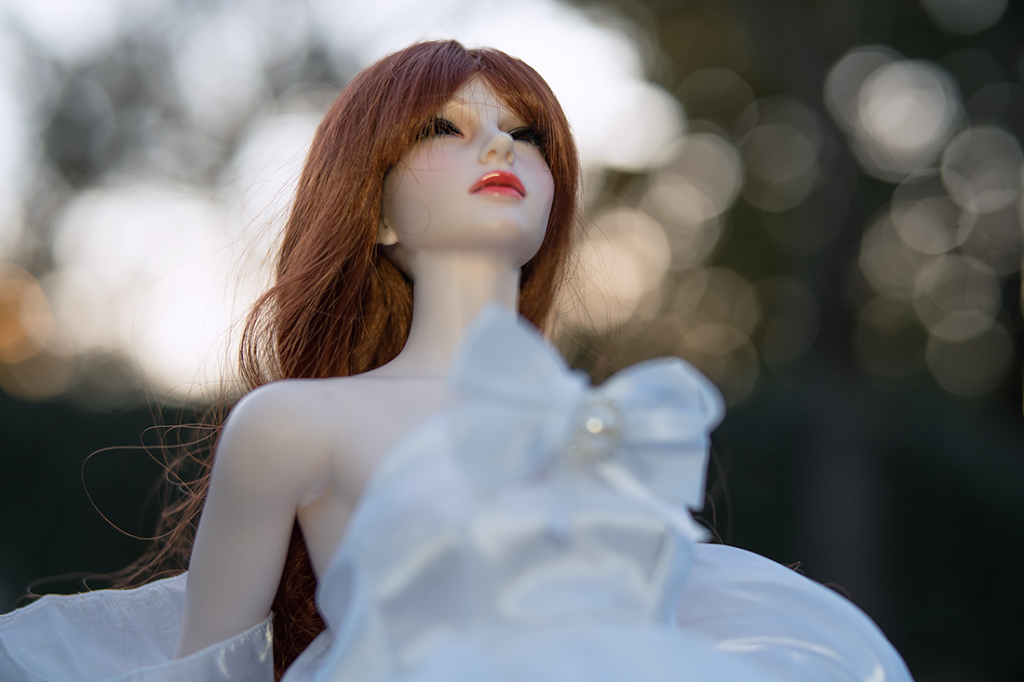
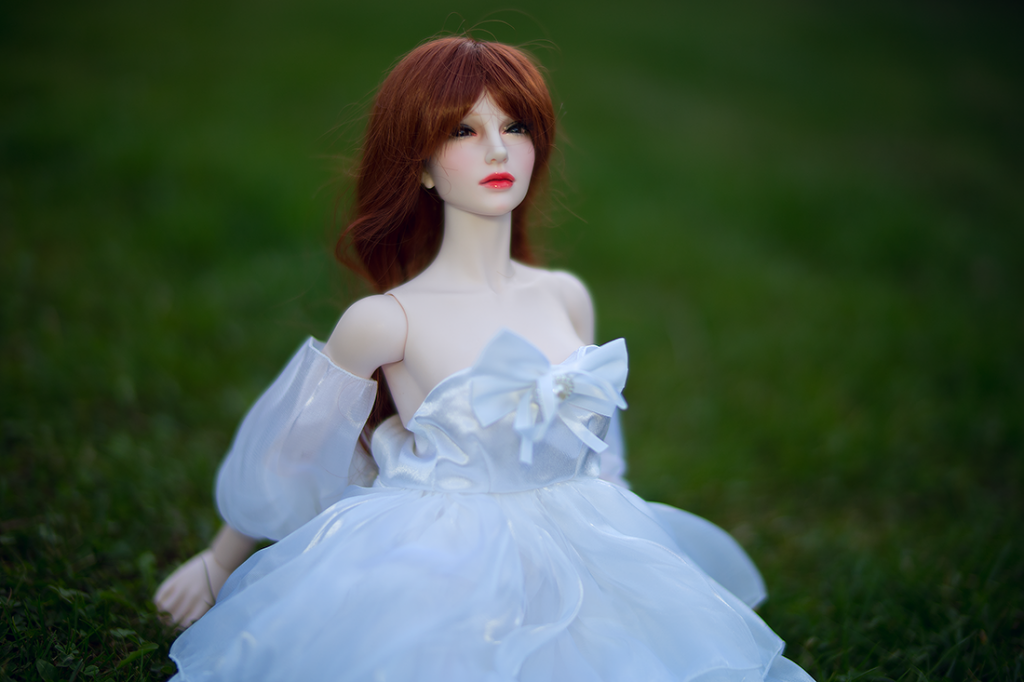
In the sample gallery, you should find portraits made on the comparative purpose. The intention wasn’t to check the sharpness or amount of the bokeh, but to try to get most out of each lens. Most of the shots were taken wide open, even if in the real life, I will rather used aperture stopped down to at least f/2.8. For larger files please visit Flickr Album
![]()
![]()
![]()
![]()
![]()
![]()
![]()
![]()
![]()
![]()
![]()
![]()
![]()
![]()
![]()
![]()
![]()
![]()
![]()
![]()
![]()
![]()
![]()
![]()
![]()
![]()
![]()
![]()
![]()
![]()
![]()
![]()
![]()
Conclusion
All four tested lenses are superb, especially for their main intended purpose – portrait. Sharpness should be for once deeply buried at the end of the preference list, since there is little to ask for. Nevertheless, there are many other relevant differences that should be taken into consideration. My impressions and recommendations are as follows.
Sony FE 85/1.4 GM
Superb portrait lens with slightly lower micro and global contrast (which might be a good thing for portrait), very smooth out of focus rendering, high quality plastic coat on metal framing, that seems to be very durable and is lighter and more pleasing to hold than metal. This lens comes at the premium price, but you can enjoy all benefits of advanced Sony AF features, such as eye AF (very useful for arranged portraits). It is big and rather heavy though, so if you are shooting portraits casually, you should consider some more compact solution. While in my testing, Sony FE 85/1.4 GM wasn’t sharpest of the bunch (could be sample variation?) it was always more than sharp enough. Color accuracy was very good and at right WB setting, skin tones were pleasing. Auto focusing is fast enough for portraits, but not for sport or fast action, where massive optical elements are limiting its speed. Lens has least mechanical vignetting which results in nice regular circular highlights toward image borders. There is some focus breathing though that might be a problem for video creators. All in all, this is lens for advanced, demanding photographers, who are looking for both – speed and beautifully balanced rendering for portraits. Highly recommended if you can afford it.
Sony Planar T* 85/1.4 ZA with LA-EA4
This is today, sort of budget option, if you go with second-hand market. If you have adapter, lens itself can be found in good condition for around 900 EUR. That is great bang for the buck, because Planar has plenty of sharpness and character to deliver. Beside cumbersome adapter, which also limits most of the advanced AF features, its main “problem” is purple fringing. Otherwise it is surprisingly sharp already at f/1.4 and it has very smooth bokeh with least focus breathing problem. Without adapter it is much more compact than Sony FE and also somewhat lighter. More compact size for transport (with the adapter packed separately), can be very important sometimes. Color accuracy is however shifted toward warm tones. Flare resistance is exceptional. I can recommend this lens (I own it myself) for everyone who wants high quality optics at great speed and reasonable price. There are some limitations as listed above, but sharpness is explicit and overall character rather unique.
Zeiss Batis 85/1.8
AFAIK the only AF portrait lens from Zeiss. Contemporary design made of light metal, lot of glass and soft rubber, makes this lens outstanding in appearance. Batis is fastest auto focusing lens in this test, suitable not only for static but also for medium speed moving subjects. It has somewhat more pronounced vignetting and traces of pincushion distortion, but it is very sharp up to the corners, with great contrast and accurate color rendition. It features slightly slower aperture at f/1.8, but it’s ability to isolate subjects is not affected. Batis is a great choice for every photo enthusiast especially for Zeiss lens lovers. New Sony FE 85/1.8 might come close in optical performance ,but with Zeiss you have guarantee that your lens was individually inspected to fulfill most rigorous production demand, that colors will be matched not only within same product line, but across all older, recent and hopefully future product lines and that you will always get great product support if needed. This would be my lens of choice for the family portraits.
Zeiss Loxia 85/2.4
Loxia is unique lens in many regards. It is made for those of us who enjoy manual focusing at its best. It is clearly addressing video makers, offering attributes of a great importance – compact size, superb build quality, ensuring longevity, greatly dampened focusing , Zeiss geared rings accessory , de-clicking of the aperture ring, full exif recording. Loxia is bitingly sharp from its widest aperture with great contrast, color accuracy and flare resistance. It does show some vignetting though and I would like to see improved grip for mounting the lens (whole body is focus ring which rotates when you try to mount the lens) but those are very minor issues. Loxia is also very compact, it is made to be carried and used instead of displayed on the shelf. It fits Sony A7 series so greatly that you simply don’t want to put other lenses instead. I own Loxia 21/2.8 and 35/2. Loxia 85/2.4 is out if my budget recently, but I have no doubts that it will find the way to my bag sooner or later. Loxia 85/2.4 alone, or as part of the Loxia collection is a superb lens for travel photography.
To help this page survive, your donation will be highly appreciated.
I would like to thank all of you who were, are and will support verybiglobo.com with financial contribution or just with encouraging messages.
My special thanks goes to Mr. Jakub Pecka, product specialist from Sony Czech, Mr. Ales Mejdrech, marketing manager of Zeiss Lenses Czech, my dear friend Thea for hers never to be forgotten support, Mr. Radek Tesik who is running this web with me, and all of you who read this review till this line :-).
If you would like to join us and write reviews for verybiglobo, please send me a short note using contact tab in the header.
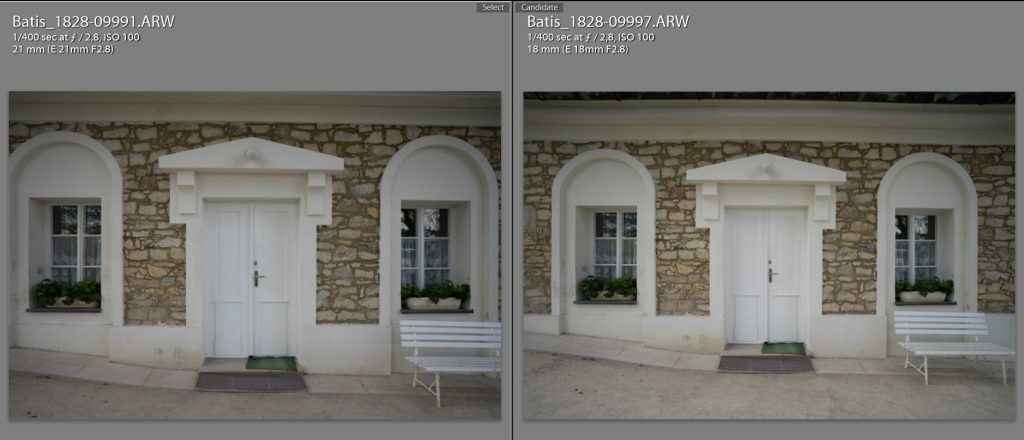
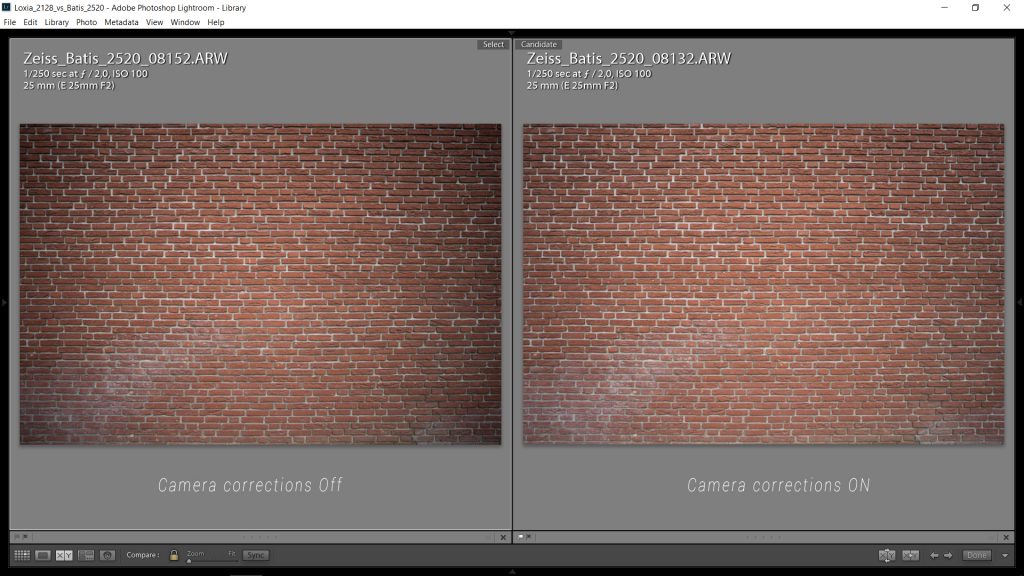
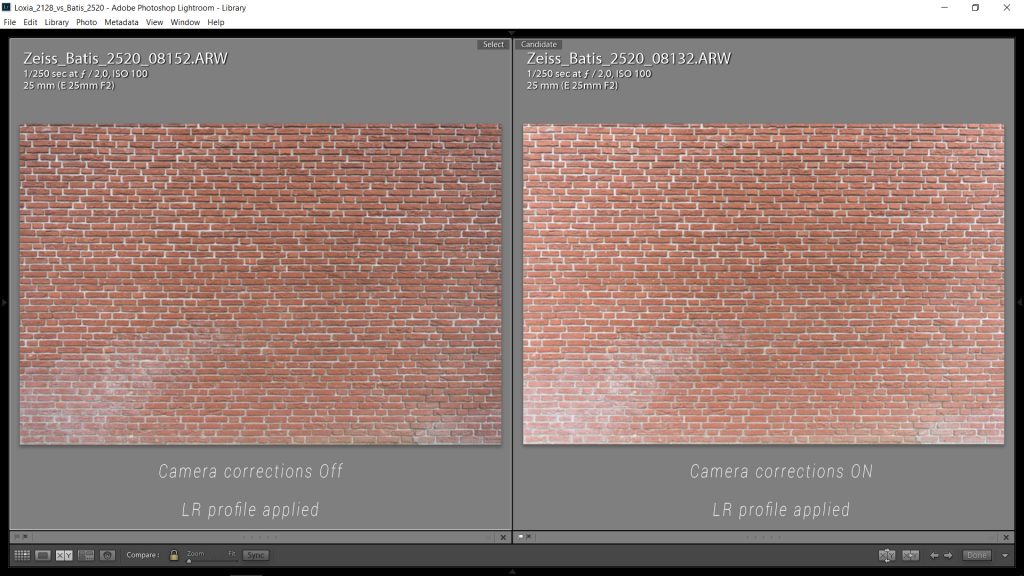
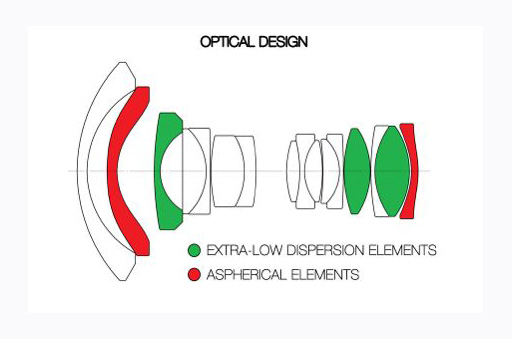
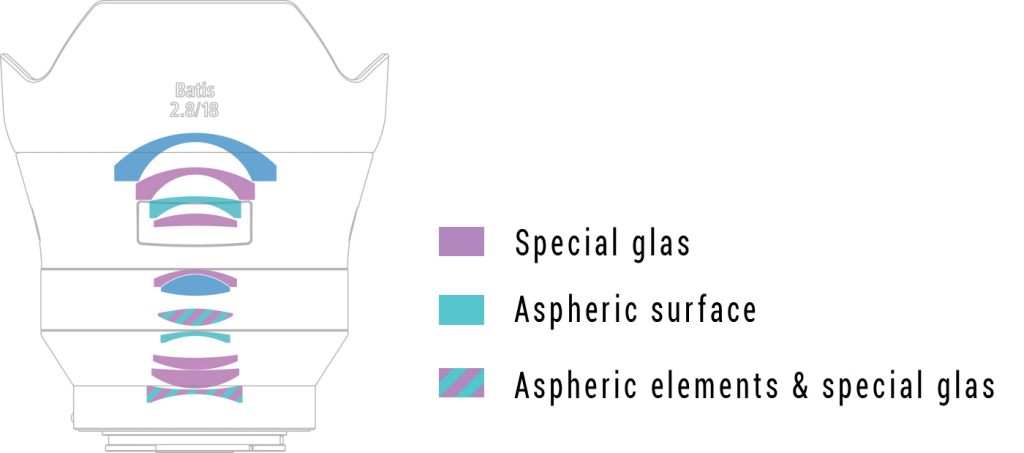 What exactly new element means, is slightly unclear to me, because Aspheric (molded) glass is always “special”, but I guess that new technology probably further improve light transmission or/and decrease reflections.
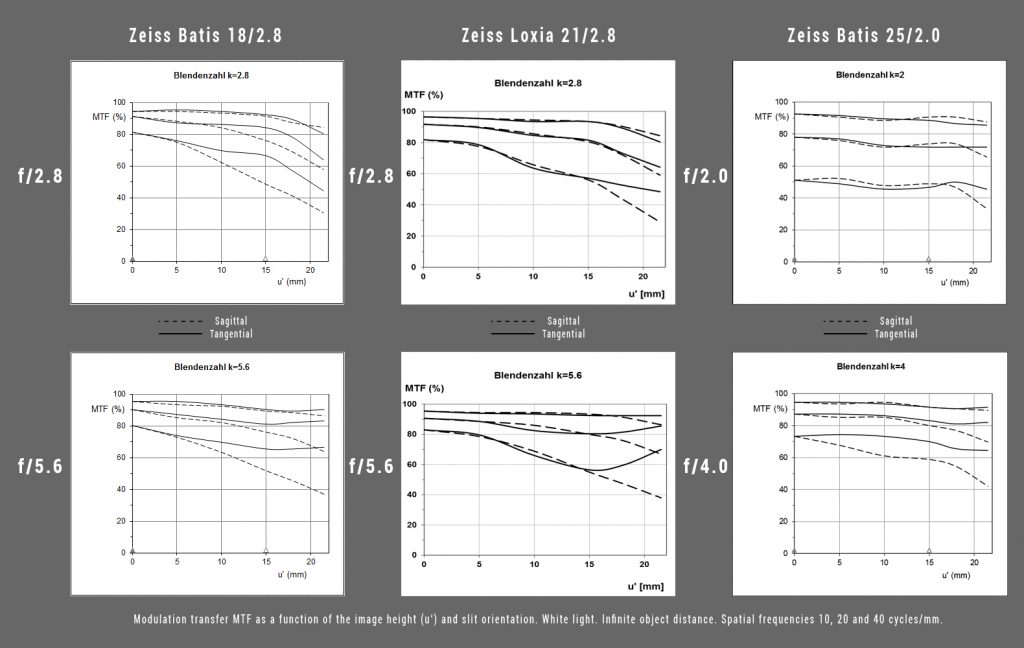 Center performance is almost equal, while corner performance decreases with the focal length, but that is rather marginal difference and one to be expected.
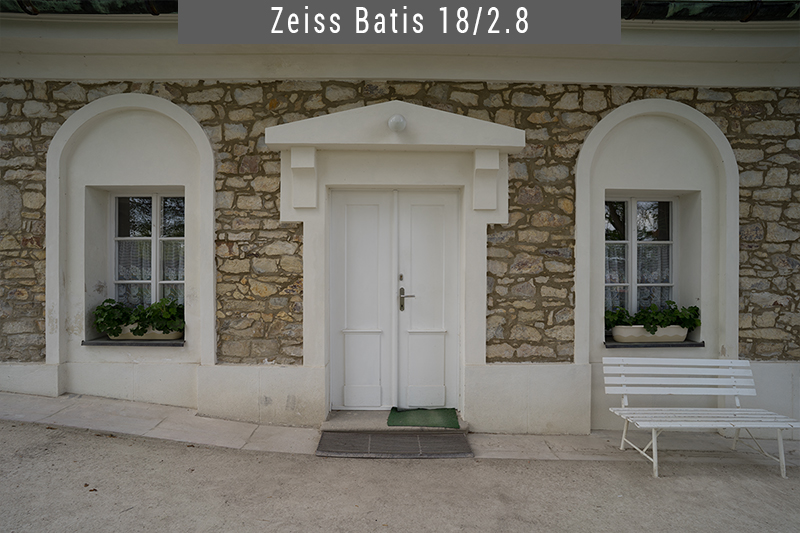
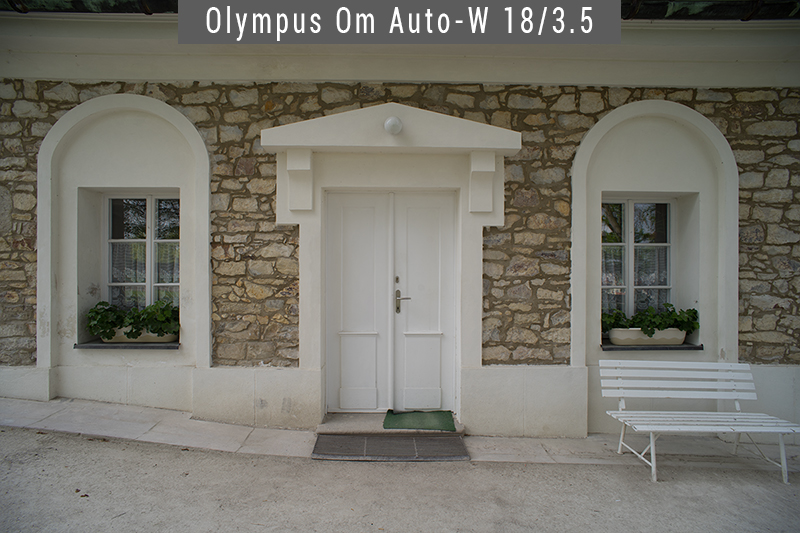
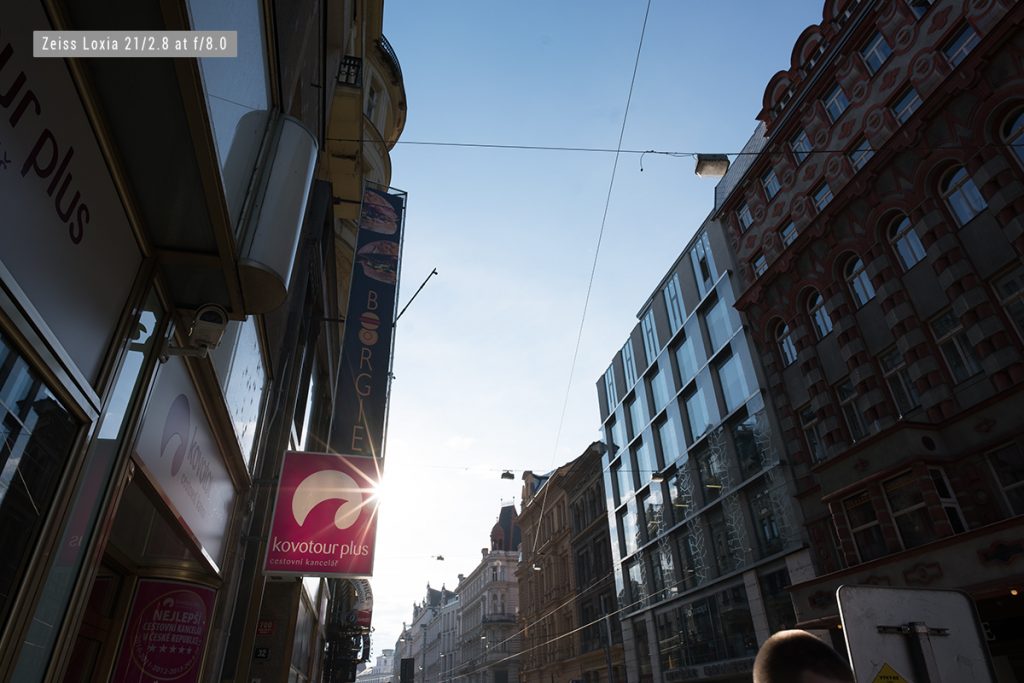
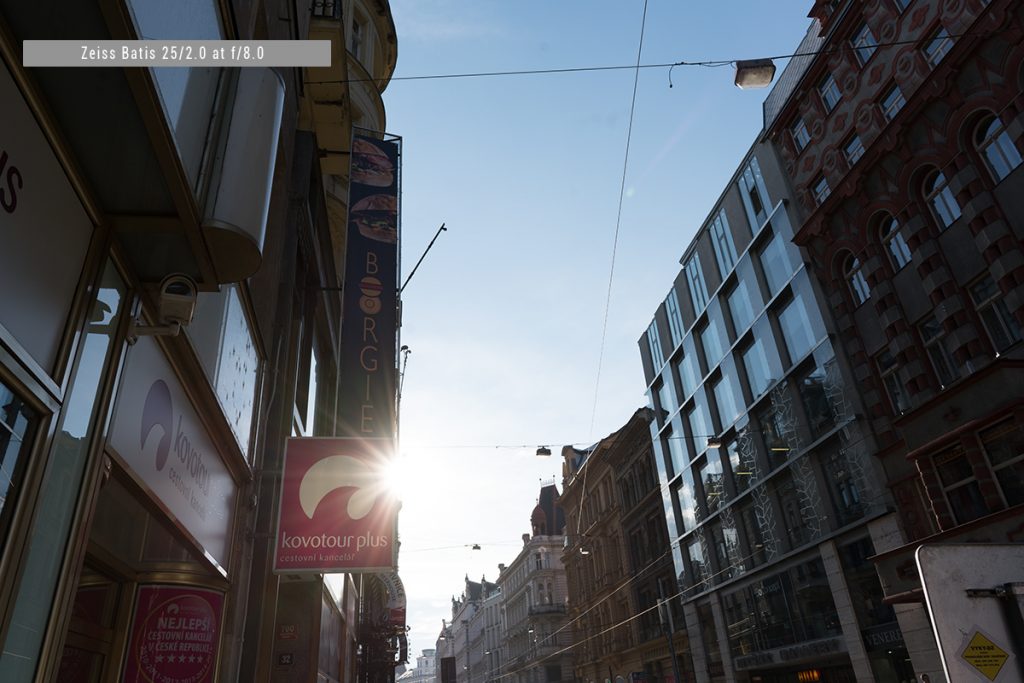
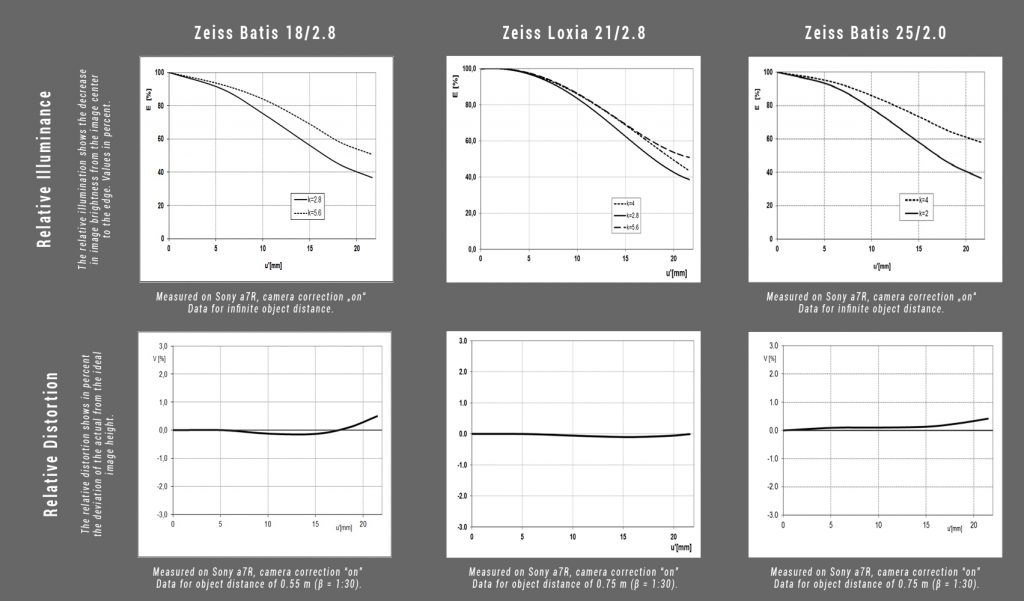 When it comes to distortion, Zeiss, as most other recent lens producers, is relying to the software corrections. Data for correction are coded into lens firmware and camera will read them without need for its own firmware update (in most cases). Difference between uncorrected and corrected image can be very significant (you can take a look at Zeiss data sheet – Loxia 21/2.8, for which Zeiss published both results (page 3). For Batis, I expect even more aggressive correction (no data by Zeiss), but results are still quite pleasing. Batis 18/2.8 even after camera correction has some distortion of a complex (mustache) type, but we will write about it later.
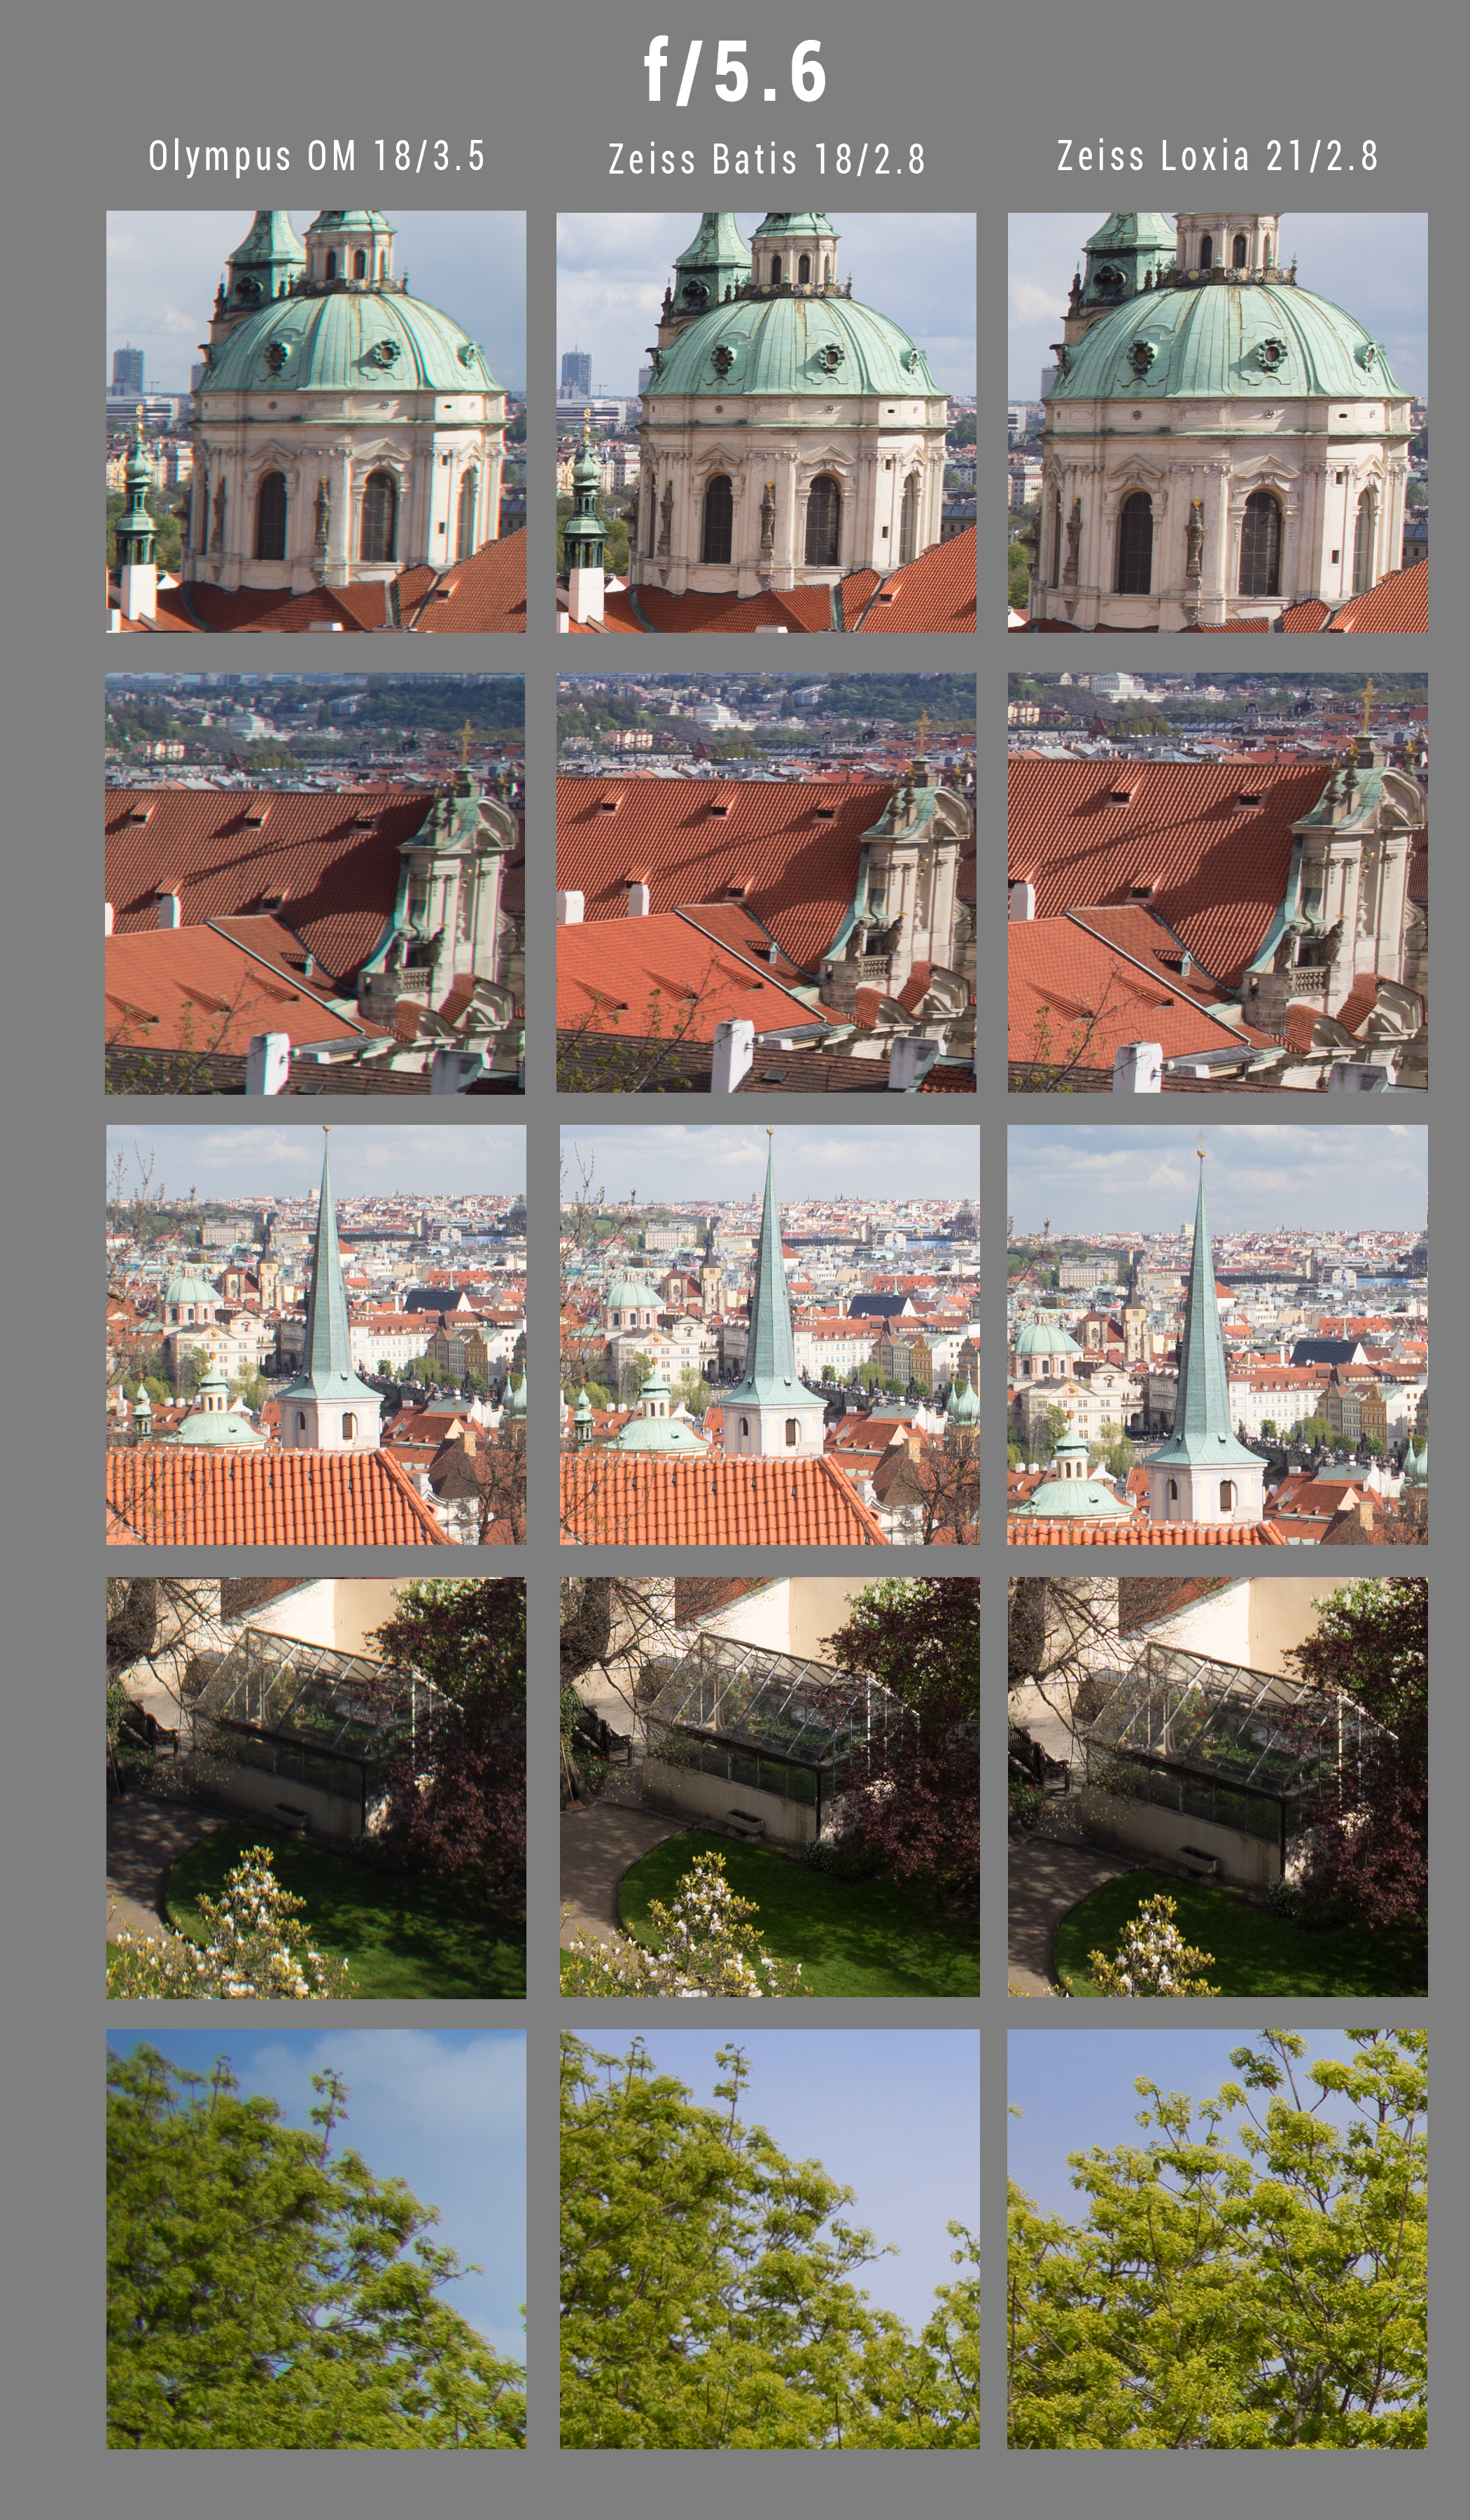
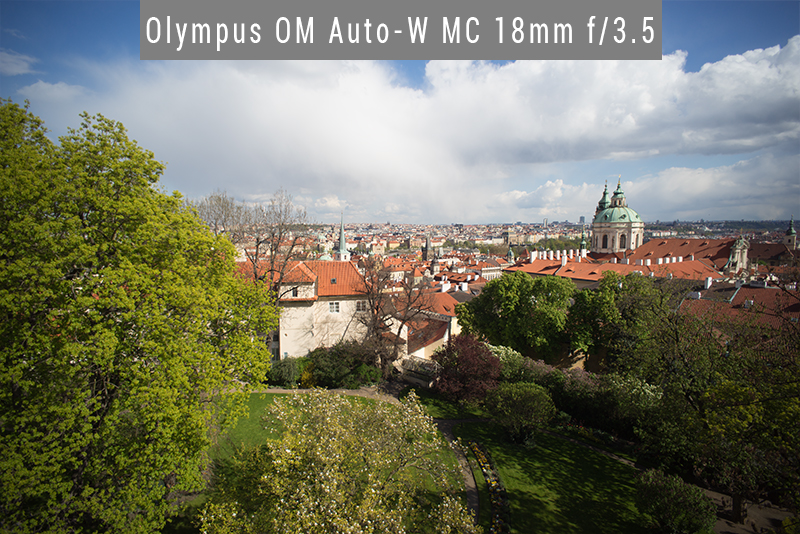
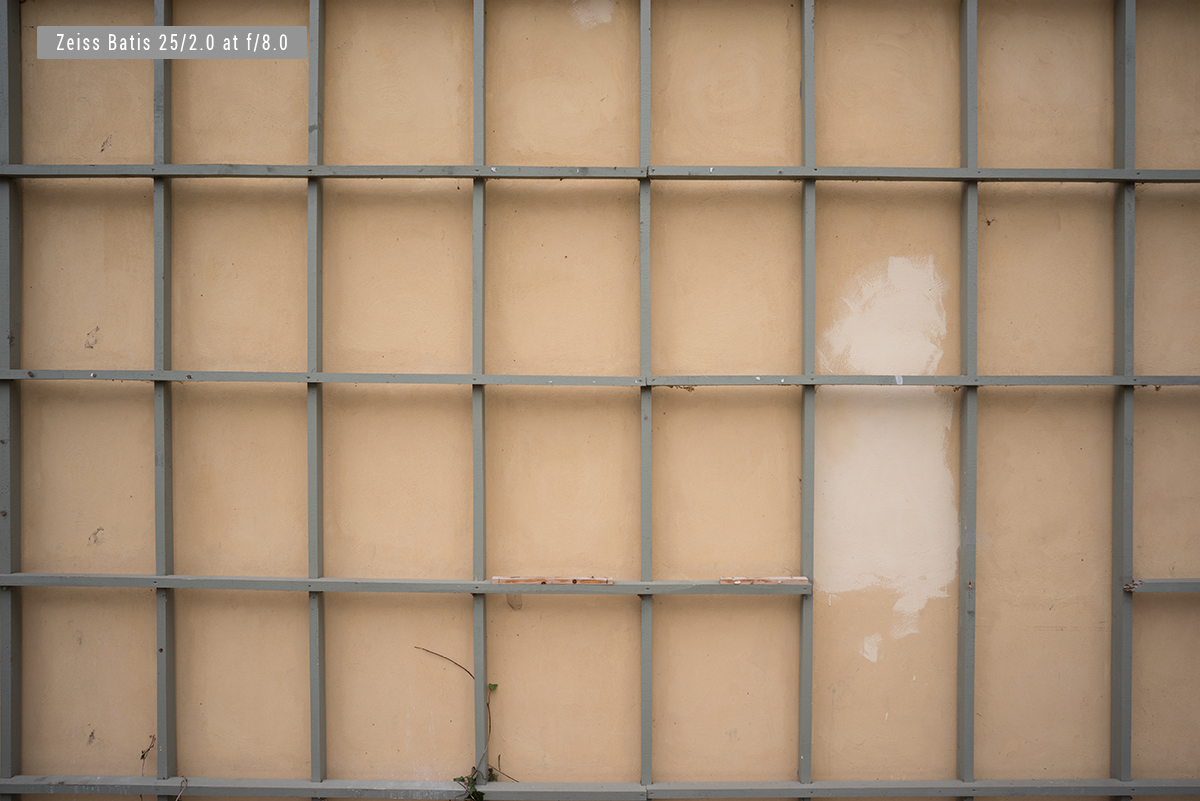
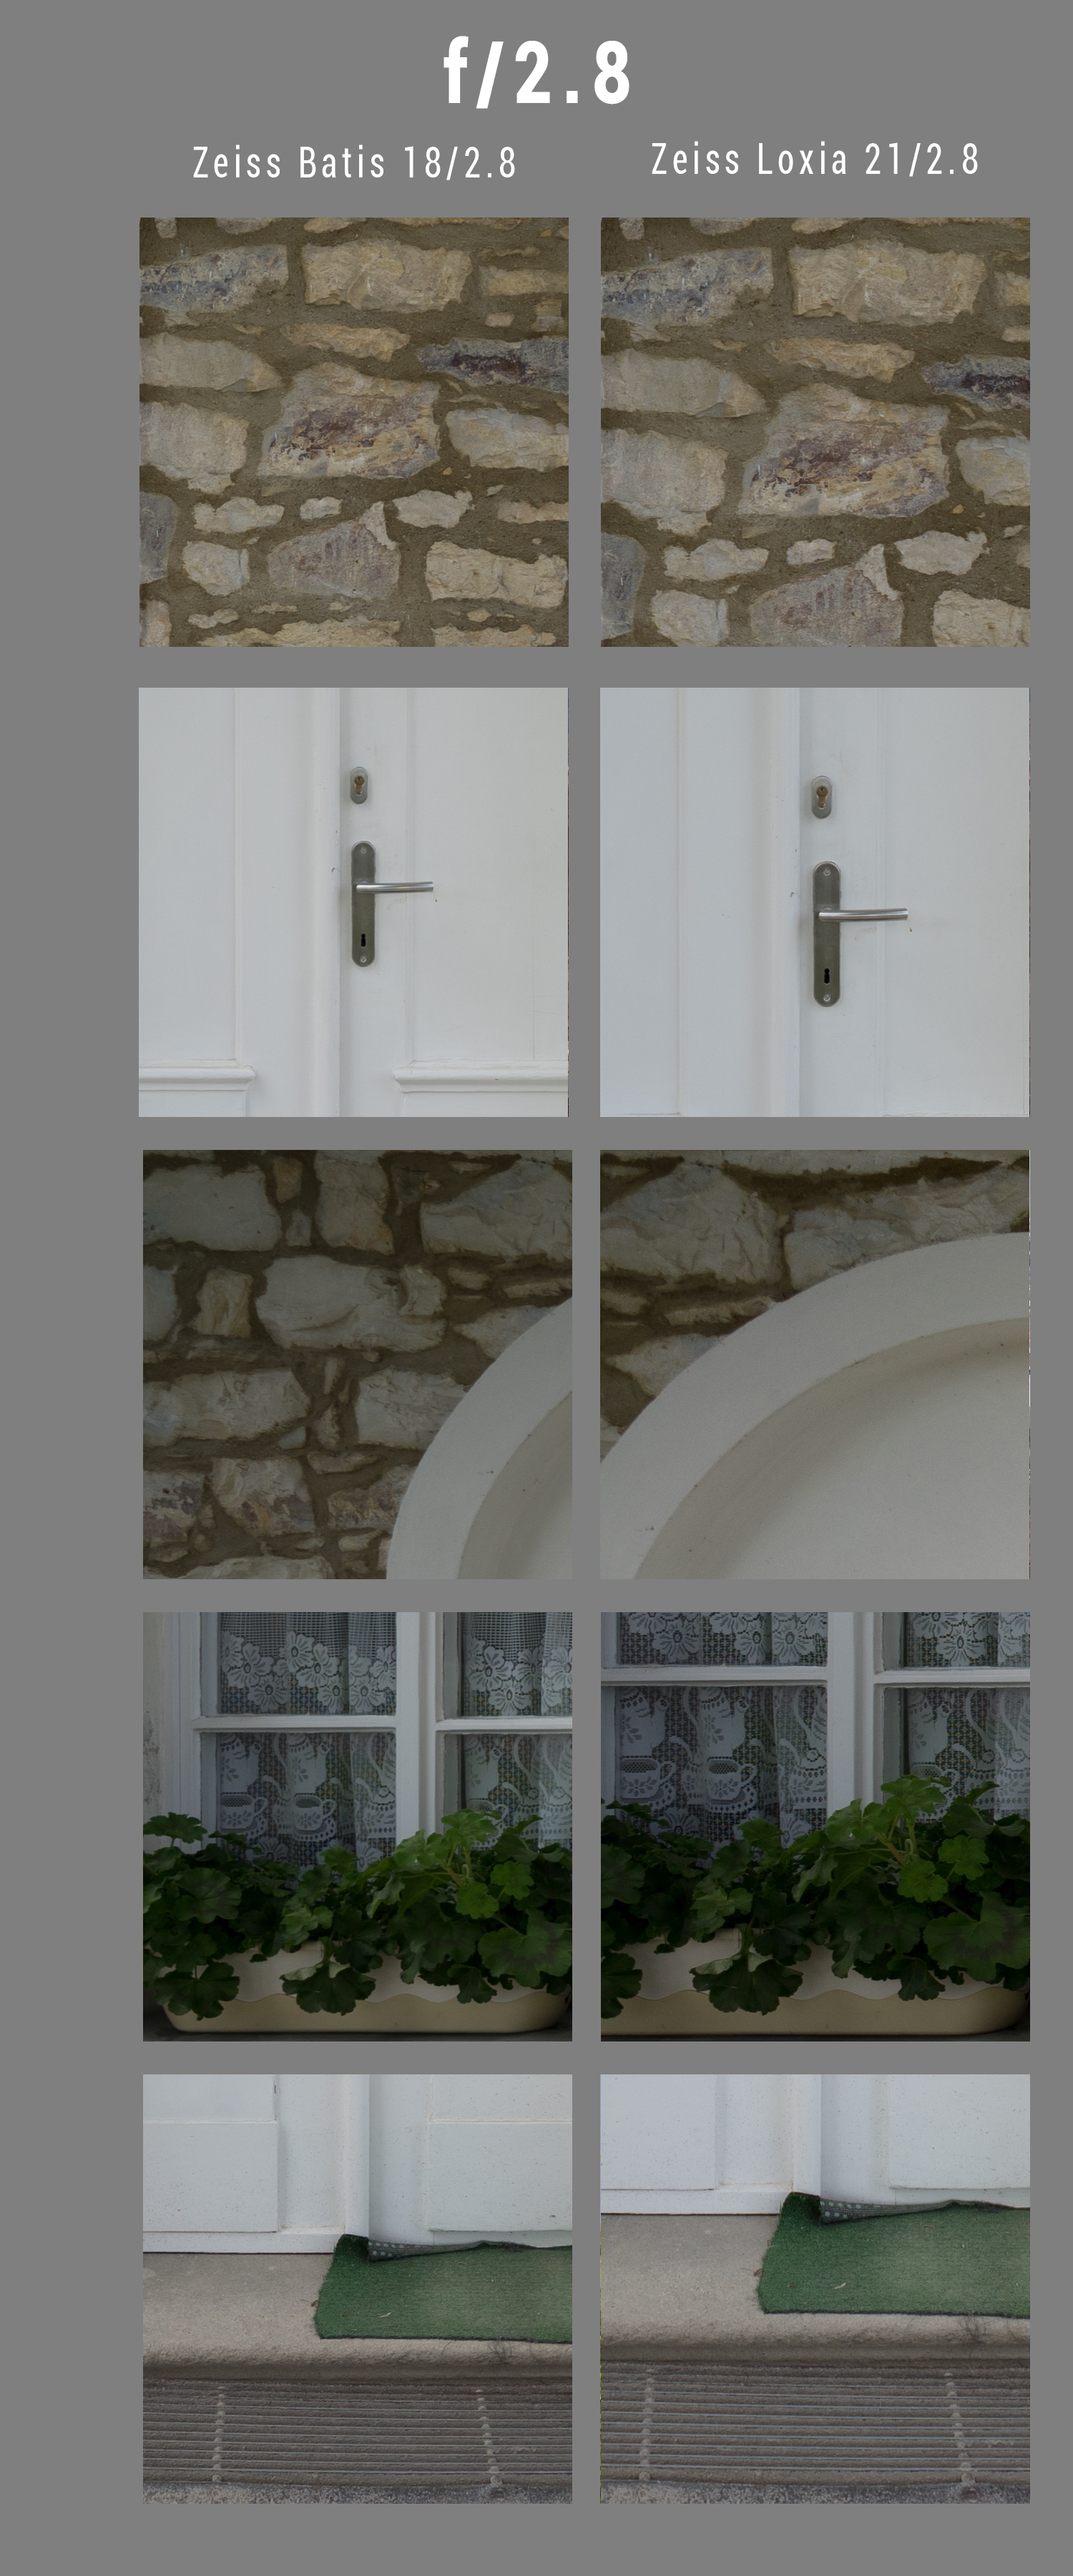 Next compilation includes Olympus lens. All lenses are at f/8 now
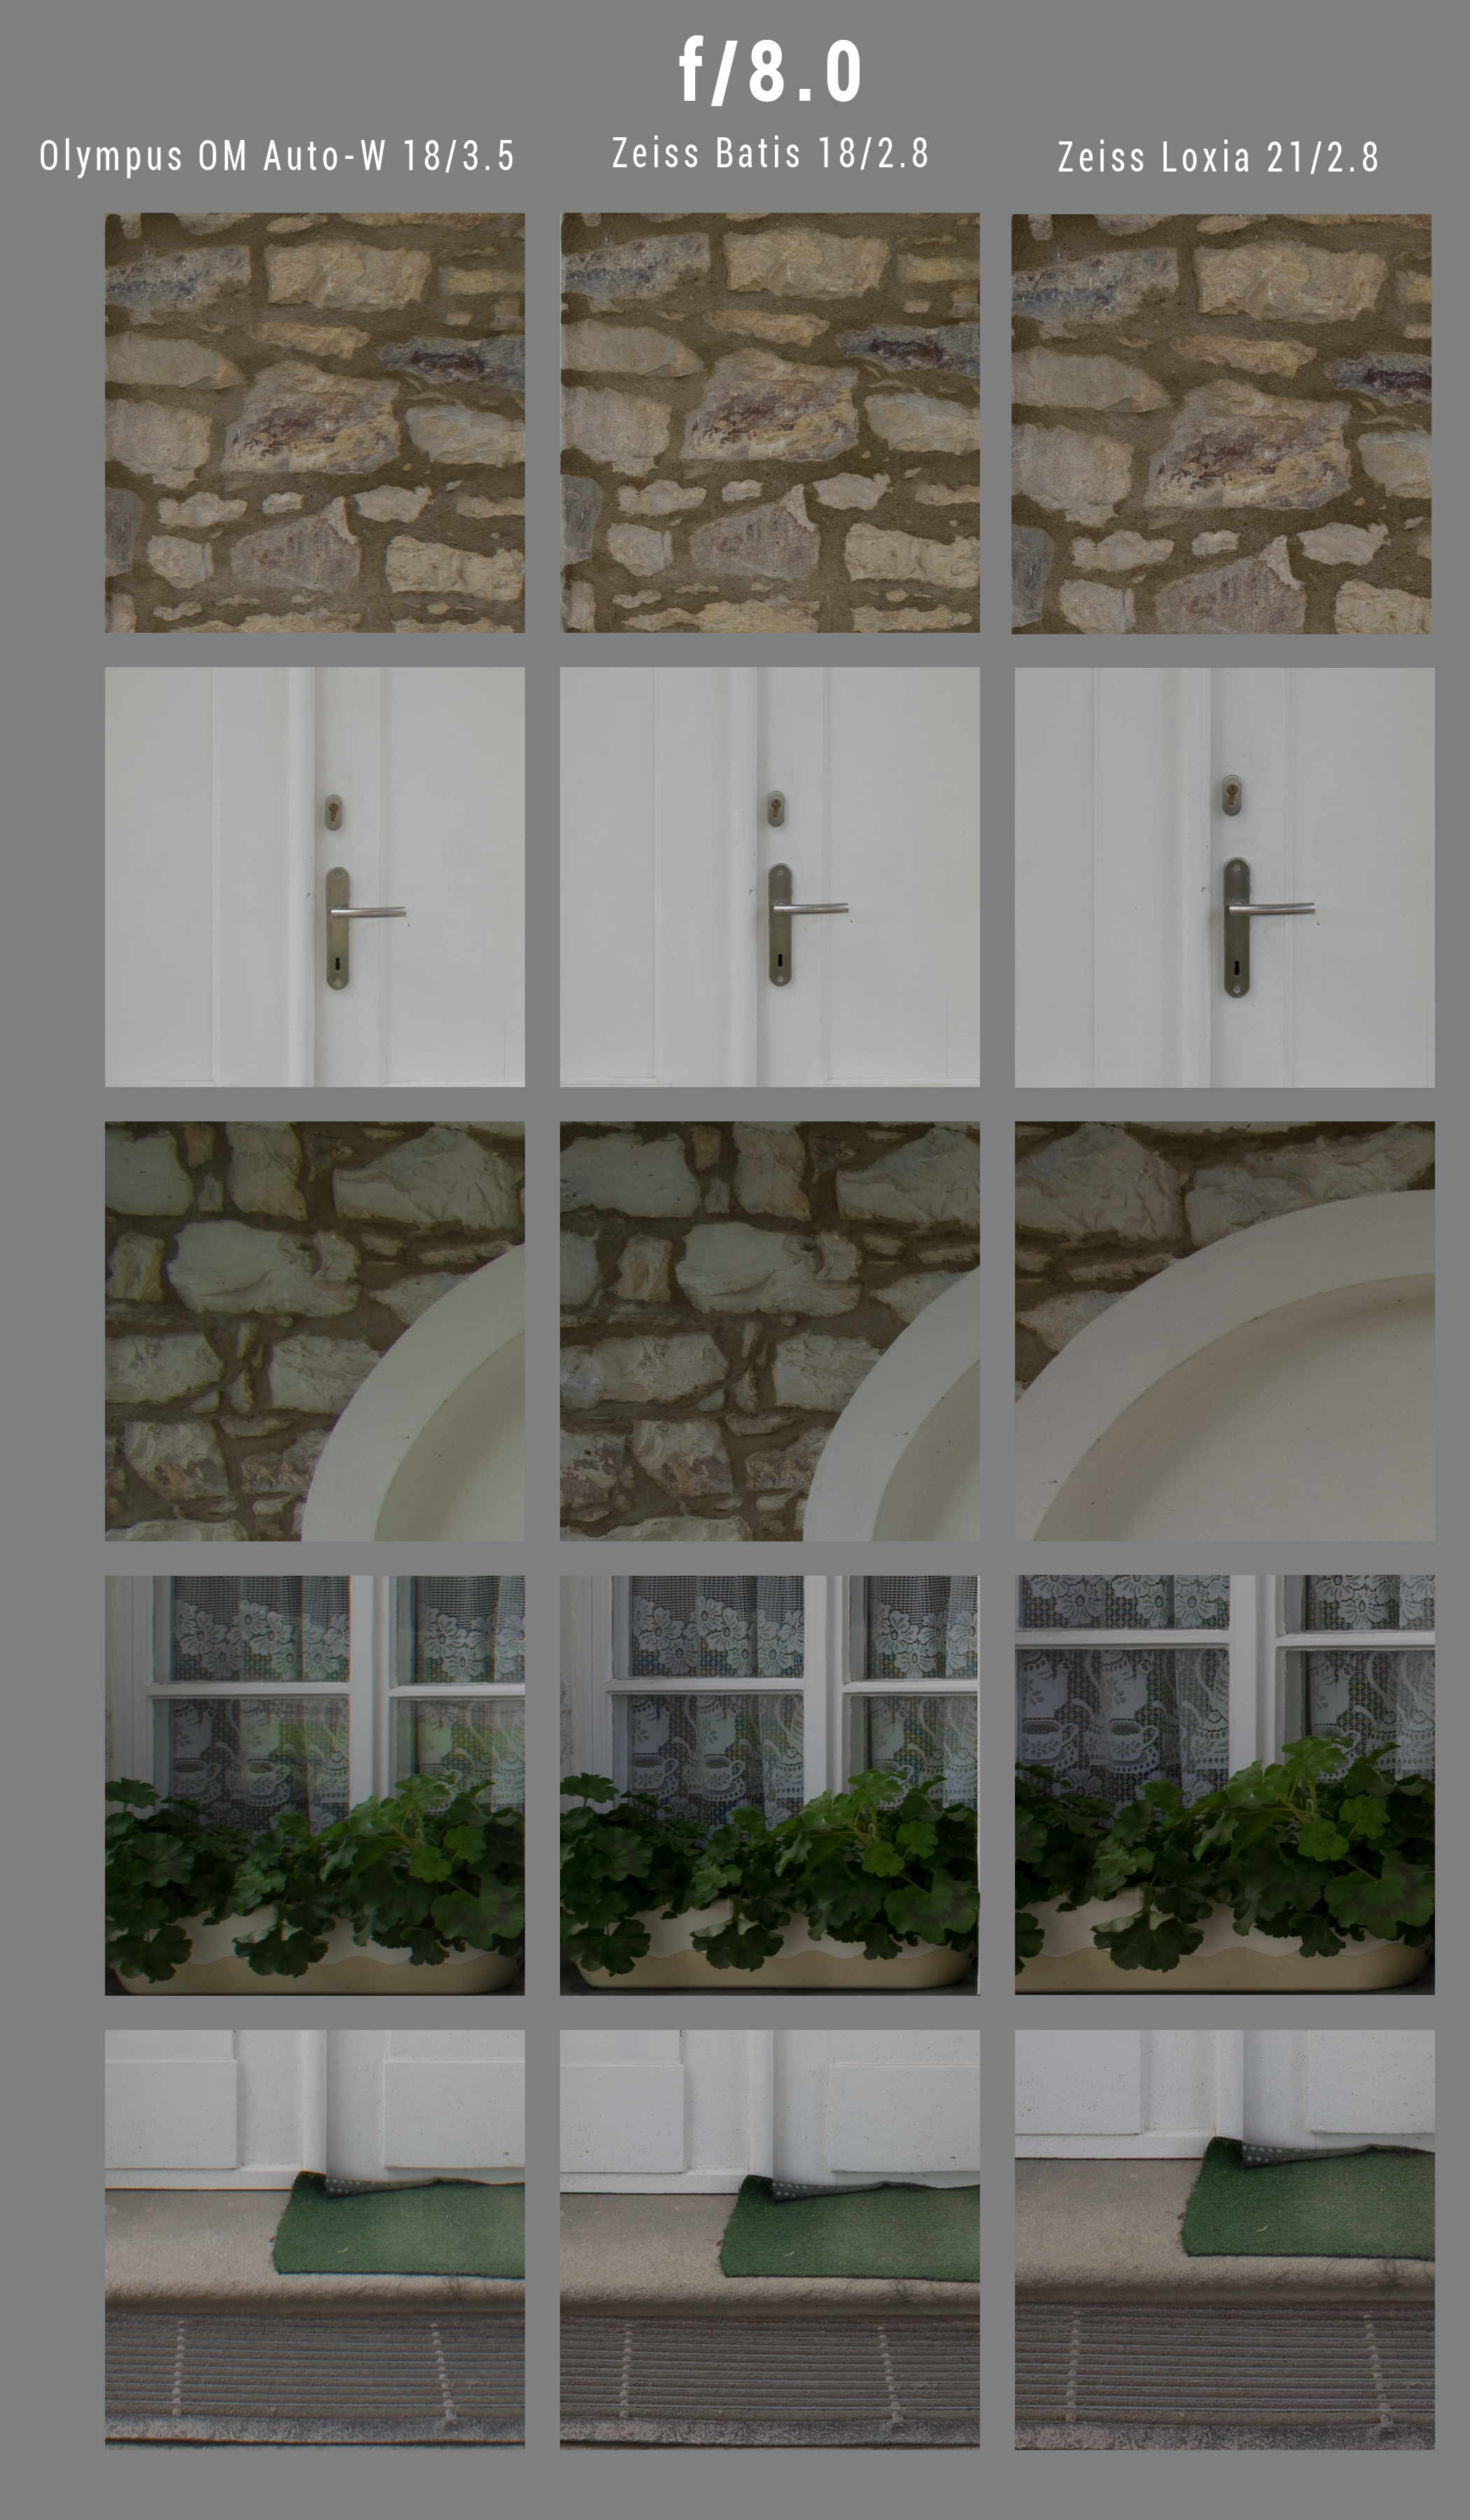 From this test, I can only say, that resolution wise, Batis and Loxia are almost indistinguishable from one another, while at f/8 Olympus is not that far away, especially toward edges.
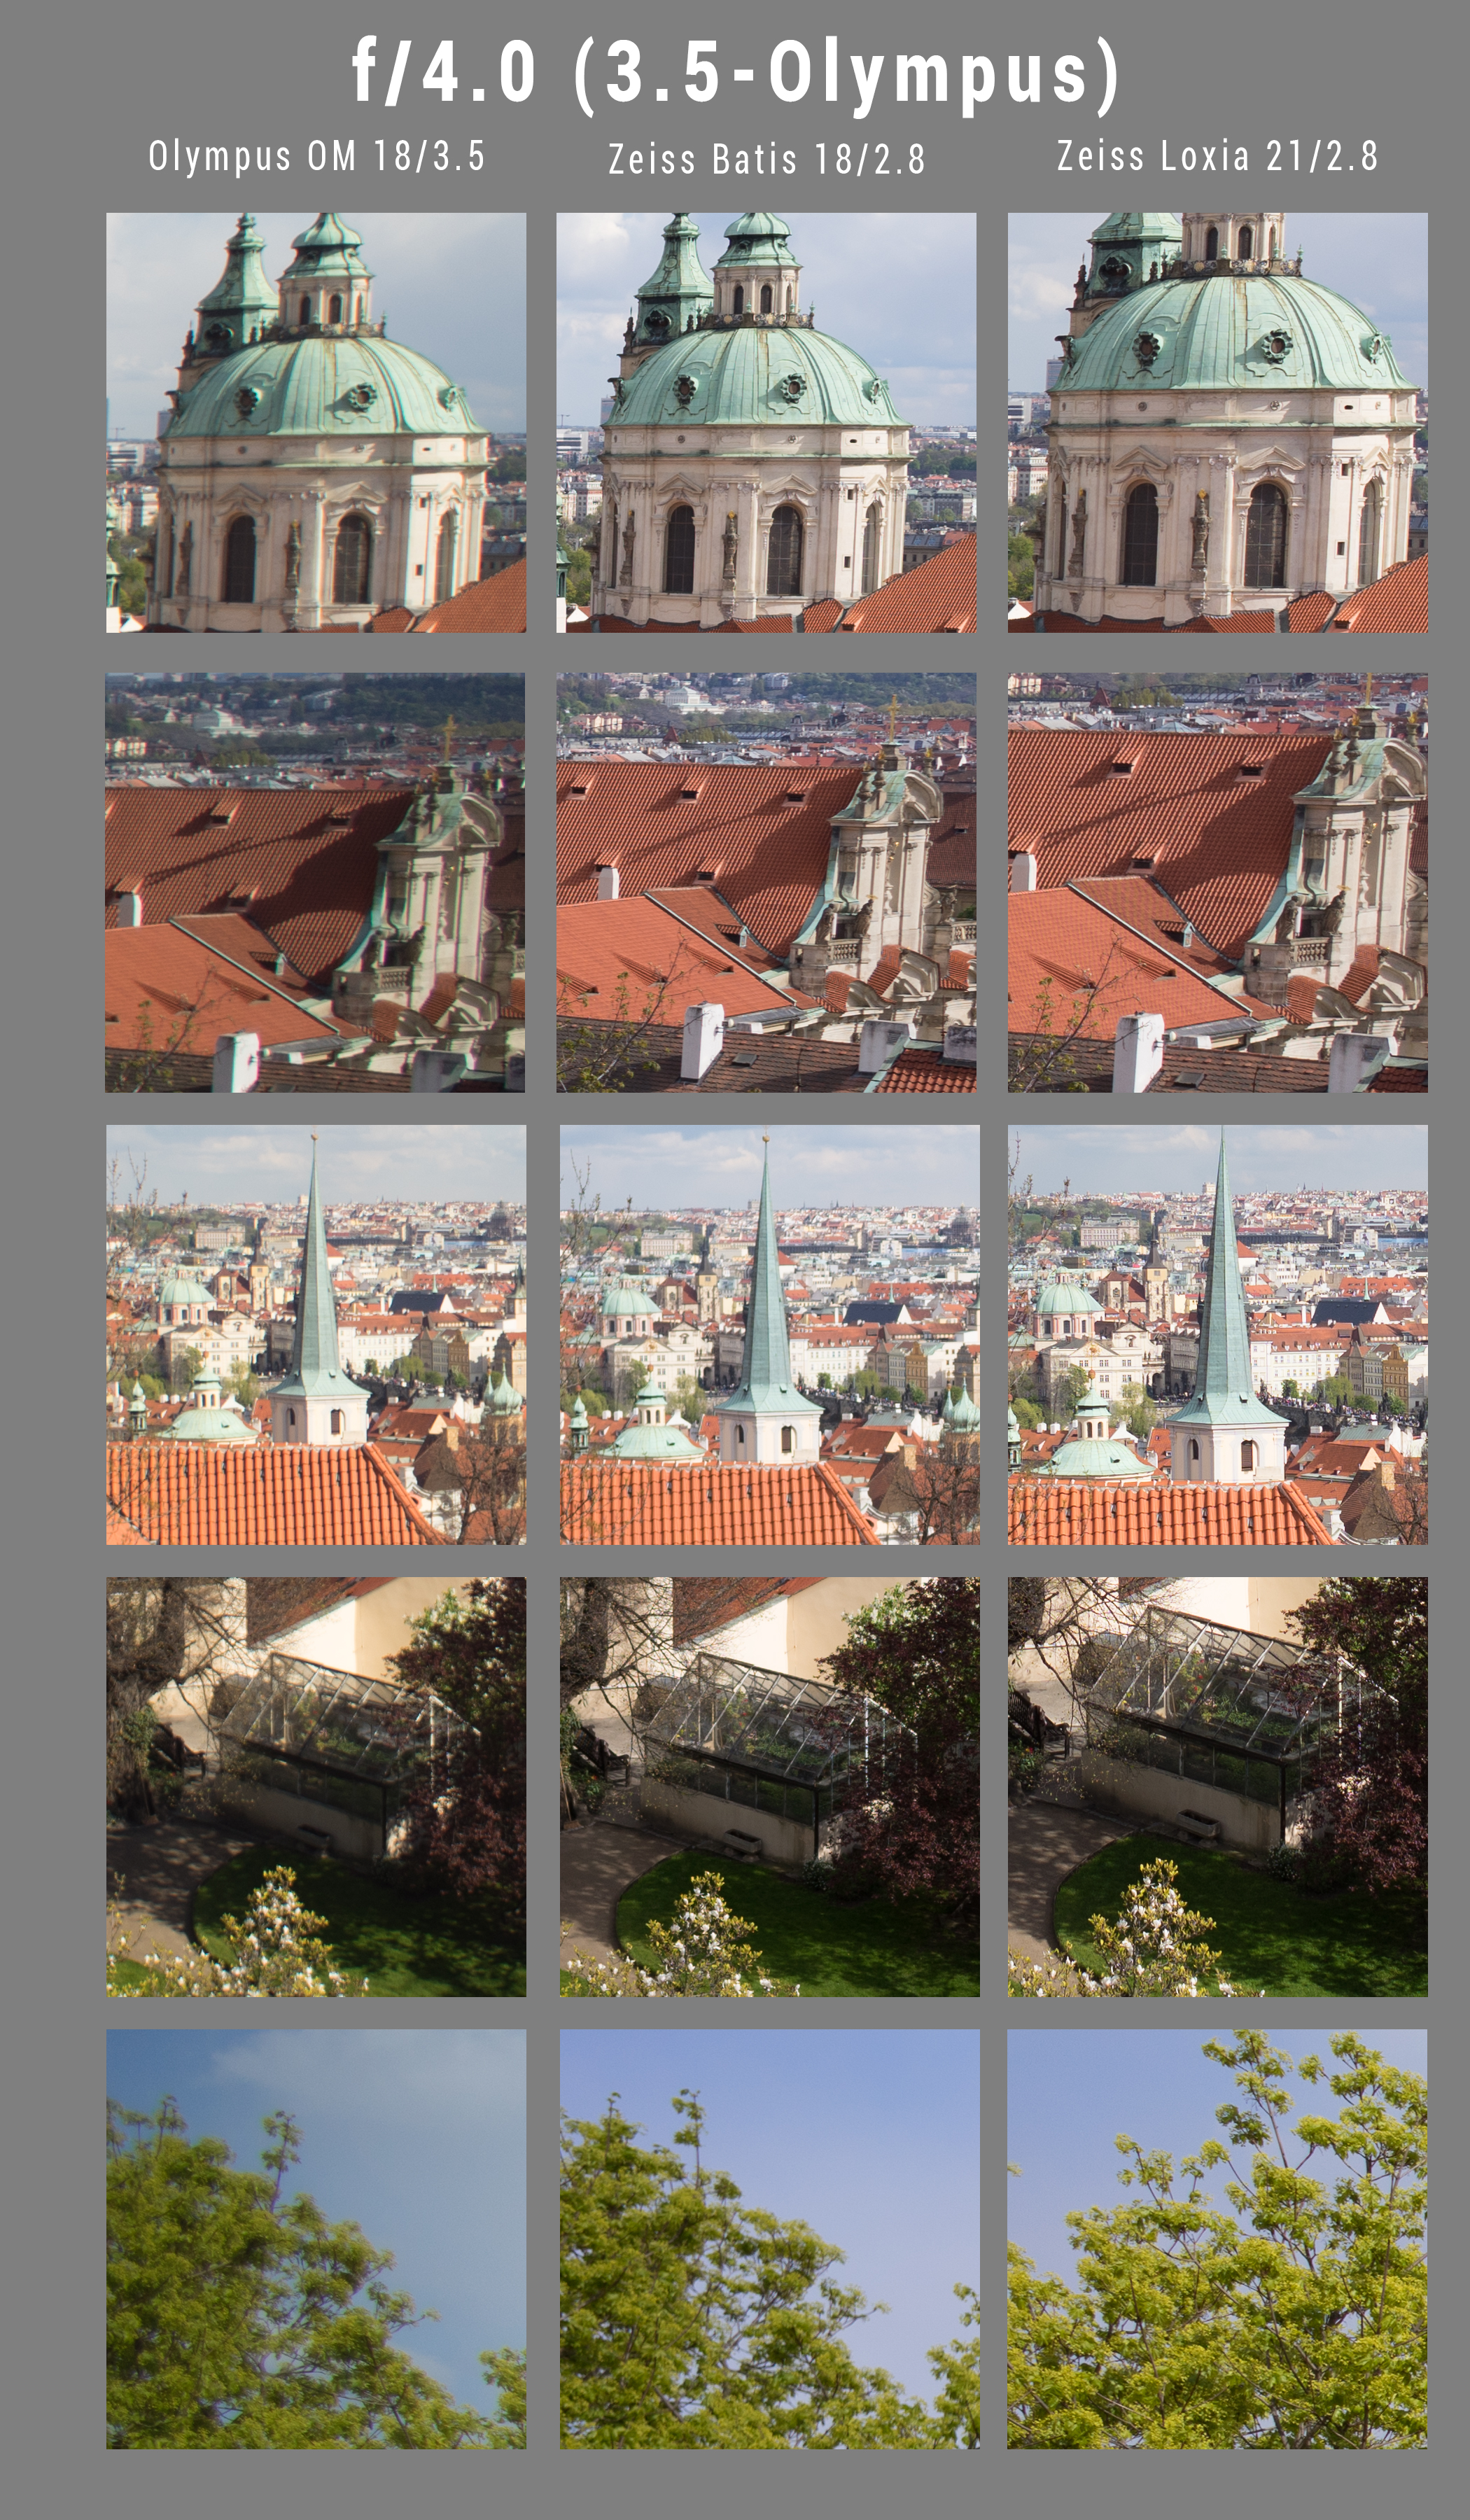
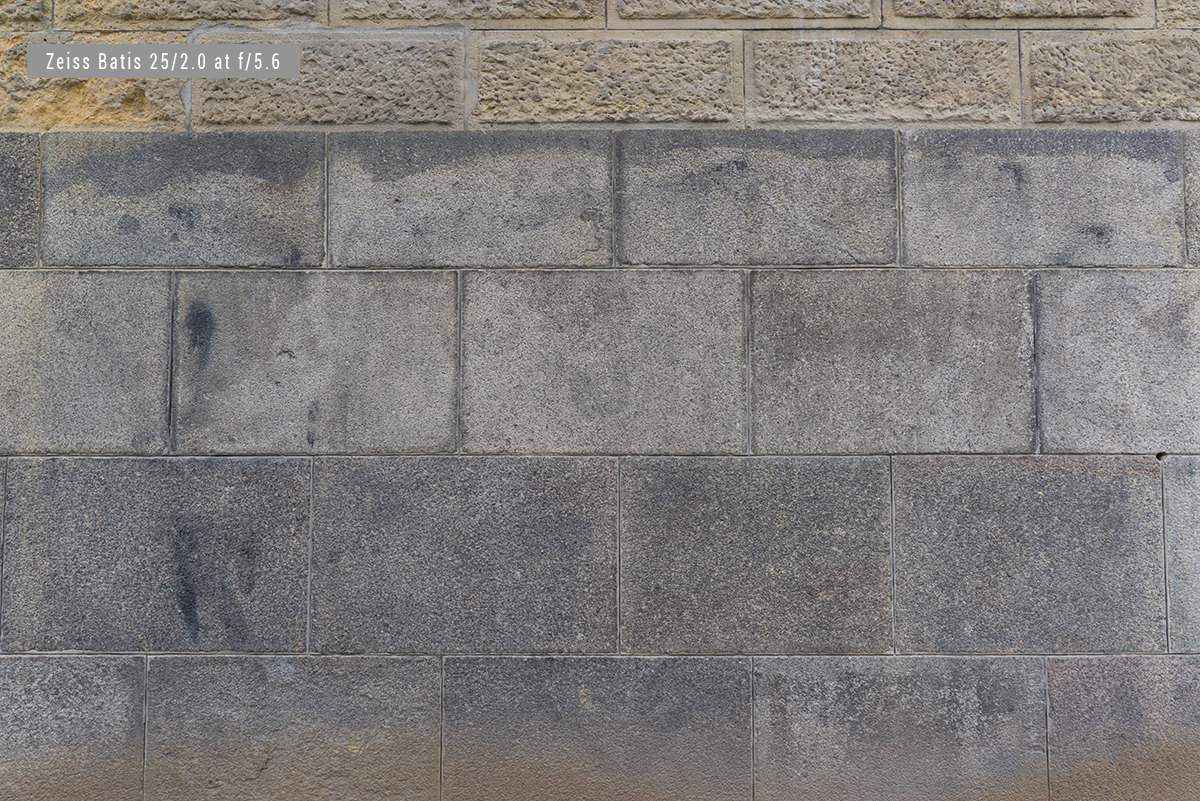
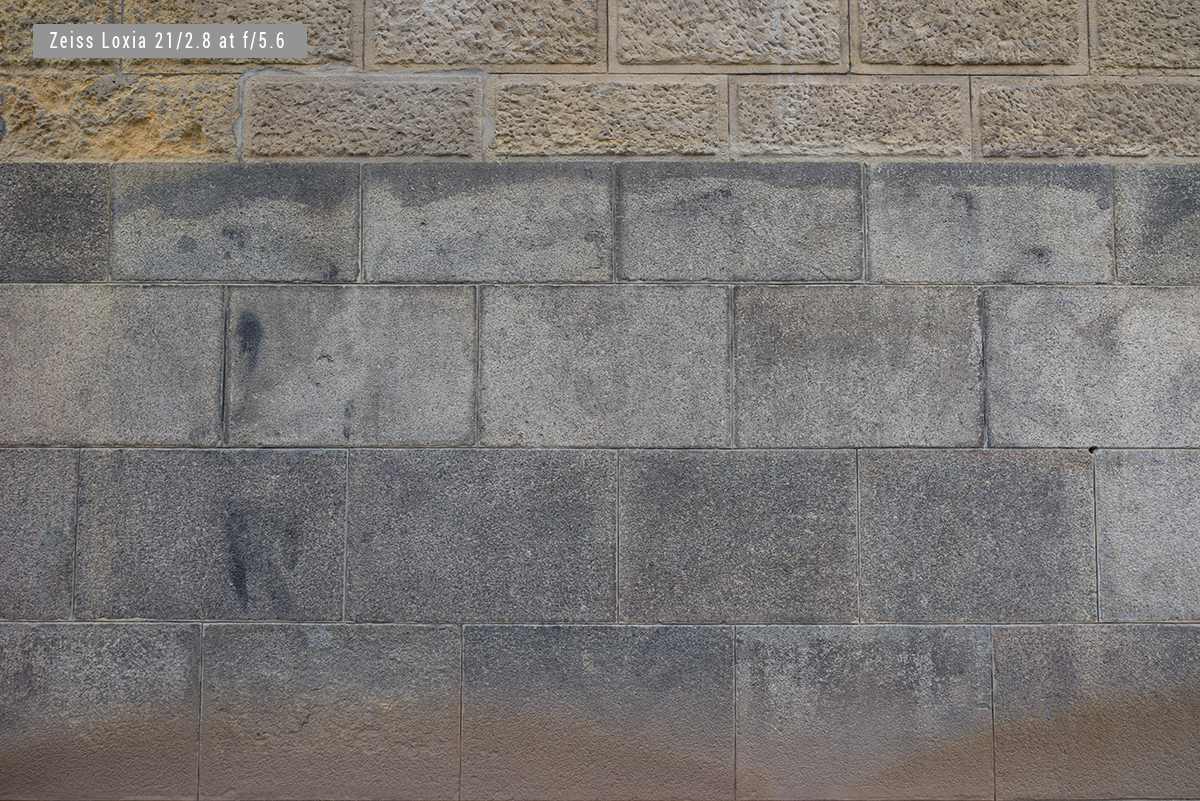
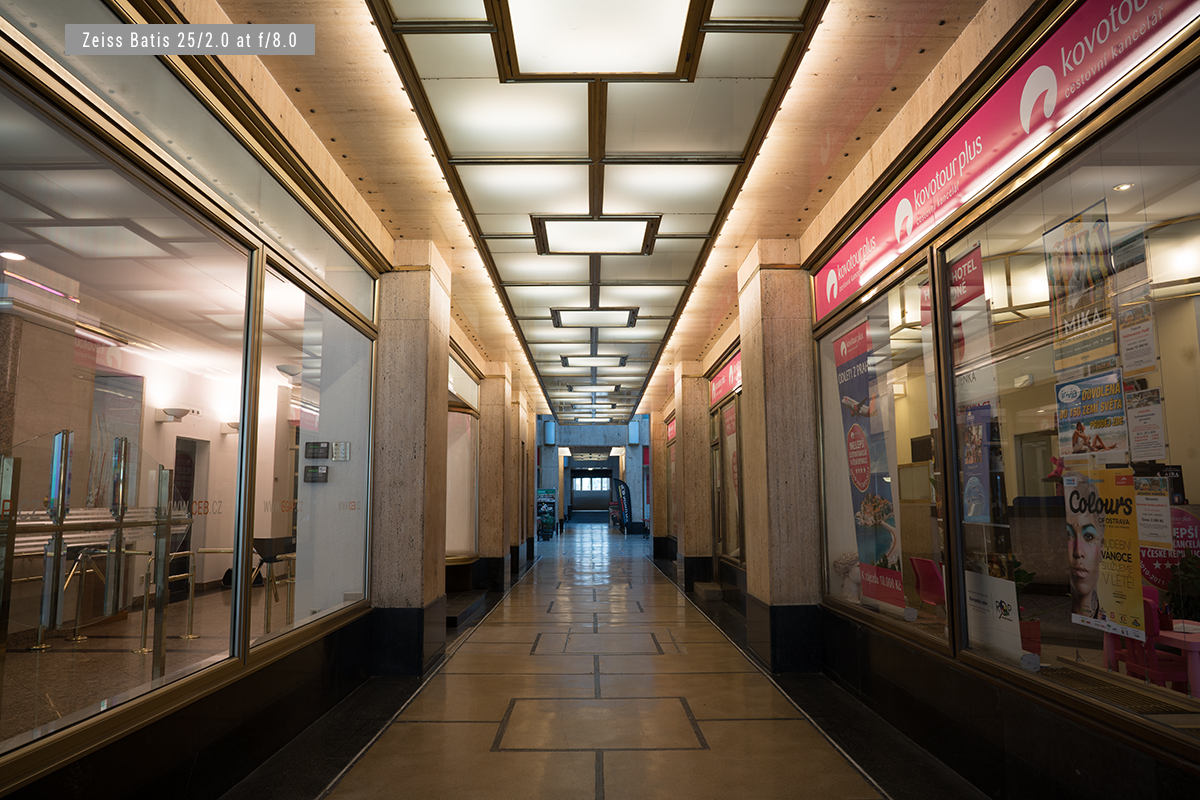
 Batis is as sharp as Loxia in the focus area, but toward edges it become less sharp, sort of fuzzy, especially at f/2.8 and f/4.0, on the left side of the image. De-centering was my first thought, but after wall test, where edge and corner performance was excellent across the frame, I am sure it has to be something else. One of the possible reasons is Sony A7r used in this test. Another slight difference were exposure times (I used external light meter to measure exposure, because lighting conditions were permanently changing) – difference was around 1/2 of the stop. Most probably however, focus plane is slightly shifted and while everything should be covered by DOF in theory, in practice, acceptable sharpness is rather vague definition, when viewing 36 mpx images at 100%.
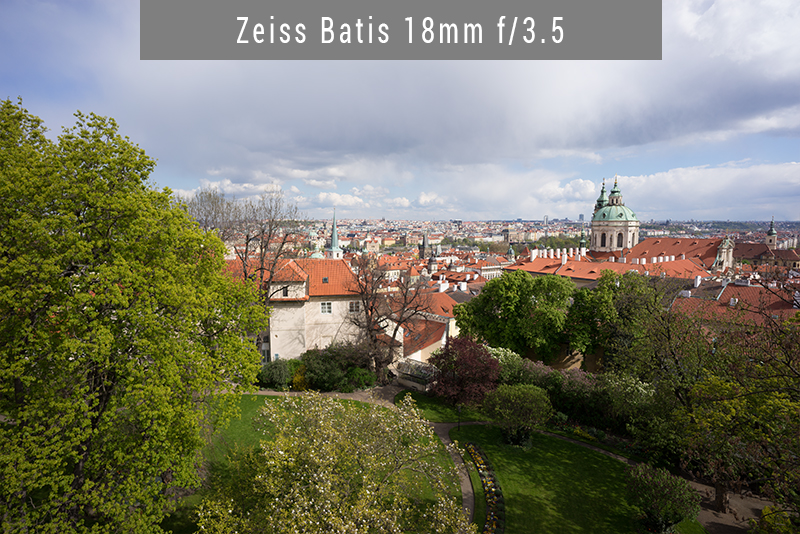
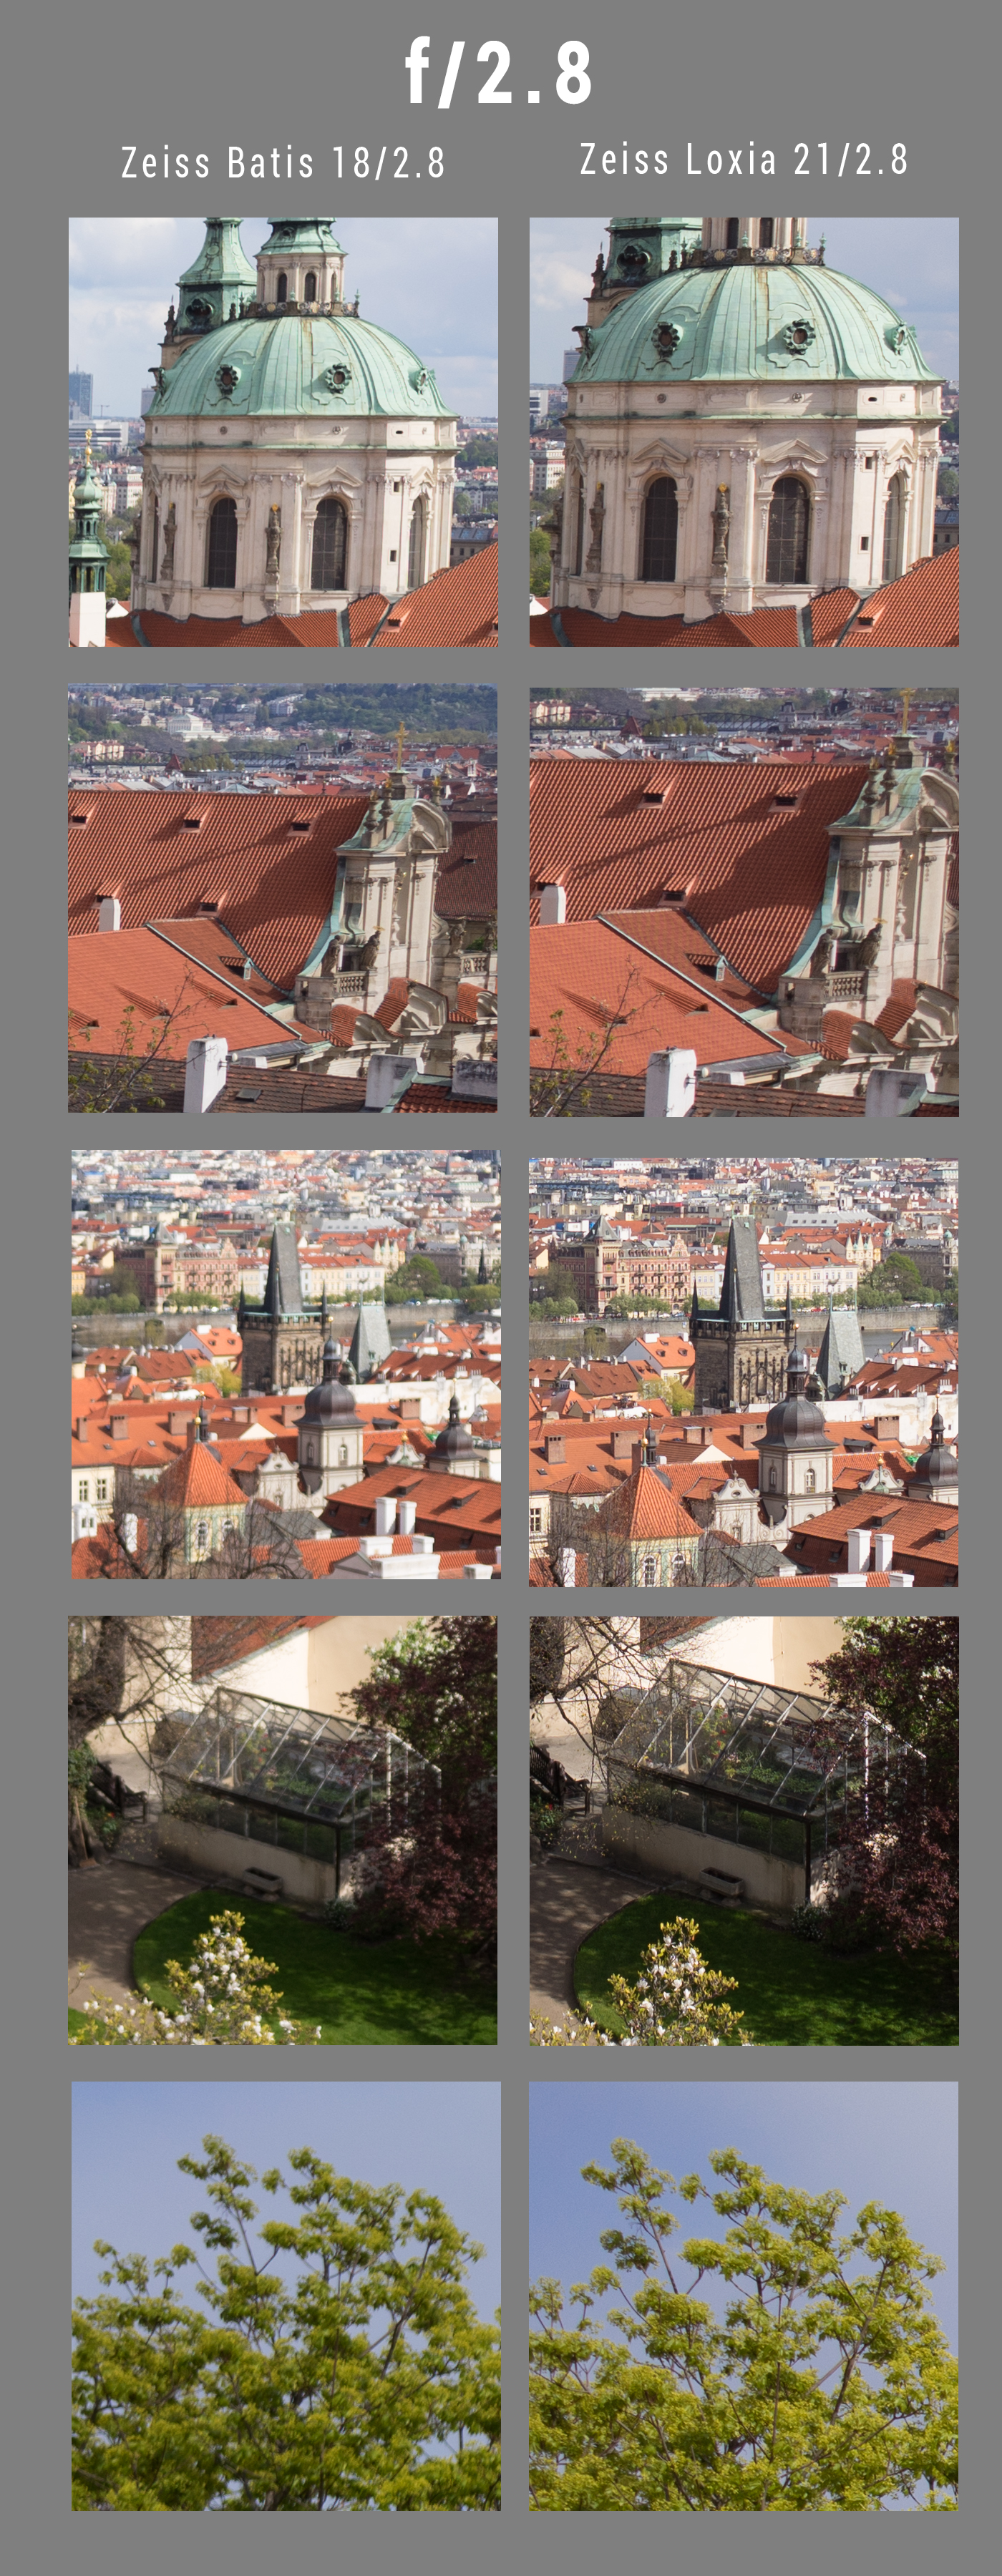
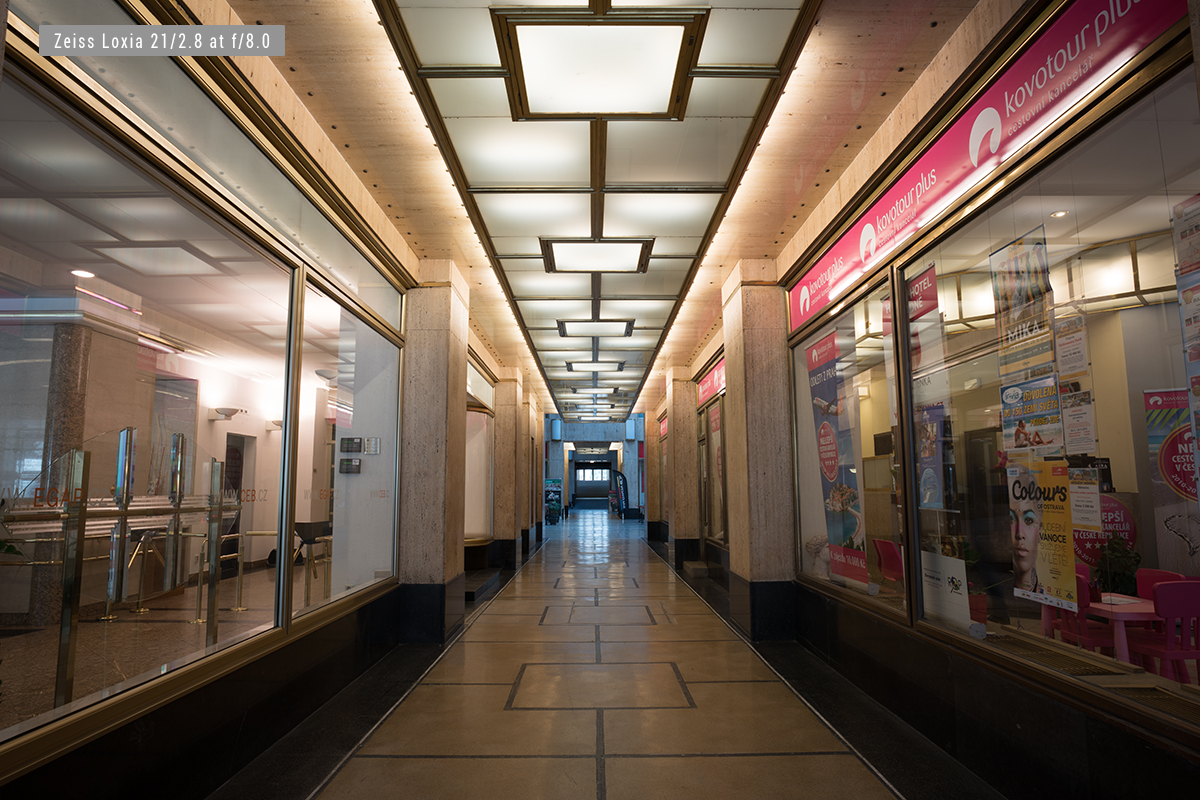
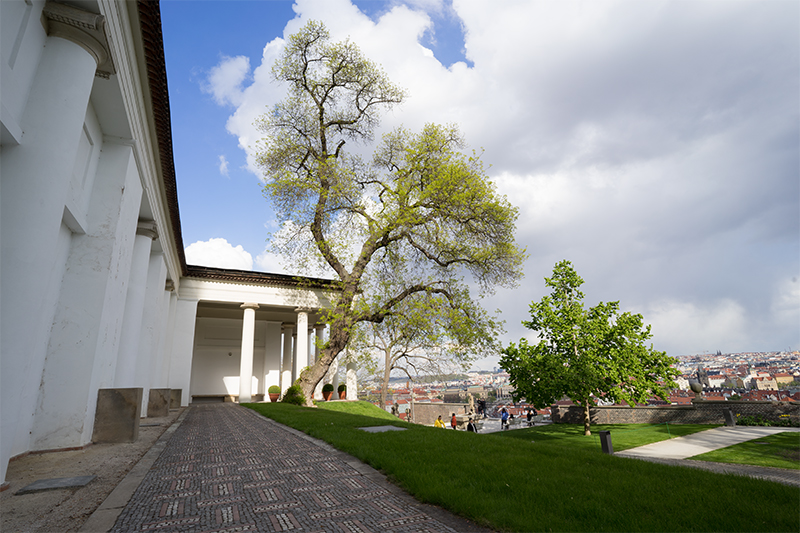 While the scene has nice dynamic because of the left wall perspective, the only straight vertical line in the entire image, is the pillar in the middle of the frame. Left side is falling toward right and right side horizon is falling to the left. While it is possible to correct perspective to certain level
 two things will happen. We will lose quite a bit of our image FOV if we want clean crop and every software distortion correction, comes with slight IQ decrease – bigger the correction, lower IQ can be expected.
 My point here is that while Batis 18/2.8 has certain amount of mustache distortion aberration, natural view-point perspective deformation of such a wide-angle lens, should be of much bigger concern for the resulting images.
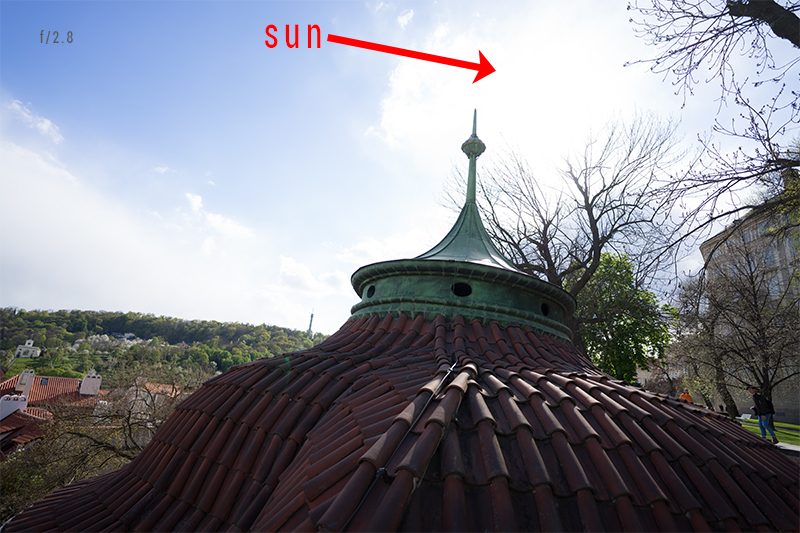


 At f/2.8, purple fringing is in almost all twigs that are against white sky, while at f/9 center part is well corrected, but toward edges, strong fringing can be still found. To be fair to Batis 18/2.8, there are very few lenses which will do significantly better in this extreme situation, one of them being Otus. If it takes that much more money, size and weight to deal with this aberration, than I can understand why most photographers simply don’t care. (And I will be poor, but strong, with the Otus, once it comes this wide).
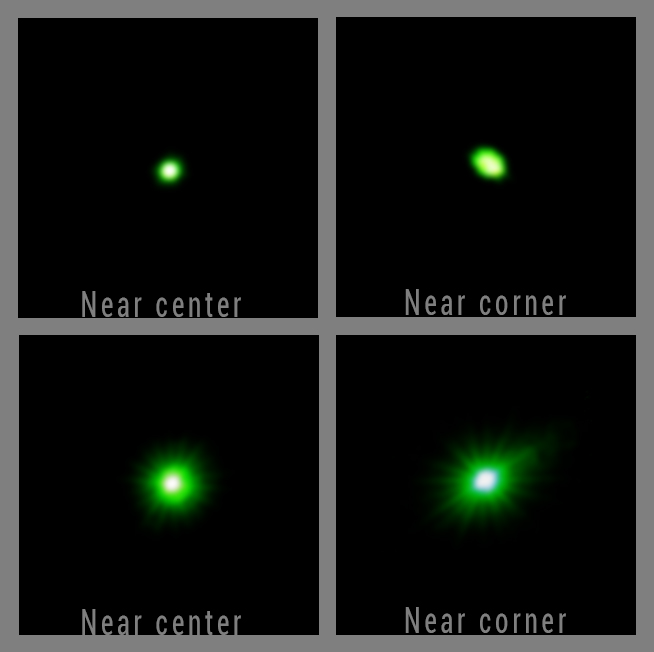


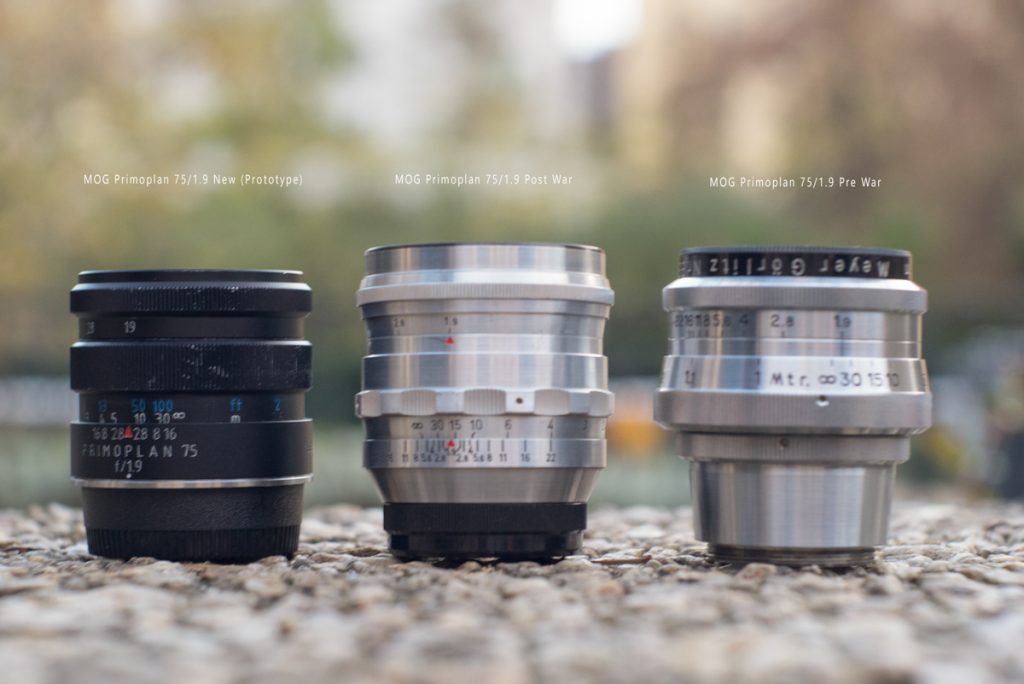
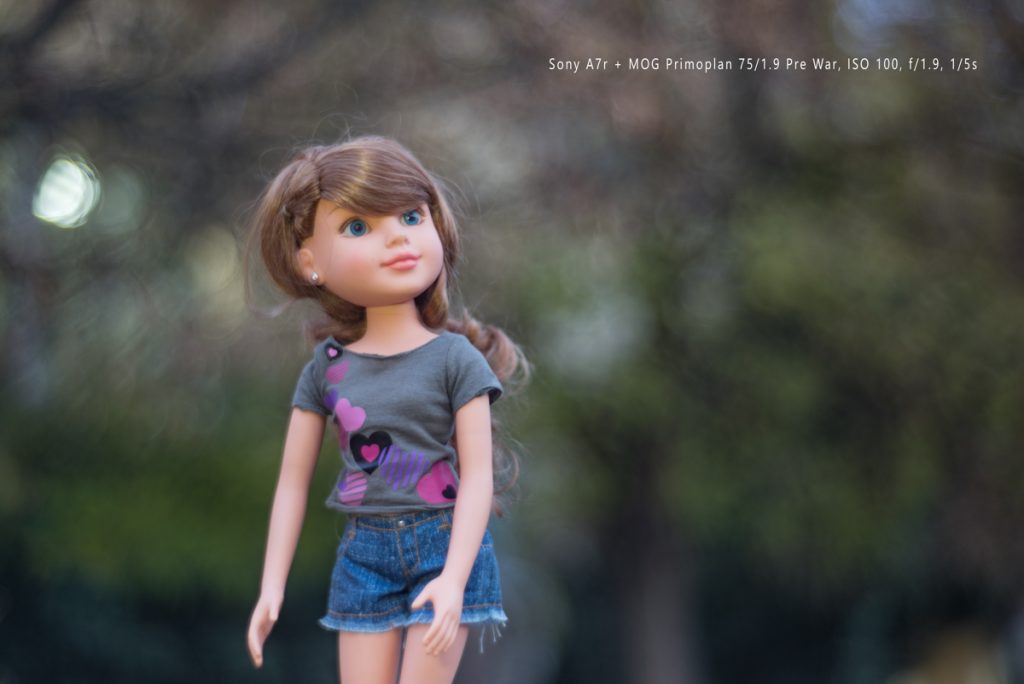
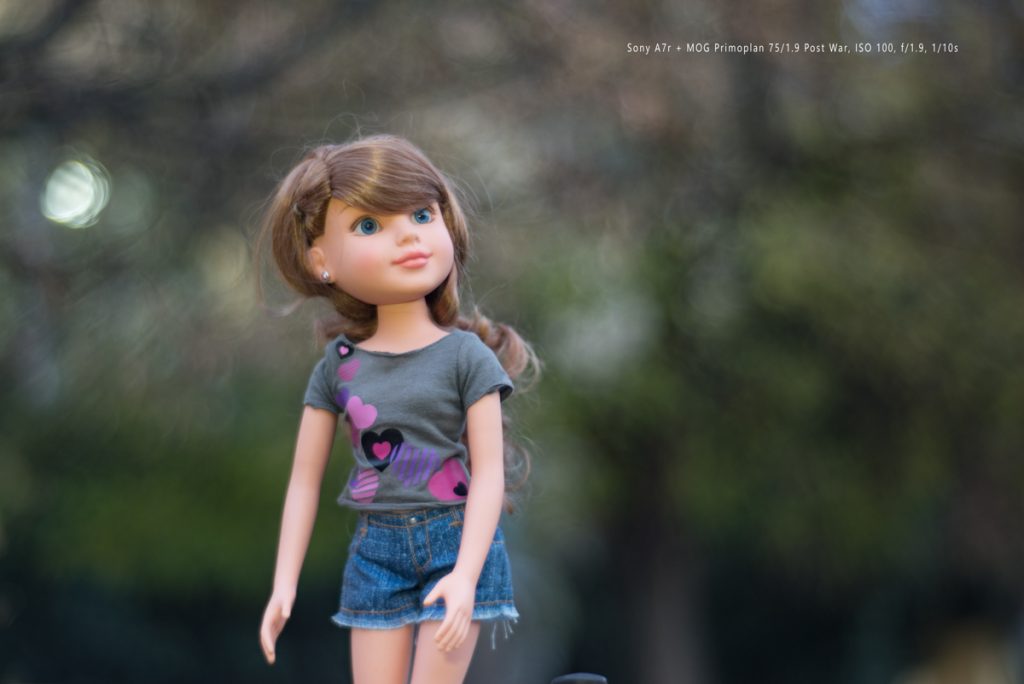
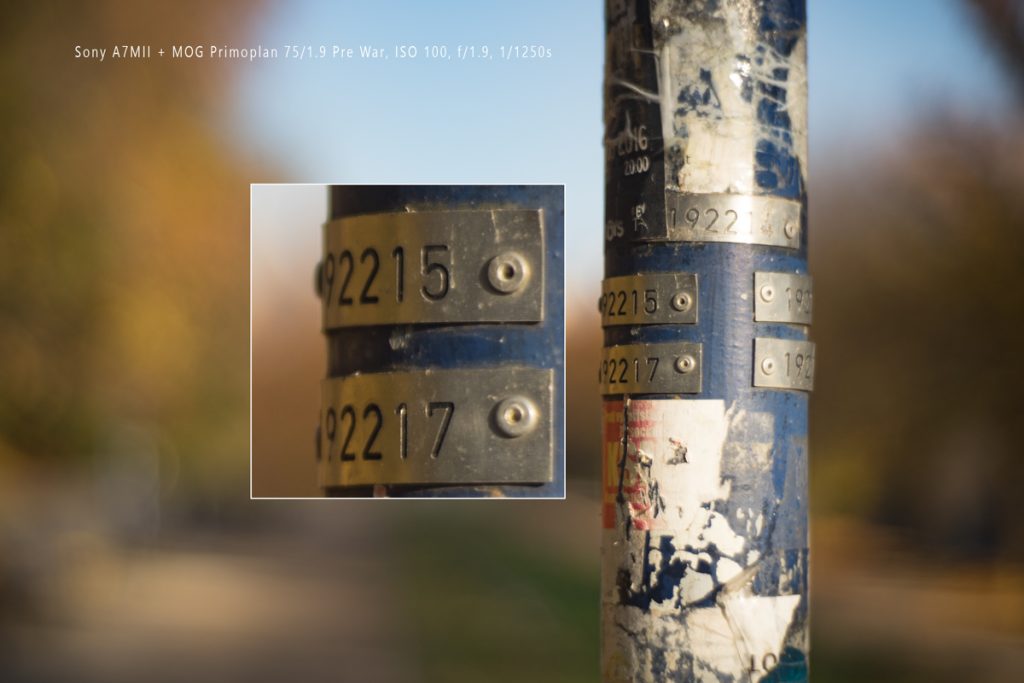
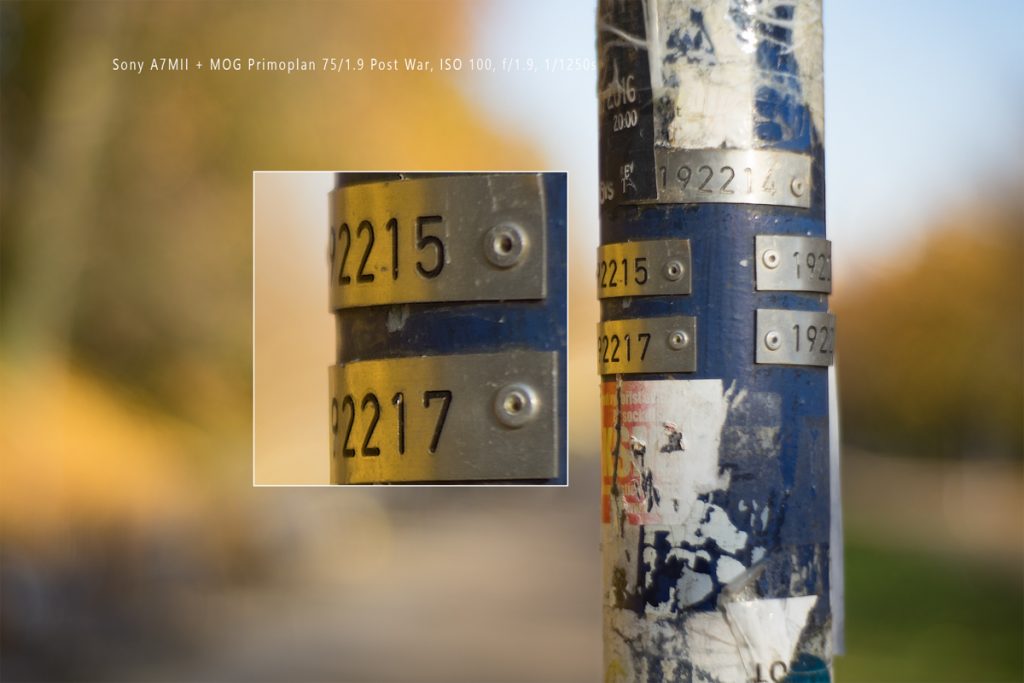
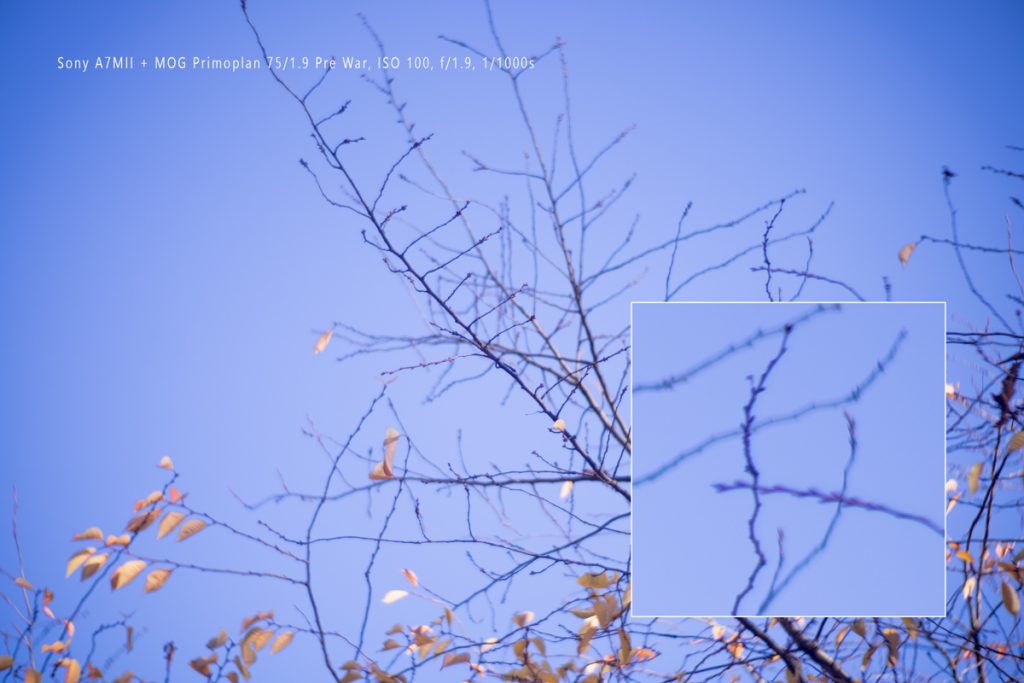
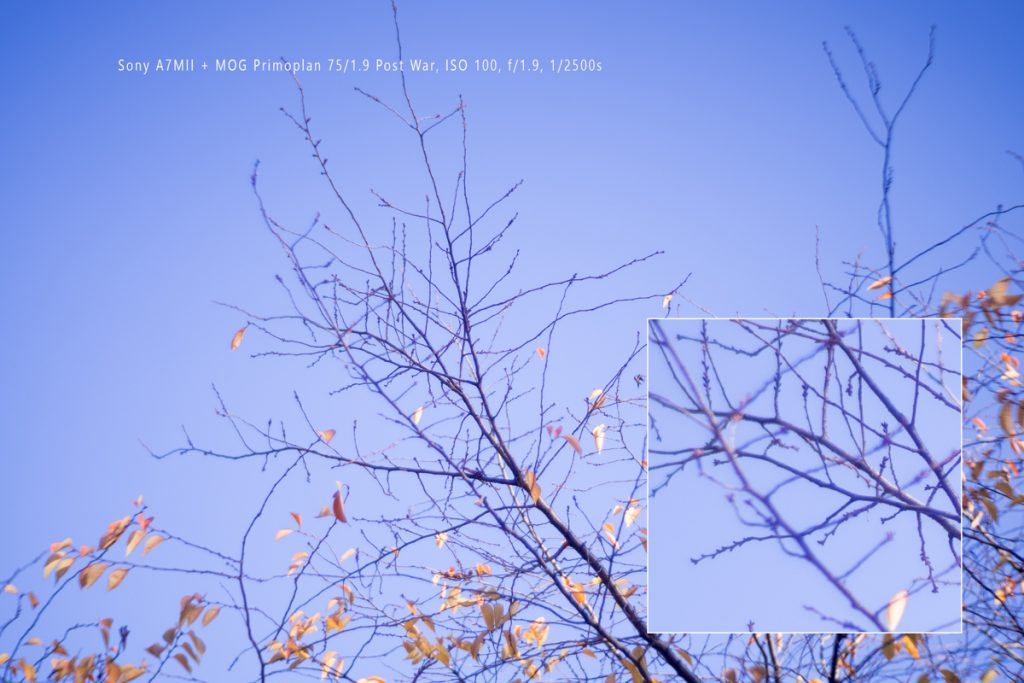
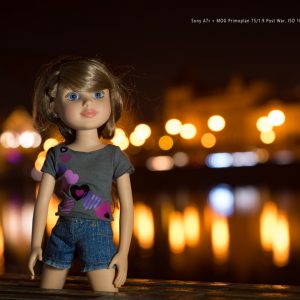
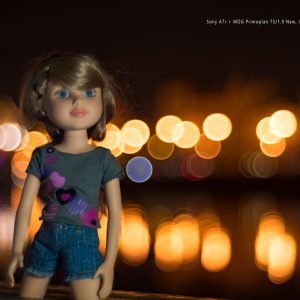
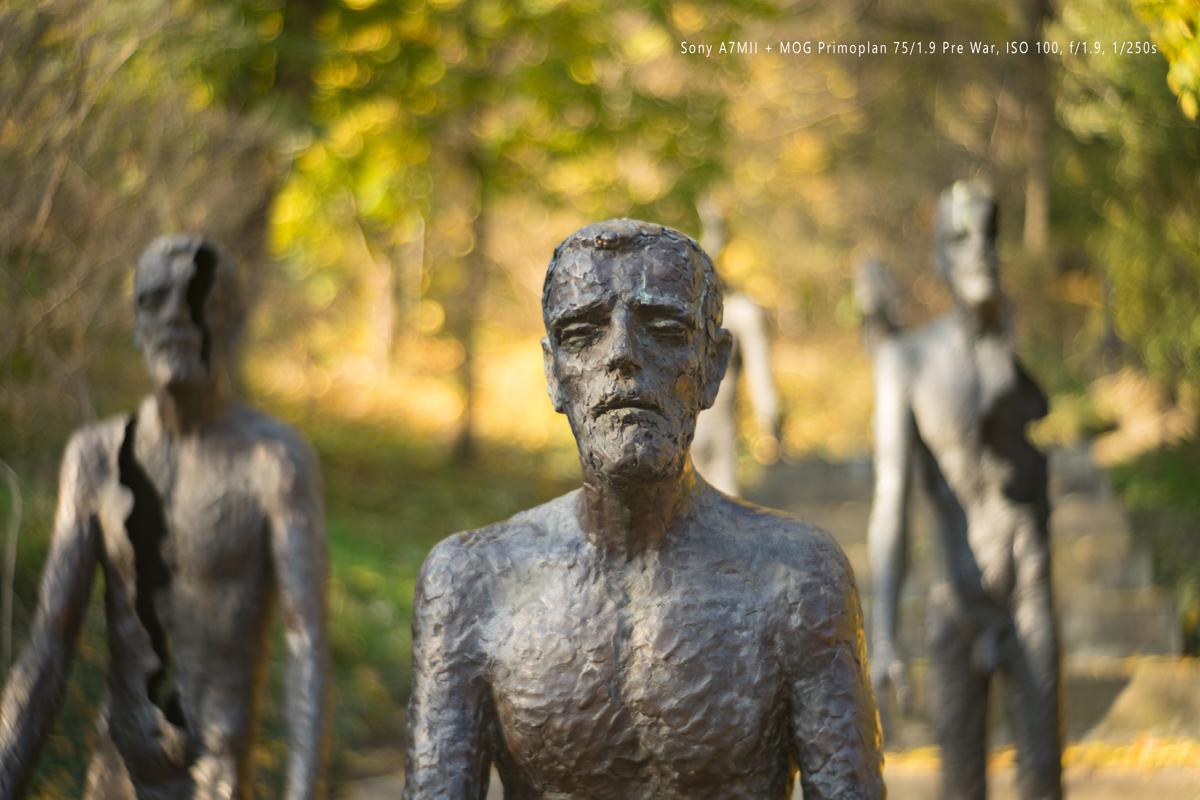
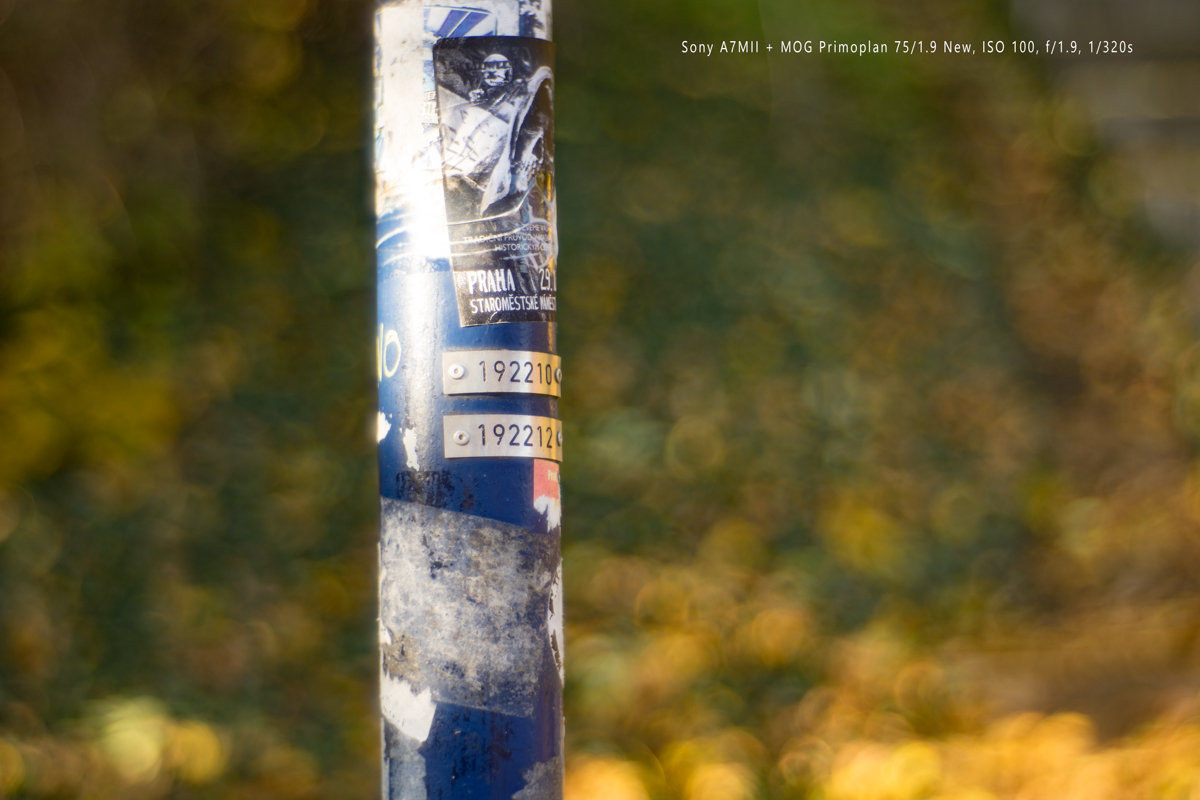
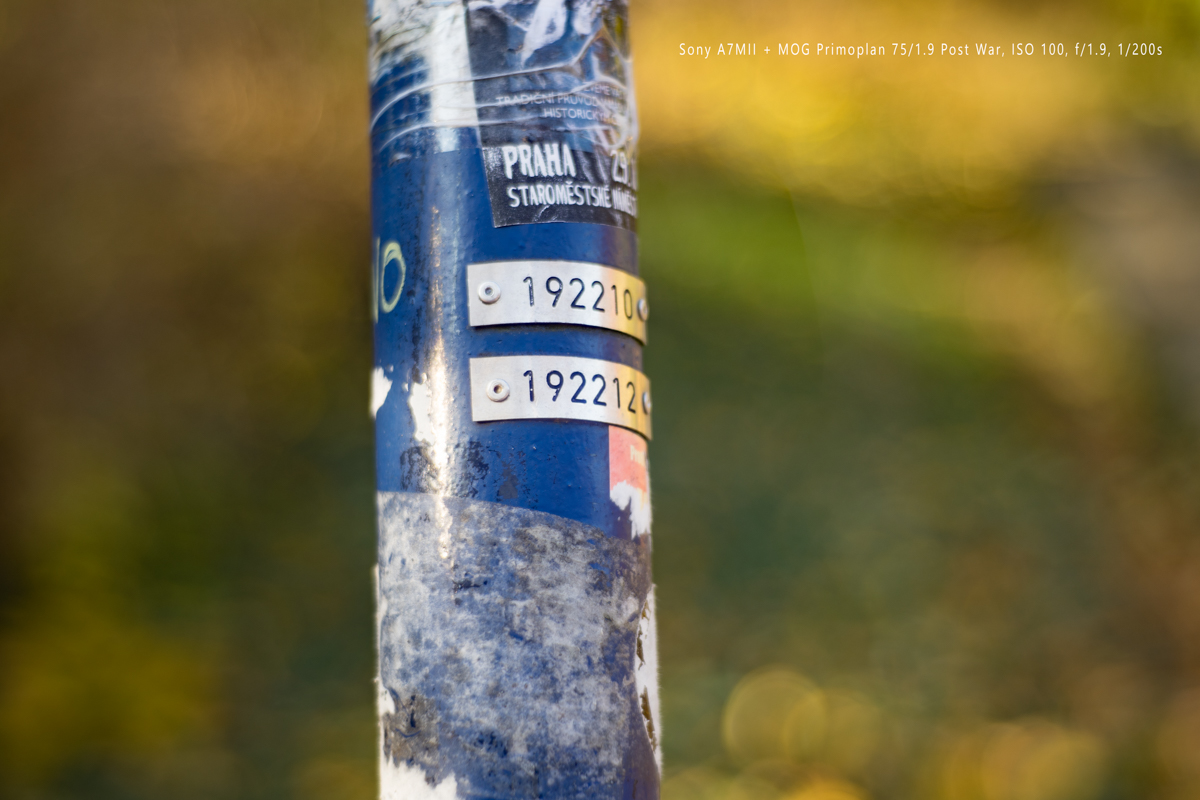
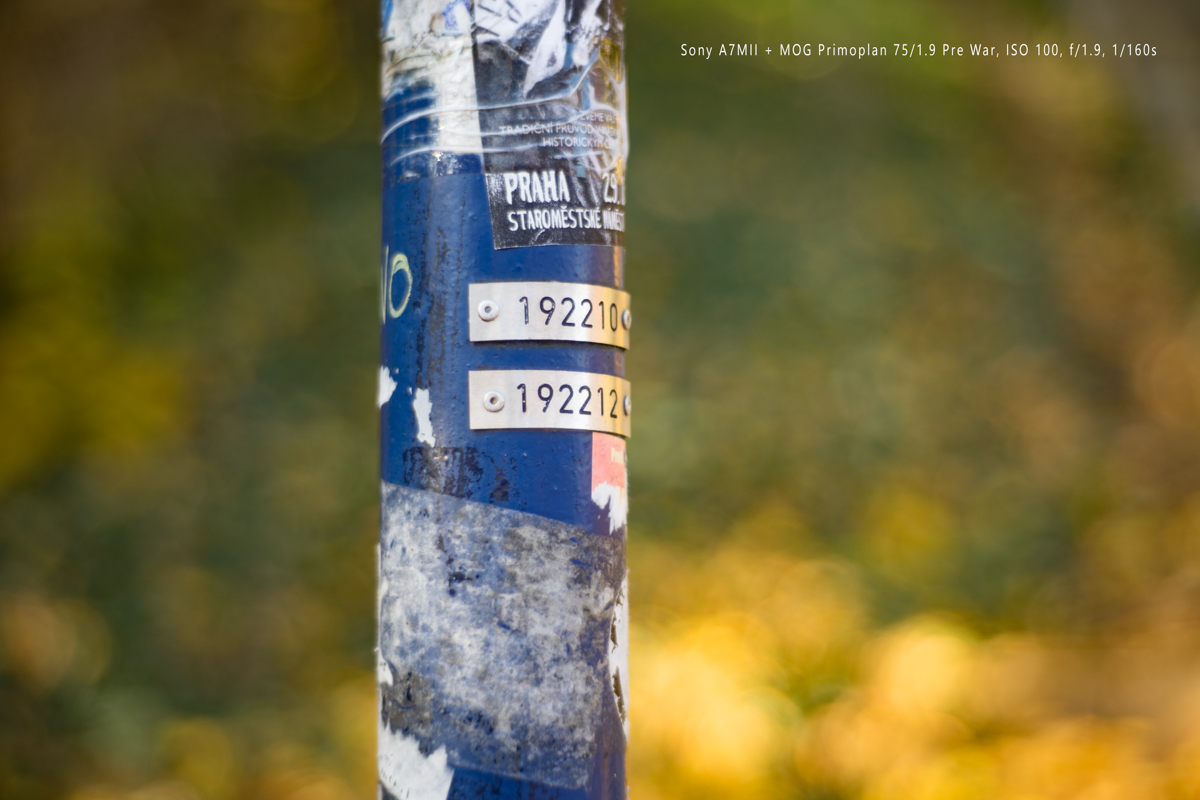
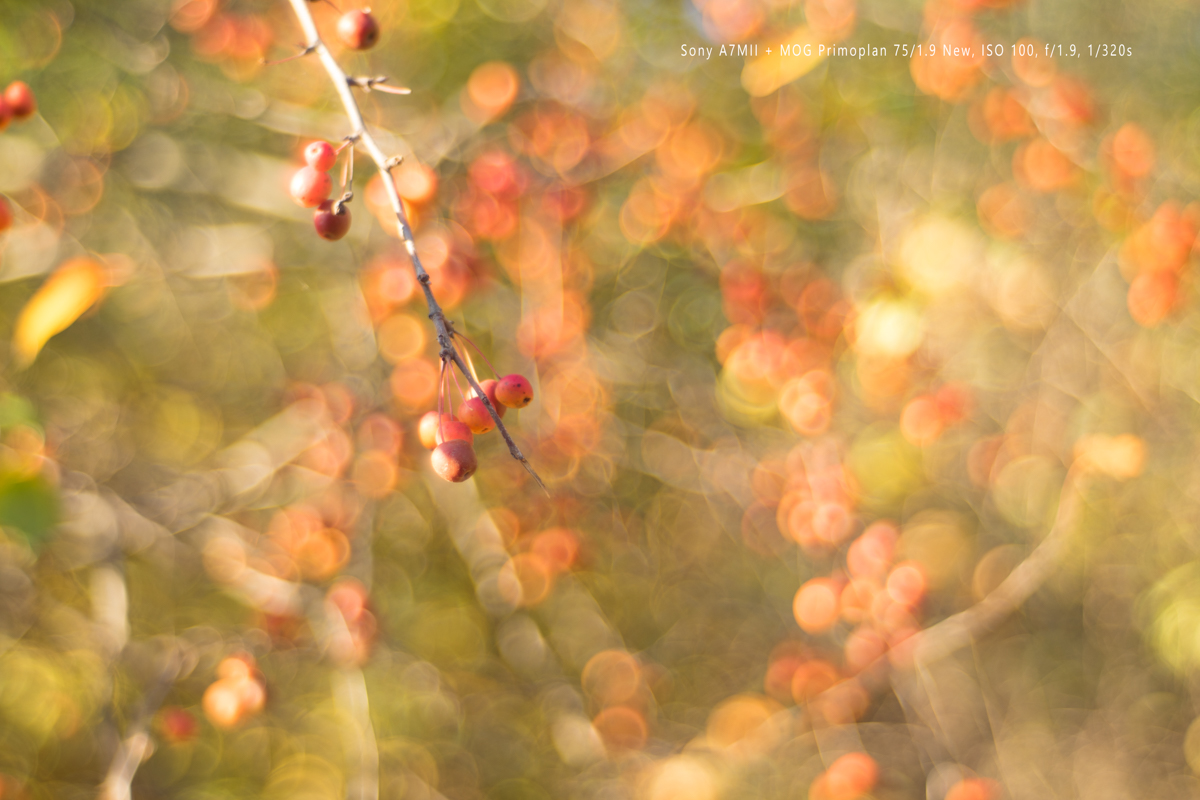
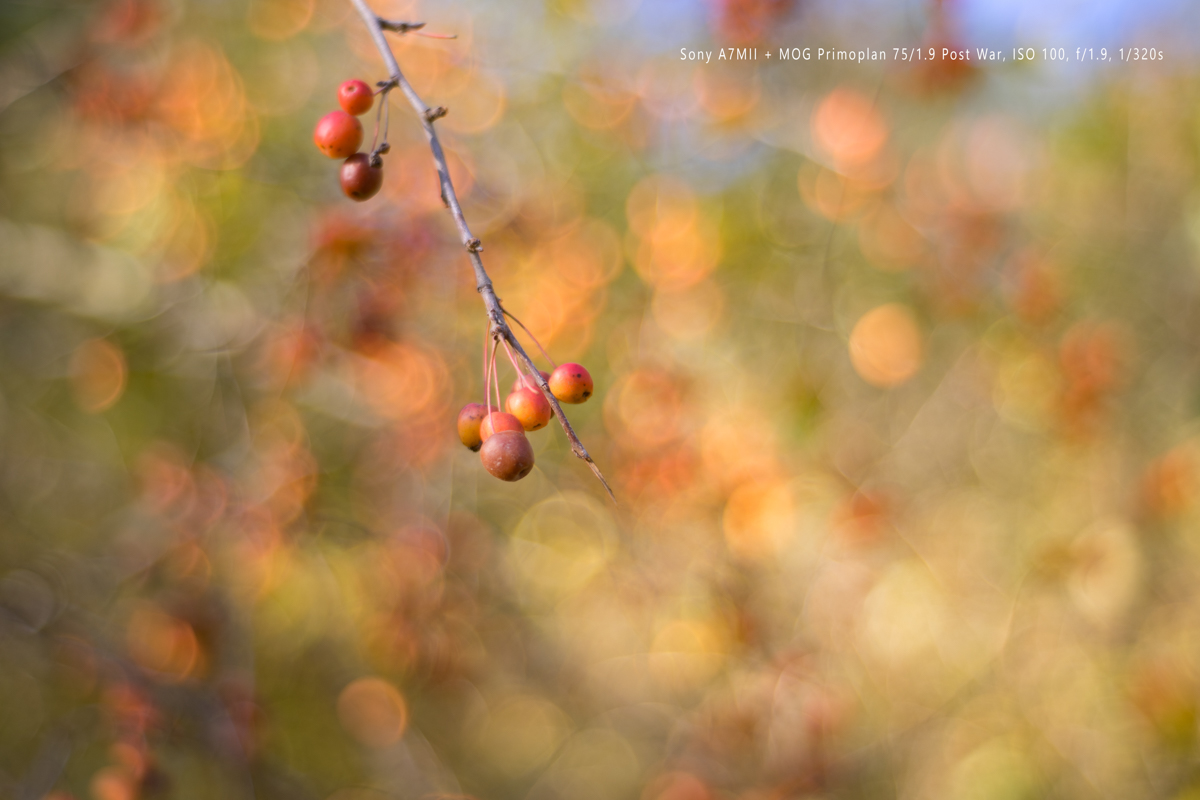
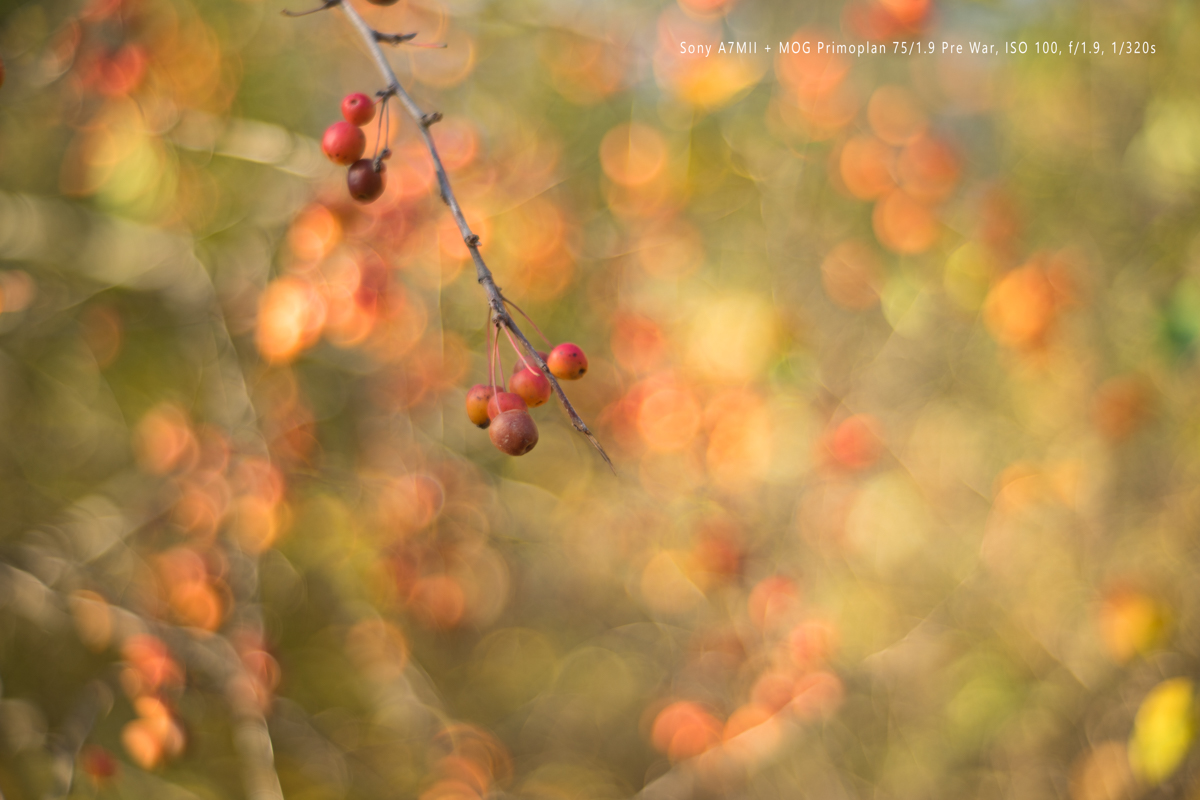
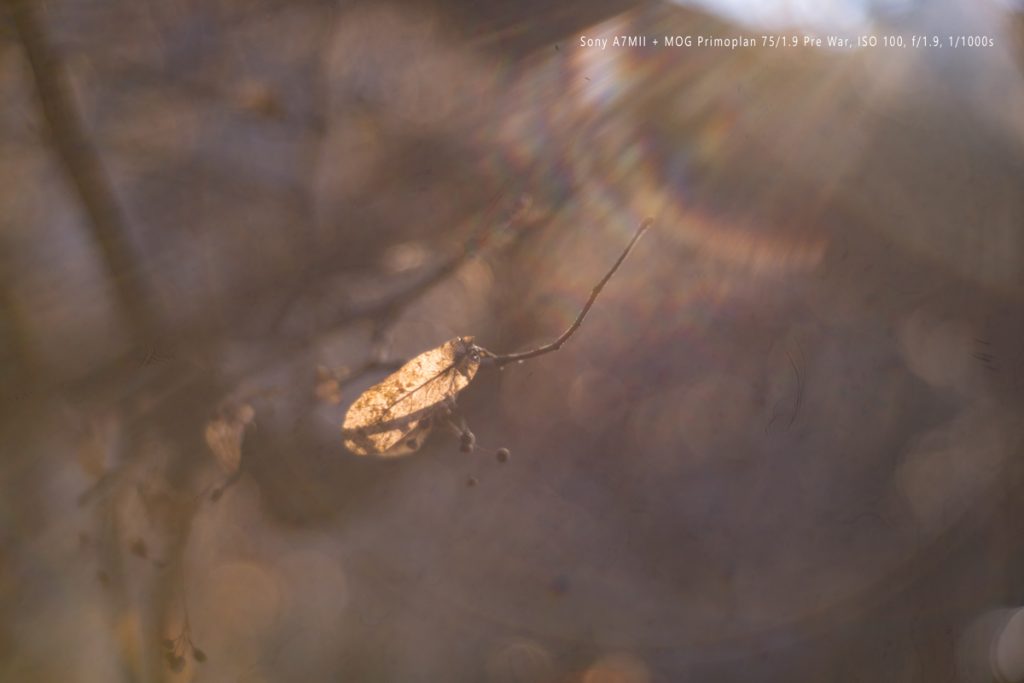
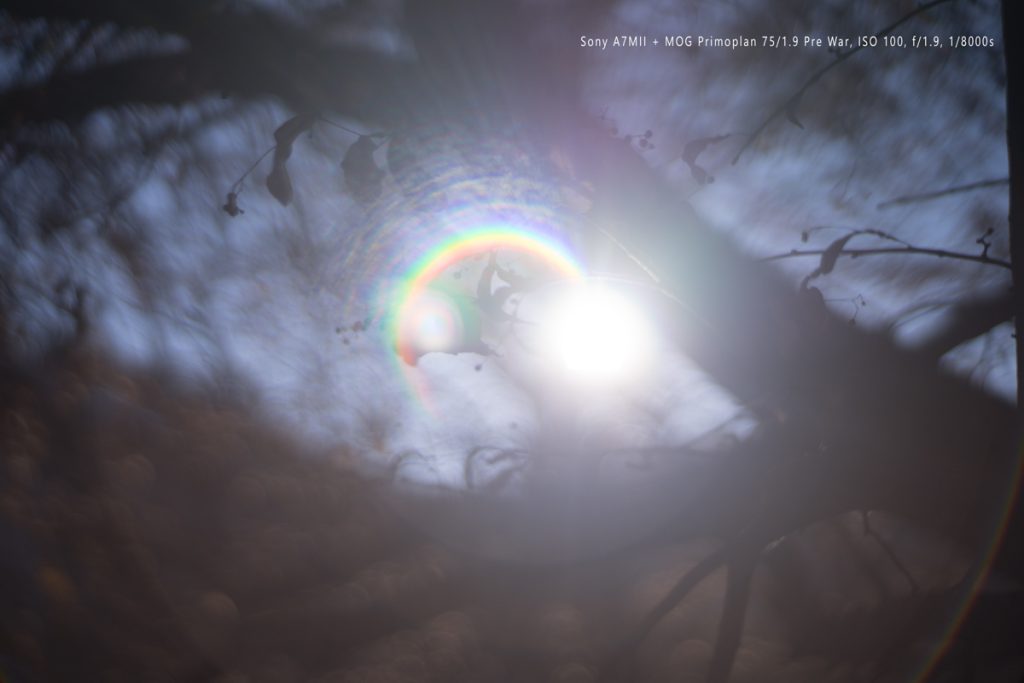
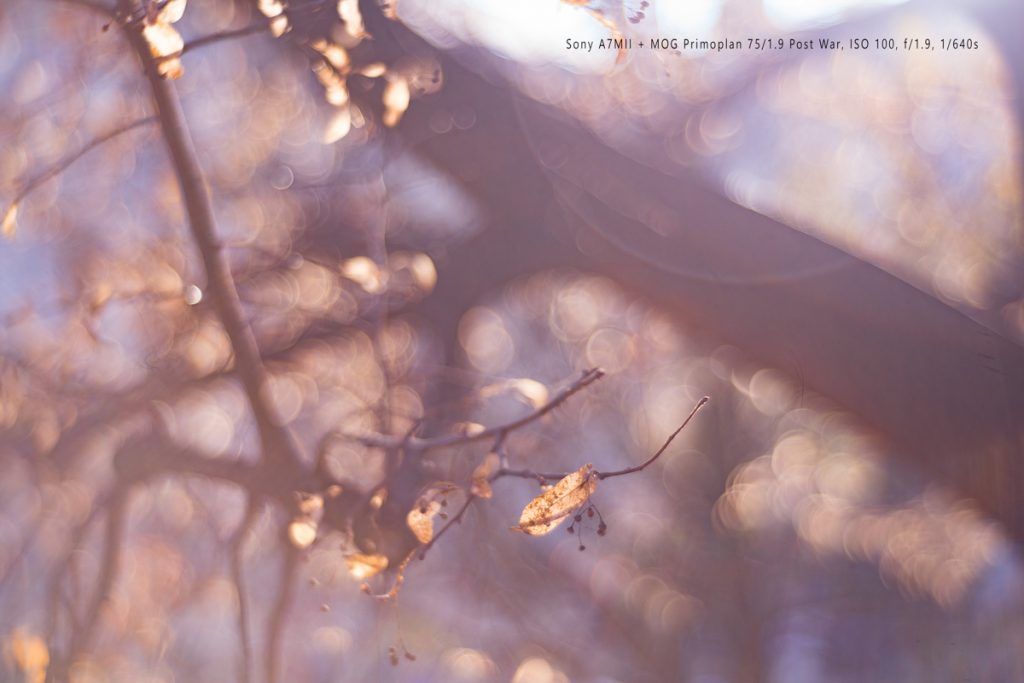
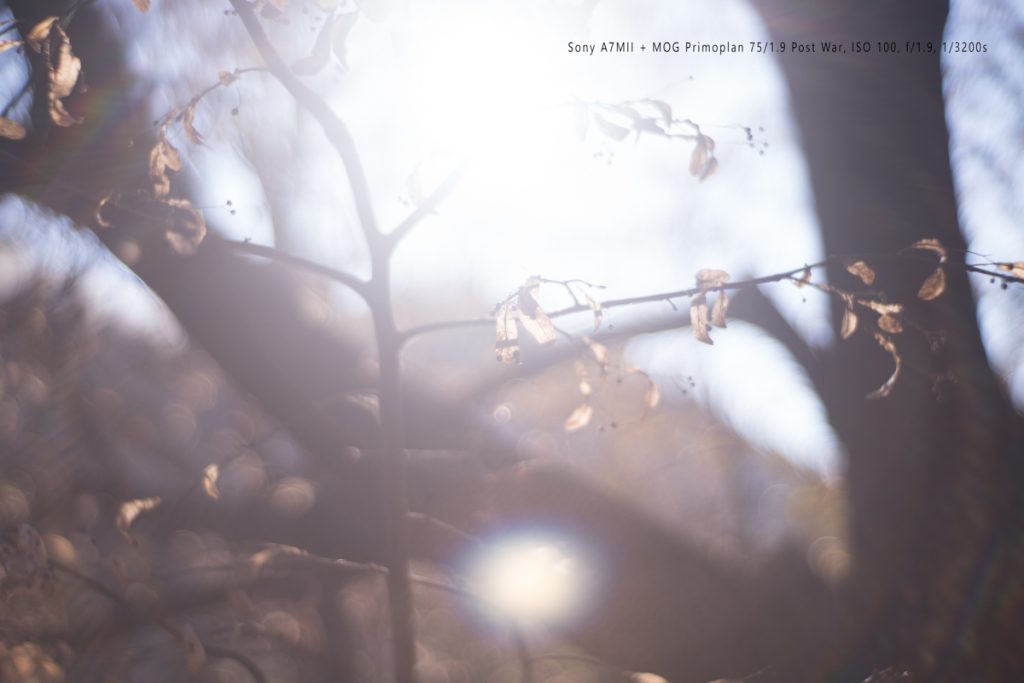
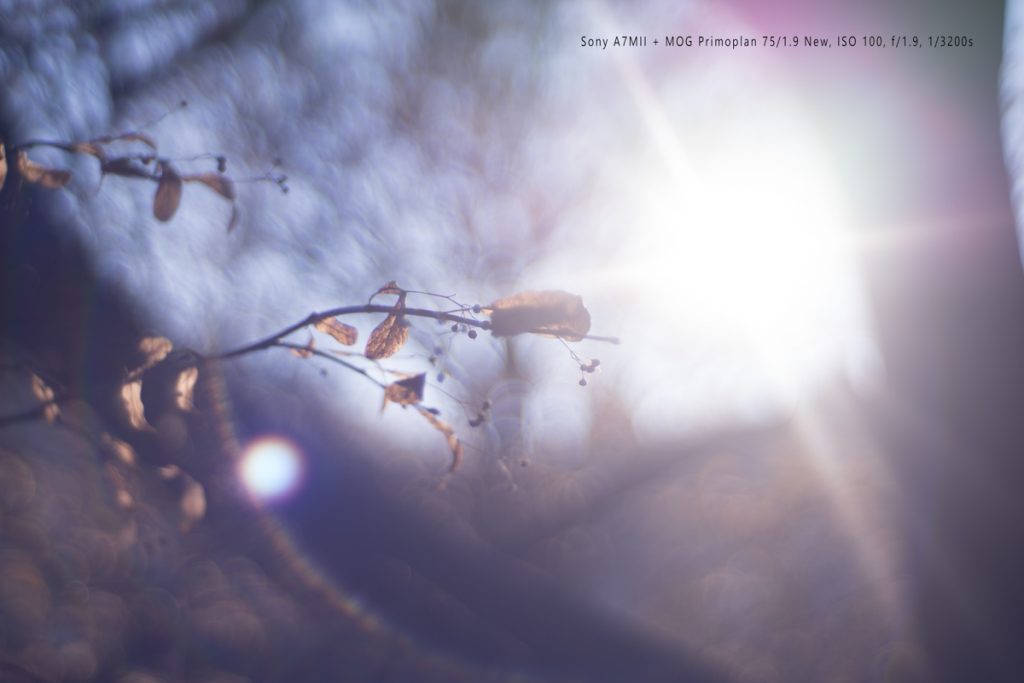
 Post War Primoplan is made of light aluminum, so even if it has largest diameter (implying probably most glass inside), it is lightest of the three with only 250gr. At the same time, those aluminum lenses from the fifties are prone to shading and focus lockup.


 This can be good opportunity for outfit producer who will get some acknowledgment and outfit images, in exchange for the clothing.